Page 43 of 256
Flip-down screens
The screens rotate down to view and up into the housing to store when
not in use. Ensure that the screens are latched into the housing when
being stored.
1. 6.4”(diagonal) color liquid crystal display (LCD) screen.
2. Screen housing.
3. Dimmer switch. Rotate to increase/decrease the brightness of the
screen.
General operation
•When the engine is not running, use the system sparingly otherwise it
will run the battery down.
•Do not leave the videocassette in the VCP overnight or for long
periods of time.
•When the ignition is turned ON, audio is through the headphones as
LOW volume. Press the (+) control to increase volume. To listen
through the vehicle’s speaker system, press the speaker button (
)
on the media control panel.
13
2
2004 Econoline(eco)
Owners Guide (post-2002-fmt)
USA English(fus)
Entertainment Systems
43
ProCarManuals.com
Page 47 of 256
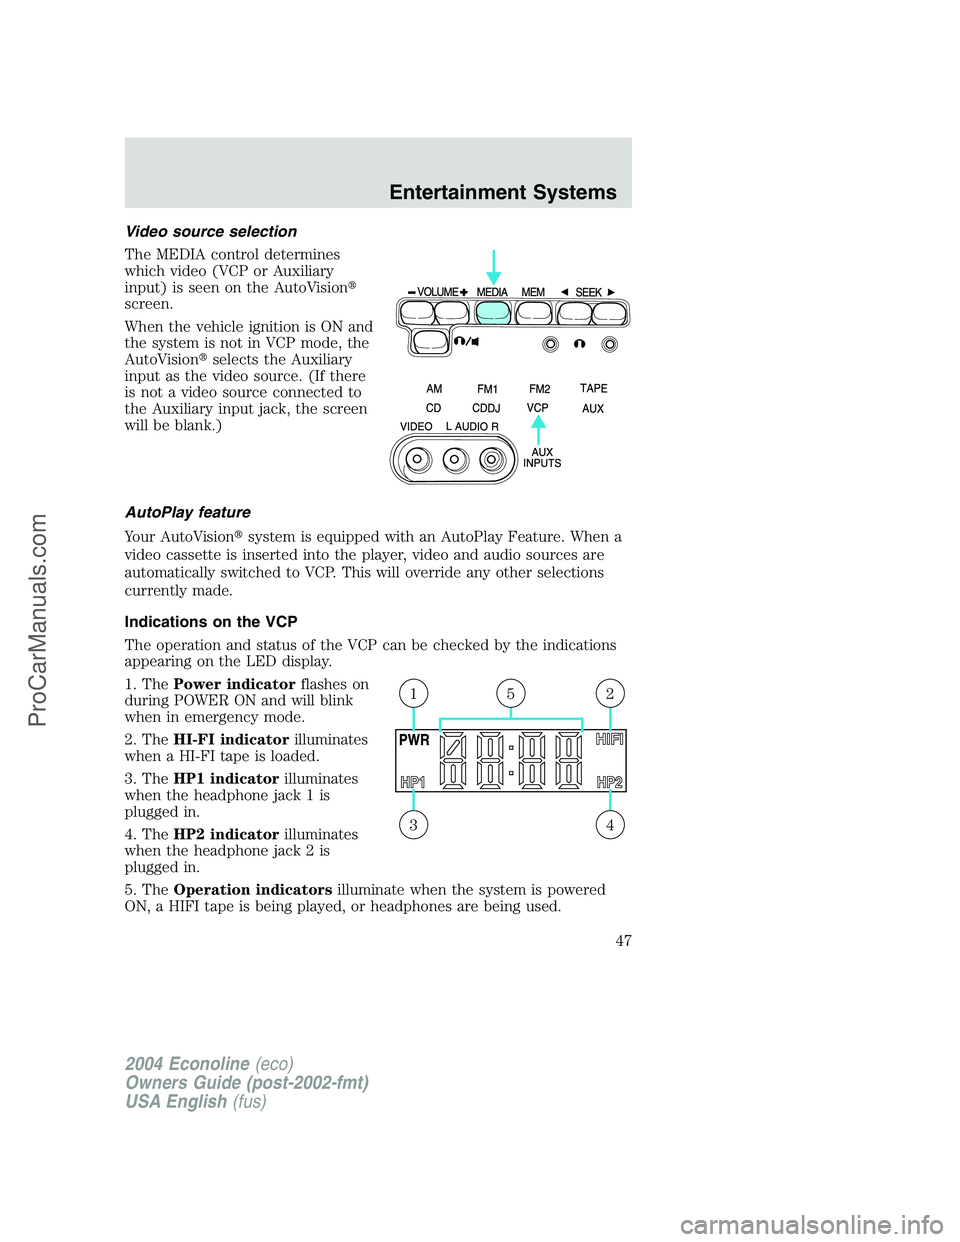
Video source selection
The MEDIA control determines
which video (VCP or Auxiliary
input) is seen on the AutoVision�
screen.
When the vehicle ignition is ON and
the system is not in VCP mode, the
AutoVision�selects the Auxiliary
input as the video source. (If there
is not a video source connected to
the Auxiliary input jack, the screen
will be blank.)
AutoPlay feature
Your AutoVision�system is equipped with an AutoPlay Feature. When a
video cassette is inserted into the player, video and audio sources are
automatically switched to VCP. This will override any other selections
currently made.
Indications on the VCP
The operation and status of the VCP can be checked by the indications
appearing on the LED display.
1. ThePower indicatorflashes on
during POWER ON and will blink
when in emergency mode.
2. TheHI-FI indicatorilluminates
when a HI-FI tape is loaded.
3. TheHP1 indicatorilluminates
when the headphone jack 1 is
plugged in.
4. TheHP2 indicatorilluminates
when the headphone jack 2 is
plugged in.
5. TheOperation indicatorsilluminate when the system is powered
ON, a HIFI tape is being played, or headphones are being used.
43
215
2004 Econoline(eco)
Owners Guide (post-2002-fmt)
USA English(fus)
Entertainment Systems
47
ProCarManuals.com
Page 55 of 256
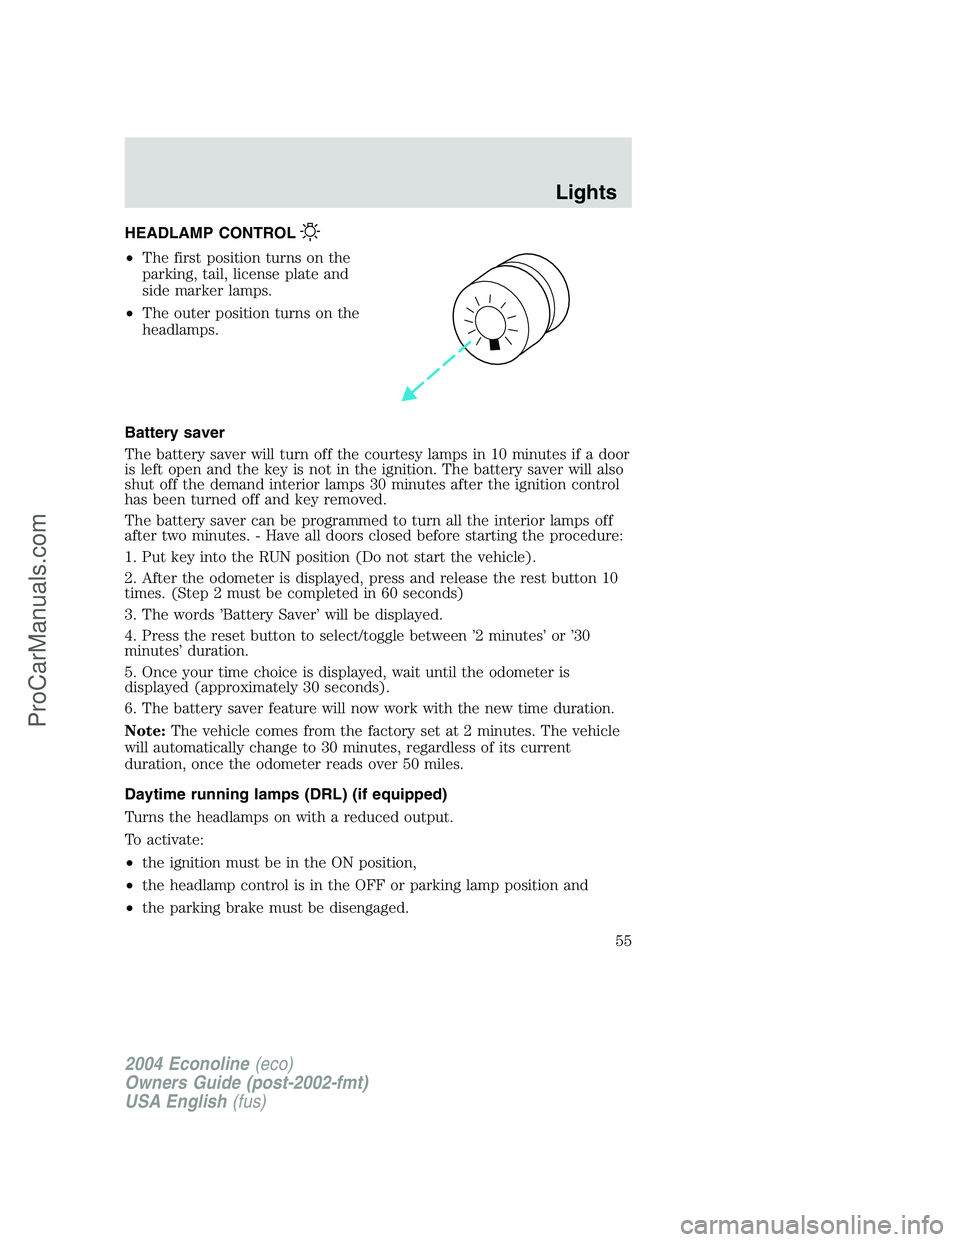
HEADLAMP CONTROL
•The first position turns on the
parking, tail, license plate and
side marker lamps.
•The outer position turns on the
headlamps.
Battery saver
The battery saver will turn off the courtesy lamps in 10 minutes if a door
is left open and the key is not in the ignition. The battery saver will also
shut off the demand interior lamps 30 minutes after the ignition control
has been turned off and key removed.
The battery saver can be programmed to turn all the interior lamps off
after two minutes. - Have all doors closed before starting the procedure:
1. Put key into the RUN position (Do not start the vehicle).
2. After the odometer is displayed, press and release the rest button 10
times. (Step 2 must be completed in 60 seconds)
3. The words’Battery Saver’will be displayed.
4. Press the reset button to select/toggle between’2 minutes’or’30
minutes’duration.
5. Once your time choice is displayed, wait until the odometer is
displayed (approximately 30 seconds).
6. The battery saver feature will now work with the new time duration.
Note:The vehicle comes from the factory set at 2 minutes. The vehicle
will automatically change to 30 minutes, regardless of its current
duration, once the odometer reads over 50 miles.
Daytime running lamps (DRL) (if equipped)
Turns the headlamps on with a reduced output.
To activate:
•the ignition must be in the ON position,
•the headlamp control is in the OFF or parking lamp position and
•the parking brake must be disengaged.
2004 Econoline(eco)
Owners Guide (post-2002-fmt)
USA English(fus)
Lights
Lights
55
ProCarManuals.com
Page 59 of 256
TURN SIGNAL CONTROL
•Push down to activate the left
turn signal.
•Push up to activate the right turn
signal.
INTERIOR LAMPS
Cargo and dome lamps with rear headliner
Rear cargo lamps equipped with an
ON/OFF/DOOR control will light
when:
•doors are closed and the control
is in the ON position
•control is in the DOOR position
and any door is open
•headlamp control is rotated fully counterclockwise
When the control is in the OFF position, it will not illuminate when you
open the doors or fully rotate the headlamp control.
Third row courtesy/reading/cargo lamps
The dome portion of the lamp, the
center light, can be turned on when
the headlamp control is rotated fully
counterclockwise or when any door
is opened.
With the ignition key in the ACC or ON position, the rear dome lamp can
be turned ON or OFF by sliding the control.
2004 Econoline(eco)
Owners Guide (post-2002-fmt)
USA English(fus)
Lights
59
ProCarManuals.com
Page 68 of 256
The compass reading may be affected when you drive near large
buildings, bridges, power lines and powerful broadcast antenna. Magnetic
or metallic objects placed in or on the vehicle may also affect compass
accuracy. Adjustments may need to be made to the zone and calibration
of the compass.
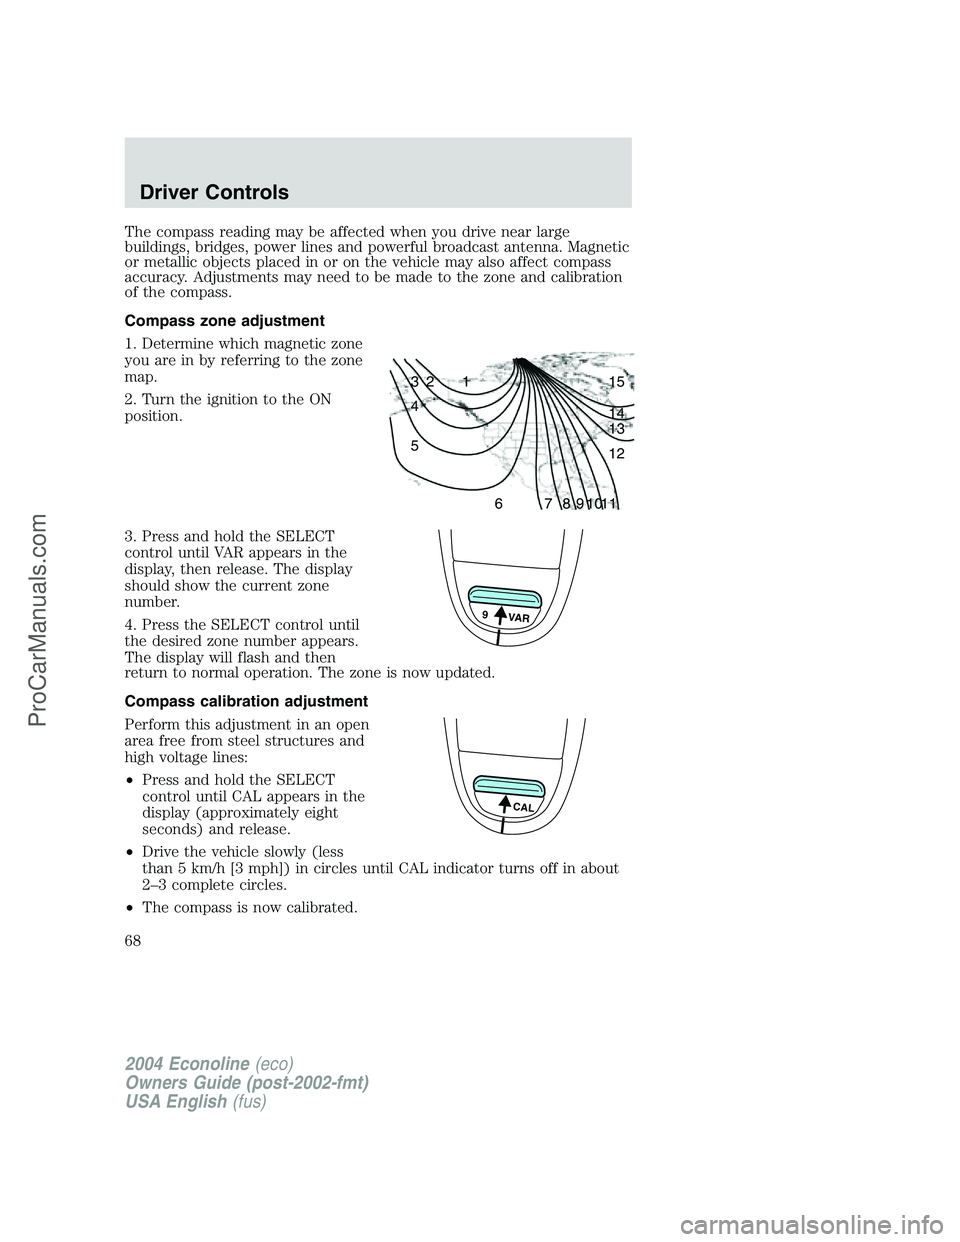
Compass zone adjustment
1. Determine which magnetic zone
you are in by referring to the zone
map.
2. Turn the ignition to the ON
position.
3. Press and hold the SELECT
control until VAR appears in the
display, then release. The display
should show the current zone
number.
4. Press the SELECT control until
the desired zone number appears.
The display will flash and then
return to normal operation. The zone is now updated.
Compass calibration adjustment
Perform this adjustment in an open
area free from steel structures and
high voltage lines:
•Press and hold the SELECT
control until CAL appears in the
display (approximately eight
seconds) and release.
•Drive the vehicle slowly (less
than 5 km/h [3 mph]) in circles until CAL indicator turns off in about
2–3 complete circles.
•The compass is now calibrated.
1 2 3
4
5
6 7 8 9 101112 13 14 15
9 VAR
CAL
2004 Econoline(eco)
Owners Guide (post-2002-fmt)
USA English(fus)
Driver Controls
68
ProCarManuals.com
Page 70 of 256
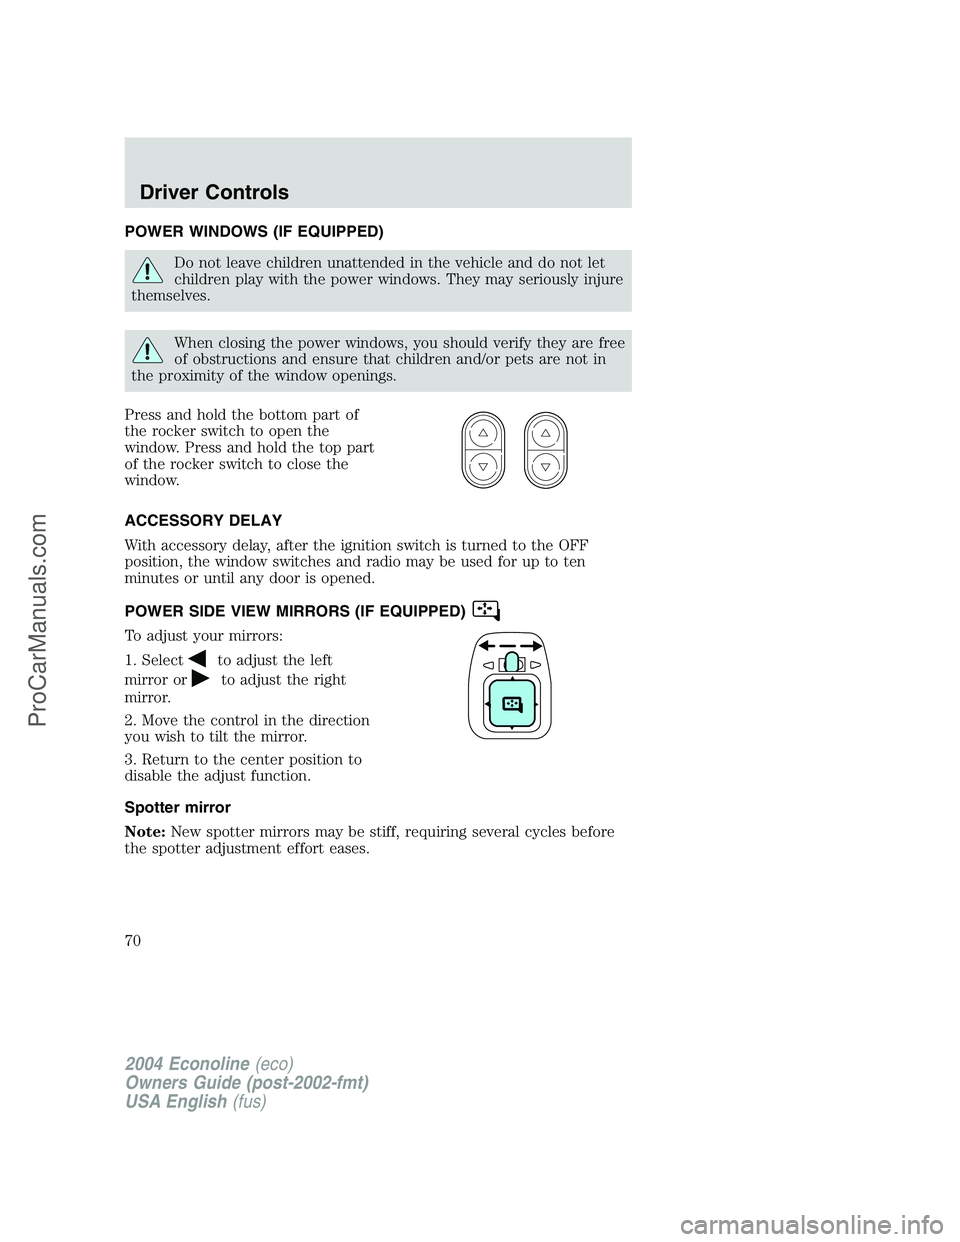
POWER WINDOWS (IF EQUIPPED)
Do not leave children unattended in the vehicle and do not let
children play with the power windows. They may seriously injure
themselves.
When closing the power windows, you should verify they are free
of obstructions and ensure that children and/or pets are not in
the proximity of the window openings.
Press and hold the bottom part of
the rocker switch to open the
window. Press and hold the top part
of the rocker switch to close the
window.
ACCESSORY DELAY
With accessory delay, after the ignition switch is turned to the OFF
position, the window switches and radio may be used for up to ten
minutes or until any door is opened.
POWER SIDE VIEW MIRRORS (IF EQUIPPED)
To adjust your mirrors:
1. Select
to adjust the left
mirror or
to adjust the right
mirror.
2. Move the control in the direction
you wish to tilt the mirror.
3. Return to the center position to
disable the adjust function.
Spotter mirror
Note:New spotter mirrors may be stiff, requiring several cycles before
the spotter adjustment effort eases.
2004 Econoline(eco)
Owners Guide (post-2002-fmt)
USA English(fus)
Driver Controls
70
ProCarManuals.com
Page 74 of 256
•Depress the brake pedal until the
desired vehicle speed is reached,
press the SET ACCEL control.
Turning off speed control
There are two ways to turn off the
speed control:
•Depress the brake pedal. This will
not erase your vehicle’s
previously set speed.
•Press the speed control OFF
control.
Note:When you turn off the speed control or the ignition, your speed
control set speed memory is erased.
RES
SET
ACCEL
COAST
2004 Econoline(eco)
Owners Guide (post-2002-fmt)
USA English(fus)
Driver Controls
74
ProCarManuals.com
Page 76 of 256
Changes or modifications not expressly approved by the party
responsible for compliance could void the user’s authority to
operate the equipment.
The typical operating range for your remote entry transmitter is
approximately 33 feet (10 meters). A decrease in operating range could
be caused by:
•weather conditions,
•nearby radio towers,
•structures around the vehicle, or
•other vehicles parked next to your vehicle.
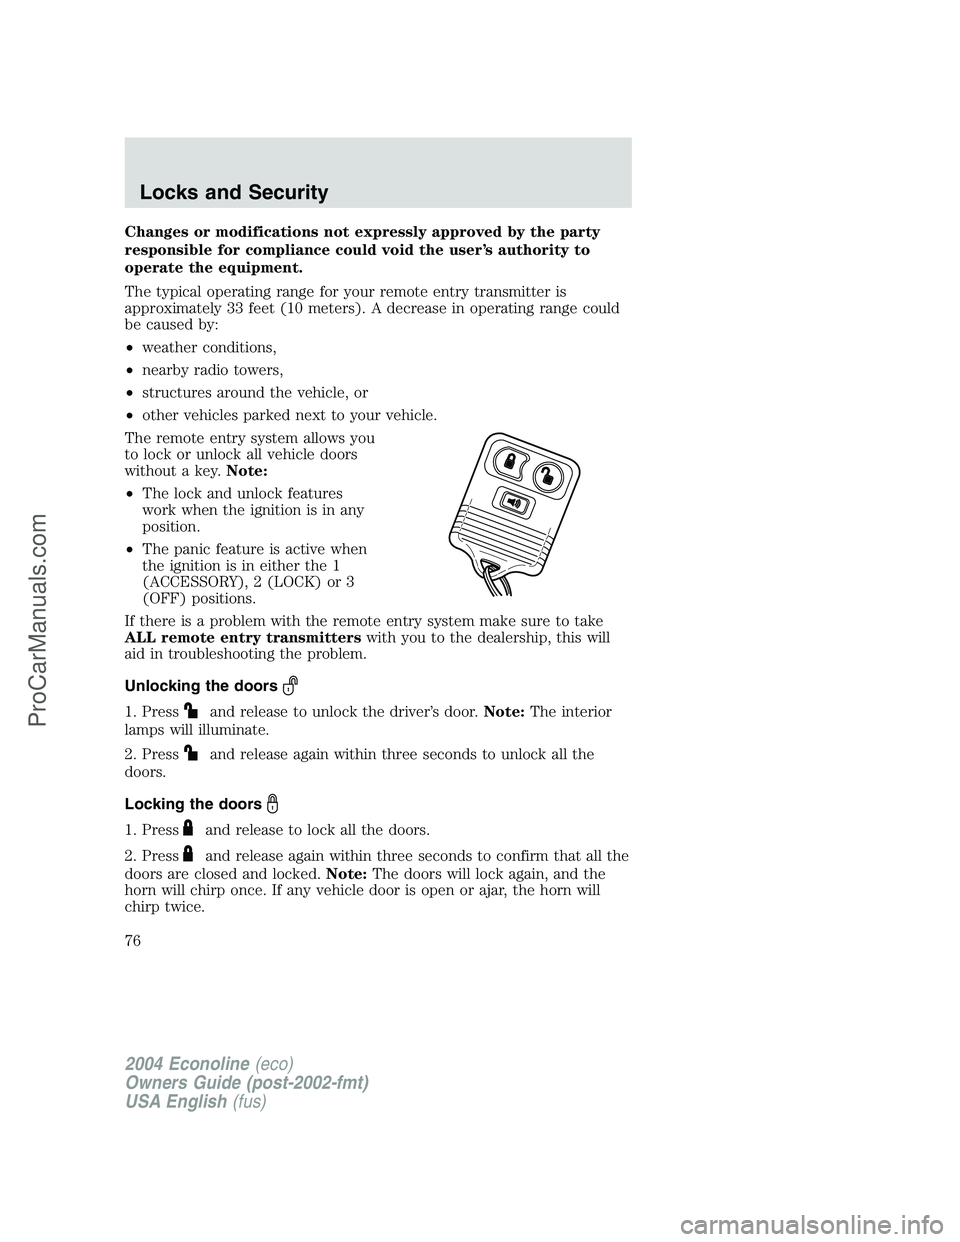
The remote entry system allows you
to lock or unlock all vehicle doors
without a key.Note:
•The lock and unlock features
work when the ignition is in any
position.
•The panic feature is active when
the ignition is in either the 1
(ACCESSORY), 2 (LOCK) or 3
(OFF) positions.
If there is a problem with the remote entry system make sure to take
ALL remote entry transmitterswith you to the dealership, this will
aid in troubleshooting the problem.
Unlocking the doors
1. Pressand release to unlock the driver’s door.Note:The interior
lamps will illuminate.
2. Press
and release again within three seconds to unlock all the
doors.
Locking the doors
1. Pressand release to lock all the doors.
2. Press
and release again within three seconds to confirm that all the
doors are closed and locked.Note:The doors will lock again, and the
horn will chirp once. If any vehicle door is open or ajar, the horn will
chirp twice.
2004 Econoline(eco)
Owners Guide (post-2002-fmt)
USA English(fus)
Locks and Security
76
ProCarManuals.com