Page 226 of 2643
1E – 12IENGINE ELECTRICAL
DAEWOO V–121 BL4
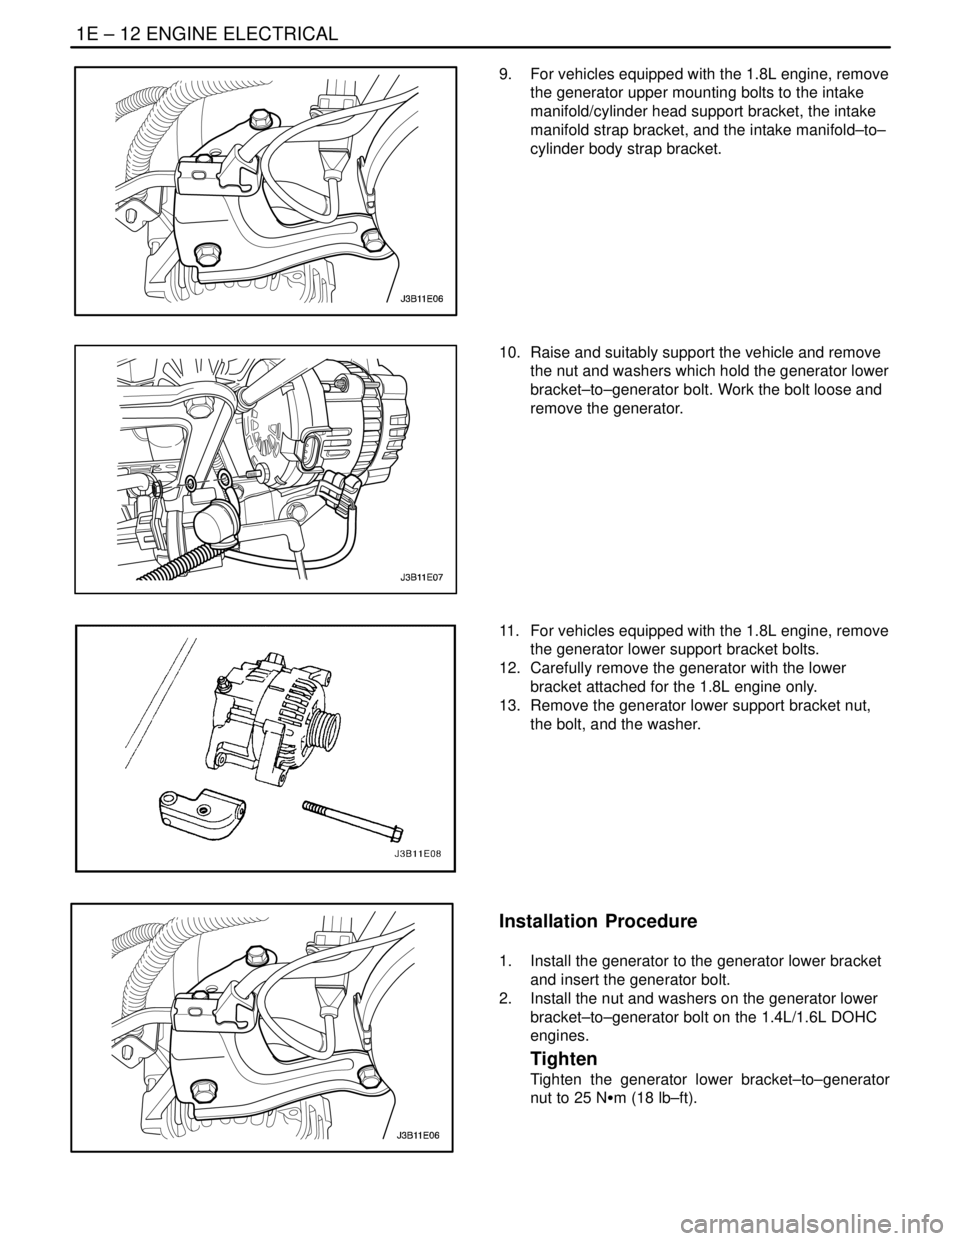
9. For vehicles equipped with the 1.8L engine, remove
the generator upper mounting bolts to the intake
manifold/cylinder head support bracket, the intake
manifold strap bracket, and the intake manifold–to–
cylinder body strap bracket.
10. Raise and suitably support the vehicle and remove
the nut and washers which hold the generator lower
bracket–to–generator bolt. Work the bolt loose and
remove the generator.
11. For vehicles equipped with the 1.8L engine, remove
the generator lower support bracket bolts.
12. Carefully remove the generator with the lower
bracket attached for the 1.8L engine only.
13. Remove the generator lower support bracket nut,
the bolt, and the washer.
Installation Procedure
1. Install the generator to the generator lower bracket
and insert the generator bolt.
2. Install the nut and washers on the generator lower
bracket–to–generator bolt on the 1.4L/1.6L DOHC
engines.
Tighten
Tighten the generator lower bracket–to–generator
nut to 25 NSm (18 lb–ft).
Page 227 of 2643
ENGINE ELECTRICAL 1E – 13
DAEWOO V–121 BL4
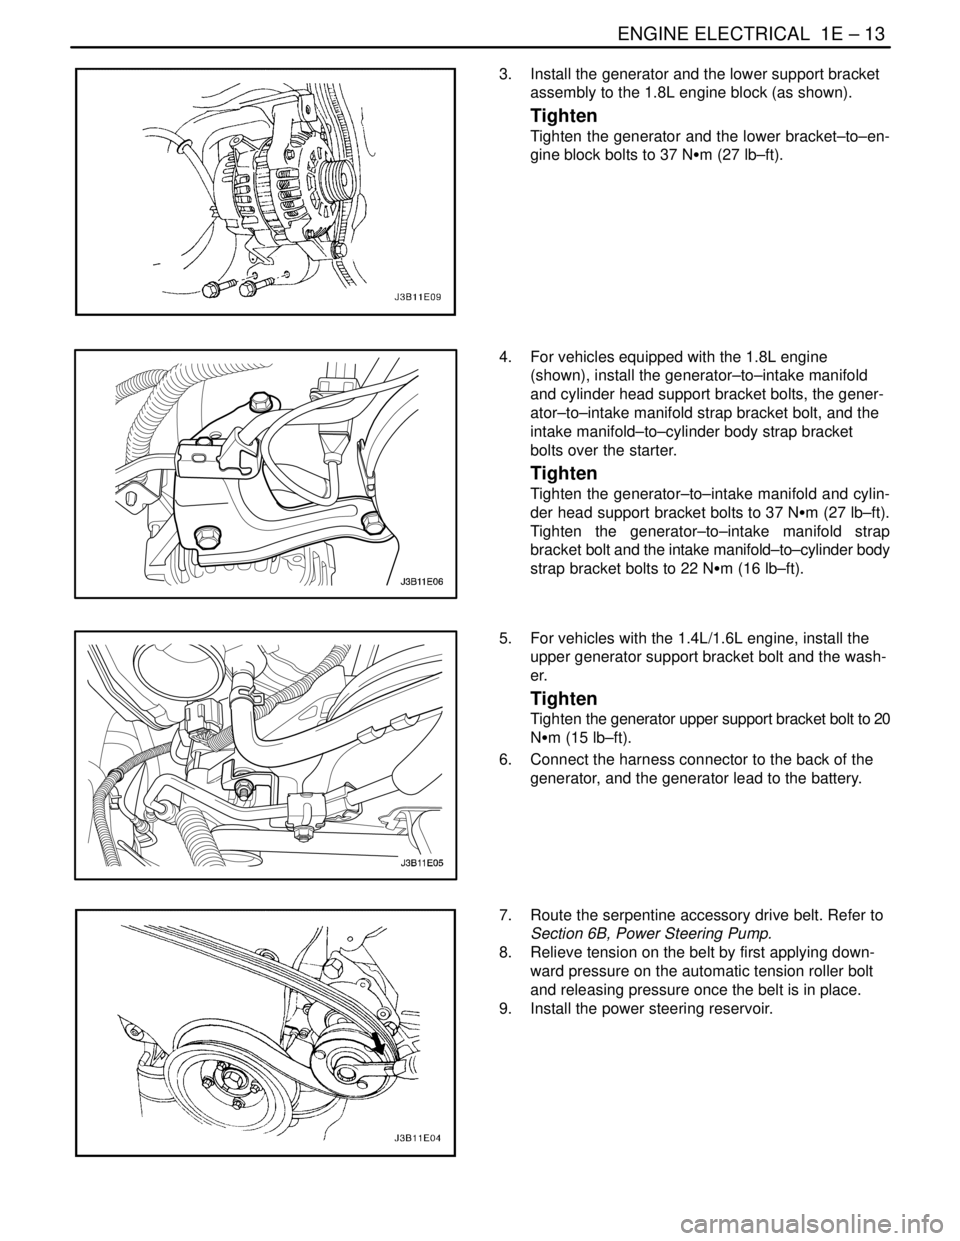
3. Install the generator and the lower support bracket
assembly to the 1.8L engine block (as shown).
Tighten
Tighten the generator and the lower bracket–to–en-
gine block bolts to 37 NSm (27 lb–ft).
4. For vehicles equipped with the 1.8L engine
(shown), install the generator–to–intake manifold
and cylinder head support bracket bolts, the gener-
ator–to–intake manifold strap bracket bolt, and the
intake manifold–to–cylinder body strap bracket
bolts over the starter.
Tighten
Tighten the generator–to–intake manifold and cylin-
der head support bracket bolts to 37 NSm (27 lb–ft).
Tighten the generator–to–intake manifold strap
bracket bolt and the intake manifold–to–cylinder body
strap bracket bolts to 22 NSm (16 lb–ft).
5. For vehicles with the 1.4L/1.6L engine, install the
upper generator support bracket bolt and the wash-
er.
Tighten
Tighten the generator upper support bracket bolt to 20
NSm (15 lb–ft).
6. Connect the harness connector to the back of the
generator, and the generator lead to the battery.
7. Route the serpentine accessory drive belt. Refer to
Section 6B, Power Steering Pump.
8. Relieve tension on the belt by first applying down-
ward pressure on the automatic tension roller bolt
and releasing pressure once the belt is in place.
9. Install the power steering reservoir.
Page 228 of 2643

1E – 14IENGINE ELECTRICAL
DAEWOO V–121 BL4
10. Install the air cleaner outlet hose and connect the
MAT electrical connector.
11. Connect the negative battery cable.
STARTER
Removal Procedure
1. Remove the nut which secures the starter ground
wire to the lower mounting stud and remove the
ground wire.
2. Remove the lower starter stud/weld nut assembly
(1.4L/1.6L engine).
3. For vehicles equipped with the 1.8L engine, remove
the starter–to–engine block mounting bolt and the
starter–to–transmission mounting bolt.
4. Remove the starter solenoid nuts to disconnect the
electrical cable.
5. Remove the starter assembly.
Installation Procedure
1. Place the starter assembly in position using an as-
sistant to prop up the starter to aid in screwing in
the upper stud with the weld nut.
2. Install the upper and the lower starter mounting
bolts.
Tighten
Tighten the starter mounting studs to 23 NSm (16 lb
ft).
3. Install the starter mounting bolts (1.8L engine).
Tighten
Tighten the starter–to–engine block mounting bolt to
45 NSm (33 lb–ft) and the starter–to–engine transaxle
mounting bolt to 50 NSm (37 lb–ft).
Page 229 of 2643
ENGINE ELECTRICAL 1E – 15
DAEWOO V–121 BL4
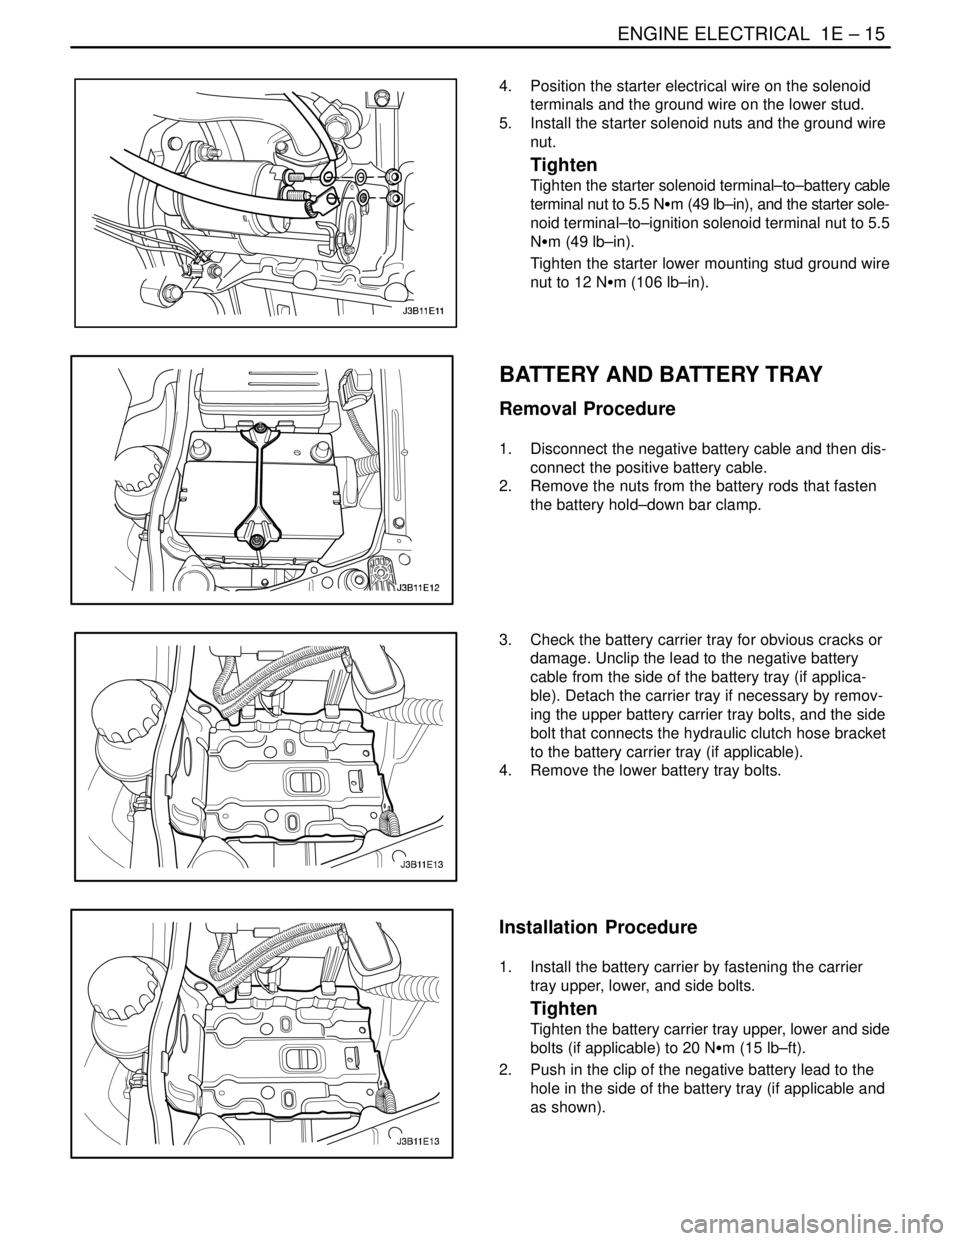
4. Position the starter electrical wire on the solenoid
terminals and the ground wire on the lower stud.
5. Install the starter solenoid nuts and the ground wire
nut.
Tighten
Tighten the starter solenoid terminal–to–battery cable
terminal nut to 5.5 NSm (49 lb–in), and the starter sole-
noid terminal–to–ignition solenoid terminal nut to 5.5
NSm (49 lb–in).
Tighten the starter lower mounting stud ground wire
nut to 12 NSm (106 lb–in).
BATTERY AND BATTERY TRAY
Removal Procedure
1. Disconnect the negative battery cable and then dis-
connect the positive battery cable.
2. Remove the nuts from the battery rods that fasten
the battery hold–down bar clamp.
3. Check the battery carrier tray for obvious cracks or
damage. Unclip the lead to the negative battery
cable from the side of the battery tray (if applica-
ble). Detach the carrier tray if necessary by remov-
ing the upper battery carrier tray bolts, and the side
bolt that connects the hydraulic clutch hose bracket
to the battery carrier tray (if applicable).
4. Remove the lower battery tray bolts.
Installation Procedure
1. Install the battery carrier by fastening the carrier
tray upper, lower, and side bolts.
Tighten
Tighten the battery carrier tray upper, lower and side
bolts (if applicable) to 20 NSm (15 lb–ft).
2. Push in the clip of the negative battery lead to the
hole in the side of the battery tray (if applicable and
as shown).
Page 230 of 2643
1E – 16IENGINE ELECTRICAL
DAEWOO V–121 BL4
3. Install the battery into the tray.
4. Fasten the bar clamp to the battery by loosely at-
taching the battery rods from the battery tray cut-
outs through the bar clamp holes, and loosely tight-
ening the nuts.
Tighten
Tighten the battery retainer clamp–to–battery rod
nuts to 5 NSm (44 lb–in).
5. Connect the negative and the positive battery
cables.
Tighten
Tighten the battery cable nuts to 5 NSm (44 lb–in).
Page 231 of 2643
ENGINE ELECTRICAL 1E – 17
DAEWOO V–121 BL4
UNIT REPAIR
STARTER MOTOR
Disassembly Procedure
1. Remove the starter. Refer to ”Starter” in this sec-
tion.
2. Remove the starter through–bolts.
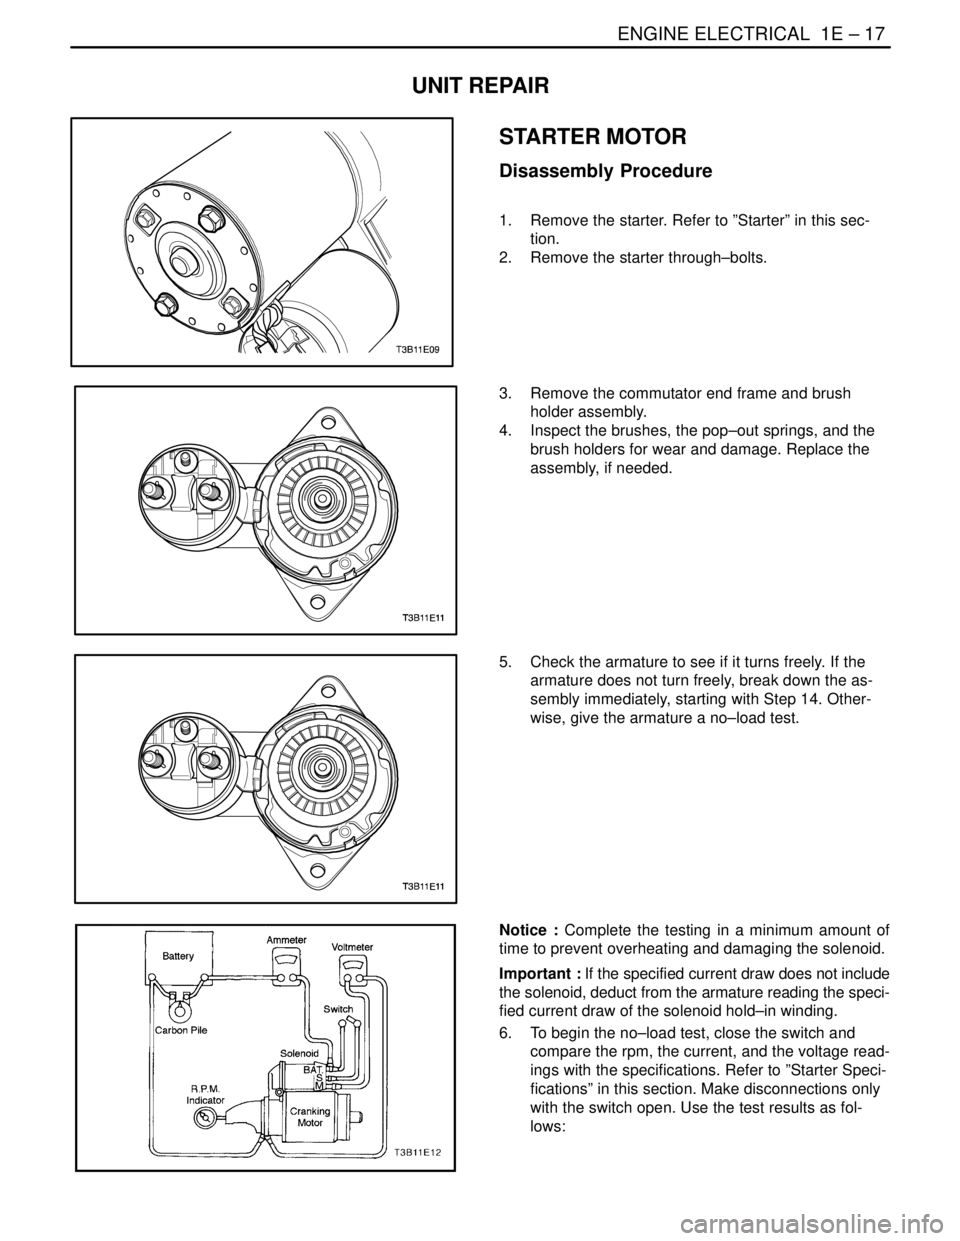
3. Remove the commutator end frame and brush
holder assembly.
4. Inspect the brushes, the pop–out springs, and the
brush holders for wear and damage. Replace the
assembly, if needed.
5. Check the armature to see if it turns freely. If the
armature does not turn freely, break down the as-
sembly immediately, starting with Step 14. Other-
wise, give the armature a no–load test.
Notice : Complete the testing in a minimum amount of
time to prevent overheating and damaging the solenoid.
Important : If the specified current draw does not include
the solenoid, deduct from the armature reading the speci-
fied current draw of the solenoid hold–in winding.
6. To begin the no–load test, close the switch and
compare the rpm, the current, and the voltage read-
ings with the specifications. Refer to ”Starter Speci-
fications” in this section. Make disconnections only
with the switch open. Use the test results as fol-
lows:
Page 232 of 2643
1E – 18IENGINE ELECTRICAL
DAEWOO V–121 BL4
1) Rated current draw and no–load speed indicate
a normal condition for the starter motor.
2) Low rpm combined with high current draw is an
indication of excessive friction caused by tight,
dirty, or worn bearings; a bent armature shaft;
a shorted armature; or a shorted field coils.
3) Failure to operate with high current draw indi-
cates a direct ground in the terminal or fields,
or ”frozen” bearings.
4) Failure to operate with no current draw indi-
cates an open field circuit, open armature coils,
broken brush springs, worn brushes, high in-
sulation between the commutator bars, or oth-
er causes which would prevent good contact
between the brushes and the commutator.
5) Low, no–load speed and low current indicate
high internal resistance and high current draw,
which usually mean shorted fields.
7. Remove the solenoid assembly screws.
8. Remove the field connector nut. Disconnect the
field connector.
Page 233 of 2643
ENGINE ELECTRICAL 1E – 19
DAEWOO V–121 BL4
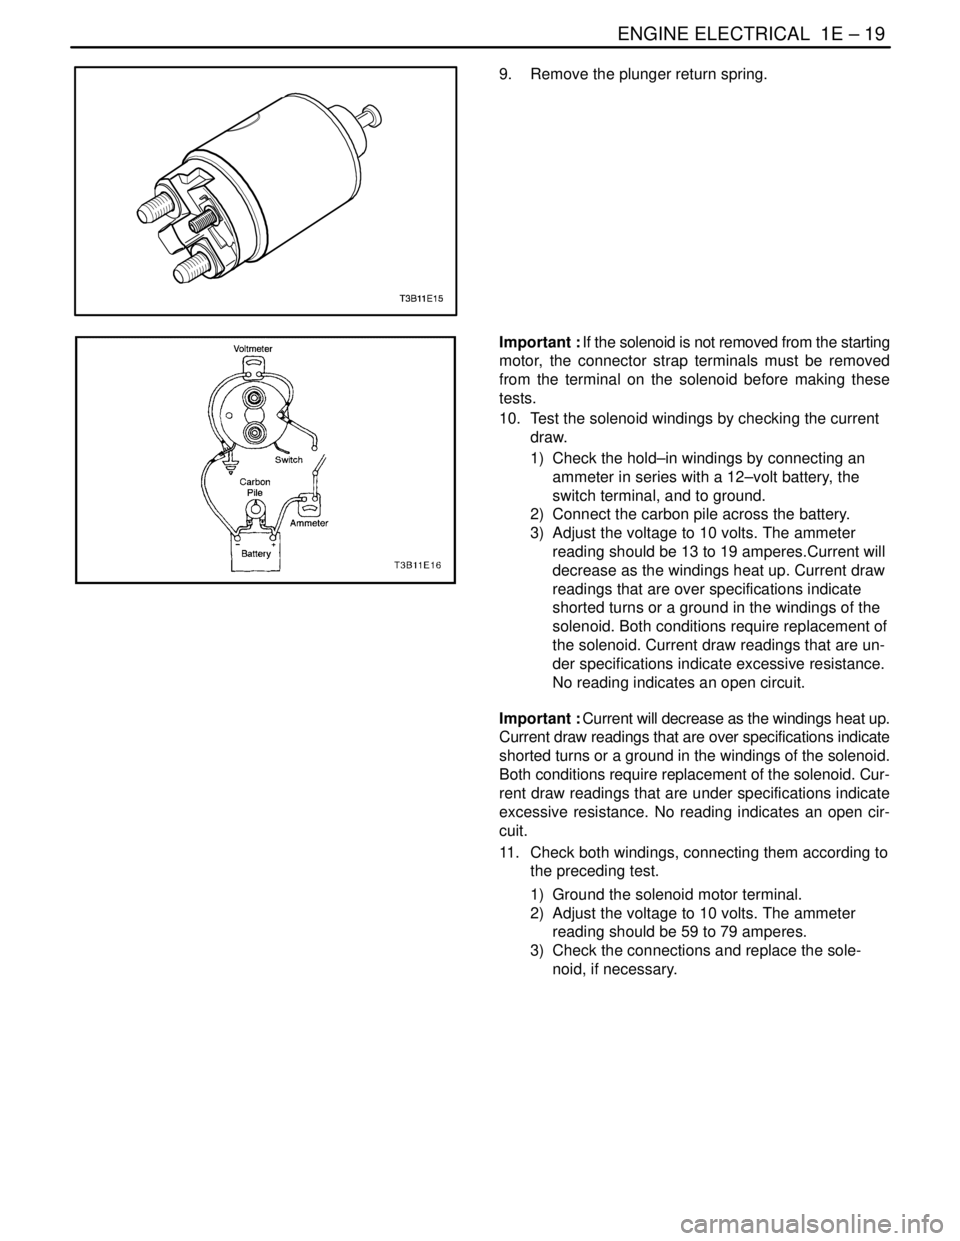
9. Remove the plunger return spring.
Important : If the solenoid is not removed from the starting
motor, the connector strap terminals must be removed
from the terminal on the solenoid before making these
tests.
10. Test the solenoid windings by checking the current
draw.
1) Check the hold–in windings by connecting an
ammeter in series with a 12–volt battery, the
switch terminal, and to ground.
2) Connect the carbon pile across the battery.
3) Adjust the voltage to 10 volts. The ammeter
reading should be 13 to 19 amperes.Current will
decrease as the windings heat up. Current draw
readings that are over specifications indicate
shorted turns or a ground in the windings of the
solenoid. Both conditions require replacement of
the solenoid. Current draw readings that are un-
der specifications indicate excessive resistance.
No reading indicates an open circuit.
Important : Current will decrease as the windings heat up.
Current draw readings that are over specifications indicate
shorted turns or a ground in the windings of the solenoid.
Both conditions require replacement of the solenoid. Cur-
rent draw readings that are under specifications indicate
excessive resistance. No reading indicates an open cir-
cuit.
11. Check both windings, connecting them according to
the preceding test.
1) Ground the solenoid motor terminal.
2) Adjust the voltage to 10 volts. The ammeter
reading should be 59 to 79 amperes.
3) Check the connections and replace the sole-
noid, if necessary.