2004 CHRYSLER SEBRING seats
[x] Cancel search: seatsPage 54 of 273

Console Features Ð With Heated Seats
The front console has two cup holders. An optional
removable ashtray may be located in the driver's side cup
holder.The center console/armrest has a pencil /tire gage holder
and a tissue holder mounted on the underside of the
cover. The bottom of the console bin also has built in
holders for compact discs or cassette tapes. The power
outlet is also mounted inside the center console (if
equipped). There are also two cup holders for rear seat
passengers and a rear courtesy lamp located directly in
back of the center console.
Two coin holders are located toward the front of the
inside of the console bin. The right side coin holder can
accommodate dimes, nickels or pennies, while the left
side coin holder can hold quarters, dimes, nickels, or
pennies. Both can also accommodate various combina-
tions of different types of coins, including some interna-
tional currencies.
54 UNDERSTANDING THE FEATURES OF YOUR VEHICLE
Page 57 of 273

SEATS
Manual Front Seat Adjustments
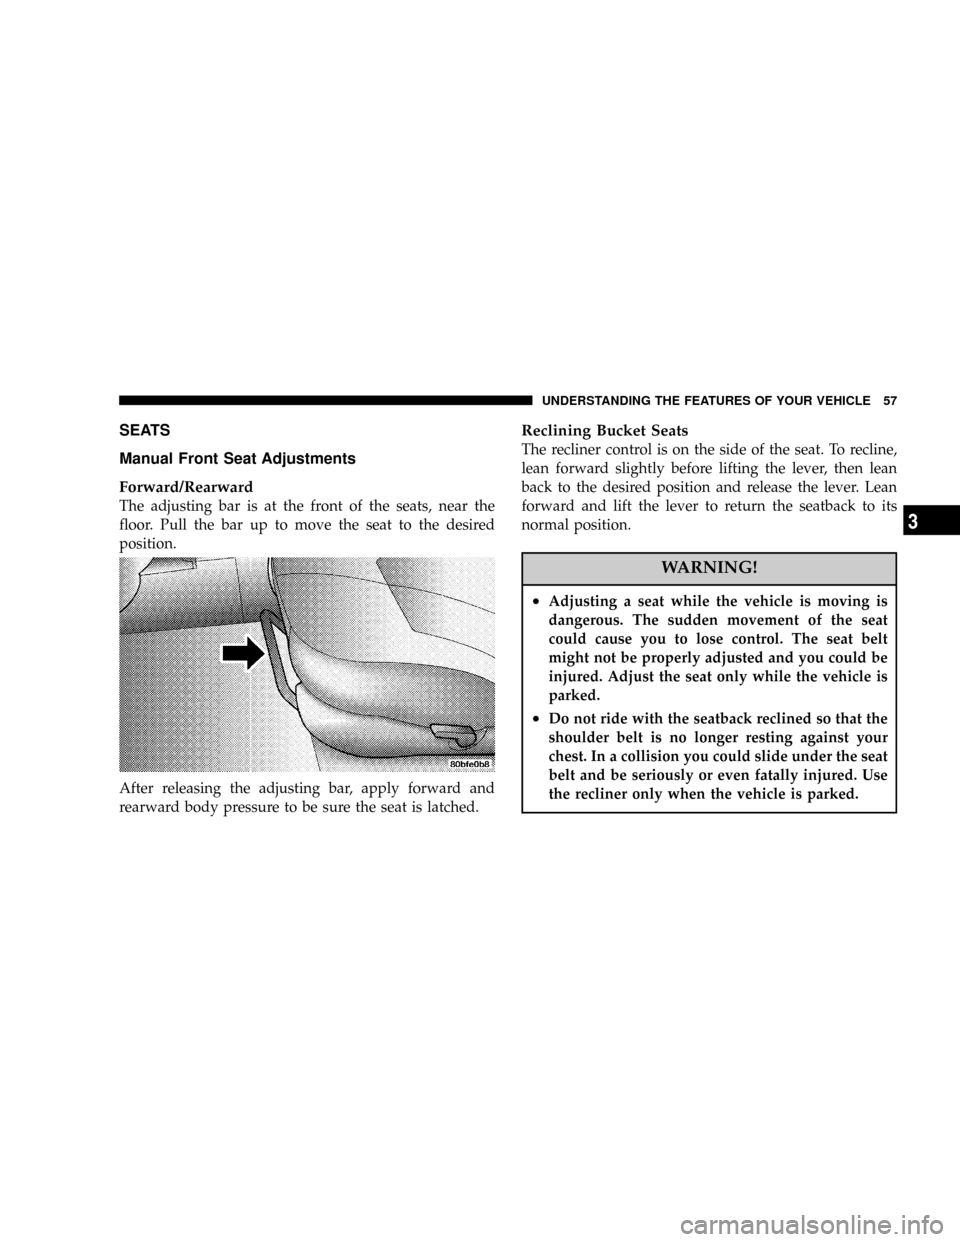
Forward/Rearward
The adjusting bar is at the front of the seats, near the
floor. Pull the bar up to move the seat to the desired
position.
After releasing the adjusting bar, apply forward and
rearward body pressure to be sure the seat is latched.
Reclining Bucket Seats
The recliner control is on the side of the seat. To recline,
lean forward slightly before lifting the lever, then lean
back to the desired position and release the lever. Lean
forward and lift the lever to return the seatback to its
normal position.
WARNING!
²Adjusting a seat while the vehicle is moving is
dangerous. The sudden movement of the seat
could cause you to lose control. The seat belt
might not be properly adjusted and you could be
injured. Adjust the seat only while the vehicle is
parked.
²Do not ride with the seatback reclined so that the
shoulder belt is no longer resting against your
chest. In a collision you could slide under the seat
belt and be seriously or even fatally injured. Use
the recliner only when the vehicle is parked.
UNDERSTANDING THE FEATURES OF YOUR VEHICLE 57
3
Page 58 of 273

Lumbar Support Ð If Equipped
This feature allows you to increase or decrease the
amount of lumbar support. Turn the control lever for-
ward to increase and rearward to decrease the desired
amount of lumbar support.
Power Seats Ð If Equipped
The power seat switches are on the outboard side of the
seat near the floor. Use the front switch to move the seat
up, down, forward, rearward, or to tilt the seat. The rear
switch controls the seatback recliner.
CAUTION!
Do not place any article under a power seat as it may
cause damage to the seat controls.
Heated Seats Ð If Equipped
This feature heats the front driver and passenger seats on
models equipped with leather seats. The controls for the
heated seats are located in the floor console next to the
parking brake.
58 UNDERSTANDING THE FEATURES OF YOUR VEHICLE
Page 77 of 273

NOTE:The sunshade can only be closed by hand.
WARNING!
In an accident, there is greater risk of being thrown
from a vehicle with an open sunroof. You could also
be seriously injured or killed. Always fasten your
seat belt properly and make sure all passengers are
properly secured too.
Do not allow small children to operate the sunroof.
Never allow fingers or other body parts, or any
object to project through the sunroof opening. Injury
may result.
Sunroof Maintenance
Use only a non abrasive cleaner and a soft cloth to clean
the glass panel.
Wind Buffeting
Wind buffeting can be described as the perception of
pressure on the ears or a helicopter type sound in the
ears. Your vehicle may exhibit wind buffeting with the
windows down, or the sunroof (if so equipped) in certain
open or partially open positions. This is a normal occur-
rence and can be minimized. If the buffeting occurs with
the rear windows open, open the front and rear windows
together to minimize the buffeting. If the buffeting occurs
with the sunroof open, adjust the sunroof opening to
minimize the buffeting.
ELECTRICAL POWER OUTLET
The power outlet is located in the lower center of your
instrument panel. If your vehicle is equipped with heated
seats, a second power outlet is located inside the center
console. All accessories connected to any outlet should be
removed or turned off when the vehicle is not in use.
UNDERSTANDING THE FEATURES OF YOUR VEHICLE 77
3
Page 124 of 273

²Floor
Air is directed through the floor outlets with a
lesser amount through the defrost and side
window demist outlets.
²
Mix
Air is directed through the floor, defrost and
side window demist outlets. This setting
works best in cold or snowy conditions that
require extra heat at the windshield. This setting is
good for maintaining comfort while reducing mois-
ture on the windshield.
²
Defrost
Air is directed through the windshield and
side window demist outlets. Use this mode
with maximum fan and temperature settings for
best windshield and side window defrosting.
NOTE:
The air conditioning compressor operates in
both Mix and Defrost modes even if the Air Conditioning
is not selected. This dehumidifies the air to help dry the
windshield.
Rear Seat Outlets
These outlets are located under the front seats and direct
warm air to the rear seat passengers. Air is directed
through these outlets when you select either the Floor,
Bi-Level, or Mix modes.
Rear Window Defroster
The Rear Window Defroster button is located to
the right of the Mode Control. Press this button
once to turn on the Rear Window Defrost and a second
time to turn them off. A light above the button shows that
the defroster is on.
NOTE:The defroster turns off automatically after 15
minutes of operation. Each later activation will allow 10
minutes of operation.
Side Window Demisters
A side window demister outlet is at each end of the
instrument panel. These non-adjustable outlets direct air
toward the side windows when the system is in either the
FLOOR, MIX, or DEFROST modes. A small amount of air
is directed to the side window demisters in BI-LEVEL
mode as well. The air is directed at the area of the
windows through which you view the outside mirrors.
124 UNDERSTANDING YOUR INSTRUMENT PANEL
Page 227 of 273

License Plate Bulb Replacement
1. Locate both small slots on the outboard side of the
license lamp. Using a small screwdriver, remove the
entire housing.
2. Turn the bulb socket counterclockwise to remove it
from the housing. Pull the bulb out of the socket. Replace
the bulb and snap it back into place on the housing of the
chrome appliqu×.
Headlight Aiming
The headlights on your new vehicle were aimed at the
factory. The factory setting was made at a no load setting.
A great increase in weight will change the aiming and it
may be necessary to readjust the headlights if carrying an
excessive amount of weight in the trunk, rear seats or
pulling a trailer. To readjust the headlights first mark the
position of the headlights on a wall prior to loading the
vehicle. Load the vehicle and then readjust the headlights
to the original position. If any further adjustments are
necessary contact your manufacturer's dealer. A detailed
service procedure is contained in the manufacturer's
Service Manual. Information on purchasing a Service
Manual can be found at the back of this Owner's Manual.
FLUIDS AND CAPACITIES
U.S. Metric
Fuel (Approximate)
2.4 Liter Engine (87 Octane) 16 Gal-
lons61 Liters
2.7 Liter Engine (87 Octane) 16 Gal-
lons61 Liters
Engine Oil-with filter
2.4 Liter Engines (SAE 5W-30) 5 qts. 4.7 Liters
2.7 Liter Engines (SAE 5W-30) 5 qts. 4.7 Liters
Cooling System *
2.4 Liter Engines* (Mopart
Antifreeze/Coolant 5 Year/
100,000 Mile Formula)8 qts. 7.5 Liters
2.7 Liter Engines (Mopart
Antifreeze/Coolant 5 Year/
100,000 Mile Formula)9.5 qts. 9.0 Liters
* Includes 1 qt. for coolant tank.
MAINTAINING YOUR VEHICLE 227
7
Page 269 of 273

Occupant Restraints...................... 25
Odometer............................. 88
Tampering........................... 88
Trip ................................ 88
Oil, Engine.........................192,227
Capacity............................ 227
Change Interval...................... 193
Checking........................... 192
Disposal............................ 195
Filter.............................. 195
Identification Logo.................169,194
Materials Added to.................... 195
Pressure Gauge....................... 89
Quality..........................169,194
Recommendation..................... 194
Synthetic........................... 195
Onboard Diagnostic System............189,190
Opener, Garage Door..................... 71
Overheating, Engine..................... 172
Owner's Manual....................... 256
Paint Care............................ 214
Paint Damage......................... 214Panic Alarm........................... 20
Parking Brake......................... 139
Parking On Hill........................ 140
Partial Zero Emissions Vehicle for 2.4 Liter.... 232
Passing Light........................... 65
Pets.................................. 47
Placard, Tire and Loading Information....... 148
Power
Brakes............................. 141
Door Locks.......................... 15
Outlet.............................. 77
Seats............................... 58
Steering............................ 142
Steering, Checking.................... 200
Sunroof............................. 76
Windows............................ 24
Pregnant Women and Seat Belts............. 31
Programmable Electronic Features.........71,75
Programming Transmitters............20,71,75
Radial Ply Tires........................ 154
Radiator Cap.......................... 207
Radio...........................96,105,110
INDEX 269
10
Page 270 of 273

Radio Broadcast Signals................... 95
Radio Operation..................105,110,118
Radio Remote Controls................... 118
Rear Window Defroster.................. 124
Recommended Fluids, Lubricants and Genuine
Parts............................... 228
Reformulated Gasoline................... 161
Refrigerant............................ 200
Reminder, Lights On..................... 64
Reminder, Seat Belt...................... 30
Remote Keyless Entry.................... 19
Remote Trunk Release.................... 23
Replacement Tires...................... 156
Reporting Safety Defects................. 256
Restraints, Occupant..................... 25
Rotation, Tires......................... 158
Safety Checks Outside Vehicle.............. 49
Safety Defects, Reporting................. 256
Safety Information, Tire.................. 144
Safety Tips............................. 48
Schedule, Maintenance................... 233
Seat Belt Maintenance................... 218Seat Belt Reminder...................... 30
Seat Belts.............................. 26
Adjustable Upper Shoulder Anchorage...... 29
And Pregnant Women.................. 31
Child Restraint....................39,40,44
Extender............................ 31
Front Seat............................ 27
Inspection........................... 48
Operating Instructions.................. 27
Reminder............................ 91
Seats................................. 57
Adjustment.......................... 57
Cleaning............................ 216
Head Restraints....................... 59
Lumbar Support....................... 58
Power.............................. 58
Rear Folding......................... 59
Reclining............................ 57
Security Alarm......................... 22
Sentry Key.......................... 11,12
Service Assistance...................... 252
Service Contract........................ 254
Service Engine Soon Light................. 87
270 INDEX