2004 CHEVROLET TRAIL BLAZER instrument panel
[x] Cancel search: instrument panelPage 139 of 448
Rear Window Defogger
Your vehicle may have this feature. The lines you see
on the rear window warm the glass.
<(Rear):Press this button to turn the rear window
defogger on or off. An indicator light in the button
will come on to let you know that the rear window
defogger is active. The rear window defogger will
automatically turn off approximately ten minutes after
the button is pressed.
If your vehicle is equipped with heated mirrors, this
button will activate them.
Notice:Don’t use anything sharp on the inside of
the rear window. If you do, you could cut or damage
the warming grid, and the repairs wouldn’t be
covered by your warranty. Do not attach a temporary
vehicle license, tape, a decal or anything similar
to the defogger grid.
Outlet Adjustment
Use the air outlets located in the center and on the side
of your instrument panel to direct the air�ow.
Ventilation System
For mild outside temperatures when little heating or
cooling is needed, use the vent setting to direct outside
air through your vehicle.Your vehicle’s ventilation system supplies outside air to
the inside of your vehicle when it is moving. With the
side windows closed, air will �ow into the front air inlet
grilles, through the vehicle and out the air exhaust
valves.
Outside air will also enter the vehicle when the heater
or the air conditioning is running, unless you have
selected recirculation mode.
Operation Tips
Keep the hood and front air inlets free of ice, snow,
or any other obstruction (such as leaves). The
heater and defroster will work far better, reducing
the chance of fogging the inside of your windows.
When you enter a vehicle in cold weather, turn the
fan knob all the way to the right for a few moments
before driving. This helps clear the intake ducts
of snow and moisture, and reduces the chance of
fogging the inside of your window.
Keep the air path under the front seats clear of
objects. This helps air to circulate throughout
your vehicle.
Adding outside equipment to the front of your
vehicle, such as hood-air de�ectors, may affect the
performance of the heating and air conditioning
system. Check with your dealer before adding
equipment to the outside of your vehicle.
3-23
Page 140 of 448
Dual Automatic Climate Control
System
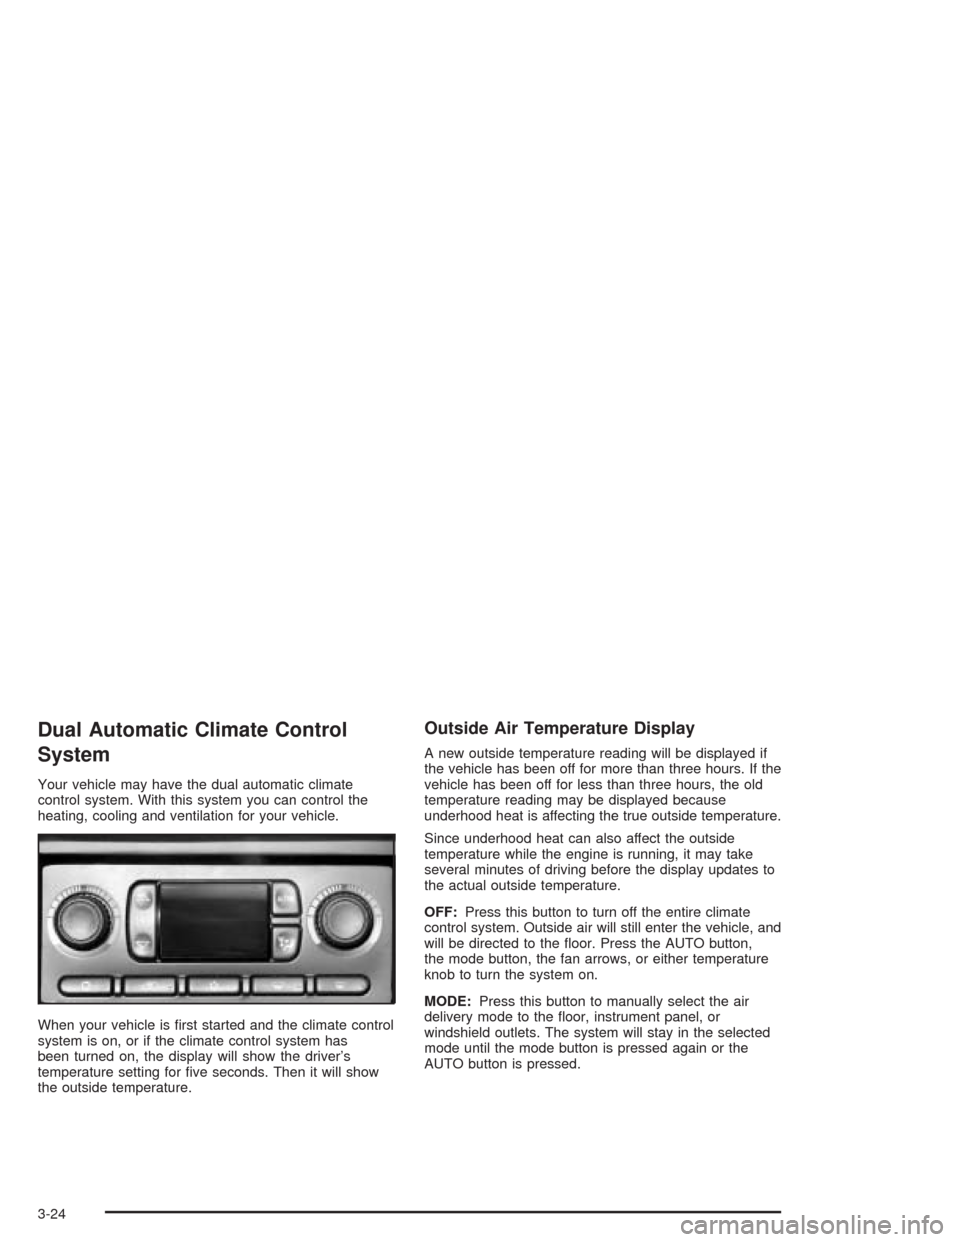
Your vehicle may have the dual automatic climate
control system. With this system you can control the
heating, cooling and ventilation for your vehicle.
When your vehicle is �rst started and the climate control
system is on, or if the climate control system has
been turned on, the display will show the driver’s
temperature setting for �ve seconds. Then it will show
the outside temperature.
Outside Air Temperature Display
A new outside temperature reading will be displayed if
the vehicle has been off for more than three hours. If the
vehicle has been off for less than three hours, the old
temperature reading may be displayed because
underhood heat is affecting the true outside temperature.
Since underhood heat can also affect the outside
temperature while the engine is running, it may take
several minutes of driving before the display updates to
the actual outside temperature.
OFF:Press this button to turn off the entire climate
control system. Outside air will still enter the vehicle, and
will be directed to the �oor. Press the AUTO button,
the mode button, the fan arrows, or either temperature
knob to turn the system on.
MODE:Press this button to manually select the air
delivery mode to the �oor, instrument panel, or
windshield outlets. The system will stay in the selected
mode until the mode button is pressed again or the
AUTO button is pressed.
3-24
Page 142 of 448
Manual Operation
To change the current setting, select one of the
following:
w9x(Fan):This button allows you to manually
adjust the fan speed. Press the up arrow to increase fan
speed and the down arrow to decrease fan speed.
The display will change to show you the selected fan
speed and the driver’s side temperature setting for
�ve seconds.
(MODE):Press this button to manually change the
direction of the air�ow in your vehicle. Keep pressing the
button until the desired mode appears on the display.
The display will change to show you the selected
air delivery mode and the driver’s temperature setting
for �ve seconds.
H(Vent):This mode directs air to the instrument
panel outlets.
)(Bi-Level):This mode directs approximately half of
the air to the instrument panel outlets, then directs
the remaining air to the �oor outlets. A little air is
directed toward the windshield and the side window
outlets. Cooler air is directed to the upper outlets and
warmer air to the �oor outlets.
6(Floor):This mode directs most of the air to the
�oor outlets. Some air also comes out of the defroster
and side window outlets. The recirculation button cannot
be selected in �oor mode.
h(Recirculation):Press this button to turn
recirculation mode on or off. When this button is
pressed, an indicator light in the button will also come
on to let you know that it is activated. Recirculation
mode is used to recirculate the air inside of your vehicle.
Use this mode to help prevent outside odors and/or
dust from entering your vehicle or to help cool the air
inside of your vehicle more quickly. Recirculation
mode can be used with vent and bi-level modes, but it
cannot be used with �oor, defog or defrost modes.
If the weather is cold and damp, the system may
cause the windows to fog while using recirculation
mode. If the windows do start to fog, select defog or
defrost mode.
#A/C (Air Conditioning):Press this button to
manually turn the air conditioning system on or off.
When the system is on, the system will automatically
begin to cool and dehumidify the air inside of your
vehicle.
If you select air conditioning off while in front defrost or
defog mode, the air conditioning off symbol will �ash
to let you know this option is not allowed.
3-26
Page 143 of 448
You may notice a slight change in engine performance
when the air-conditioning compressor shuts off and
turns on again. This is normal.
A/C OFF (Air Conditioning Off):When you turn the
air conditioning off, the words A/C OFF will appear
on the display. When the air conditioning is selected or
in AUTO mode, the system will run the air conditioning
automatically.
Defogging and Defrosting
Fog on the inside of windows is a result of high humidity
(moisture) condensing on the cool window glass. This
can be minimized if the climate control system is
used properly. You can use either defog or front defrost
to clear fog or frost from your windshield.
-(Defog):Use this setting to clear the windows of fog
or moisture. This setting will deliver air to the �oor
and windshield outlets.
0(Front Defrost):Press the front defrost button to
clear the windshield and side windows of frost or
fog quickly. The system will automatically control the fan
speed if you select defrost from AUTO mode. If the
outside temperature is 40°F (4°C) or warmer, your air
conditioning compressor will automatically run to
help dehumidify the air and dry the windshield. Do not
drive the vehicle until all the windows are clear.
Rear Window Defogger
The rear window defogger uses a warming grid to
remove fog from the rear window.
<(Rear):Press this button to turn the rear window
defogger on or off.
An indicator light in the button will come on to let you
know that the rear window defogger is activated.
The rear window defogger will turn off approximately 10
minutes after the button is pressed. If you need
additional warming time, press the button again.
Notice:Using a razor blade or sharp object to clear
the inside rear window may damage the rear
window defogger. Repairs would not be covered by
your warranty. Do not clear the inside of the rear
window with sharp objects.
Outlet Adjustment
Use the air outlets located in the center and on the side
of your instrument panel to direct the air�ow.
Ventilation System
For mild outside temperatures when little heating or
cooling is needed, use the vent setting to direct outside
air through your vehicle.
3-27
Page 149 of 448

Instrument Panel Cluster
Your instrument panel cluster is designed to let you know at a glance how your vehicle is running. You’ll know how
fast you’re going, about how much fuel you’ve used, and many other thing you’ll need to know to drive safely
and economically.
United States version shown, Canada similar
3-33
Page 150 of 448
Speedometer and Odometer
Your speedometer lets you see your speed in both
miles per hour (mph) and kilometers per hour (km/h).
Your odometer shows how far your vehicle has
been driven, in either miles (used in the United States)
or kilometers (used in Canada).
The odometer mileage can be checked without the
vehicle running. Simply press the trip stem located on
the instrument panel cluster.
You may wonder what happens if your vehicle needs a
new odometer installed. The new one will be set to
the correct mileage total of the old odometer.
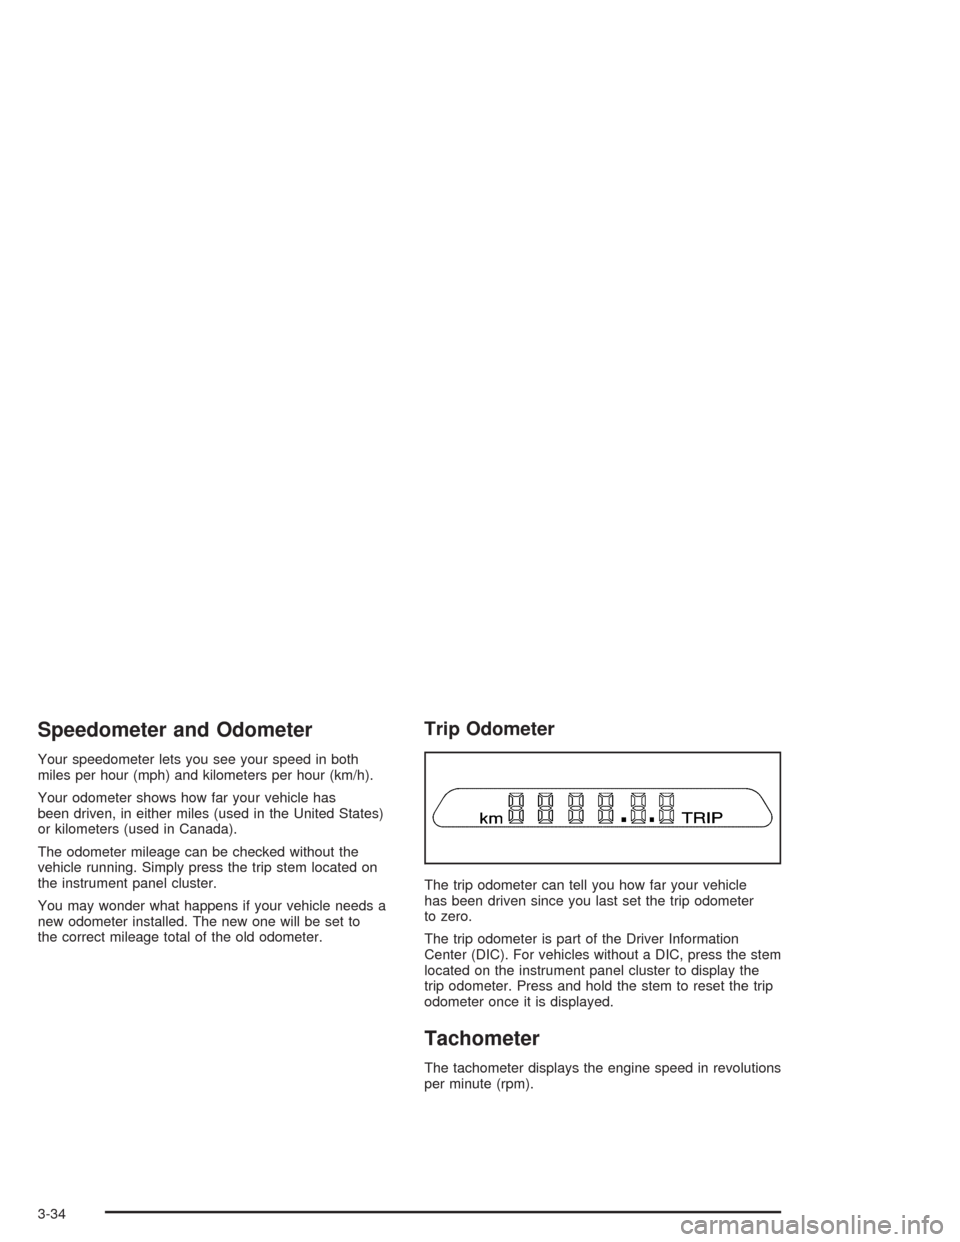
Trip Odometer
The trip odometer can tell you how far your vehicle
has been driven since you last set the trip odometer
to zero.
The trip odometer is part of the Driver Information
Center (DIC). For vehicles without a DIC, press the stem
located on the instrument panel cluster to display the
trip odometer. Press and hold the stem to reset the trip
odometer once it is displayed.
Tachometer
The tachometer displays the engine speed in revolutions
per minute (rpm).
3-34
Page 151 of 448

Safety Belt Reminder Light
When the key is turned to RUN, a chime will come on
for several seconds to remind people to fasten their
safety belts, unless the driver’s safety belt is already
buckled.
The safety belt light will
also come on and stay
on for several seconds,
then it will �ash for
several more.
If the driver’s belt is already buckled, neither the chime
nor the light will come on.
Air Bag Readiness Light
There is an air bag readiness light on the instrument
panel, which shows the air bag symbol. The system
checks the air bag’s electrical system for malfunctions.
The light tells you if there is an electrical problem.
The system check includes the air bag sensors, the air
bag modules, the wiring and the crash sensing and
diagnostic module. For more information on the air bag
system, seeAir Bag Systems on page 1-47.
This light will come on
when you start your
vehicle, and it will �ash for
a few seconds. Then
the light should go out.
This means the system
is ready.
3-35
Page 164 of 448
Here are four things that some owners ask about. None
of these show a problem with your fuel gage:
At the gas station, the gas pump shuts off before
the gage reads full.
It takes a little more or less fuel to �ll up than the
gage indicated. For example, the gage may have
indicated the tank was half full, but it actually took a
little more or less than half the tank’s capacity to
�ll the tank.
The gage moves a little when you turn a corner or
speed up.
The gage doesn’t go back to empty when you turn
off the ignition.
Low Fuel Warning Light
The light next to the fuel gage will come on brie�y when
you are starting the engine.
This light comes on when the fuel tank is low on fuel.
To turn it off, add fuel to the fuel tank.
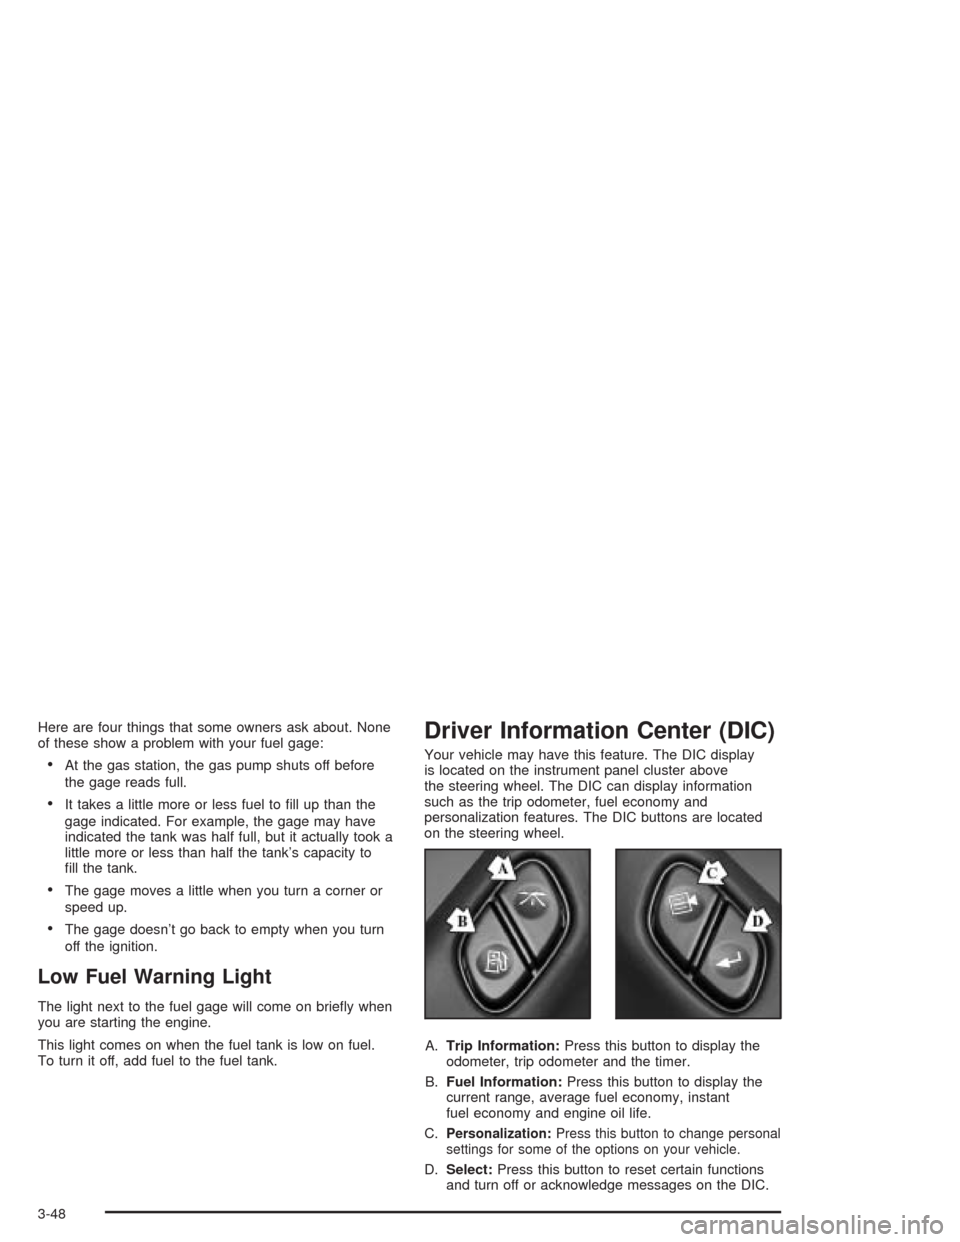
Driver Information Center (DIC)
Your vehicle may have this feature. The DIC display
is located on the instrument panel cluster above
the steering wheel. The DIC can display information
such as the trip odometer, fuel economy and
personalization features. The DIC buttons are located
on the steering wheel.
A.Trip Information:Press this button to display the
odometer, trip odometer and the timer.
B.Fuel Information:Press this button to display the
current range, average fuel economy, instant
fuel economy and engine oil life.
C.
Personalization:Press this button to change personal
settings for some of the options on your vehicle.
D.Select:Press this button to reset certain functions
and turn off or acknowledge messages on the DIC.
3-48