2004 CHEVROLET MALIBU remote control
[x] Cancel search: remote controlPage 69 of 426
Keys...............................................................2-3
Remote Keyless Entry System.........................2-5
Remote Keyless Entry System Operation...........2-6
Doors and Locks............................................2-10
Door Locks..................................................2-10
Power Door Locks........................................2-11
Door Ajar Reminder......................................2-12
Delayed Locking...........................................2-12
Programmable Automatic
Door Locks...............................................2-12
Lockout Protection........................................2-13
Leaving Your Vehicle....................................2-13
Trunk..........................................................2-13
Liftgate........................................................2-15
Windows........................................................2-16
Power Windows............................................2-17
Sun Visors...................................................2-17
Theft-Deterrent Systems..................................2-18
Content Theft-Deterrent.................................2-18
PASS-Key
®III+............................................2-20
PASS-Key®III+ Operation..............................2-20Starting and Operating Your Vehicle................2-22
New Vehicle Break-In....................................2-22
Ignition Positions..........................................2-22
Starting Your Engine.....................................2-23
Adjustable Throttle and Brake Pedal................2-24
Engine Coolant Heater..................................2-25
Automatic Transaxle Operation.......................2-27
Parking Brake..............................................2-29
Shifting Into Park (P).....................................2-30
Shifting Out of Park (P).................................2-32
Parking Over Things That Burn.......................2-32
Engine Exhaust............................................2-33
Running Your Engine While You Are Parked.......2-34
Mirrors...........................................................2-35
Manual Rearview Mirror.................................2-35
Manual Rearview Mirror with OnStar
®..............2-35
Automatic Dimming Rearview Mirror................2-35
Automatic Dimming Rearview Mirror with
OnStar
®...................................................2-36
Outside Power Mirrors...................................2-37
Outside Power Heated Mirrors........................2-37
Outside Convex Mirror...................................2-37
Section 2 Features and Controls
2-1
Page 77 of 426
Remote Vehicle Start
Your vehicle may have a remote starting feature. This
feature allows you to start the engine from outside of the
vehicle. It also starts up the vehicle’s heating or air
conditioning systems and rear window defogger. When
the remote start system is active and the vehicle
has an automatic climate control system, it will
automatically regulate the inside temperature. Normal
operation of the system will return after the key is turned
to the on position. A remote start occurs when buttons
on the remote keyless entry transmitter are pressed.
Laws in some local communities require that a person
using remote start have the vehicle in view when
doing so and may prohibit the execution of remote start
if not in view of the vehicle. Check local regulations
for any requirements on remote starting of vehicles.
Do not use the remote start feature if your vehicle is low
on fuel. Your vehicle may run out of fuel.
The remote start feature provides two separate starts,
each with 10 minutes of engine running. Or it provides
one start with 10 minutes of engine running, which can be
extended by 10 more minutes, for 20 minutes of total
running time. Once two starts or 20 minutes running time
has been provided, the vehicle must be started normally
with the ignition key to get more remote starts.The remote start feature will not operate if the key is in
the ignition or the hood is not closed.
Your remote keyless entry transmitter, with the remote
start button, provides an increased range of operation.
However, the range may be less while the vehicle
is running. As a result, you may need to be closer to
your vehicle to turn it off, than you were to turn it on.
There are other conditions which can affect the
performance of the transmitter, see “Remote Keyless
Entry System Operation” previously in this section.
/(Remote Start):Press the lock button and then
press this button to use the remote start feature.
To start the vehicle using the remote start feature, do
the following:
1. Aim the transmitter at the vehicle.
2. Press the transmitter’s lock button, release it and
then immediately press and hold the transmitter’s
remote start button until the vehicle’s turn signal
lights �ash or for at least four seconds. The
vehicle’s doors will be locked.
3. When the vehicle starts, the parking lamps will turn
on and remain on while the vehicle is running.
4. If it is your �rst remote start since last driving,
repeat these steps while the engine is still
running for a 10 minute time extension.
2-9
Page 81 of 426
Lockout Protection
Lockout protection is intended to provide enhanced
security and convenience. This feature prevents
the driver’s door from being locked using the power
door locks. If the key is left in the ignition and a door is
open, pressing the power door lock switch will lock
all the doors and then unlock the driver’s door.
Pressing and holding down the power door lock switch
for more than three seconds or until the driver door
locks, will override this feature.
This feature cannot guarantee that you will never be
locked out of your vehicle. If you don’t leave the key in
the ignition, or if you use the manual door lock or
the remote keyless entry transmitter, you could still lock
your key inside your vehicle. Always remember to
take your key with you.
Leaving Your Vehicle
If you are leaving your vehicle, open your door and set
the locks from the inside, then get out and close the door.
Trunk
To unlock the trunk on the sedan manually from the
outside, insert the key and turn the trunk lock cylinder.
When closing the trunk, close from the center to
ensure it fully latches.
{CAUTION:
It can be dangerous to drive with the trunk lid
open because carbon monoxide (CO) gas can
come into your vehicle. You can not see or
smell CO. It can cause unconsciousness and
even death. If you must drive with the trunk lid
open or if electrical wiring or other cable
connections must pass through the seal
between the body and the trunk lid:
Make sure all other windows are shut.
Turn the fan on your heating or cooling
system to its highest speed and select the
control setting that will force outside air
into your vehicle. See Climate Control
System in the Index.
If you have air outlets on or under the
instrument panel, open them all the way.
SeeEngine Exhaust on page 2-33.
2-13
Page 83 of 426
Liftgate
To open the liftgate on the MAXX from the outside, use
the trunk button on the remote keyless entry transmitter
or the remote trunk release button, located on the
lower edge of the driver’s door.
Unlocking all doors using the power door unlock switch
or the remote keyless entry transmitter unlock button
will also unlock the liftgate. Locking all doors with
the power door lock switch or the remote keyless entry
transmitter lock button will also lock the liftgate.
You can also use the key in the driver’s door lock cylinder
to unlock and open the liftgate. Turn the driver’s door lock
cylinder toward the rear of the vehicle and back to the
center twice to unlock the liftgate. Turn the driver’s door
lock cylinder toward the rear of the vehicle and back to
the center three times to open the liftgate.
If the liftgate is unlocked, you can manually open it by
pushing on the touch pad switch located on the underside
of the liftgate trim panel, slightly to the right of center.
If none of these ways of opening the liftgate works, there
is a pull cable located under the body trim panel in
the liftgate area which will open it. This should be used
in case of emergency only, not for daily use.{CAUTION:
It can be dangerous to drive with the liftgate
open because carbon monoxide (CO) gas can
come into your vehicle. You can’t see or smell
CO. It can cause unconsciousness and even
death. If you must drive with the liftgate open
or if electrical wiring or other cable
connections must pass through the seal
between the body and the liftgate:
Make sure all other windows are shut.
Turn the fan on your heating or cooling
system to its highest speed and select the
control setting that will force outside air
into your vehicle. SeeClimate Control
System on page 3-21.
If you have air outlets on or under the
instrument panel, open them all the way.
SeeEngine Exhaust on page 2-33.
To close the liftgate, pull down on the openings, then
�rmly shut the liftgate. Don’t drive with the liftgate open,
even slightly. SeeEngine Exhaust on page 2-33.
2-15
Page 135 of 426
Interior Lamps
Instrument Panel Brightness
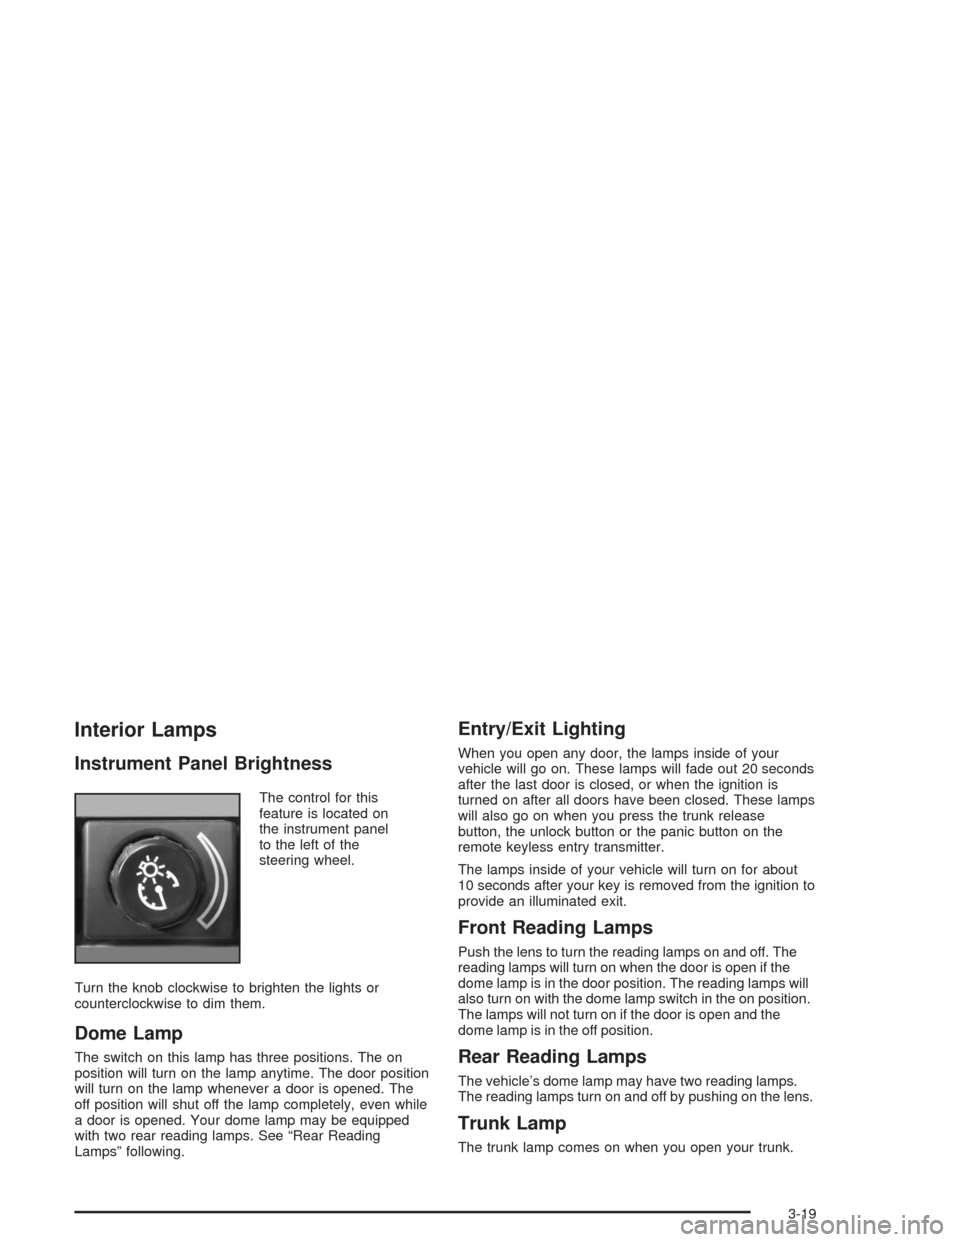
The control for this
feature is located on
the instrument panel
to the left of the
steering wheel.
Turn the knob clockwise to brighten the lights or
counterclockwise to dim them.
Dome Lamp
The switch on this lamp has three positions. The on
position will turn on the lamp anytime. The door position
will turn on the lamp whenever a door is opened. The
off position will shut off the lamp completely, even while
a door is opened. Your dome lamp may be equipped
with two rear reading lamps. See “Rear Reading
Lamps” following.
Entry/Exit Lighting
When you open any door, the lamps inside of your
vehicle will go on. These lamps will fade out 20 seconds
after the last door is closed, or when the ignition is
turned on after all doors have been closed. These lamps
will also go on when you press the trunk release
button, the unlock button or the panic button on the
remote keyless entry transmitter.
The lamps inside of your vehicle will turn on for about
10 seconds after your key is removed from the ignition to
provide an illuminated exit.
Front Reading Lamps
Push the lens to turn the reading lamps on and off. The
reading lamps will turn on when the door is open if the
dome lamp is in the door position. The reading lamps will
also turn on with the dome lamp switch in the on position.
The lamps will not turn on if the door is open and the
dome lamp is in the off position.
Rear Reading Lamps
The vehicle’s dome lamp may have two reading lamps.
The reading lamps turn on and off by pushing on the lens.
Trunk Lamp
The trunk lamp comes on when you open your trunk.
3-19
Page 136 of 426
Cargo Lamp
If your vehicle is the MAXX model, it has a cargo lamp.
The cargo lamp comes on when the liftgate is opened.
If you want to leave the liftgate open you can turn off the
cargo lamp by pushing on the lens.
Battery Run-Down Protection
Your vehicle has a battery run-down protection feature
designed to protect your vehicle’s battery.
When any interior lamp (trunk, reading, or visor vanity)
is left on while the ignition is turned off, the battery
run-down protection system will automatically shut the
lamp(s) off after 20 minutes. This will avoid draining
the battery.
To reactivate the interior lamps, do one of the following:
Turn on the ignition.
Turn the exterior lamp control off and then on.
Open a door.
Press any remote keyless entry transmitter button
(if equipped).
Press the remote trunk release button.
Press the power door lock switch.The battery run-down feature will also be activated
when any door on the vehicle is left open and the
ignition is in OFF.
Accessory Power Outlets
With accessory power outlets you can plug in auxiliary
electrical equipment such as a cellular telephone.
For vehicles with anti-lock brake system (ABS), the
accessory power outlets are located on the front of the
center console storage area and also inside the
console storage compartment. Vehicles without ABS,
both outlets are located on the front of the center
console storage area. The compartment has notches
that allow power cords to be routed outside of the
console while the lid is closed. There is also an outlet in
the rear cargo area of the MAXX.
Notice:Leaving electrical equipment on for
extended periods will drain the battery. Always turn
off electrical equipment when not in use and do
not plug in equipment that exceeds the maximum
amperage rating.
3-20
Page 137 of 426
Certain electrical accessories may not be compatible
with the accessory power outlet and could result
in blown vehicle or adapter fuses. If you experience
a problem see your dealer for additional information
on accessory power outlets.
Notice:Adding any electrical equipment to your
vehicle may damage it or keep other components
from working as they should. The repairs would
not be covered by your warranty. Check with your
dealer before adding electrical equipment.
When adding electrical equipment, be sure to follow
the proper installation instructions included with
the equipment.
Notice:Improper use of the power outlet can
cause damage not covered by your warranty.
Do not hang any type of accessory or accessory
bracket from the plug because the power outlets
are designed for accessory power plugs only.Climate Controls
Climate Control System
With this system you can control the heating, cooling and
ventilation for your vehicle. If your vehicle has the remote
start feature, the climate control system will function as
part of the remote start feature. The system will return to
the last settings the vehicle was at when it was turned off.
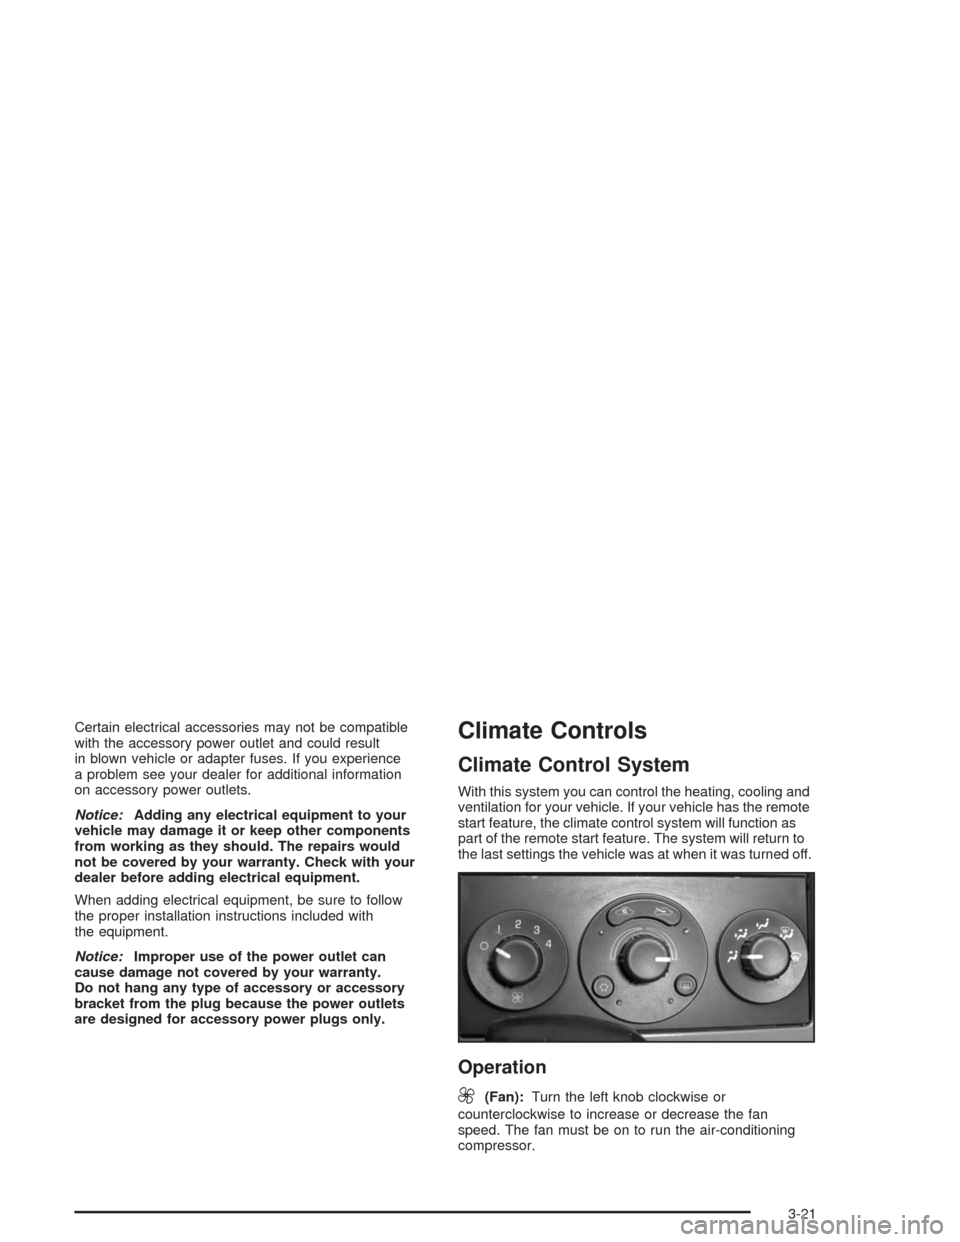
Operation
9
(Fan):Turn the left knob clockwise or
counterclockwise to increase or decrease the fan
speed. The fan must be on to run the air-conditioning
compressor.
3-21
Page 142 of 426
Use the steps below to place the entire system in
automatic mode:
1. Place the fan knob and the mode knob to the
AUTO position.
The display will now show the current set
temperature. When auto is selected, the air
conditioning operation and air inlet will be
automatically controlled. The air conditioning
compressor will run when the outside temperature
is over about 40°F (4°C). The air inlet will normally
be set to outside air. If it’s hot outside, the air
inlet may automatically switch to recirculate inside
air to help quickly cool down your vehicle.
2. Set the temperature.
To �nd your comfort setting, start with an initial
temperature setting and allow about 20 minutes for
the system to regulate. Press the up or down arrow
temperature buttons to adjust the temperature
setting as necessary. If you choose the temperature
setting of 60°F (15°C) the system will remain at
the maximum cooling setting. If you choose the
temperature setting of 90°F (32°C) the system will
remain at the maximum heat setting. Choosing either
maximum setting will not cause the vehicle to heat
or cool any faster.Be careful not to cover the sensor located on the
top of the instrument panel near the windshield.
This sensor regulates air temperature based on sun
load, and also turns on your headlamps.
Also be careful not to cover the sensor grille on
the lower right side of the climate control faceplate.
This senses the inside vehicle temperature
needed for proper regulation.
To avoid blowing cold air at start-up in cold weather,
the system will delay turning on the fan until
warm air is available. The length of delay depends
on the engine coolant temperature. Turning the
fan knob will override this delay and change the
fan to a selected speed.
If your vehicle has the remote start feature, the climate
control display will initially show “AS” in place of the
temperature to indicate the remote start has been
activated. The system will automatically regulate the
temperature.
3-26