2004 CHEVROLET MALIBU fuel
[x] Cancel search: fuelPage 1 of 426
Seats and Restraint Systems........................... 1-1
Front Seats
............................................... 1-2
Rear Seats
............................................... 1-7
Safety Belts
.............................................1-10
Child Restraints
.......................................1-31
Air Bag Systems
......................................1-52
Restraint System Check
............................1-60
Features and Controls..................................... 2-1
Keys
........................................................ 2-3
Doors and Locks
......................................2-10
Windows
.................................................2-16
Theft-Deterrent Systems
............................2-18
Starting and Operating Your Vehicle
...........2-22
Mirrors
....................................................2-35
OnStar
®System
......................................2-38
HomeLink®Transmitter
.............................2-40
Storage Areas
.........................................2-44
Sunroof
..................................................2-48
Instrument Panel............................................. 3-1
Instrument Panel Overview
.......................... 3-4
Climate Controls
......................................3-21
Warning Lights, Gages, and Indicators
........3-31Driver Information Center (DIC)
..................3-45
Audio System(s)
.......................................3-52
Driving Your Vehicle....................................... 4-1
Your Driving, the Road, and Your Vehicle
..... 4-2
Towing
...................................................4-31
Service and Appearance Care.......................... 5-1
Service
..................................................... 5-3
Fuel
......................................................... 5-5
Checking Things Under the Hood
...............5-12
Bulb Replacement
....................................5-45
Windshield Wiper Blade Replacement
.........5-49
Tires
......................................................5-50
Appearance Care
.....................................5-78
Vehicle Identi�cation
.................................5-86
Electrical System
......................................5-87
Capacities and Speci�cations
.....................5-96
Maintenance Schedule..................................... 6-1
Maintenance Schedule
................................ 6-2
Customer Assistance and Information.............. 7-1
Customer Assistance and Information
........... 7-2
Reporting Safety Defects
...........................7-11
Index................................................................ 1
2004 Chevrolet Malibu Owner ManualM
Page 77 of 426
Remote Vehicle Start
Your vehicle may have a remote starting feature. This
feature allows you to start the engine from outside of the
vehicle. It also starts up the vehicle’s heating or air
conditioning systems and rear window defogger. When
the remote start system is active and the vehicle
has an automatic climate control system, it will
automatically regulate the inside temperature. Normal
operation of the system will return after the key is turned
to the on position. A remote start occurs when buttons
on the remote keyless entry transmitter are pressed.
Laws in some local communities require that a person
using remote start have the vehicle in view when
doing so and may prohibit the execution of remote start
if not in view of the vehicle. Check local regulations
for any requirements on remote starting of vehicles.
Do not use the remote start feature if your vehicle is low
on fuel. Your vehicle may run out of fuel.
The remote start feature provides two separate starts,
each with 10 minutes of engine running. Or it provides
one start with 10 minutes of engine running, which can be
extended by 10 more minutes, for 20 minutes of total
running time. Once two starts or 20 minutes running time
has been provided, the vehicle must be started normally
with the ignition key to get more remote starts.The remote start feature will not operate if the key is in
the ignition or the hood is not closed.
Your remote keyless entry transmitter, with the remote
start button, provides an increased range of operation.
However, the range may be less while the vehicle
is running. As a result, you may need to be closer to
your vehicle to turn it off, than you were to turn it on.
There are other conditions which can affect the
performance of the transmitter, see “Remote Keyless
Entry System Operation” previously in this section.
/(Remote Start):Press the lock button and then
press this button to use the remote start feature.
To start the vehicle using the remote start feature, do
the following:
1. Aim the transmitter at the vehicle.
2. Press the transmitter’s lock button, release it and
then immediately press and hold the transmitter’s
remote start button until the vehicle’s turn signal
lights �ash or for at least four seconds. The
vehicle’s doors will be locked.
3. When the vehicle starts, the parking lamps will turn
on and remain on while the vehicle is running.
4. If it is your �rst remote start since last driving,
repeat these steps while the engine is still
running for a 10 minute time extension.
2-9
Page 88 of 426
PASS-Key®III+
Your PASS-Key®III + system operates on a radio
frequency subject to Federal Communications
Commission (FCC) Rules and with Industry Canada.
This device complies with Part 15 of the FCC Rules.
Operation is subject to the following two conditions:
1. this device may not cause harmful interference, and
2. this device must accept any interference received,
including interference that may cause undesired
operation.
This device complies with RSS-210 of Industry Canada.
Operation is subject to the following two conditions:
1. this device may not cause interference, and
2. this device must accept any interference received,
including interference that may cause undesired
operation of the device.
Changes or modi�cations to this system by other than
an authorized service facility could void authorization to
use this equipment.
PASS-Key
®III + uses a radio frequency transponder in
the key that matches a decoder in your vehicle.
PASS-Key®III+ Operation
Your vehicle is equipped with PASS-Key®III +
(Personalized Automotive Security System)
theft-deterrent system. PASS-Key
®III + is a passive
theft-deterrent system. This means you don’t have to do
anything special to arm or disarm the system. It works
when you insert or remove the key from the ignition.
When the PASS-Key
®III + system senses that someone
is using the wrong key, it shuts down the vehicle’s starter
and fuel systems. The starter will not work and fuel will
stop �owing to the engine. Anyone using a trial-and-error
method to start the vehicle will be discouraged because
of the high number of electrical key codes.
When trying to start the vehicle if the engine does not
start and the SECURITY light in the instrument
panel cluster comes on, the key may have a damaged
transponder. Turn the ignition off and try again.
If the engine still does not start, and the key appears to
be undamaged, try another ignition key. At this time,
you may also want to check the fuse, seeFuses
on page 5-88. If the engine still does not start with the
other key, your vehicle needs service. If your vehicle
does start, the �rst key may be faulty. See your dealer
who can service the PASS-Key
®III + to have a new
key made. In an emergency, contact Chevrolet Roadside
Assistance. SeeRoadside Assistance Program on
page 7-6for more information.
2-20
Page 93 of 426
To use your adjustable throttle and pedal feature, do the
following:
The adjustable pedal feature is meant to be used with
the adjustable seat and adjustable steering wheel
controls to reach a safe and comfortable position.
1. Adjust your seat to a comfortable position where
you can comfortably reach other controls such as
the radio and climate controls.
2. Adjust the throttle and brake pedals to reach a
comfortable and safe operating position.
3. Adjust the steering wheel to a safe operating
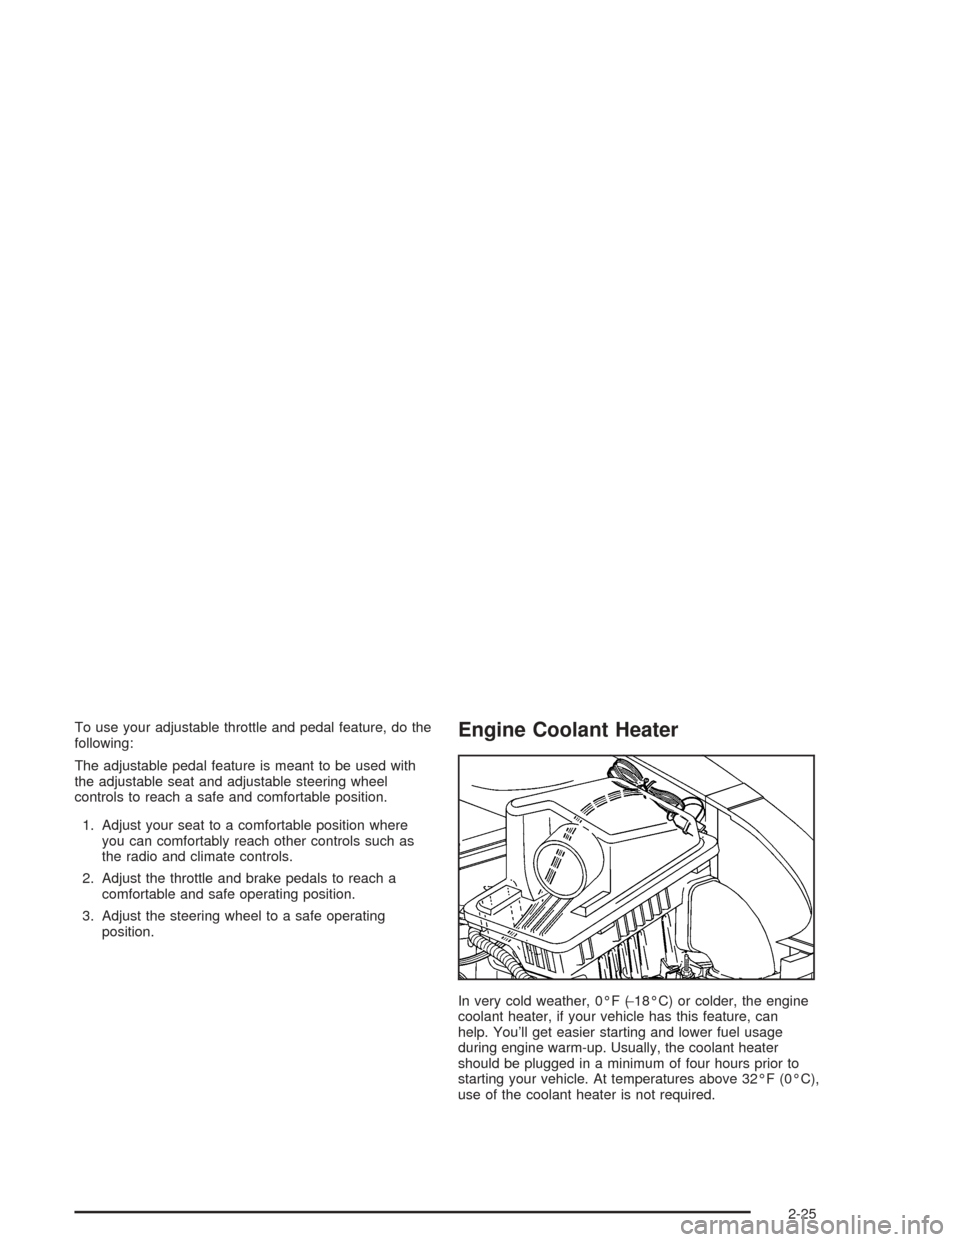
position.Engine Coolant Heater
In very cold weather, 0°F (−18°C) or colder, the engine
coolant heater, if your vehicle has this feature, can
help. You’ll get easier starting and lower fuel usage
during engine warm-up. Usually, the coolant heater
should be plugged in a minimum of four hours prior to
starting your vehicle. At temperatures above 32°F (0°C),
use of the coolant heater is not required.
2-25
Page 97 of 426
Notice:Driving your vehicle if you notice that it is
moving slowly or not shifting gears as you
increase speed may damage the transaxle. Have
your vehicle serviced right away. You can drive in
LOW (L2) when you are driving less than 35 mph
(55 km/h) and AUTOMATIC OVERDRIVE (D) for
higher speeds until then.
LOW (L):This position gives you access to THIRD,
SECOND and FIRST gears for more power but
lower fuel economy than AUTOMATIC OVERDRIVE
(D). You can use it on very steep hills, or in deep snow
or mud. If the electronic range select is put in LOW
(L1), the transaxle won’t shift into lower gears until the
vehicle is going slow enough.
Electronic Range Select Mode
This feature allows you to select lower driving gears.
The button for this mode is located on the left side of the
shift lever knob.
The electronic range select mode only changes gear
when the shift lever is in LOW (L).
When the shift lever is �rst moved into the LOW (L)
position, the display in the instrument panel shows L3.
Press the (−) end of the button on the shift lever
once for L2 and once more for L1. Press the (+) end of
the button to return to L2 and L3. The shift lever
must be moved back to DRIVE (D) to turn off the
electronic range select mode.
Parking Brake
To set the parking brake, push down the parking brake
pedal with your left foot. If the ignition is on, the
brake system warning light will come on. SeeBrake
System Warning Light on page 3-36.
To release the parking brake, hold the regular brake
pedal down with your right foot. Push down momentarily
on the parking brake pedal with your left foot until you
feel the pedal release. If the parking brake is not
released when you begin to drive, the brake system
warning light will be on and a chime will sound warning
you that the parking brake is still on.
A message will also appear in the Driver Information
Center (DIC) to remind you to release the parking brake.
SeeDIC Warnings and Messages on page 3-50.
Notice:Driving with the parking brake on can
overheat the brake system and cause premature
wear or damage to brake system parts. Verify that
the parking brake is fully released and the brake
warning light is off before driving.
If you are towing a trailer and are parking on a hill, see
Towing a Trailer on page 4-40.
2-29
Page 117 of 426
Instrument Panel Overview...............................3-4
Hazard Warning Flashers................................3-6
Other Warning Devices...................................3-7
Horn.............................................................3-7
Tilt Wheel.....................................................3-7
Turn Signal/Multifunction Lever.........................3-8
Exterior Lamps.............................................3-14
Interior Lamps..............................................3-19
Accessory Power Outlets...............................3-20
Climate Controls............................................3-21
Climate Control System.................................3-21
Automatic Climate Control System...................3-25
Outlet Adjustment.........................................3-30
Warning Lights, Gages, and Indicators............3-31
Instrument Panel Cluster................................3-32
Speedometer and Odometer...........................3-33
Tachometer.................................................3-33
Safety Belt Reminder Light.............................3-34
Air Bag Readiness Light................................3-34
Charging System Light..................................3-35
Brake System Warning Light..........................3-36
Anti-Lock Brake System
Warning Light...........................................3-37
Enhanced Traction System
Warning Light...........................................3-37
Enhanced Traction System Active Light............3-38Engine Coolant Temperature Warning Light......3-38
Engine Coolant Temperature Gage..................3-39
Malfunction Indicator Lamp.............................3-39
Oil Pressure Light.........................................3-42
Security Light...............................................3-43
Cruise Control Light......................................3-43
Service Vehicle Soon Light............................3-44
Fuel Gage...................................................3-44
Driver Information Center (DIC).......................3-45
DIC Operation and Displays...........................3-46
DIC Warnings and Messages.........................3-50
Audio System(s).............................................3-52
Setting the Time for Radios without Radio
Data Systems (RDS)..................................3-52
Setting the Time for Radios with Radio Data
Systems (RDS).........................................3-53
Radio with CD (Base Level)...........................3-53
Radio with CD (Up Level)..............................3-58
Radio with Cassette and CD..........................3-69
Radio with Six-Disc CD.................................3-82
Rear Seat Entertainment System....................3-96
Rear Seat Audio (RSA)
(Without Entertainment System).................3-111
Rear Seat Audio (RSA)
(With Entertainment System).....................3-113
Theft-Deterrent Feature................................3-115
Section 3 Instrument Panel
3-1
Page 148 of 426
Instrument Panel Cluster
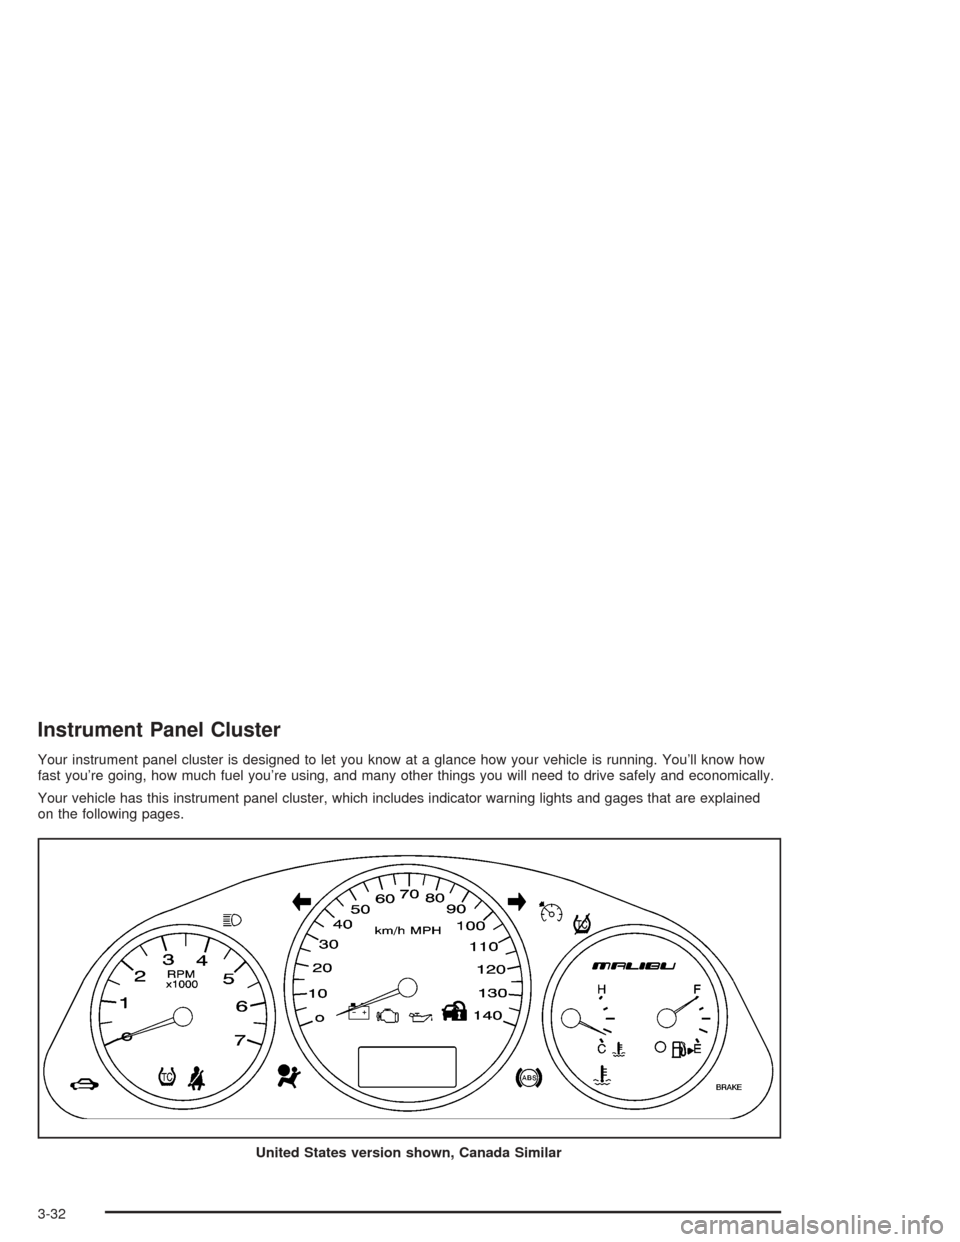
Your instrument panel cluster is designed to let you know at a glance how your vehicle is running. You’ll know how
fast you’re going, how much fuel you’re using, and many other things you will need to drive safely and economically.
Your vehicle has this instrument panel cluster, which includes indicator warning lights and gages that are explained
on the following pages.
United States version shown, Canada Similar
3-32
Page 155 of 426
Engine Coolant Temperature Gage
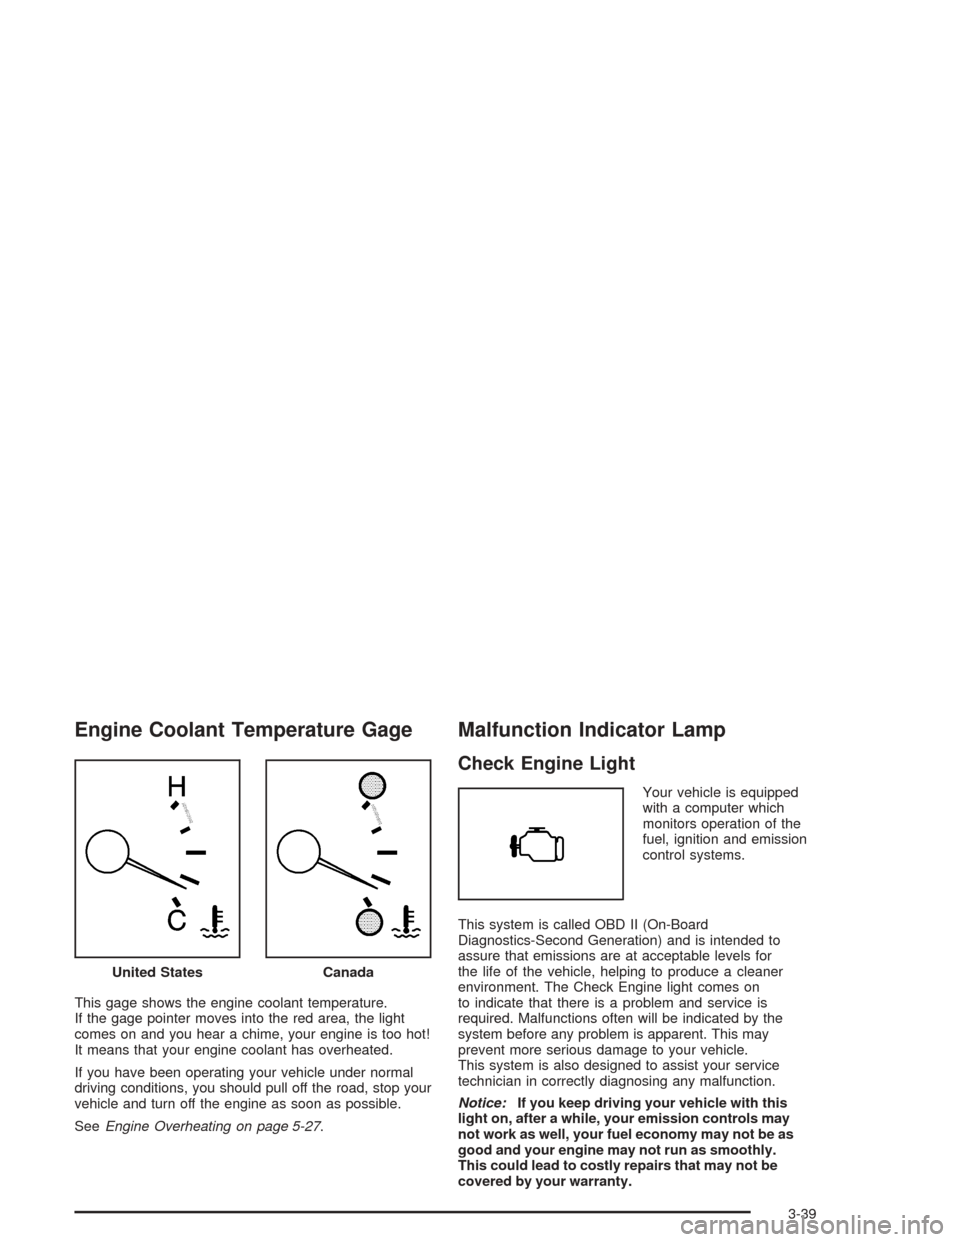
This gage shows the engine coolant temperature.
If the gage pointer moves into the red area, the light
comes on and you hear a chime, your engine is too hot!
It means that your engine coolant has overheated.
If you have been operating your vehicle under normal
driving conditions, you should pull off the road, stop your
vehicle and turn off the engine as soon as possible.
SeeEngine Overheating on page 5-27.
Malfunction Indicator Lamp
Check Engine Light
Your vehicle is equipped
with a computer which
monitors operation of the
fuel, ignition and emission
control systems.
This system is called OBD II (On-Board
Diagnostics-Second Generation) and is intended to
assure that emissions are at acceptable levels for
the life of the vehicle, helping to produce a cleaner
environment. The Check Engine light comes on
to indicate that there is a problem and service is
required. Malfunctions often will be indicated by the
system before any problem is apparent. This may
prevent more serious damage to your vehicle.
This system is also designed to assist your service
technician in correctly diagnosing any malfunction.
Notice:If you keep driving your vehicle with this
light on, after a while, your emission controls may
not work as well, your fuel economy may not be as
good and your engine may not run as smoothly.
This could lead to costly repairs that may not be
covered by your warranty. United States
Canada
3-39