Page 264 of 420

Uniform Tire Quality Grading..........................5-77
Wheel Alignment and Tire Balance..................5-79
Wheel Replacement......................................5-79
Tire Chains..................................................5-80
If a Tire Goes Flat........................................5-81
Changing a Flat Tire.....................................5-82
Compact Spare Tire......................................5-93
Appearance Care............................................5-94
Cleaning the Inside of Your Vehicle.................5-94
Care of Safety Belts......................................5-97
Weatherstrips...............................................5-97
Cleaning the Outside of Your Vehicle..............5-97
Sheet Metal Damage.....................................5-99
Finish Damage...........................................5-100Underbody Maintenance...............................5-100
Chemical Paint Spotting...............................5-100
Vehicle Care/Appearance Materials................5-101
Vehicle Identi�cation.....................................5-102
Vehicle Identi�cation Number (VIN)................5-102
Service Parts Identi�cation Label...................5-102
Electrical System..........................................5-103
Add-On Electrical Equipment.........................5-103
Headlamp Wiring........................................5-103
Windshield Wiper Fuses...............................5-103
Power Windows and Other Power Options......5-103
Fuses and Circuit Breakers..........................5-103
Capacities and Speci�cations........................5-110
Section 5 Service and Appearance Care
5-2
Page 337 of 420

Tire Inspection and Rotation
Tires should be rotated every 5,000 to 8,000 miles
(8 000 to 13 000 km).
Any time you notice unusual wear, rotate your tires as
soon as possible and check wheel alignment. Also check
for damaged tires or wheels. SeeWhen It Is Time for
New Tires on page 5-76andWheel Replacement on
page 5-79for more information.
The purpose of regular rotation is to achieve more
uniform wear for all tires on the vehicle. The �rst rotation
is the most important. SeeScheduled Maintenance
on page 6-4for scheduled rotation intervals.
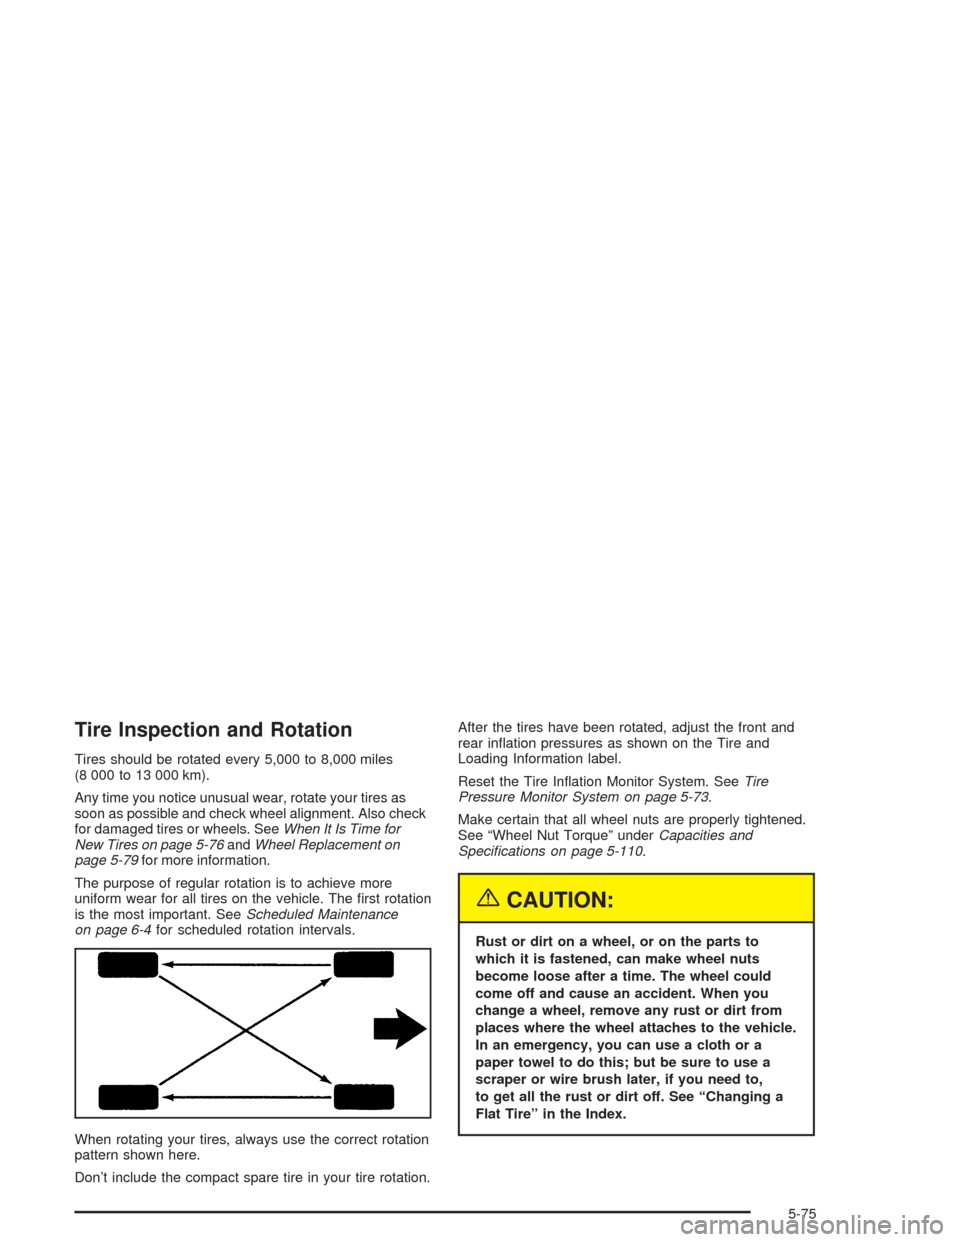
When rotating your tires, always use the correct rotation
pattern shown here.
Don’t include the compact spare tire in your tire rotation.After the tires have been rotated, adjust the front and
rear in�ation pressures as shown on the Tire and
Loading Information label.
Reset the Tire In�ation Monitor System. SeeTire
Pressure Monitor System on page 5-73.
Make certain that all wheel nuts are properly tightened.
See “Wheel Nut Torque” underCapacities and
Speci�cations on page 5-110.
{CAUTION:
Rust or dirt on a wheel, or on the parts to
which it is fastened, can make wheel nuts
become loose after a time. The wheel could
come off and cause an accident. When you
change a wheel, remove any rust or dirt from
places where the wheel attaches to the vehicle.
In an emergency, you can use a cloth or a
paper towel to do this; but be sure to use a
scraper or wire brush later, if you need to,
to get all the rust or dirt off. See “Changing a
Flat Tire” in the Index.
5-75
Page 339 of 420

{CAUTION:
Mixing tires could cause you to lose control
while driving. If you mix tires of different sizes
or types (radial and bias-belted tires), the
vehicle may not handle properly, and you
could have a crash. Using tires of different
sizes may also cause damage to your vehicle.
Be sure to use the same size and type tires on
all wheels. It’s all right to drive with your
compact spare temporarily, it was developed
for use on your vehicle. SeeCompact Spare
Tire on page 5-93.
{CAUTION:
If you use bias-ply tires on your vehicle, the
wheel rim �anges could develop cracks after
many miles of driving. A tire and/or wheel
could fail suddenly, causing a crash. Use only
radial-ply tires with the wheels on your vehicle.
Uniform Tire Quality Grading
Quality grades can be found where applicable on the
tire sidewall between tread shoulder and maximum
section width. For example:
Treadwear 200 Traction AA Temperature A
The following information relates to the system
developed by the United States National Highway
Traffic Safety Administration, which grades tires by
treadwear, traction and temperature performance.
(This applies only to vehicles sold in the United States.)
The grades are molded on the sidewalls of most
passenger car tires. The Uniform Tire Quality Grading
system does not apply to deep tread, winter-type
snow tires, space-saver or temporary use spare tires,
tires with nominal rim diameters of 10 to 12 inches
(25 to 30 cm), or to some limited-production tires.
While the tires available on General Motors passenger
cars and light trucks may vary with respect to these
grades, they must also conform to federal safety
requirements and additional General Motors Tire
Performance Criteria (TPC) standards.
5-77
Page 347 of 420
Removing the Wheel Covers
Your vehicle may be
equipped with wheel
covers.
To remove the steel wheel covers and wheel nut caps,
loosen the plastic nut caps with the wheel wrench in
a counterclockwise direction. If needed, you can �nish
loosening them with your �ngers. The plastic nut
caps will not come off. Use the �at end of the wheel
wrench and pry along the edge of the cover until
it comes off. The edge of the wheel cover could be
sharp, so do not try to remove it with your bare hands.
Do not drop the cover or lay it face down, as it could
become scratched or damaged.
Removing the Flat Tire and Installing
the Spare Tire
1. Using the wheel wrench, loosen all the wheel nuts.
Don’t remove them yet.
5-85
Page 348 of 420
{CAUTION:
Getting under a vehicle when it is jacked up is
dangerous. If the vehicle slips off the jack you
could be badly injured or killed. Never get under
a vehicle when it is supported only by a jack.
{CAUTION:
Raising your vehicle with the jack improperly
positioned can damage the vehicle and even
make the vehicle fall. To help avoid personal
injury and vehicle damage, be sure to �t the
jack lift head into the proper location before
raising the vehicle.The diagram shows you where you should place
your jack to change a front tire. Use the bolts (A) as
a guide when positioning the jack lift head (C)
near the rear edge of the front wheel opening (B).
For jacking at the vehicle’s front location, put
the jack lift about 8.5 inches (21.5 cm) from the rear
edge of the front wheel opening in the cutout of
the rocker panel molding.
Put the compact spare tire near you.Jack Placement for a Front Tire
5-86
Page 349 of 420
The diagram shows you where to place your jack to
change a rear tire. Use the notch (B) as a guide
when positioning the jack lift head (A) near the front
edge of the rear wheel opening (C).
For jacking at the vehicle’s rear location, put the
jack lift head about 4 inches (10 cm) from the front
edge of the rear wheel opening in the cutout of
the rocker panel molding.
Put the compact spare tire near you.2. Raise the vehicle by turning the jack handle
clockwise. Raise the vehicle far enough off the
ground for the compact spare tire to �t underneath
the wheel well of the vehicle. Remove all wheel
nuts and take off the �at tire. Jack Placement for a Rear Tire
5-87
Page 350 of 420
3. Remove any rust or dirt
from the wheel bolts,
mounting surfaces
and spare wheel.
{CAUTION:
Rust or dirt on the wheel, or on the parts to
which it is fastened, can make the wheel nuts
become loose after a time. The wheel could
come off and cause an accident. When you
change a wheel, remove any rust or dirt from
CAUTION: (Continued)
CAUTION: (Continued)
the places where the wheel attaches to the
vehicle. In an emergency, you can use a cloth
or a paper towel to do this; but be sure to use
a scraper or wire brush later, if you need to,
to get all the rust or dirt off.
{CAUTION:
Never use oil or grease on studs or nuts. If you
do, the nuts might come loose. Your wheel
could fall off, causing a serious accident.
5-88
Page 351 of 420
4. Install the compact spare tire.
5. Reinstall the wheel nuts
with the rounded end of
the nuts toward the
wheel. Tighten each nut
by hand until the wheel
is held against the hub.
6. Lower the vehicle by turning the jack handle
counterclockwise. Lower the jack completely.
5-89