2004 CHEVROLET BLAZER fuses
[x] Cancel search: fusesPage 275 of 446

Maintenance When Trailer Towing
Your vehicle will need service more often when you’re
pulling a trailer. See the Maintenance Schedule for more
on this. Things that are especially important in trailer
operation are automatic transmission �uid (don’t over�ll),
engine oil, axle lubricant, belt, cooling system and
brake system. Each of these is covered in this manual,
and the Index will help you �nd them quickly. If
you’re trailering, it’s a good idea to review these sections
before you start your trip.
Check periodically to see that all hitch nuts and bolts
are tight.
Trailer Wiring Harness
The light-duty trailer wiring is a six-wire harness
assembly. The optional heavy-duty trailer wiring is an
eight-wire harness assembly. The harnesses are stored
under the vehicle, along the passenger-side frame
crossmember on two-door vehicles or on the driver’s
side corner frame rear crossmember on four-door
vehicles. The heavy-duty trailer wiring is fused in the
engine compartment fuse block. SeeFuses and Circuit
Breakers on page 5-99. Both harnesses have no
connector and should be wired by a quali�ed electrical
technician.The technician can use the following color code chart
when connecting the wiring harness to your trailer.
Dark Blue: Use for electric trailer brakes or auxiliary
wiring (eight-wire harness only).
Red: Use for battery charging; it connects to the
starter solenoid (eight-wire harness only).
Light Green: Back-up lamps.
Brown: Taillamps and parking lamps.
Yellow: Driver’s side stoplamp and turn signal.
Dark Green: Passenger’s side stoplamp and turn
signal.
White: Ground wire.
Light Blue: Auxiliary stoplamp.
Securely attach the harness to the trailer, then tape or
strap it to your vehicle’s frame rail. Be sure you
leave it loose enough so the wiring doesn’t bend or
break, but not so loose that it drags on the ground. Store
the harness in its original place. Wrap the harness
together and tie it neatly so it won’t be damaged.
4-71
Page 278 of 446

Changing a Flat Tire.....................................5-76
Compact Spare Tire......................................5-88
Spare Tire...................................................5-89
Appearance Care............................................5-89
Cleaning the Inside of Your Vehicle.................5-90
Care of Safety Belts......................................5-92
Weatherstrips...............................................5-92
Cleaning the Outside of
Your Vehicle.............................................5-92
Sheet Metal Damage.....................................5-95
Finish Damage.............................................5-95
Underbody Maintenance................................5-95Chemical Paint Spotting.................................5-95
Vehicle Care/Appearance Materials..................5-96
Vehicle Identi�cation......................................5-97
Vehicle Identi�cation Number (VIN).................5-97
Service Parts Identi�cation Label.....................5-97
Electrical System............................................5-98
Add-On Electrical Equipment..........................5-98
Headlamps..................................................5-98
Windshield Wiper Fuses................................5-98
Power Windows and Other Power Options.......5-98
Fuses and Circuit Breakers............................5-99
Capacities and Speci�cations........................5-103
Section 5 Service and Appearance Care
5-2
Page 289 of 446

A. Battery. SeeBattery on page 5-42for more
information.
B. Coolant Recovery Tank. SeeEngine Coolant on
page 5-24for more information.
C. Engine Oil Dipstick. SeeEngine Oil on page 5-13
for more information.
D. Engine Oil Fill. SeeEngine Oil on page 5-13for
more information.
E. Automatic Transmission Dipstick (If Equipped).
SeeAutomatic Transmission Fluid on page 5-19for
more information.
F. Power Steering Reservoir. SeePower Steering Fluid
on page 5-36for more information.
G. Brake Master Cylinder Reservoir. SeeBrakes on
page 5-39for more information.
H. Engine Air Cleaner/Filter. SeeEngine Air
Cleaner/Filter on page 5-17for more information.
I. Clutch Master Cylinder Reservoir. SeeHydraulic
Clutch on page 5-23for more information.
J. Engine Compartment Fuse Block. SeeFuses and
Circuit Breakers on page 5-99for more information.
K. Windshield Washer Fluid Reservoir. SeeWindshield
Washer Fluid on page 5-38for more information.Engine Oil
Checking Engine Oil
It is a good idea to check your engine oil every time you
get fuel. In order to get an accurate reading, the oil
must be warm and the vehicle must be on level ground.
The engine oil dipstick handle is a yellow loop. See
Engine Compartment Overview on page 5-12for
the location of the engine oil dipstick.
Turn off the engine and give the oil several minutes to
drain back into the oil pan. If you don’t, the oil
dipstick might not show the actual level.
Pull out the dipstick and clean it with a paper towel or
cloth, then push it back in all the way. Remove it again,
keeping the tip down, and check the level.
5-13
Page 374 of 446

Electrical System
Add-On Electrical Equipment
Notice:Don’t add anything electrical to your vehicle
unless you check with your dealer �rst. Some
electrical equipment can damage your vehicle and
the damage wouldn’t be covered by your warranty.
Some add-on electrical equipment can keep other
components from working as they should.
Your vehicle has an air bag system. Before attempting
to add anything electrical to your vehicle, seeServicing
Your Air Bag-Equipped Vehicle on page 1-58.
Headlamps
The headlamp wiring is protected by an internal circuit
breaker. An electrical overload will cause the lamps
to go on and off, or in some cases to remain off.
If this happens, have your headlamp wiring checked
right away.
Windshield Wiper Fuses
The windshield wiper motor is protected by a circuit
breaker and a fuse. If the motor overheats due to heavy
snow or ice, the wiper will stop until the motor cools.
If the overload is caused by some electrical problem,
be sure to get it �xed.
Power Windows and Other Power
Options
Circuit breakers protect the power windows and other
power accessories. When the current load is too heavy,
the circuit breaker opens and closes, protecting the
circuit until the problem is �xed or goes away.
5-98
Page 375 of 446

Fuses and Circuit Breakers
The wiring circuits in your vehicle are protected from
short circuits by a combination of fuses and circuit
breakers. This greatly reduces the chance of �res
caused by electrical problems.
Look at the silver-colored band inside the fuse. If the
band is broken or melted, replace the fuse. Be sure
you replace a bad fuse with a new one of the identical
size and rating.
If you ever have a problem on the road and don’t have
a spare fuse, you can borrow one that has the same
amperage. Just pick some feature of your vehicle
that you can get along without — like the radio or
cigarette lighter — and use its fuse, if it is the correct
amperage. Replace it as soon as you can.
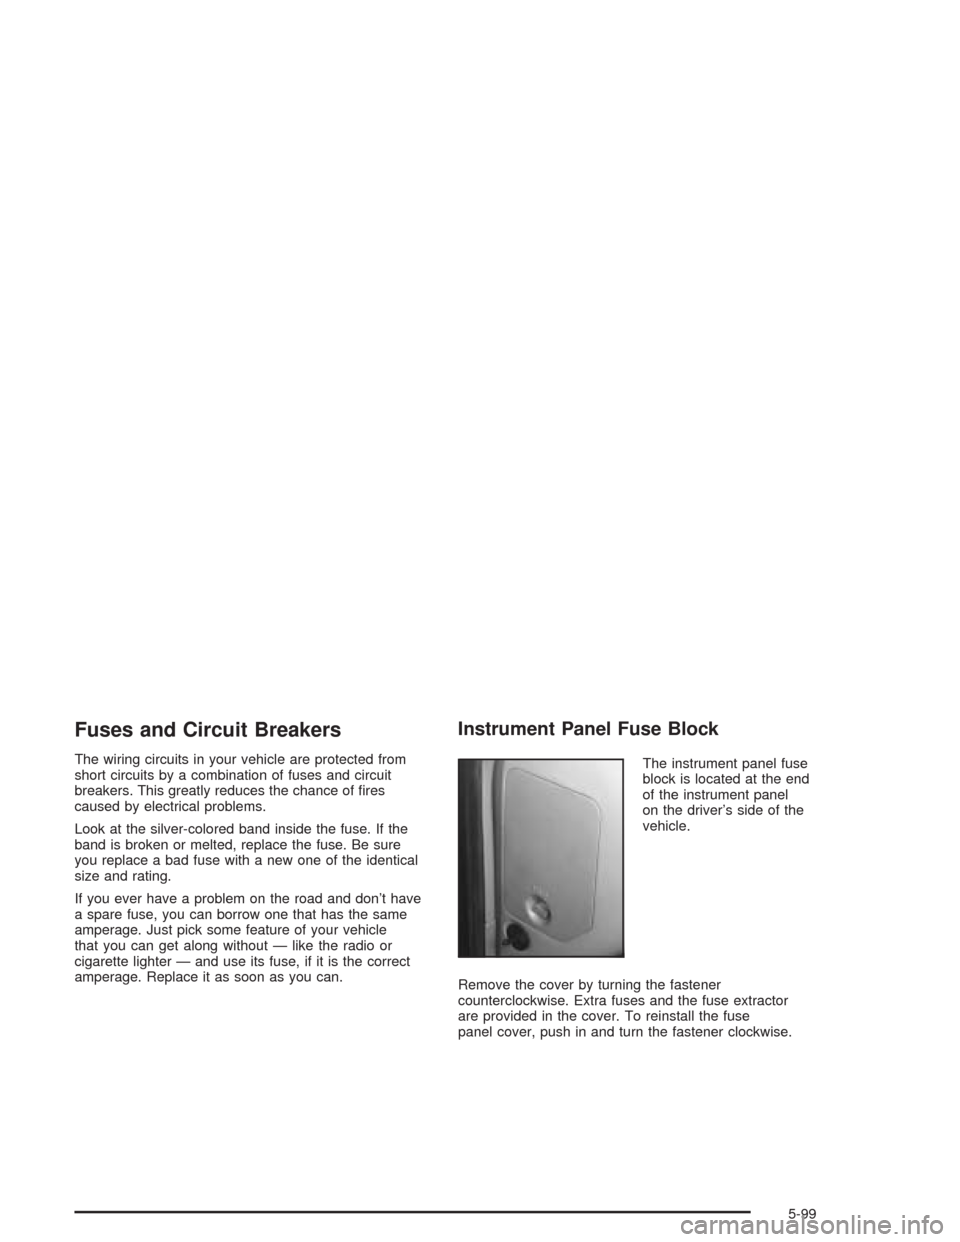
Instrument Panel Fuse Block
The instrument panel fuse
block is located at the end
of the instrument panel
on the driver’s side of the
vehicle.
Remove the cover by turning the fastener
counterclockwise. Extra fuses and the fuse extractor
are provided in the cover. To reinstall the fuse
panel cover, push in and turn the fastener clockwise.
5-99
Page 435 of 446

Driving in Water..............................................4-29
Driving On Grades..........................................4-69
Driving on Off-Road Hills.................................4-19
Driving on Snow or Ice....................................4-41
Driving Through Deep Standing Water...............4-34
Driving Through Flowing Water.........................4-34
Driving Uphill..................................................4-21
Driving with a Trailer.......................................4-67
E
Electrical System
Add-On Equipment......................................5-98
Fuses and Circuit Breakers...........................5-99
Headlamps.................................................5-98
Power Windows and Other Power Options......5-98
Windshield Wiper Fuses...............................5-98
Electronic Transfer Case..................................2-29
Emergency Release for Opening Tailgate...........2-15
Emissions Inspection and Maintenance
Programs...................................................3-32
Engine
Air Cleaner/Filter.........................................5-17
Battery.......................................................5-42
Check and Service Engine Soon Light............3-30
Coolant......................................................5-24
Coolant Heater............................................2-22
Coolant Temperature Gage...........................3-29
Cooling System Inspection............................6-31Engine (cont.)
Drive Belt Routing.......................................6-36
Engine Compartment Overview......................5-12
Exhaust.....................................................2-40
Fan Noise..................................................5-36
Oil .............................................................5-13
Overheating................................................5-27
Starting......................................................2-20
Engine Compartment Fuse Block.....................5-101
Engine Coolant Level Check.............................6-26
Engine Oil Additives........................................5-16
Engine Oil Level Check...................................6-26
Engine Speci�cations...................................5-103
Engine Speed Control.....................................2-21
Entry Lighting.................................................3-15
Environmental Concerns..................................4-17
Erasing HomeLink
®Buttons..............................2-48
Event Data Recorders (EDR)............................. 7-9
Exit Lighting...................................................3-16
Express Down Window....................................2-12
Extender, Safety Belt.......................................1-30
Exterior Lamps...............................................3-12
F
Filter
Engine Air Cleaner......................................5-17
Finding a Program Type (PTY)
Station.......................................3-44, 3-53, 3-64
5
Page 436 of 446

Finding a Station....................3-39, 3-42, 3-50, 3-61
Finish Care....................................................5-93
Finish Damage...............................................5-95
Five-Speed....................................................2-26
Fixed Mast Antenna........................................3-74
Flash-to-Pass Feature....................................... 3-7
Flat Tire........................................................5-75
Flat Tire, Changing.........................................5-76
Fluid
Automatic Transmission................................5-19
Manual Transmission....................................5-22
Power Steering...........................................5-36
Windshield Washer......................................5-38
FM ...............................................................3-72
Fog Lamps....................................................3-15
Following Distance..........................................4-67
Footnotes................................................6-7, 6-18
Four Door Models...........................1-26, 1-28, 1-51
Four-Wheel Drive....................................2-28, 5-48
Front Axle......................................................5-49
Front Map Lamps...........................................3-16
Front Reading Lamps......................................3-16
Front Storage Area.........................................2-56
Fuel............................................................... 5-4
Additives...................................................... 5-6
California Fuel.............................................. 5-5
Filling a Portable Fuel Container..................... 5-9
Filling Your Tank........................................... 5-7
Fuels in Foreign Countries.............................. 5-6Fuel (cont.)
Gage.........................................................3-36
Gasoline Octane........................................... 5-4
Gasoline Speci�cations.................................. 5-5
Low Warning Light.......................................3-36
System Inspection.......................................6-31
Fuses
Fuses and Circuit Breakers...........................5-99
Windshield Wiper.........................................5-98
G
Gage
Check Gages Warning Light..........................3-35
Engine Coolant Temperature.........................3-29
Fuel..........................................................3-36
Oil Pressure...............................................3-33
Speedometer..............................................3-24
Tachometer.................................................3-24
Voltmeter Gage...........................................3-26
Garage Door Opener.......................................2-44
Garment Hooks..............................................2-57
Gasoline
Octane........................................................ 5-4
Speci�cations............................................... 5-5
Gate Ajar Light...............................................3-35
Gate Operator and Canadian Programming........2-48
Getting Familiar with Off-Road Driving................4-17
6
Page 446 of 446

W
Warning Lights, Gages and Indicators................3-21
Warnings
Hazard Warning Flashers............................... 3-4
Other Warning Devices.................................. 3-4
Safety and Symbols......................................... iii
Vehicle Damage.............................................. iv
Washing Your Vehicle......................................5-92
Weatherstrip Lubrication...................................6-27
Weight of the Trailer........................................4-62
Weight of the Trailer Tongue.............................4-64
Weight-Distributing Hitches and Weight
Carrying Hitches..........................................4-65
What Kind of Engine Oil to Use........................5-14
What to Add..................................................5-40
What to Do with Used Oil................................5-17
What to Use..................5-25, 5-37, 5-38, 5-47, 5-49
Wheels
Alignment and Tire Balance..........................5-72
Replacement...............................................5-73
Wheels and Tires..........................................5-103
When to Add Engine Oil..................................5-14
When to Change Engine Oil.............................5-16
When to Check......................................5-22, 5-68
When to Check and Change............................5-19
When to Check and Change Lubricant.......5-47, 5-49When to Check and What to Use.....................5-24
When to Check Power Steering Fluid................5-37
When to Inspect the Engine Air Cleaner/Filter.....5-18
When You Are Ready to Leave After
Parking on a Hill.........................................4-70
Where to Put the Restraint...............................1-40
Why Safety Belts Work..................................... 1-9
Window Lockout.............................................2-12
Windows.......................................................2-11
Power........................................................2-12
Rear Window..............................................2-13
Swing-Out Windows.....................................2-13
Windshield Washer
Fluid..........................................................5-38
Windshield Washer Fluid Level Check................6-26
Windshield Wiper
Blade Replacement......................................5-55
Fuses........................................................5-98
Windshield Wipers............................................ 3-8
Winter Driving................................................4-40
Wiper Blade Check.........................................6-27
Y
Your Driving, the Road, and Your Vehicle............. 4-2
Your Vehicle and the Environment....................... 6-2
16