2004 CHEVROLET AVEO clutch
[x] Cancel search: clutchPage 86 of 334

Starting Your Engine
Automatic Transaxle
Move your shift lever to PARK (P) or NEUTRAL (N).
Your engine will not start in any other position — that is
a safety feature. To restart when you are already
moving, use NEUTRAL (N) only.
Notice:Shifting into PARK (P) with the vehicle
moving could damage the transaxle. Shift into
PARK (P) only when your vehicle is stopped.
Manual Transaxle
The shift lever should be in NEUTRAL and the parking
brake engaged. Hold the clutch pedal to the floor and
start the engine. Your vehicle will not start if the clutch
pedal is not all the way down — that is a safety feature.
Starting Your Engine
1. With your foot off the accelerator pedal, turn your
ignition key to START. When the engine starts,
let go of the key. The idle speed will go down as your
engine gets warm.
Notice:Holding your key in START for longer than
15 seconds at a time will cause your battery to be
drained much sooner. And the excessive heat can
damage your starter motor. Wait about 15 seconds
between each try to help avoid draining your battery
or damaging your starter.2. If it does not start, wait about 15 seconds and try
again to start the engine by turning the ignition key to
START. Wait about 15 seconds between each try.
When your engine has run about 10 seconds to
warm up, your vehicle is ready to be driven. Do not
race your engine when it is cold.
If the weather is below freezing (32°F or 0°C),
let the engine run for a few minutes to warm up.
3. If your engine still will not start or starts but then
stops, it could be flooded with too much gasoline.
Try pushing your accelerator pedal all the way to the
floor and holding it there as you hold the key in
START for about three seconds. If the vehicle starts
briefly but then stops again, do the same thing, but
this time keep the pedal down for five or six seconds.
This clears the extra gasoline from the engine.
Notice:Your engine is designed to work with the
electronics in your vehicle. If you add electrical
parts or accessories, you could change the way the
engine operates. Before adding electrical equipment,
check with your dealer. If you do not, your engine
might not perform properly.
2-20
Page 92 of 334
Manual Transaxle Operation
Five-Speed
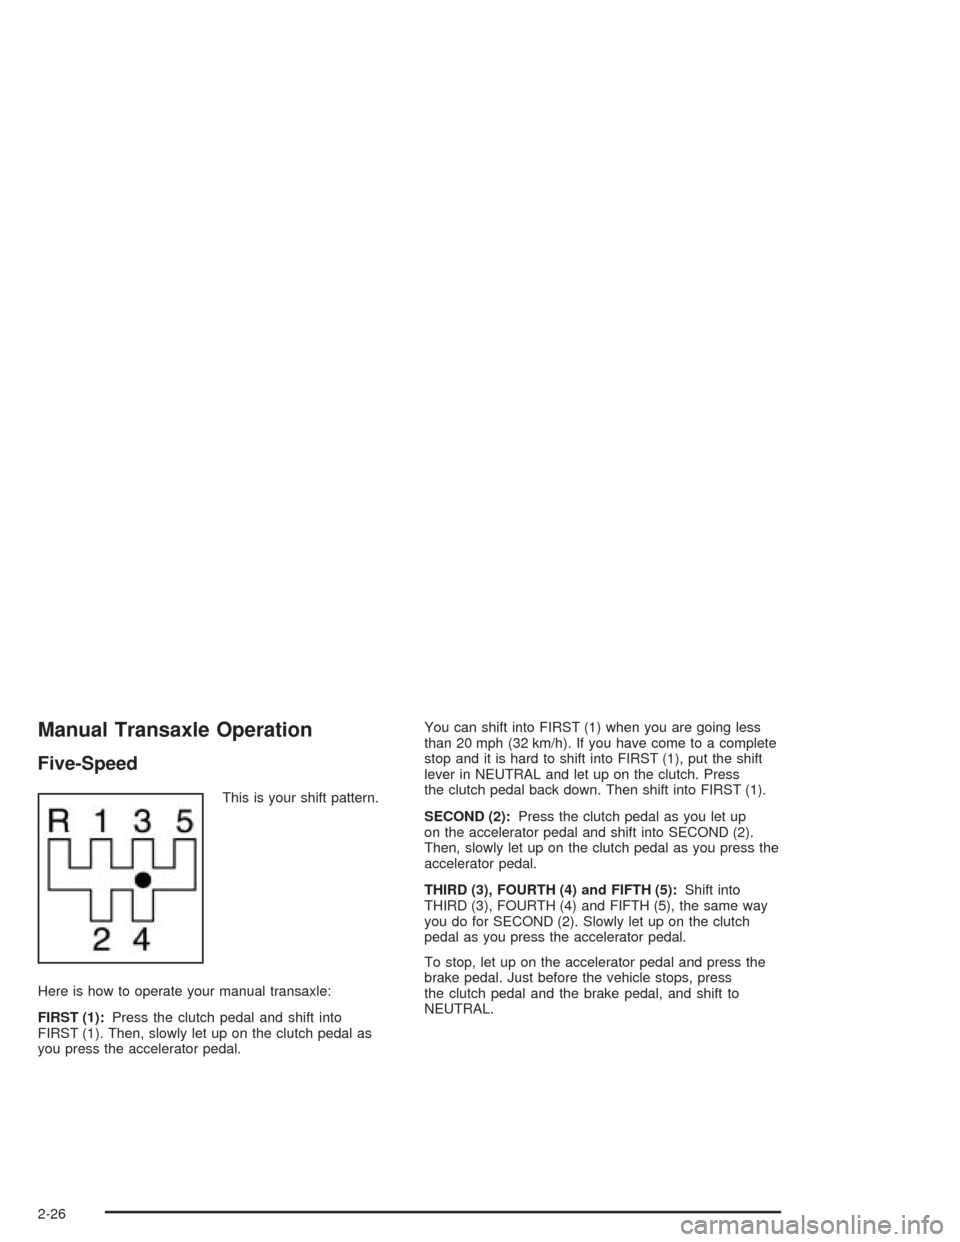
This is your shift pattern.
Here is how to operate your manual transaxle:
FIRST (1):Press the clutch pedal and shift into
FIRST (1). Then, slowly let up on the clutch pedal as
you press the accelerator pedal.You can shift into FIRST (1) when you are going less
than 20 mph (32 km/h). If you have come to a complete
stop and it is hard to shift into FIRST (1), put the shift
lever in NEUTRAL and let up on the clutch. Press
the clutch pedal back down. Then shift into FIRST (1).
SECOND (2):Press the clutch pedal as you let up
on the accelerator pedal and shift into SECOND (2).
Then, slowly let up on the clutch pedal as you press the
accelerator pedal.
THIRD (3), FOURTH (4) and FIFTH (5):Shift into
THIRD (3), FOURTH (4) and FIFTH (5), the same way
you do for SECOND (2). Slowly let up on the clutch
pedal as you press the accelerator pedal.
To stop, let up on the accelerator pedal and press the
brake pedal. Just before the vehicle stops, press
the clutch pedal and the brake pedal, and shift to
NEUTRAL.
2-26
Page 93 of 334

NEUTRAL:Use this position when you start or idle
your engine.
REVERSE (R):To back up, press down the clutch
pedal, lift up the ring on the shift lever and shift
into REVERSE (R). Let up on the clutch pedal slowly
while pressing the accelerator pedal.
Notice:Shifting to REVERSE (R) while your vehicle
is moving forward could damage the transaxle.
The repairs would not be covered by your warranty.
Shift to REVERSE (R) only after your vehicle is
stopped.
Also, use REVERSE (R), along with the parking brake,
for parking your vehicle.Shift Speeds
{CAUTION:
If you skip a gear when you downshift, you could
lose control of your vehicle. You could injure
yourself or others. Don’t shift down more than
one gear at a time when you downshift.
2-27
Page 97 of 334
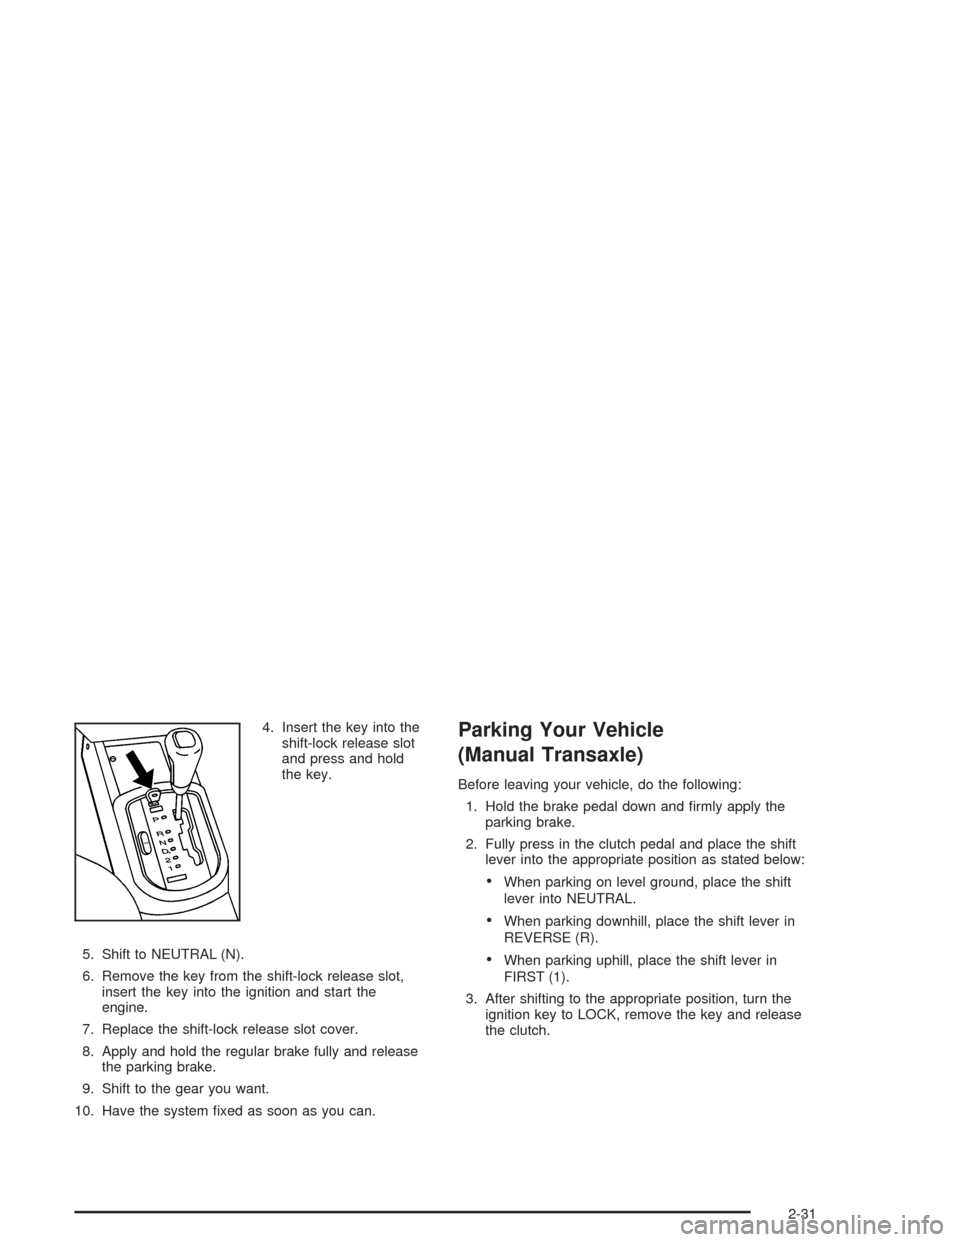
4. Insert the key into the
shift-lock release slot
and press and hold
the key.
5. Shift to NEUTRAL (N).
6. Remove the key from the shift-lock release slot,
insert the key into the ignition and start the
engine.
7. Replace the shift-lock release slot cover.
8. Apply and hold the regular brake fully and release
the parking brake.
9. Shift to the gear you want.
10. Have the system fixed as soon as you can.Parking Your Vehicle
(Manual Transaxle)
Before leaving your vehicle, do the following:
1. Hold the brake pedal down and firmly apply the
parking brake.
2. Fully press in the clutch pedal and place the shift
lever into the appropriate position as stated below:
•When parking on level ground, place the shift
lever into NEUTRAL.
•When parking downhill, place the shift lever in
REVERSE (R).
•When parking uphill, place the shift lever in
FIRST (1).
3. After shifting to the appropriate position, turn the
ignition key to LOCK, remove the key and release
the clutch.
2-31
Page 187 of 334

Service............................................................5-3
Doing Your Own Service Work.........................5-4
Adding Equipment to the Outside of Your
Vehicle......................................................5-4
Fuel................................................................5-5
Gasoline Octane............................................5-5
Gasoline Specifications....................................5-5
California Fuel...............................................5-6
Additives.......................................................5-6
Fuels in Foreign Countries...............................5-7
Filling Your Tank............................................5-8
Filling a Portable Fuel Container.....................5-10
Checking Things Under the Hood....................5-11
Hood Release..............................................5-11
Engine Compartment Overview.......................5-14
Engine Oil...................................................5-15
Engine Air Cleaner/Filter................................5-20
Automatic Transaxle Fluid..............................5-21
Manual Transaxle Fluid..................................5-21
Hydraulic Clutch...........................................5-22
Engine Coolant.............................................5-23Coolant Surge Tank Pressure Cap..................5-25
Engine Overheating.......................................5-25
Cooling System............................................5-28
Power Steering Fluid.....................................5-34
Windshield Washer Fluid................................5-35
Brakes........................................................5-36
Battery........................................................5-39
Jump Starting...............................................5-40
Headlamp Aiming...........................................5-45
Bulb Replacement..........................................5-45
Halogen Bulbs..............................................5-45
Headlamps..................................................5-46
Front Turn Signal and Parking Lamps................5-46
Turn Signal Lamps (Side)..............................5-47
Fog Lamps..................................................5-48
Sidemarker Lamps (Front)..............................5-48
Sidemarker Lamps (Rear)..............................5-49
Taillamps, Turn Signal, Stoplamps and
Back-up Lamps.........................................5-49
Windshield Wiper Blade Replacement..............5-50
Section 5 Service and Appearance Care
5-1
Page 208 of 334
Hydraulic Clutch
There is one reservoir for both the brake and the
hydraulic clutch fluid. SeeBrakes on page 5-36for
more information.
The hydraulic clutch linkage in your vehicle is
self-adjusting. The master cylinder reservoir is filled
with hydraulic fluid.
A fluid loss in this system could indicate a problem.
Have the system inspected and repaired.
When to Check and What to Use
Refer to the Maintenance Schedule to determine how
often you should check the fluid level in your master
cylinder reservoir and for the proper fluid. SeePart B:
Owner Checks and Services on page 6-19and
Part D: Recommended Fluids and Lubricants on
page 6-26.
How to Check and Add Fluid
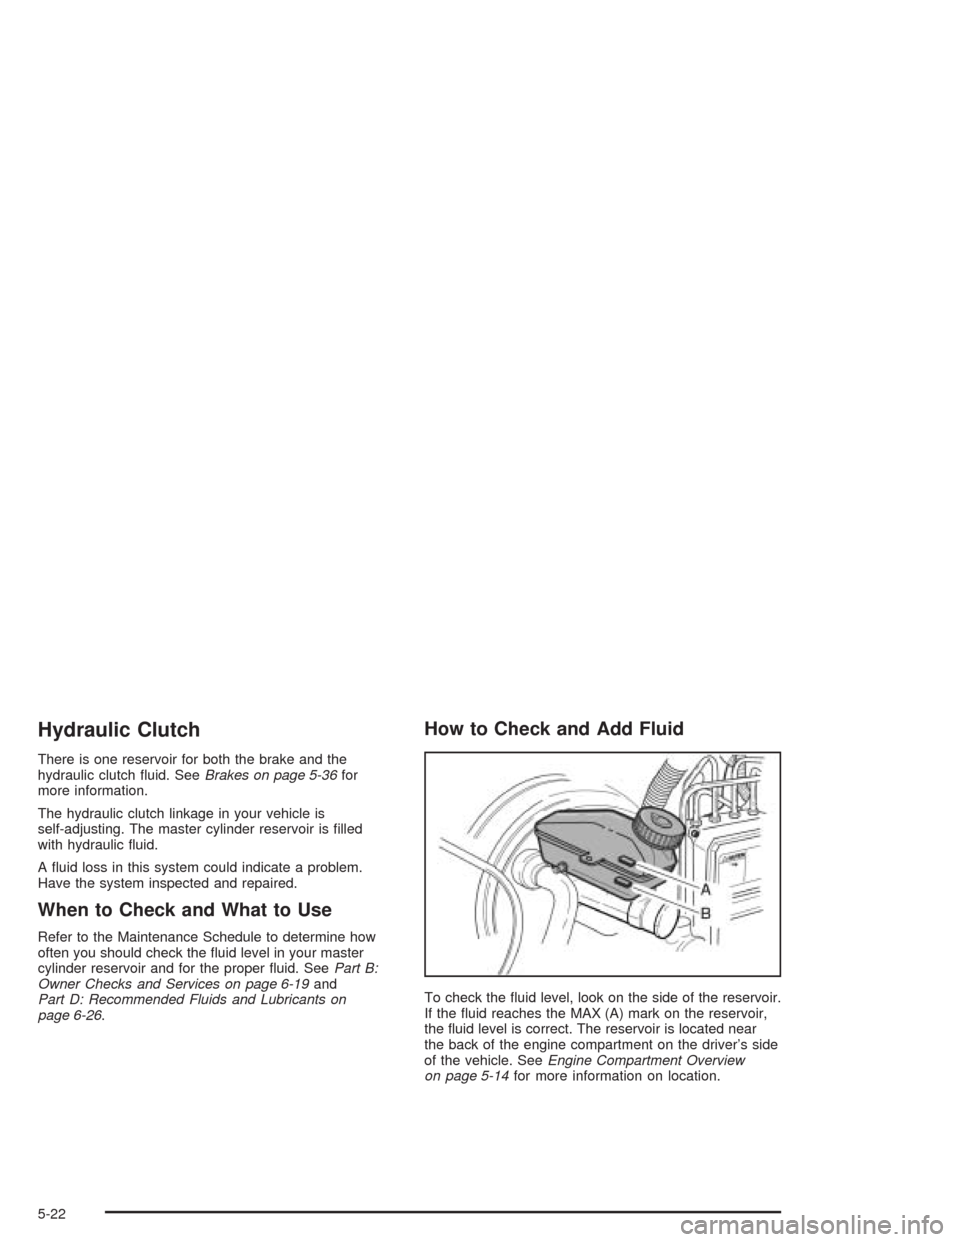
To check the fluid level, look on the side of the reservoir.
If the fluid reaches the MAX (A) mark on the reservoir,
the fluid level is correct. The reservoir is located near
the back of the engine compartment on the driver’s side
of the vehicle. SeeEngine Compartment Overview
on page 5-14for more information on location.
5-22
Page 222 of 334
Brakes
Brake Fluid
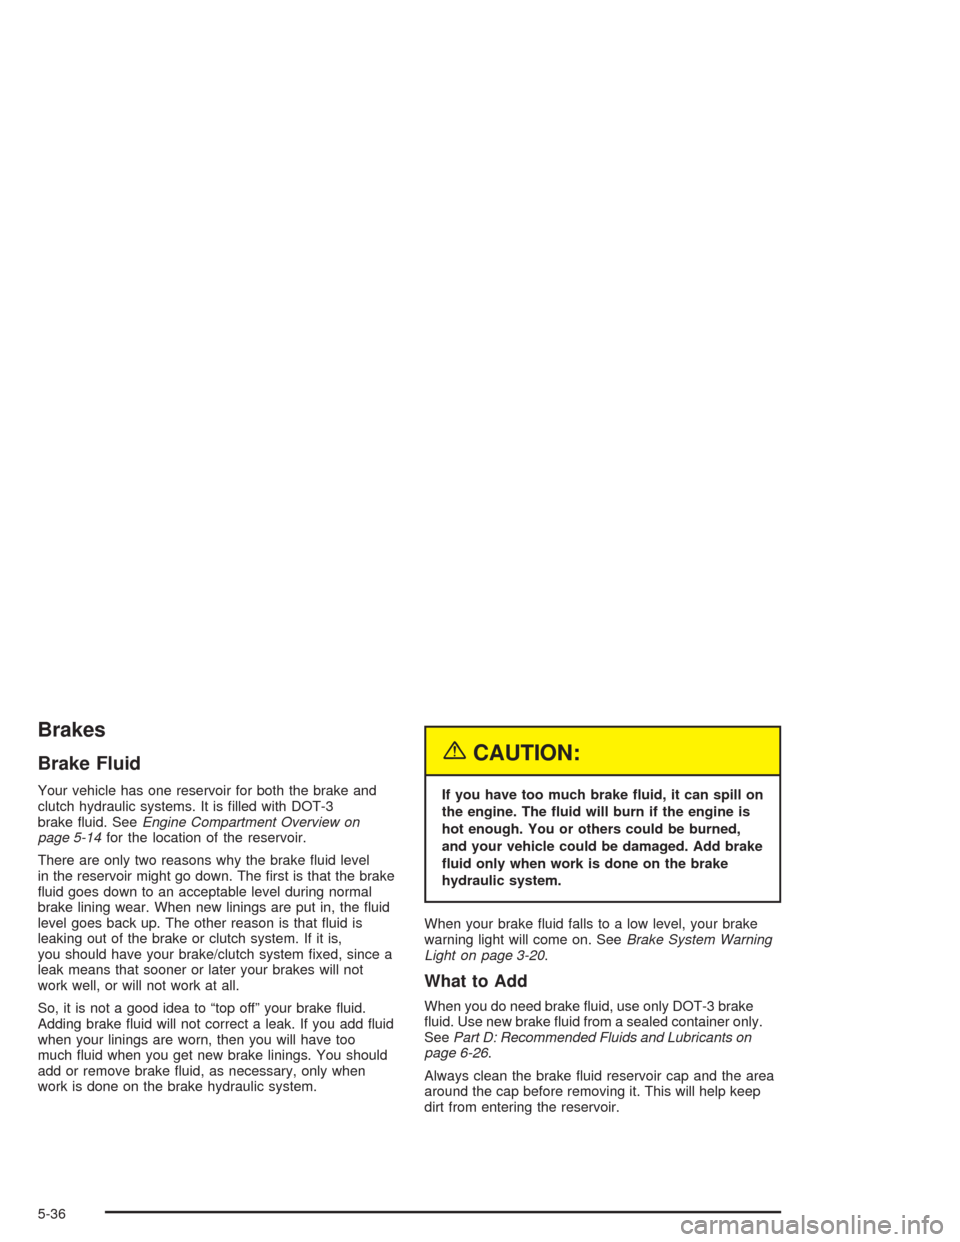
Your vehicle has one reservoir for both the brake and
clutch hydraulic systems. It is filled with DOT-3
brake fluid. SeeEngine Compartment Overview on
page 5-14for the location of the reservoir.
There are only two reasons why the brake fluid level
in the reservoir might go down. The first is that the brake
fluid goes down to an acceptable level during normal
brake lining wear. When new linings are put in, the fluid
level goes back up. The other reason is that fluid is
leaking out of the brake or clutch system. If it is,
you should have your brake/clutch system fixed, since a
leak means that sooner or later your brakes will not
work well, or will not work at all.
So, it is not a good idea to “top off” your brake fluid.
Adding brake fluid will not correct a leak. If you add fluid
when your linings are worn, then you will have too
much fluid when you get new brake linings. You should
add or remove brake fluid, as necessary, only when
work is done on the brake hydraulic system.
{CAUTION:
If you have too much brake �uid, it can spill on
the engine. The �uid will burn if the engine is
hot enough. You or others could be burned,
and your vehicle could be damaged. Add brake
�uid only when work is done on the brake
hydraulic system.
When your brake fluid falls to a low level, your brake
warning light will come on. SeeBrake System Warning
Light on page 3-20.
What to Add
When you do need brake fluid, use only DOT-3 brake
fluid. Use new brake fluid from a sealed container only.
SeePart D: Recommended Fluids and Lubricants on
page 6-26.
Always clean the brake fluid reservoir cap and the area
around the cap before removing it. This will help keep
dirt from entering the reservoir.
5-36
Page 277 of 334
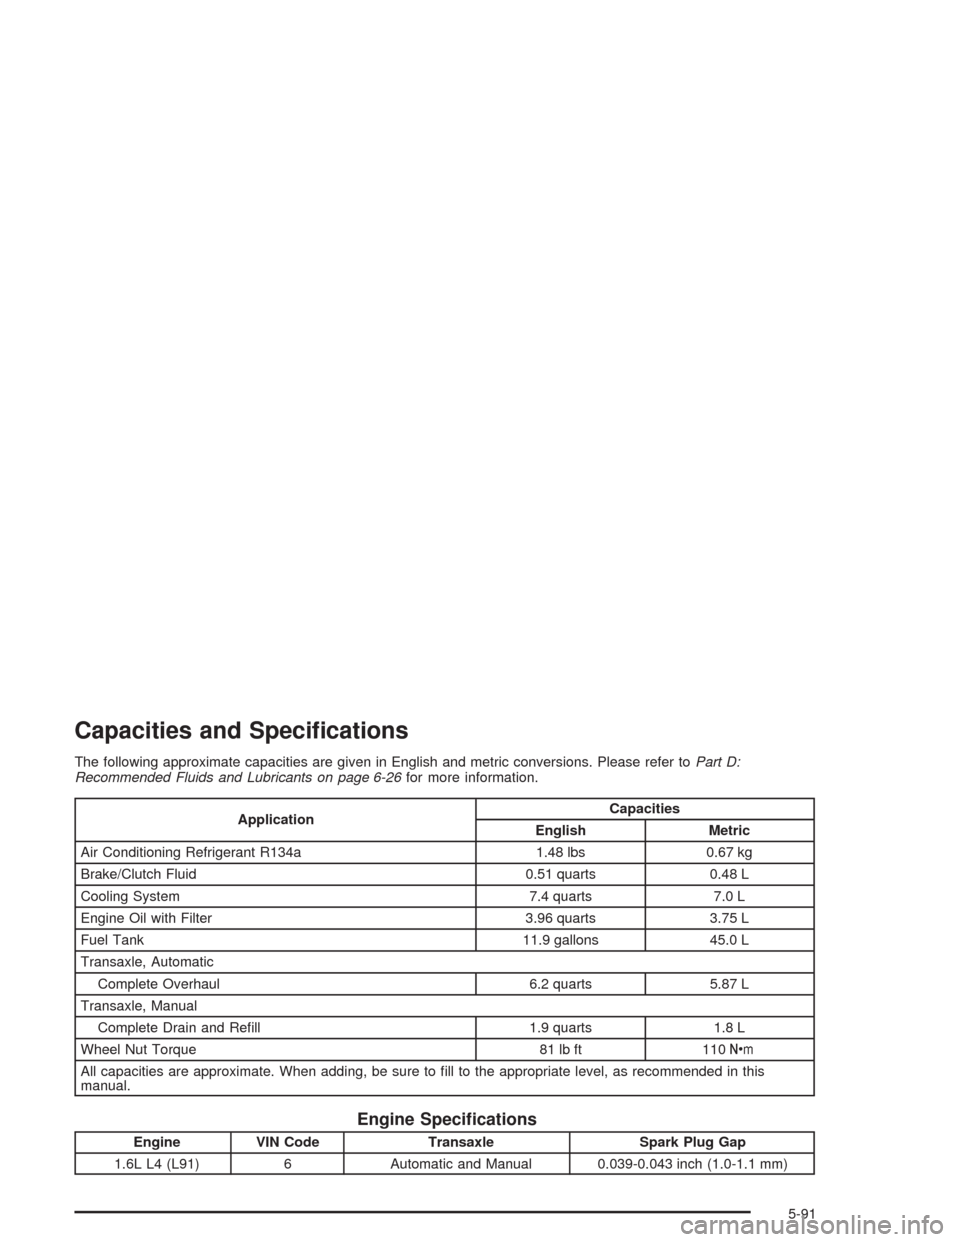
Capacities and Speci�cations
The following approximate capacities are given in English and metric conversions. Please refer toPart D:
Recommended Fluids and Lubricants on page 6-26for more information.
ApplicationCapacities
English Metric
Air Conditioning Refrigerant R134a 1.48 lbs 0.67 kg
Brake/Clutch Fluid 0.51 quarts 0.48 L
Cooling System 7.4 quarts 7.0 L
Engine Oil with Filter 3.96 quarts 3.75 L
Fuel Tank 11.9 gallons 45.0 L
Transaxle, Automatic
Complete Overhaul 6.2 quarts 5.87 L
Transaxle, Manual
Complete Drain and Refill 1.9 quarts 1.8 L
Wheel Nut Torque 81 lb ft 110Y
All capacities are approximate. When adding, be sure to fill to the appropriate level, as recommended in this
manual.
Engine Speci�cations
Engine VIN Code Transaxle Spark Plug Gap
1.6L L4 (L91) 6 Automatic and Manual 0.039-0.043 inch (1.0-1.1 mm)
5-91