2004 CHEVROLET AVALANCHE service reset
[x] Cancel search: service resetPage 231 of 548

Select Button
The select button is used to reset certain functions and
turn off or acknowledge messages on the DIC display.
The select button also toggles through the options
available in each personalization menu. For example, this
button will reset the trip odometers, turn off the FUEL
LEVEL LOW message, and toggle through the languages
you can select the DIC to display information in.
DIC Warnings and Messages
Warning messages are displayed on the DIC to notify the
driver that the status of the vehicle has changed and that
some action may be needed by the driver to correct the
condition. If there is more than one message that needs
to be displayed they will appear one after another. Some
messages may not require immediate action but you
should press the select button (if equipped) to
acknowledge that you received the message and clear it
from the display. Some messages cannot be cleared from
the display because they are more urgent; these
messages require action before they can be removed
from the DIC display. The following are the possible
messages that can be displayed and some information
about them.
CHANGE ENGINE OIL
This message is displayed when the engine oil needs to
be changed and service is required for your vehicle.
SeeScheduled Maintenance on page 6-4andEngine
Oil on page 5-16for more information. Also see “GM Oil
Life System” previously in this section for information
on how to reset the message. This message will
clear itself after 10 seconds until the next ignition cycle.
OIL LIFE RESET
This message will appear on the display for about
10 seconds after resetting the change engine oil
message.
OIL PRESSURE LOW
If low oil pressure levels occur, this message will be
displayed on the DIC and a chime will sound. Stop the
vehicle as soon as safely possible and do not operate
it until the cause of the low oil pressure has been
corrected. Check your oil as soon as possible and have
your vehicle serviced.
3-65
Page 237 of 548

STABILITY SYS ACTIVE
You may see the STABILITY SYS ACTIVE message on
the DIC. It means that an advanced computer-controlled
system has come on to help your vehicle continue to
go in the direction in which you’re steering.
For more information on the Stabilitrak
®system, see
Stabilitrak®System on page 4-11.
SERVICE STABILITY
If you ever see the SERVICE STABILITY message, it
means there may be a problem with your
Stabilitrak
®system. If you see this message try to reset
the system (stop; turn off the engine; then start the
engine again). If the SERVICE STABILITY message still
comes on, it means there is a problem. You should
see your dealer for service. The vehicle is safe to drive,
however, you do not have the bene�t of Stabilitrak
®,
so reduce your speed and drive accordingly.
For more information on the Stabilitrak
®system, see
Stabilitrak®System on page 4-11.
STABILITY SYS DISABLED
The STABILITY SYS DISABLED message will turn on
when you press the Stabilitrak®button, or when the
stability control has been automatically disabled. There
are four conditions that can cause this message to
appear. One condition is overheating, which could occur
if Stabilitrak
®activates continuously for an extended
period of time. The message will also be displayed if the
brake system warning light is on. SeeBrake System
Warning Light on page 3-42Brake System Warning
Light. The message could be displayed if the stability
system takes longer than usual to complete its
diagnostic checks due to driving conditions. Also, if an
engine or vehicle related problem has been detected,
and the vehicle needs service, the message will appear.
The message will turn off as soon as the conditions
that caused the message to be displayed are no longer
present.
For more information on the Stabilitrak
®system, see
Stabilitrak®System on page 4-11.
3-71
Page 244 of 548
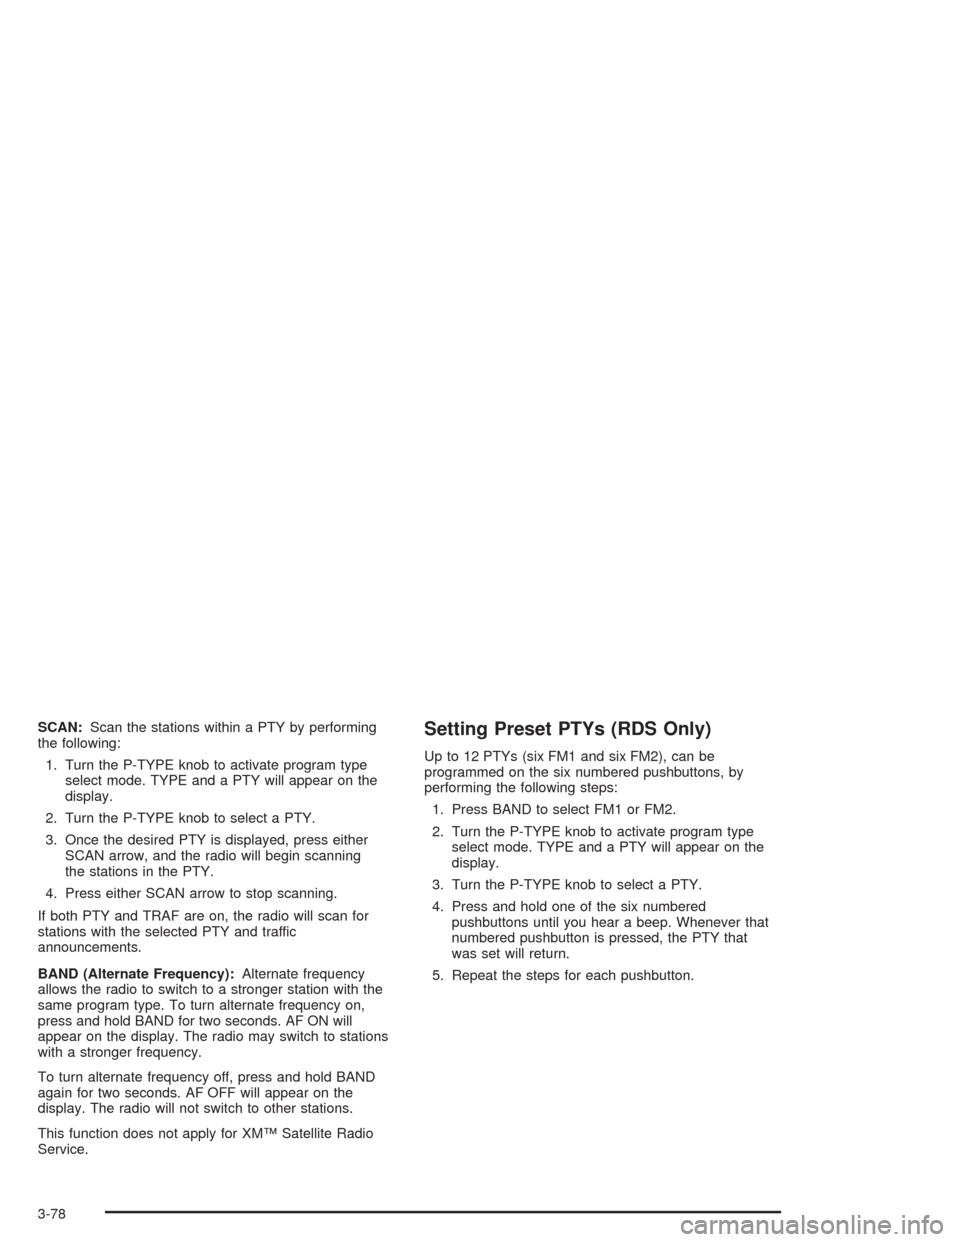
SCAN:Scan the stations within a PTY by performing
the following:
1. Turn the P-TYPE knob to activate program type
select mode. TYPE and a PTY will appear on the
display.
2. Turn the P-TYPE knob to select a PTY.
3. Once the desired PTY is displayed, press either
SCAN arrow, and the radio will begin scanning
the stations in the PTY.
4. Press either SCAN arrow to stop scanning.
If both PTY and TRAF are on, the radio will scan for
stations with the selected PTY and traffic
announcements.
BAND (Alternate Frequency):Alternate frequency
allows the radio to switch to a stronger station with the
same program type. To turn alternate frequency on,
press and hold BAND for two seconds. AF ON will
appear on the display. The radio may switch to stations
with a stronger frequency.
To turn alternate frequency off, press and hold BAND
again for two seconds. AF OFF will appear on the
display. The radio will not switch to other stations.
This function does not apply for XM™ Satellite Radio
Service.Setting Preset PTYs (RDS Only)
Up to 12 PTYs (six FM1 and six FM2), can be
programmed on the six numbered pushbuttons, by
performing the following steps:
1. Press BAND to select FM1 or FM2.
2. Turn the P-TYPE knob to activate program type
select mode. TYPE and a PTY will appear on the
display.
3. Turn the P-TYPE knob to select a PTY.
4. Press and hold one of the six numbered
pushbuttons until you hear a beep. Whenever that
numbered pushbutton is pressed, the PTY that
was set will return.
5. Repeat the steps for each pushbutton.
3-78
Page 247 of 548
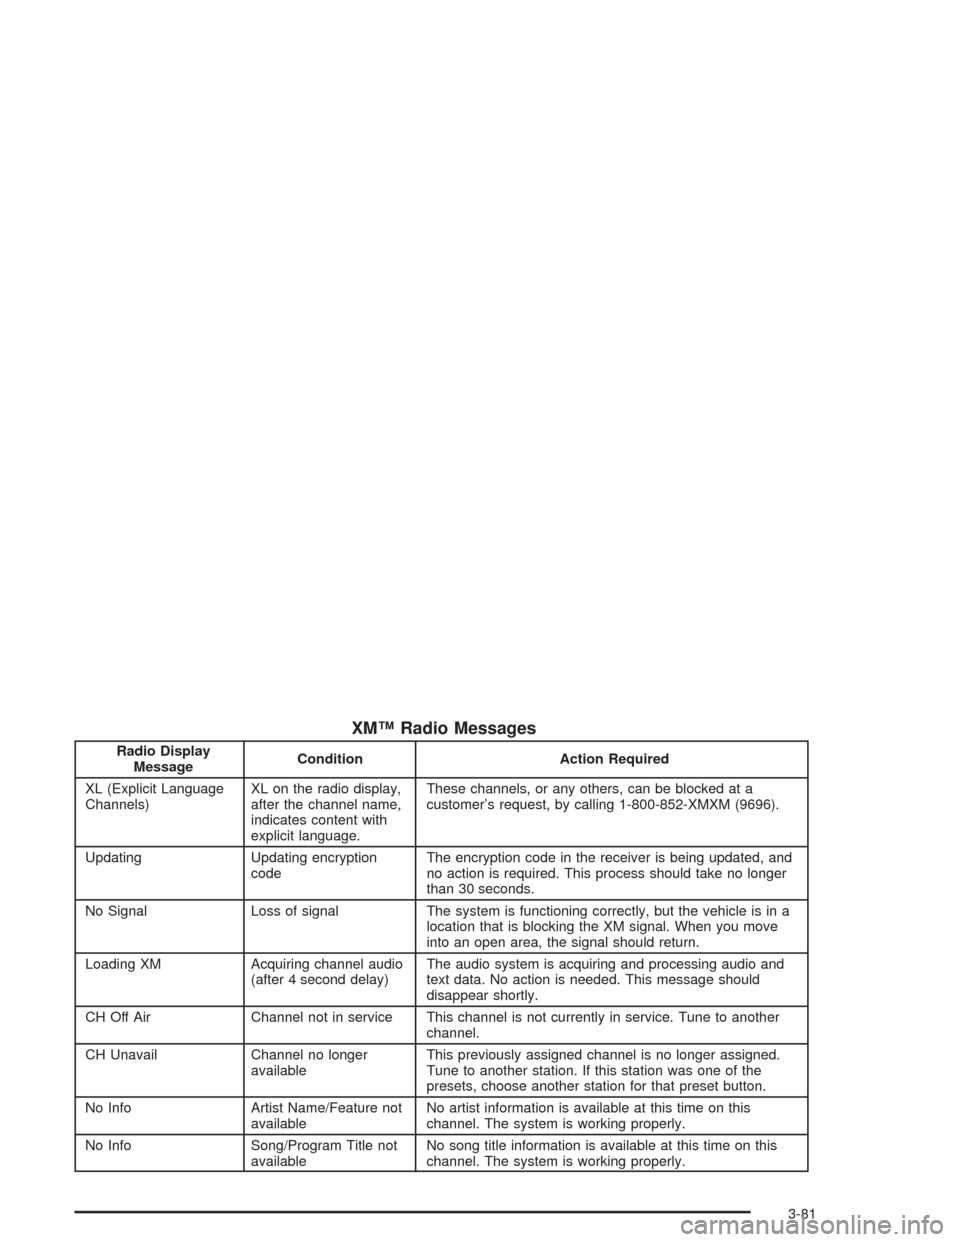
XM™ Radio Messages
Radio Display
MessageCondition Action Required
XL (Explicit Language
Channels)XL on the radio display,
after the channel name,
indicates content with
explicit language.These channels, or any others, can be blocked at a
customer’s request, by calling 1-800-852-XMXM (9696).
Updating Updating encryption
codeThe encryption code in the receiver is being updated, and
no action is required. This process should take no longer
than 30 seconds.
No Signal Loss of signal The system is functioning correctly, but the vehicle is in a
location that is blocking the XM signal. When you move
into an open area, the signal should return.
Loading XM Acquiring channel audio
(after 4 second delay)The audio system is acquiring and processing audio and
text data. No action is needed. This message should
disappear shortly.
CH Off Air Channel not in service This channel is not currently in service. Tune to another
channel.
CH Unavail Channel no longer
availableThis previously assigned channel is no longer assigned.
Tune to another station. If this station was one of the
presets, choose another station for that preset button.
No Info Artist Name/Feature not
availableNo artist information is available at this time on this
channel. The system is working properly.
No Info Song/Program Title not
availableNo song title information is available at this time on this
channel. The system is working properly.
3-81
Page 256 of 548
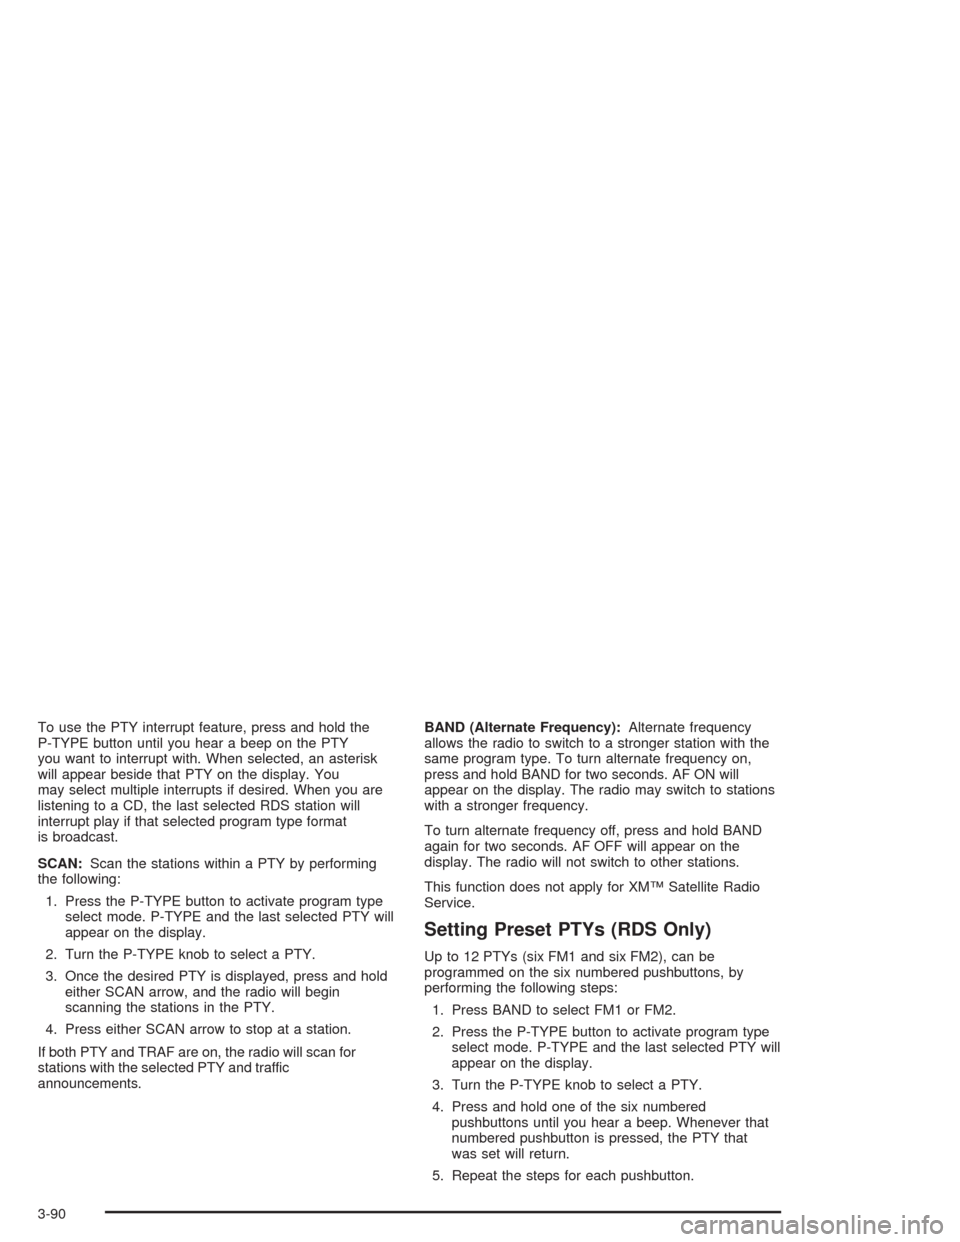
To use the PTY interrupt feature, press and hold the
P-TYPE button until you hear a beep on the PTY
you want to interrupt with. When selected, an asterisk
will appear beside that PTY on the display. You
may select multiple interrupts if desired. When you are
listening to a CD, the last selected RDS station will
interrupt play if that selected program type format
is broadcast.
SCAN:Scan the stations within a PTY by performing
the following:
1. Press the P-TYPE button to activate program type
select mode. P-TYPE and the last selected PTY will
appear on the display.
2. Turn the P-TYPE knob to select a PTY.
3. Once the desired PTY is displayed, press and hold
either SCAN arrow, and the radio will begin
scanning the stations in the PTY.
4. Press either SCAN arrow to stop at a station.
If both PTY and TRAF are on, the radio will scan for
stations with the selected PTY and traffic
announcements.BAND (Alternate Frequency):Alternate frequency
allows the radio to switch to a stronger station with the
same program type. To turn alternate frequency on,
press and hold BAND for two seconds. AF ON will
appear on the display. The radio may switch to stations
with a stronger frequency.
To turn alternate frequency off, press and hold BAND
again for two seconds. AF OFF will appear on the
display. The radio will not switch to other stations.
This function does not apply for XM™ Satellite Radio
Service.
Setting Preset PTYs (RDS Only)
Up to 12 PTYs (six FM1 and six FM2), can be
programmed on the six numbered pushbuttons, by
performing the following steps:
1. Press BAND to select FM1 or FM2.
2. Press the P-TYPE button to activate program type
select mode. P-TYPE and the last selected PTY will
appear on the display.
3. Turn the P-TYPE knob to select a PTY.
4. Press and hold one of the six numbered
pushbuttons until you hear a beep. Whenever that
numbered pushbutton is pressed, the PTY that
was set will return.
5. Repeat the steps for each pushbutton.
3-90
Page 258 of 548
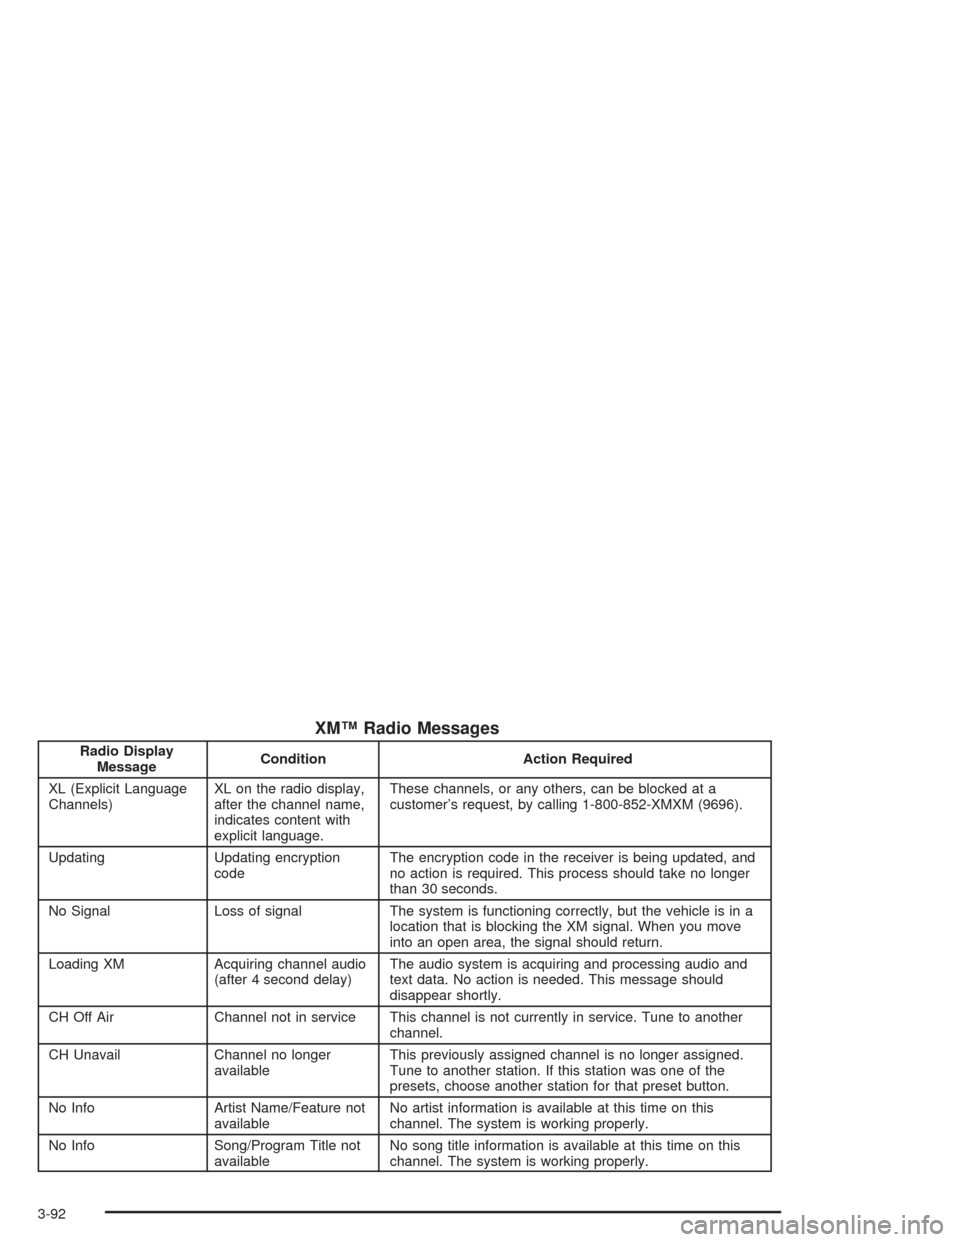
XM™ Radio Messages
Radio Display
MessageCondition Action Required
XL (Explicit Language
Channels)XL on the radio display,
after the channel name,
indicates content with
explicit language.These channels, or any others, can be blocked at a
customer’s request, by calling 1-800-852-XMXM (9696).
Updating Updating encryption
codeThe encryption code in the receiver is being updated, and
no action is required. This process should take no longer
than 30 seconds.
No Signal Loss of signal The system is functioning correctly, but the vehicle is in a
location that is blocking the XM signal. When you move
into an open area, the signal should return.
Loading XM Acquiring channel audio
(after 4 second delay)The audio system is acquiring and processing audio and
text data. No action is needed. This message should
disappear shortly.
CH Off Air Channel not in service This channel is not currently in service. Tune to another
channel.
CH Unavail Channel no longer
availableThis previously assigned channel is no longer assigned.
Tune to another station. If this station was one of the
presets, choose another station for that preset button.
No Info Artist Name/Feature not
availableNo artist information is available at this time on this
channel. The system is working properly.
No Info Song/Program Title not
availableNo song title information is available at this time on this
channel. The system is working properly.
3-92
Page 281 of 548
PROG (Program):Press this button to play a station
you have programmed on the radio preset pushbuttons.
The radio will only seek preset stations with a strong
signal that are in the selected band.
When a CD is playing in the CD changer, press this
button to go to the next available CD, if multiple CDs are
loaded.
QSOURCER:Press this button to switch between
FM1, FM2, AM, or XM1 or XM2 (if equipped), or a
CD. If a CD is loaded the CD symbol will appear on the
display.
QSEEKR:Press the up or the down arrow to go to
the next or to the previous radio station and stay
there. The radio will only seek stations with a strong
signal that are in the selected band.
When a CD is playing, press the up or the down arrow
to fast forward or reverse.
QVOLR(Volume):Press the up or the down arrow
to increase or to decrease the volume.
Radio Reception
AM
The range for most AM stations is greater than for FM,
especially at night. The longer range can cause
station frequencies to interfere with each other. Static
can occur on AM stations caused by things like
storms and power lines. Try reducing the treble to
reduce this noise.
FM Stereo
FM stereo will give the best sound, but FM signals will
reach only about 10 to 40 miles (16 to 65 km). Tall
buildings or hills can interfere with FM signals, causing
the sound to fade in and out.
XM™ Satellite Radio Service
XM™ Satellite Radio Service gives digital radio
reception from coast to coast. Just as with FM, tall
buildings or hills can interfere with satellite radio signals,
causing the sound to fade in and out. The radio may
display NO SIGNAL to indicate interference.
3-115
Page 385 of 548

Notice:Use only engine oil identi�ed as meeting
GM Standard GM6094M and showing the American
Petroleum Institute Certi�ed For Gasoline Engines
starburst symbol. Failure to use the recommended
oil can result in engine damage not covered by
your warranty.
GM Goodwrench
®oil meets all the requirements for
your vehicle.
If you are in an area of extreme cold, where the
temperature falls below−20°F (−29°C), it is
recommended that you use either an SAE 5W-30
synthetic oil or an SAE 0W-30 oil. Both will provide
easier cold starting and better protection for your engine
at extremely low temperatures.
Engine Oil Additives
Do not add anything to your oil. The recommended oils
with the starburst symbol that meet GM Standard
GM6094M are all you will need for good performance
and engine protection.
When to Change Engine Oil
(GM Oil Life System)
Your vehicle has a computer system that lets you know
when to change the engine oil and �lter. This is based on
engine revolutions and engine temperature, and not on
mileage. Based on driving conditions, the mileage at
which an oil change will be indicated can vary
considerably. For the oil life system to work properly, you
must reset the system every time the oil is changed.
When the system has calculated that oil life has been
diminished, it will indicate that an oil change is necessary.
A CHANGE ENGINE OIL message will come on. Change
your oil as soon as possible within the next two times you
stop for fuel. It is possible that, if you are driving under the
best conditions, the oil life system may not indicate that
an oil change is necessary for over a year. However, your
engine oil and �lter must be changed at least once a year
and at this time the system must be reset. Your dealer
has GM-trained service people who will perform this work
using genuine GM parts and reset the system. It is also
important to check your oil regularly and keep it at the
proper level.
If the system is ever reset accidentally, you must
change your oil at 3,000 miles (5 000 km) since your
last oil change. Remember to reset the oil life system
whenever the oil is changed.
5-19