Page 112 of 382

HomeLinkžis now in the train (learning) mode and can
be programmed at any time beginning with Step 2
under ªProgramming HomeLink
ž.º
Individual buttons can not be erased, but they can be
reprogrammed. See ªReprogramming a Single
HomeLink
žButtonº next.
Reprogramming a Single HomeLinkž
Button
To program a device to HomeLinkžusing a HomeLinkž
button previously trained, follow these steps:
1. Press and hold the desired HomeLinkžbutton. Do
not release the button.
2. The indicator light will begin to ¯ash after
20 seconds. While still holding the HomeLink
ž
button, proceed with Step 2 under ªProgramming
HomeLinkž.º
Resetting Defaults
To reset HomeLinkžto default settings do the following:
1. Hold down the two outside buttons for about
20 seconds until the indicator light begins to ¯ash.
2. Continue to hold both buttons until the HomeLink
ž
indicator light turns off.
3. Release both buttons.
For questions or comments, contact HomeLink
žat
1-800-355-3515, or on the internet at
www.homelink.com.
Storage Areas
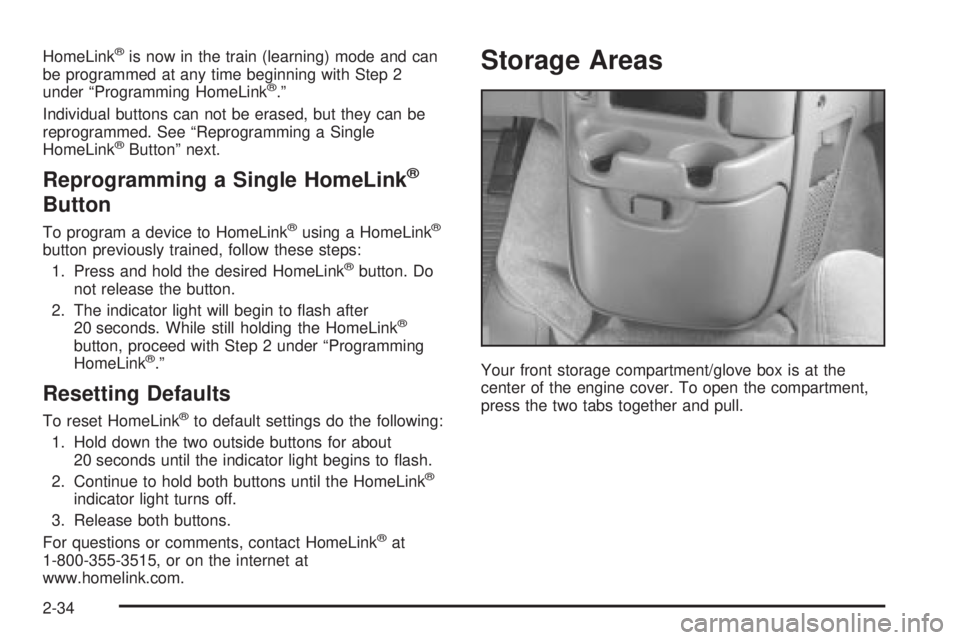
Your front storage compartment/glove box is at the
center of the engine cover. To open the compartment,
press the two tabs together and pull.
2-34
Page 136 of 382

Dome Lamps
The dome lamps will come on when you open a door.
Press the DOME OVERRIDE button in to cancel
automatic operation of the dome lamps. The button is
located near the exterior lamp control. Press the button
again to return it to the out position for normal
operation.
You can also turn the dome lamps on by turning the
thumbwheel, located next to the exterior lamp control, all
the way up. In this position, the dome lamps will
remain on whether a door is opened or closed.
You can use the DOME OVERRIDE button, located
near the exterior lamp control, to set the dome lamps to
come on automatically when a door is opened, or to
remain off. To turn the lamps off, press the button into
the in position, the dome lamps will remain off when
a door is open. To return the lamps to automatic
operation, press the button again and return it to the out
position. With the button in this position, the dome
lamps will come on when you open a door.
Battery Run-Down Protection
This feature shuts off the dome, courtesy, vanity,
reading and glove box lights if they are left on for more
than 20 minutes when the ignition is off. This will
keep your battery from running down.
If the battery run-down protection shuts off the interior
lamps, it may be necessary to do one of the following to
return to normal operation:
·Shut off all lamps and close all doors, or
·turn the ignition key to RUN.
Accessory Power Outlets
You can plug accessory electrical equipment into an
accessory power outlet. Just pull on the outlet cover to
remove it and follow the proper installation instructions
that are included with any electrical equipment that
you install.
The accessory power outlet is located on the
passenger's side of the front storage compartment.
These circuits are protected by a fuse and have
maximum current levels.
3-16
Page 312 of 382

Fuse/Circuit
Breaker Usage
3 Courtesy Lamps, Glove Box Lamp,
Dome Reading Lamps, Vanity Mirror
Lamps, Courtesy Lamps
4 Daytime Running Lamps Relay,
Instrument Panel Cluster
5 Rear Defogger
6 Cruise Module, Truck Body Control
Module, Instrument Panel Cluster,
Cruise Control Switch,
Electrochromic Mirror
7 Power Outlets, Subwoofer Ampli®er
8 Crank Circuit Fuse, Park/Neutral
Switch, Starter Enabler Relay
9 License Plate Lamp, Tailamps,
Parking Lamps, Ashtray Lamp,
Panel Lights, Trailer Taillamps, Front
and Rear Sidemarker Lamps, Door
Switch Illumination, Headlamp
Switch Illumination, Rear Seat Audio
Illumination, Truck Body Control
Module
10 Air Bag System
11 Not UsedFuse/Circuit
Breaker Usage
12 Blower Motor, Rear Air Conditioning
Relay Coil, Front Cont. Temp. Door
Motor, HI Blower Relay, Defogger
Timer Coil
13 Cigarette Lighter, Door Lock
Switches, Dutch Door Release
Module
14 Cluster Illumination, Climate
Controls, Chime Module, Radio
Illumination, Rear Heat Switch
Illumination, Rear Wiper/Washer
Switch Illumination, Rear Liftgate
Switch Illumination, Remote
Cassette Illumination, Overhead
Console, Truck Body Control
Illumination
15 Truck Body Module, Headlamp
Relay
16 Front Turn Signals, Rear Turn
Signals, Trailer Turn Signals,
Back-Up Lamps, Brake
Transmission Shift Interlock Solenoid
17 Front Wipers, Front Washer Pump
5-98
Page 345 of 382

Wiper Blade Check
Inspect wiper blades for wear or cracking. Replace
blade inserts that appear worn or damaged or that
streak or miss areas of the windshield. Also see
Cleaning the Outside of Your Vehicle on page 5-83.
Spare Tire Check
At least twice a year, after the monthly in¯ation check of
the spare tire determines that the spare is in¯ated to
the correct tire in¯ation pressure, make sure that
the spare tire is stored securely. Push, pull, and then try
to rotate or turn the tire. If it moves, use the wheel
wrench to tighten the cable. See
Changing a Flat Tire
on page 5-68.
Weatherstrip Lubrication
Silicone grease on weatherstrips will make them last
longer, seal better, and not stick or squeak. Apply
silicone grease with a clean cloth. During very cold,
damp weather more frequent application may be
required. See
Part D: Recommended Fluids and
Lubricants on page 6-30.
Automatic Transmission Check
Check the transmission ¯uid level; add if needed. SeeAutomatic Transmission Fluid on page 5-21. A ¯uid loss
may indicate a problem. Check the system and repair
if needed.
At Least Once a Year
Key Lock Cylinders Service
Lubricate the key lock cylinders with the lubricant
speci®ed in Part D.
Body Lubrication Service
Lubricate all body door hinges, the body hood, fuel door
and rear compartment hinges, latches and locks
including interior glove box and console doors, hood
latch assembly, secondary latch, pivots, spring anchor,
release pawl and any moving seat hardware. Lubricate
the hood safety lever pivot and prop rod pivot. Part D
tells you what to use. More frequent lubrication may be
required when exposed to a corrosive environment.
6-25