2004 CADILLAC SEVILLE oil temperature
[x] Cancel search: oil temperaturePage 85 of 410
Engine Coolant Heater
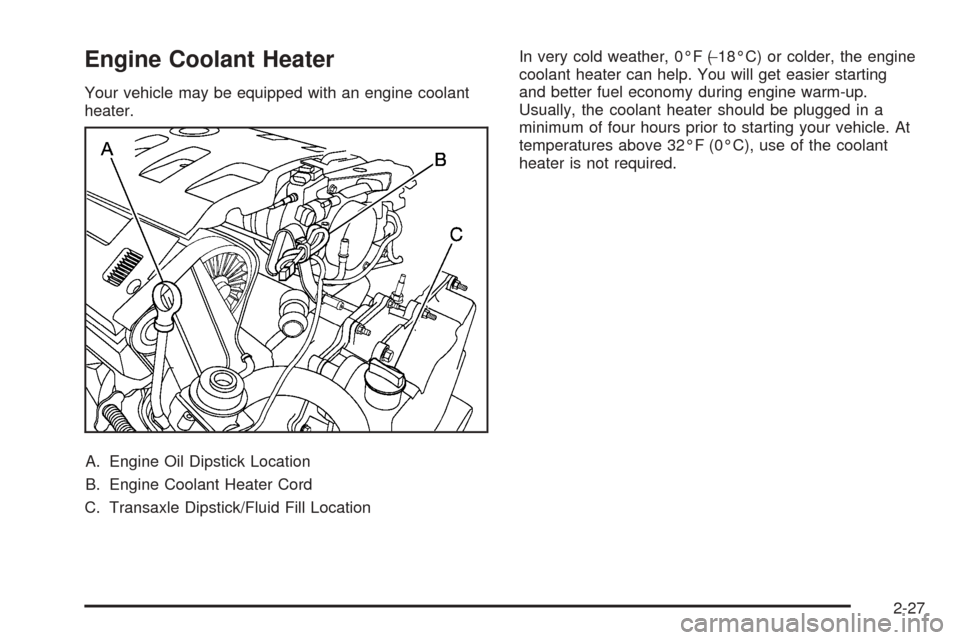
Your vehicle may be equipped with an engine coolant
heater.
A. Engine Oil Dipstick Location
B. Engine Coolant Heater Cord
C. Transaxle Dipstick/Fluid Fill LocationIn very cold weather, 0°F (−18°C) or colder, the engine
coolant heater can help. You will get easier starting
and better fuel economy during engine warm-up.
Usually, the coolant heater should be plugged in a
minimum of four hours prior to starting your vehicle. At
temperatures above 32°F (0°C), use of the coolant
heater is not required.
2-27
Page 86 of 410
To Use the Engine Coolant Heater
1. Turn off the engine.
2. Open the hood and unwrap the electrical cord.
The electrical cord is located on the driver’s side
of the engine, behind the transaxle dipstick/fluid fill
location (C) and next to the engine.
3. Plug it into a normal, grounded 110-volt AC outlet.
{CAUTION:
Plugging the cord into an ungrounded outlet
could cause an electrical shock. Also, the
wrong kind of extension cord could overheat
and cause a fire. You could be seriously
injured. Plug the cord into a properly grounded
three-prong 110-volt AC outlet. If the cord will
not reach, use a heavy-duty three-prong
extension cord rated for at least 15 amps.
4. Before starting the engine, be sure to unplug and
store the cord as it was before to keep it away
from moving engine parts. If you do not, it could be
damaged.How long should you keep the coolant heater plugged
in? The answer depends on the outside temperature, the
kind of oil you have, and some other things. Instead
of trying to list everything here, we ask that you contact
your dealer in the area where you will be parking
your vehicle. The dealer can give you the best advice
for that particular area.
Automatic Transaxle Operation
There are several different
positions for the shift lever,
which is located on the
console between the seats.
PARK (P):This position locks the front wheels. It is the
best position to use when you start the engine
because your vehicle cannot move easily.
2-28
Page 113 of 410
Instrument Panel Overview...............................3-4
Hazard Warning Flashers................................3-6
Other Warning Devices...................................3-7
Horn.............................................................3-7
Tilt Wheel.....................................................3-7
Turn Signal/Multifunction Lever.........................3-9
Exterior Lamps.............................................3-16
Interior Lamps..............................................3-22
Ultrasonic Rear Parking Assist (URPA)............3-24
Accessory Power Outlets...............................3-26
Ashtrays and Cigarette Lighter........................3-27
Climate Controls............................................3-28
Dual Climate Control System..........................3-28
Outlet Adjustment.........................................3-33
Rear Climate Control System.........................3-34
Passenger Compartment Air Filter...................3-35
Steering Wheel Climate Controls.....................3-36
Climate Controls Personalization.....................3-36
Warning Lights, Gages and Indicators.............3-37
Warning Lights, Gages, and Indicators.............3-37
Instrument Panel Cluster................................3-38
Speedometer and Odometer...........................3-39
Tachometer.................................................3-40
Safety Belt Reminder Light.............................3-41Air Bag Readiness Light................................3-41
Charging System Light..................................3-42
Brake System Warning and Parking Brake
Indicator Light...........................................3-43
Anti-Lock Brake System Warning Light.............3-44
Traction Control System (TCS) Warning Light......3-44
Engine Coolant Temperature Warning Light......3-45
Engine Coolant Temperature Gage..................3-45
Malfunction Indicator Lamp.............................3-46
Oil Pressure Light.........................................3-49
Security Light...............................................3-50
Fog Lamp Light............................................3-50
Lights On Reminder......................................3-50
Cruise Control Light......................................3-50
Fuel Gage...................................................3-51
Driver Information Center (DIC).......................3-52
DIC Controls and Displays.............................3-52
DIC Warnings and Messages.........................3-55
Climate Controls and Radio System
Personalization..........................................3-62
DIC Vehicle Personalization............................3-63
Trip Computer................................................3-74
Oil Life Indicator...........................................3-74
Section 3 Instrument Panel
3-1
Page 165 of 410
•AVG MPH (Average Miles per Hour):This
message shows the average speed you have
traveled at since the last time you reset the value.
To reset the value, press the INFO button to
display AVG MPH then press and hold the INFO
RESET button until 0.0 AVG MPH is displayed.
•TIMER:This feature is like a stopwatch, in that you
can clock the time it takes to get from one point to
another.
To operate, press the INFO button to display
TIMER. Each of the fields for the hours, minutes
and seconds are two numeric digits.
Once TIMER 00:00:00 is displayed, press the
ON/OFF button to start the timing feature. Press the
ON/OFF button again to stop it. If you will be starting
and stopping your vehicle, during a trip for instance,
the TIMER feature will automatically start timing
where it left off when you last stopped. To reset it,
press and hold the INFO RESET button until the
display reads TIMER 00:00:00. Press the INFO
button to exit from the TIMER display.
•ENGINE OIL LIFE:Press the INFO button to display
ENGINE OIL LIFE, then press and hold the INFO
RESET button until 100% ENGINE OIL LIFE is
displayed. (This only needs to be reset after you
have had the oil changed.)
•TRANSMISSION FLUID LIFE MONITOR:Under
normal conditions, the rate of deterioration of the
transmission fluid is slow. SeeScheduled
Maintenance on page 6-4for proper fluid and change
intervals. To reset the transmission fluid life, press
the INFO button to display TRANS FLUID LIFE, then
press and hold the INFO RESET button until 100%
TRANS FLUID LIFE is displayed. (This only needs to
be reset after you have had the fluid changed.)
ON/OFF:Pressing this button turns the Personalization
Features on and off. (FEATURE PROGRAMMING must
be displayed on the DIC to begin actual programming.)
This button also starts and stops the timer.
OUTSIDE TEMP (Temperature):This message shows
the outside temperature. After this display has been on
the DIC for about five seconds, the words OUTSIDE
TEMP will disappear so that only the temperature
remains.
3-53
Page 171 of 410
ICE POSSIBLE – 13:This message appears when the
outside air temperature is cold enough to create icy
road conditions.
LEFT REAR DOOR AJAR – 142:The left rear door is
open or ajar when this message appears. The ignition
must be in ON and the transaxle not in PARK (P) for this
message to display. A chime will sound if the vehicle’s
speed is greater than 3 mph (5 km/h).
OIL PRESSURE LOW STOP ENGINE – 35:If this
message appears while the engine is running, stop the
engine and do not operate it until the cause of low
oil pressure is corrected. Severe damage to the engine
can result. A multiple chime will sound when this
message is displayed.
PASSENGER DOOR AJAR – 141:The right front
passenger’s door is open or ajar when this message
appears. The ignition must be in ON and the transaxle
not in PARK (P) for this message to display. A chime
will sound if the vehicle’s speed is greater than
3 mph (5 km/h).
RIGHT REAR DOOR AJAR – 143:The right rear door
is open or ajar when this message appears. The
ignition must be in ON and the transaxle not in PARK (P)
for this message to display. A chime will sound if the
vehicle’s speed is greater than 3 mph (5 km/h).SERVICE AC SYSTEM – 14:This message appears
when the electronic sensors that control the air
conditioning and heating systems are no longer working.
Have the climate control system serviced if you notice
a drop in heating and air conditioning efficiency.
SERVICE AIR BAG – 83:There is a problem with the
air bag system when this message appears. Let
only a qualified technician work on your vehicle. Have
your vehicle serviced by your dealership immediately.
SERVICE CHARGING SYS – 102:This message
will display when a problem with the charging system
has been detected. Have your vehicle serviced at
your dealership.
SERVICE ELECTRICAL SYS – 106:This message will
display if an electrical problem has occurred within
the Powertrain Control Module (PCM) or the ignition
switch. Have your vehicle serviced by your dealership.
SERVICE FUEL SYSTEM – 101:The Powertrain
Control Module (PCM) has detected a problem within
the fuel system when this message appears. Have your
vehicle serviced by your dealership.
SERVICE IDLE CONTROL – 107:A problem with the
idle control has occurred when this message displays.
Have your vehicle serviced by your dealership.
3-59
Page 186 of 410
Driver’s Name Set/Recall
If your vehicle has the optional memory package, you
will have this feature. This feature allows individual
driver’s names to be displayed in the DIC when
the ignition is turned to ON. This feature only works
when the remote keyless entry transmitter is used
to unlock the vehicle or when buttons 1 or 2 on the
driver’s door are pressed. See your dealer for assistance
in programming this feature.
Exiting Feature Programming
To exit FEATURE PROGRAMMING, press the INFO
RESET or INFO button.
Trip Computer
Oil Life Indicator
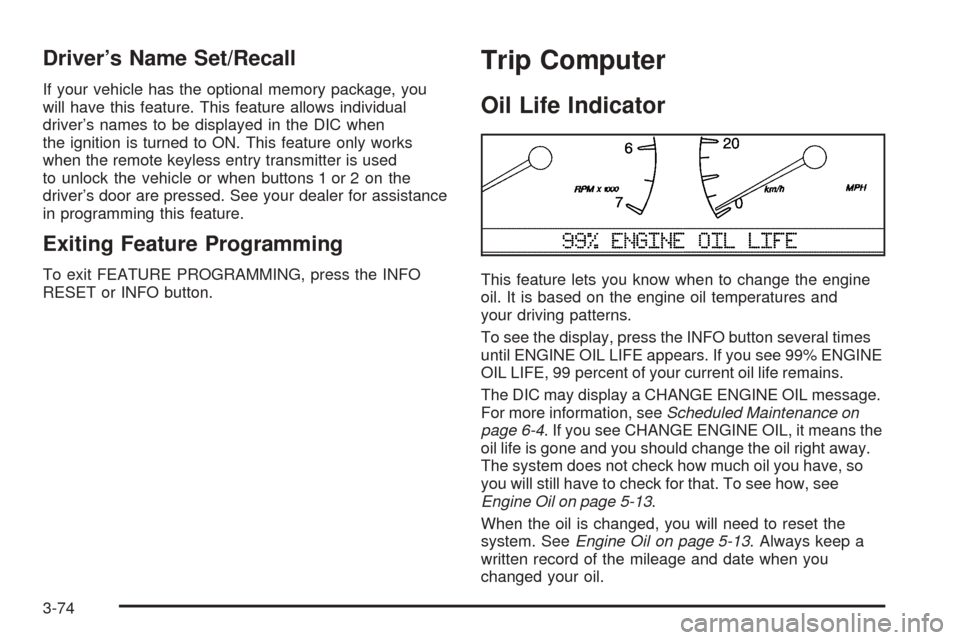
This feature lets you know when to change the engine
oil. It is based on the engine oil temperatures and
your driving patterns.
To see the display, press the INFO button several times
until ENGINE OIL LIFE appears. If you see 99% ENGINE
OIL LIFE, 99 percent of your current oil life remains.
The DIC may display a CHANGE ENGINE OIL message.
For more information, seeScheduled Maintenance on
page 6-4. If you see CHANGE ENGINE OIL, it means the
oil life is gone and you should change the oil right away.
The system does not check how much oil you have, so
you will still have to check for that. To see how, see
Engine Oil on page 5-13.
When the oil is changed, you will need to reset the
system. SeeEngine Oil on page 5-13. Always keep a
written record of the mileage and date when you
changed your oil.
3-74
Page 276 of 410
Notice:Use only engine oil identified as meeting
GM Standard GM6094M and showing the American
Petroleum Institute Certified For Gasoline Engines
starburst symbol. Failure to use the recommended
oil can result in engine damage not covered by
your warranty.
GM Goodwrench
®oil meets all the requirements for
your vehicle.
If you are in an area of extreme cold, where the
temperature falls below−20°F (−29°C), it is
recommended that you use either an SAE 5W-30
synthetic oil or an SAE 0W-30 oil. Both will provide
easier cold starting and better protection for your engine
at extremely low temperatures.
Engine Oil Additives
Do not add anything to your oil. The recommended oils
with the starburst symbol that meet GM Standard
GM6094M are all you will need for good performance
and engine protection.
When to Change Engine Oil
(GM Oil Life System)
Your vehicle has a computer system that lets you know
when to change the engine oil and filter. This is based on
engine revolutions and engine temperature, and not on
mileage. Based on driving conditions, the mileage at
which an oil change will be indicated can vary
considerably. For the oil life system to work properly, you
must reset the system every time the oil is changed.
When the system has calculated that oil life has been
diminished, it will indicate that an oil change is
necessary. A CHANGE ENGINE OIL message in the
Driver Information Center (DIC) will come on. Change
your oil as soon as possible within the next two
times you stop for fuel. It is possible that, if you are
driving under the best conditions, the oil life system may
not indicate that an oil change is necessary for over a
year. However, your engine oil and filter must be
changed at least once a year and at this time the system
must be reset. Your dealer has GM-trained people
who will perform this work using genuine GM parts and
reset the system. It is also important to check your
oil regularly and keep it at the proper level.
If the system is ever reset accidentally, you must
change your oil at 3,000 miles (5 000 km) since your
last oil change. Remember to reset the oil life system
whenever the oil is changed.
5-16
Page 280 of 410
Follow these steps to reinstall the engine air
cleaner/filter assembly:
1. Slide the cover into the slots in the bottom of
the base.
2. Close the cover and make sure that both latches
are secure and fully engaged.
3. Reinstall the clean air duct over the mass airflow
sensor. Make sure that the duct is secure around
the entire outer edge of the sensor.
4. Tighten the air duct clamp.
{CAUTION:
Operating the engine with the air cleaner/filter off
can cause you or others to be burned. The air
cleaner not only cleans the air, it helps to stop
flame if the engine backfires. If it is not there and
the engine backfires, you could be burned. Do
not drive with it off, and be careful working on
the engine with the air cleaner/filter off.
Notice:If the air cleaner/filter is off, a backfire can
cause a damaging engine fire. And, dirt can
easily get into your engine, which will damage it.
Always have the air cleaner/filter in place when you
are driving.
Automatic Transaxle Fluid
When to Check and Change
A good time to check your automatic transaxle fluid
level is when the engine oil is changed.
Change both the fluid and filter every 50,000 miles
(83 000 km) if the vehicle is mainly driven under one or
more of these conditions:
•In heavy city traffic where the outside temperature
regularly reaches 90° F (32° C) or higher.
•In hilly or mountainous terrain.
•When doing frequent trailer towing.
•Uses such as found in taxi, police or delivery
service.
If you do not use your vehicle under any of these
conditions, the fluid and filter do not require change until
the message CHANGE TRANS FLUID appears on
the Driver Information Center.
SeeScheduled Maintenance on page 6-4.
5-20