2004 BUICK RANDEZVOUS wheel
[x] Cancel search: wheelPage 109 of 486

Starting and Operating Your
Vehicle
New Vehicle Break-In
Notice:Your vehicle does not need an elaborate
“break-in.” But it will perform better in the long run
if you follow these guidelines:
If you have all-wheel drive, keep your speed at
55 mph (88 km/h) or less for the �rst 500 miles
(805 km).
Do not drive at any one speed — fast or
slow — for the �rst 500 miles (805 km).
Do not make full-throttle starts.
Avoid making hard stops for the �rst 200 miles
(322 km) or so. During this time your new brake
linings are not yet broken in. Hard stops with new
linings can mean premature wear and earlier
replacement. Follow this breaking-in guideline
every time you get new brake linings.
Do not tow a trailer during break-in. SeeTowing a
Trailer on page 4-42for more information.
2-19
Page 110 of 486

Ignition Positions
With the key in the ignition, you can turn the key to four
different positions.
A (OFF):This is the only position in which you can
remove the key. This position locks the steering wheel,
ignition and transaxle.Notice:If your key seems stuck in OFF and you
can’t turn it, be sure you are using the correct key; if
so, is it all the way in? If it is, then turn the steering
wheel left and right while you turn the key hard. Turn
the key only with your hand. Using a tool to force it
could break the key or the ignition switch. If none of
these works, then your vehicle needs service.
B (ACCESSORY):This position allows you to use
things like the radio and the windshield wipers while the
engine is off. This position will allow you to turn off
the engine, but still turn the steering wheel. Use
ACCESSORY if you must have your vehicle in motion
while the engine is off, for example, if your vehicle
is being pushed or towed.
C (ON):This is the position that the switch returns to
after you start your engine and release the key.
The switch stays in ON when the engine is running. But
even when the engine is not running, you can use
ON to operate your electrical power accessories, and to
display some instrument panel warning lights.
D (START):This position starts the engine. When the
engine starts, release the key. The ignition switch
will return to ON for normal driving.
If the engine is not running, ACCESSORY and ON are
positions that allow you to operate your electrical
accessories, such as the radio.
2-20
Page 113 of 486

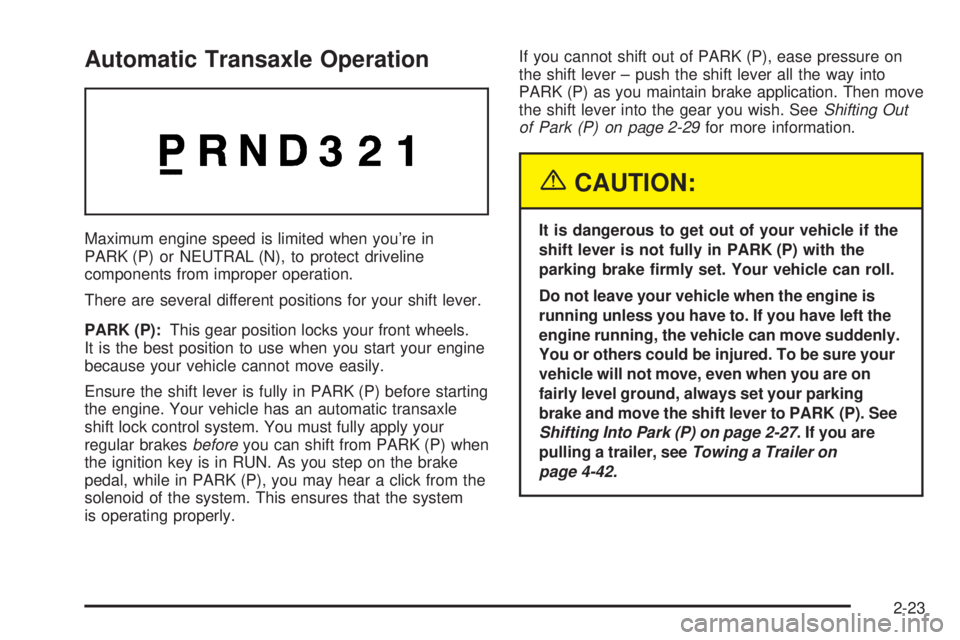
Automatic Transaxle Operation
Maximum engine speed is limited when you’re in
PARK (P) or NEUTRAL (N), to protect driveline
components from improper operation.
There are several different positions for your shift lever.
PARK (P):This gear position locks your front wheels.
It is the best position to use when you start your engine
because your vehicle cannot move easily.
Ensure the shift lever is fully in PARK (P) before starting
the engine. Your vehicle has an automatic transaxle
shift lock control system. You must fully apply your
regular brakesbeforeyou can shift from PARK (P) when
the ignition key is in RUN. As you step on the brake
pedal, while in PARK (P), you may hear a click from the
solenoid of the system. This ensures that the system
is operating properly.If you cannot shift out of PARK (P), ease pressure on
the shift lever – push the shift lever all the way into
PARK (P) as you maintain brake application. Then move
the shift lever into the gear you wish. SeeShifting Out
of Park (P) on page 2-29for more information.
{CAUTION:
It is dangerous to get out of your vehicle if the
shift lever is not fully in PARK (P) with the
parking brake �rmly set. Your vehicle can roll.
Do not leave your vehicle when the engine is
running unless you have to. If you have left the
engine running, the vehicle can move suddenly.
You or others could be injured. To be sure your
vehicle will not move, even when you are on
fairly level ground, always set your parking
brake and move the shift lever to PARK (P). See
Shifting Into Park (P) on page 2-27. If you are
pulling a trailer, seeTowing a Trailer on
page 4-42.
2-23
Page 114 of 486

REVERSE (R):Use this gear to back up.
Notice:Shifting to REVERSE (R) while your vehicle
is moving forward could damage the transaxle. The
repairs would not be covered by your warranty. Shift
to REVERSE (R) only after your vehicle is stopped.
To rock your vehicle back and forth to get out of snow,
ice or sand without damaging your transaxle, see If
You Are Stuck: In Sand, Mud, Ice or Snow on
page 4-32.
NEUTRAL (N):In this position, your engine does not
connect with the wheels. To restart when you are
already moving, use NEUTRAL (N) only. Also, use
NEUTRAL (N) when your vehicle is being towed.
{CAUTION:
Shifting into a drive gear while your engine is
running at high speed is dangerous. Unless
your foot is �rmly on the brake pedal, your
vehicle could move very rapidly. You could
lose control and hit people or objects. Do not
shift into a drive gear while your engine is
running at high speed.Notice:Shifting out of PARK (P) or NEUTRAL (N)
with the engine racing may damage the transaxle.
The repairs would not be covered by your warranty.
Be sure the engine is not racing when shifting
your vehicle.
AUTOMATIC OVERDRIVE (D):This position is for
normal driving. If you need more power for passing,
and you are:
Going less than 35 mph (55 km/h), push your
accelerator pedal about halfway down.
Going about 35 mph (55 km/h) or more, push the
accelerator all the way down.
You will shift down to the next gear and have more
power.
Notice:Driving your vehicle if you notice that it is
moving slowly or not shifting gears as you
increase speed may damage the transaxle. Have
your vehicle serviced right away. You can drive in
SECOND (2) when you are driving less than 35 mph
(55 km/h) and AUTOMATIC OVERDRIVE (D) for
higher speeds until then.
2-24
Page 141 of 486

Instrument Panel Overview...............................3-4
Hazard Warning Flashers................................3-6
Other Warning Devices...................................3-7
Horn.............................................................3-7
Tilt Wheel.....................................................3-7
Turn Signal/Multifunction Lever.........................3-8
Exterior Lamps.............................................3-14
Interior Lamps..............................................3-16
Instrument Panel Switchbank..........................3-21
Head-Up Display (HUD).................................3-21
Ultrasonic Rear Parking Assist (URPA)..............3-24
Accessory Power Outlets...............................3-27
Ashtrays and Cigarette Lighter........................3-28
Climate Controls............................................3-28
Climate Control System.................................3-28
Dual Climate Control System..........................3-32
Dual Automatic Climate Control System...........3-35
Outlet Adjustment.........................................3-38
Warning Lights, Gages and Indicators.............3-39
Instrument Panel Cluster................................3-40
Speedometer and Odometer...........................3-41
Tachometer.................................................3-42
Safety Belt Reminder Light.............................3-43Air Bag Readiness Light................................3-43
Brake System Warning Light..........................3-44
Anti-Lock Brake System Warning Light.............3-45
Traction Control System (TCS) Warning Light . . .3-45
Engine Coolant Temperature Gage..................3-46
Malfunction Indicator Lamp.............................3-46
Fuel Gage...................................................3-49
Message Center.............................................3-50
Service Traction System Warning Message......3-50
Traction Active Message................................3-51
Engine Coolant Temperature Warning
Message..................................................3-51
Charging System Indicator Message................3-52
Low Oil Pressure Message............................3-52
Change Engine Oil Message..........................3-53
Low Tire Message........................................3-54
Door Ajar Warning Message...........................3-54
Rear Hatch Ajar Warning Message..................3-54
PASS-Key
®III Security Message....................3-55
All-Wheel Drive Disable Warning Message.......3-55
Low Washer Fluid Warning Message...............3-56
Low Fuel Warning Message...........................3-56
Low Brake Fluid Warning Message.................3-57
Section 3 Instrument Panel
3-1
Page 142 of 486

Service Vehicle Soon Message.......................3-57
Program Mode Message................................3-58
Remote Keyless Entry Transmitter Battery Low
Warning Message......................................3-58
Parking Lamp Warning Message.....................3-59
Highbeam Out Warning Message....................3-59
Driver Information Center (DIC).......................3-60
DIC Controls and Displays.............................3-62
DIC Vehicle Personalization............................3-64
Audio System(s).............................................3-73
Setting the Time...........................................3-73
Radio with CD..............................................3-74
Radio with Cassette and CD..........................3-85
Radio with Six-Disc CD.................................3-98Navigation/Radio System..............................3-112
Rear Seat Entertainment System...................3-113
Rear Seat Audio (RSA)................................3-126
Theft-Deterrent Feature................................3-128
Audio Steering Wheel Controls......................3-129
DVD Distortion............................................3-129
Understanding Radio Reception....................3-130
Care of Your Cassette Tape Player...............3-130
Care of Your CDs and DVDs........................3-131
Care of Your CD and DVD Player.................3-131
Cleaning Your DVD Player...........................3-131
Integrated Windshield Antenna......................3-132
XM™ Satellite Radio Antenna System
(48 Contiguous US States)........................3-132
Section 3 Instrument Panel
3-2
Page 145 of 486

The main components of the instrument panel are the
following:
A. Exterior/Interior Lamps Control. SeeExterior Lamps
on page 3-14andInterior Lamps on page 3-16.
B. Turn Signal/Multifunction Lever. SeeTurn
Signal/Multifunction Lever on page 3-8.
C. Hazard Warning Flasher Switch. SeeHazard
Warning Flashers on page 3-6.
D. Instrument Panel Cluster. SeeInstrument Panel
Cluster on page 3-40.
E. Shift Lever. SeeAutomatic Transaxle Operation on
page 2-23.
F. Instrument Panel Outlets. SeeOutlet Adjustment on
page 3-38.
G. Audio System. SeeAudio System(s) on page 3-73.
H. Audio Steering Wheel Controls. SeeAudio
Steering Wheel Controls on page 3-129.
I. Head-Up Display Switch and Driver Information
Center (DIC) Controls. SeeHead-Up Display (HUD)
on page 3-21andDIC Controls and Displays on
page 3-62.J. Hood Release. SeeHood Release on page 5-11.
K. Ignition Switch. SeeIgnition Positions on page 2-20.
L. Climate Controls. SeeClimate Control System on
page 3-28,Dual Climate Control System on
page 3-32orDual Automatic Climate Control System
on page 3-35.
M. Instrument Panel Switchbank. SeeInstrument Panel
Switchbank on page 3-21.
N. Front Armrest Storage. SeeFront Armrest Storage
Area on page 2-40.
O. Ashtray/Cigarette Lighter/Accessory Power
Outlet/Cell Phone Storage/Purse
Storage/Cupholders. SeeAshtrays and Cigarette
Lighter on page 3-28,Accessory Power Outlets on
page 3-27,Cell Phone Storage Area on page 2-39,
Floor Console Storage Area on page 2-40and
Cupholder(s) on page 2-39.
P. Floor Console Fuse Block. SeeFuses and Circuit
Breakers on page 5-109.
Q. Glove Box. SeeGlove Box on page 2-39.
3-5
Page 147 of 486

Other Warning Devices
If you carry re�ective triangles, you can set one up at
the side of the road about 300 feet (100 m) behind your
vehicle.
Horn
You can sound the horn by pressing the center of your
steering wheel.
Tilt Wheel
A tilt wheel allows you to adjust the steering wheel
before you drive. You can raise it to the highest level to
give your legs more room when you exit and enter
the vehicle.
The lever that allows you to tilt the steering wheel is
located on the left side of the steering column.To tilt the wheel, hold the
steering wheel and pull
the lever.
Then move the steering wheel to a comfortable position
and release the lever to lock the wheel in place.
3-7