2004 BUICK PARK AVENUE clock
[x] Cancel search: clockPage 75 of 410
Battery Replacement
Under normal use, the battery in your remote keyless
entry transmitter should last about four years.
You can tell the battery is weak if the transmitter won’t
work at the normal range in any location. If you have
to get close to your vehicle before the transmitter works,
it’s probably time to change the battery.
Notice:When replacing the battery, use care not to
touch any of the circuitry. Static from your body
transferred to these surfaces may damage the
transmitter.To replace the battery, do the following:
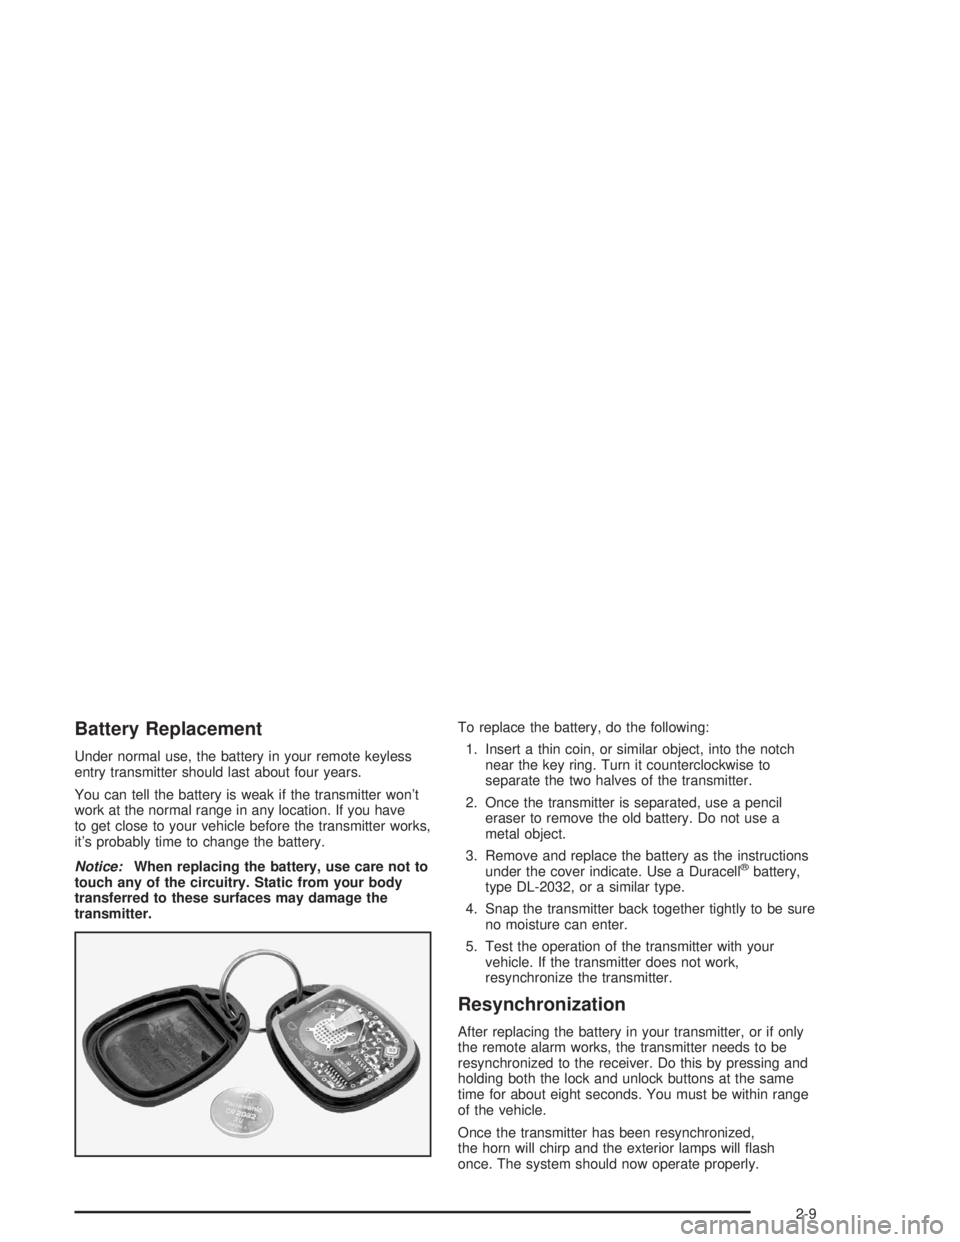
1. Insert a thin coin, or similar object, into the notch
near the key ring. Turn it counterclockwise to
separate the two halves of the transmitter.
2. Once the transmitter is separated, use a pencil
eraser to remove the old battery. Do not use a
metal object.
3. Remove and replace the battery as the instructions
under the cover indicate. Use a Duracell
®battery,
type DL-2032, or a similar type.
4. Snap the transmitter back together tightly to be sure
no moisture can enter.
5. Test the operation of the transmitter with your
vehicle. If the transmitter does not work,
resynchronize the transmitter.
Resynchronization
After replacing the battery in your transmitter, or if only
the remote alarm works, the transmitter needs to be
resynchronized to the receiver. Do this by pressing and
holding both the lock and unlock buttons at the same
time for about eight seconds. You must be within range
of the vehicle.
Once the transmitter has been resynchronized,
the horn will chirp and the exterior lamps will �ash
once. The system should now operate properly.
2-9
Page 82 of 410

Remote Trunk Release Lockout
The remote trunk release lockout button allows you to
secure items in the trunk.
Insert the ignition key into
the TRUNK button, located
to the left of the steering
column. Turn the key
one-quarter turn clockwise
to LK then remove it
from the button.
This will disable the trunk release button and prevent
the trunk from opening when this button is pressed.
Trunk Security Override
The remote keyless entry transmitter will open the trunk
when the ignition is on or off and the vehicle is in
PARK (P), even if the trunk release lockout is activated.
Emergency Trunk Release Handle
Notice:Using the emergency trunk release handle
as a tie-down or anchor point when securing
items in the trunk may damage it. Use the
emergency trunk release handle only to help you
open the trunk lid.
There is a glow-in-the-dark emergency trunk release
handle located near the trunk latch. This handle will glow
following exposure to light. Pull the release handle up
to open the trunk from the inside.
2-16
Page 133 of 410

Interior Lamps
Instrument Panel Brightness
Adjust the instrument panel light brightness by turning
the exterior lamps control.
Courtesy Lamps
When any door is opened, several lamps go on.
They make it easy for you to enter and leave your vehicle.
You can also turn these lamps on by turning the exterior
lamps control clockwise all the way past the normal stop.
Entry Lighting
When you open either front door or press the unlock
button on the remote keyless entry transmitter, the lamps
inside your vehicle will turn on. These lamps will turn off
after about 40 seconds. These lamps will also turn off if
you start the engine or activate the power door locks.
Delayed Entry Lighting
When you open the door, the interior lamps will come on.
When you close the door with the ignition off, the interior
lamps will stay on for 25 seconds or until the ignition is
turned to an on position. Locking the doors with thepower door lock switch will override the delayed entry
lighting feature and the lamps will turn off right away.
Using the remote keyless entry transmitter to lock the
door will not cancel delayed lighting.
Theater Dimming
This feature allows for a three to �ve-second fade out of
the courtesy lamps instead of immediate turn off.
Delayed Exit Lighting
With this feature, the interior lamps will come on for
25 seconds after you remove the key from the ignition.
This will give you time to �nd the door handle or
lock switches.
Parade Dimming
This feature prohibits the dimming of your instrument
panel displays during daylight while your headlamps are
on. This feature operates with the light sensor for the
Twilight Sentinel
®and is fully automatic. When the light
sensor reads darkness outside, you will be able to
dim your instrument panel displays once again.
3-15
Page 181 of 410
Cassette Tape Messages
E (Error):If this message and a number appears on
the display, it could be for one of the following reasons:
E10:The tape is tight and the player cannot turn
the tape hubs. Remove the tape. Hold the tape
with the open end down and try to turn the right hub
counterclockwise with a pencil. Turn the tape
over and repeat. If the hubs do not turn easily, your
tape may be damaged and should not be used in
the player. Try a new tape to make sure your player
is working properly.
E11:The tape is broken. Try a new tape.
CLN (Clean):If this message appears on the display,
the cassette tape player needs to be cleaned. It will
still play tapes, but you should clean it as soon as
possible to prevent damage to the tapes and player.
SeeCare of Your Cassette Tape Player on page 3-79.
If any error occurs repeatedly or if an error cannot
be corrected, contact your dealer. If your radio displays
an error number, write it down and provide it to your
dealer when reporting the problem.
Radio with Cassette and CD
Playing the Radio
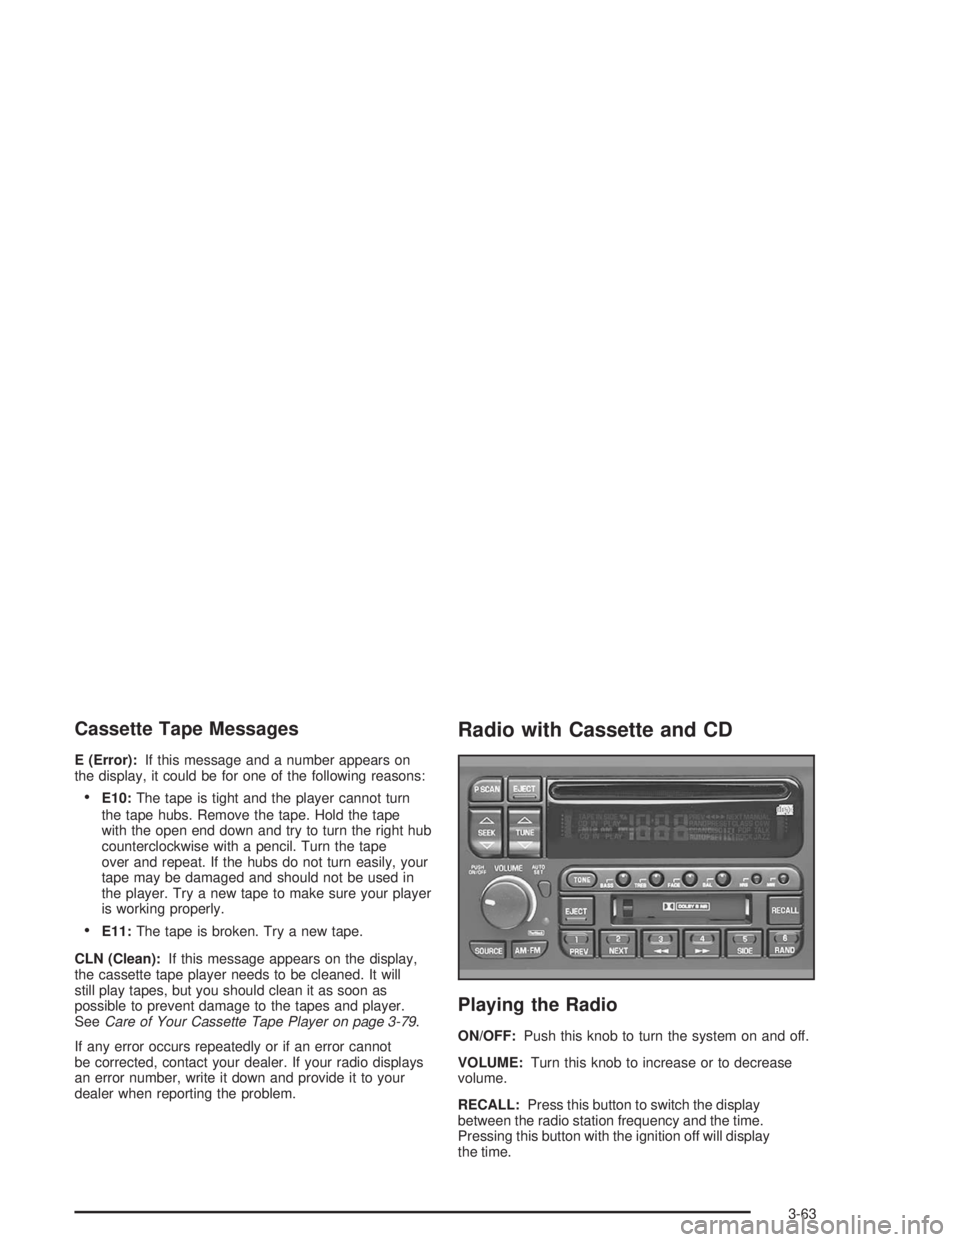
ON/OFF:Push this knob to turn the system on and off.
VOLUME:Turn this knob to increase or to decrease
volume.
RECALL:Press this button to switch the display
between the radio station frequency and the time.
Pressing this button with the ignition off will display
the time.
3-63
Page 186 of 410
Cassette Tape Messages
E (Error):If this message and a number appears on
the display, it could be for one of the following reasons:
E10:The tape is tight and the player cannot turn
the tape hubs. Remove the tape. Hold the tape
with the open end down and try to turn the right hub
counterclockwise with a pencil. Turn the tape
over and repeat. If the hubs do not turn easily, your
tape may be damaged and should not be used in
the player. Try a new tape to make sure your player
is working properly.
E11:The tape is broken. Try a new tape.
CLN (Clean):If this message appears on the display,
the cassette tape player needs to be cleaned. It will
still play tapes, but you should clean it as soon as
possible to prevent damage to the tapes and player.
SeeCare of Your Cassette Tape Player on page 3-79.
If any error occurs repeatedly or if an error cannot
be corrected, contact your dealer. If your radio displays
an error number, write it down and provide it to your
dealer when reporting the problem.
Playing a CD
With the ignition on, insert a CD partway into the slot,
label side up. The player will pull it in. The CD
should begin playing. If you want to insert a CD while
the ignition or the radio is off, �rst press EJECT or
RECALL.
If you turn off the ignition or radio with a CD in the
player, it will stay in the player. When you turn on the
ignition or system, the CD will start playing where
it stopped, if it was the last selected audio source.
Also, as a protection feature, if a CD is ejected and left
in the player, it will be pulled back in the player with
the ignition on or off.
As each new track starts to play, the track number will
appear on the display.
The CD player can play the smaller 8 cm single CDs
with an adapter ring. Full-size CDs and the smaller CDs
are loaded in the same manner.
3-68
Page 211 of 410
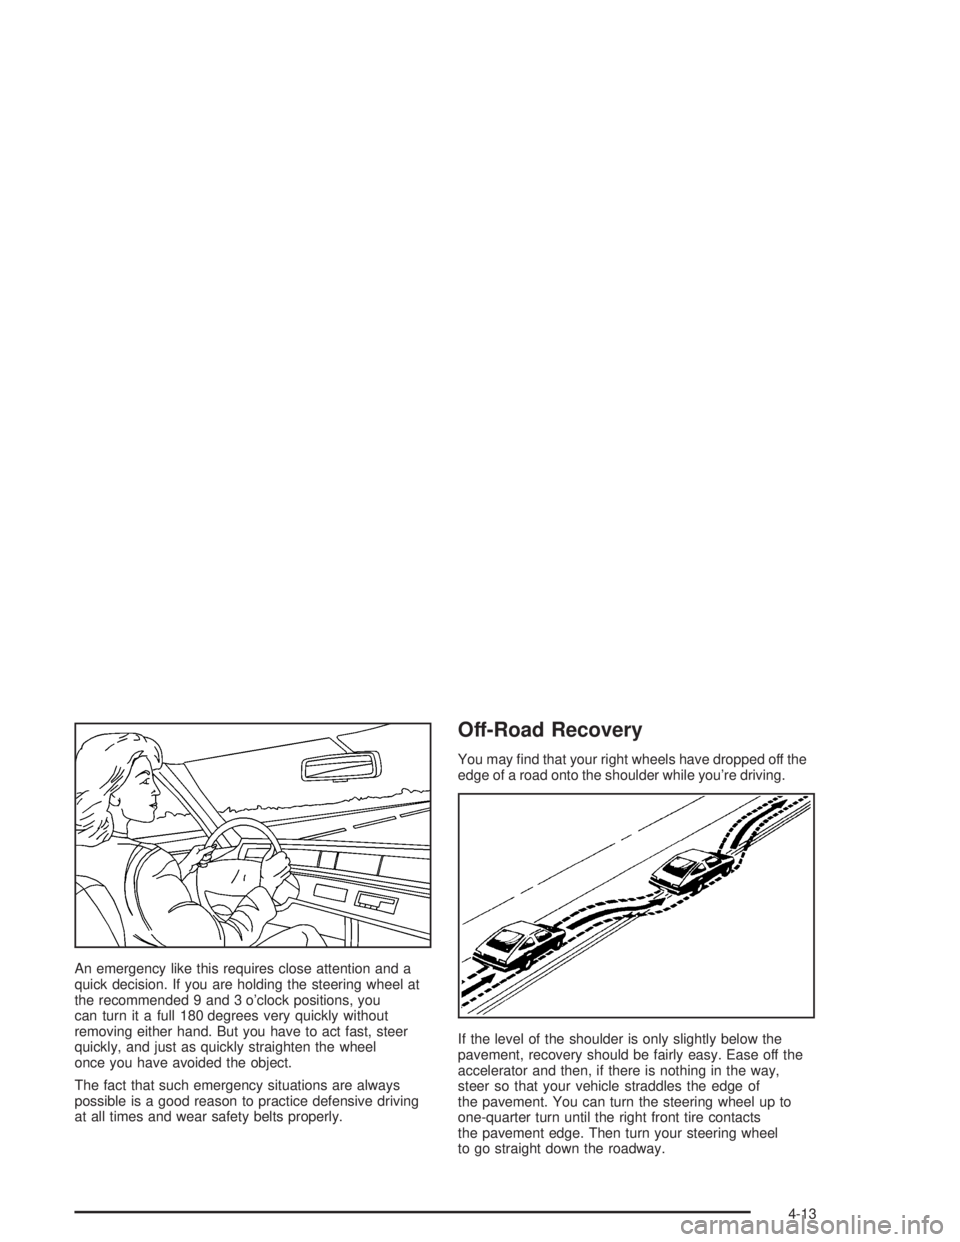
An emergency like this requires close attention and a
quick decision. If you are holding the steering wheel at
the recommended 9 and 3 o’clock positions, you
can turn it a full 180 degrees very quickly without
removing either hand. But you have to act fast, steer
quickly, and just as quickly straighten the wheel
once you have avoided the object.
The fact that such emergency situations are always
possible is a good reason to practice defensive driving
at all times and wear safety belts properly.
Off-Road Recovery
You may �nd that your right wheels have dropped off the
edge of a road onto the shoulder while you’re driving.
If the level of the shoulder is only slightly below the
pavement, recovery should be fairly easy. Ease off the
accelerator and then, if there is nothing in the way,
steer so that your vehicle straddles the edge of
the pavement. You can turn the steering wheel up to
one-quarter turn until the right front tire contacts
the pavement edge. Then turn your steering wheel
to go straight down the roadway.
4-13
Page 252 of 410
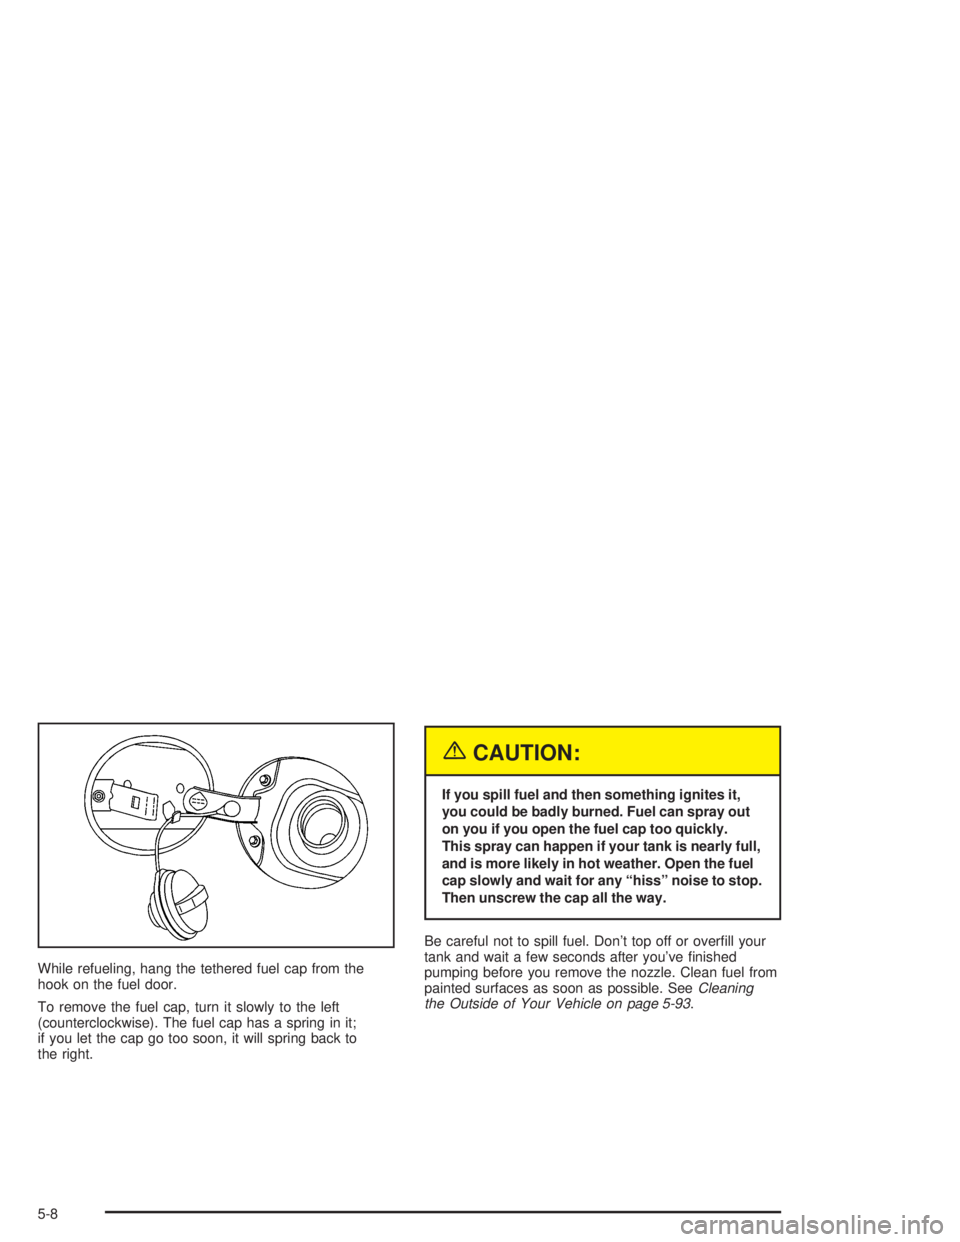
While refueling, hang the tethered fuel cap from the
hook on the fuel door.
To remove the fuel cap, turn it slowly to the left
(counterclockwise). The fuel cap has a spring in it;
if you let the cap go too soon, it will spring back to
the right.
{CAUTION:
If you spill fuel and then something ignites it,
you could be badly burned. Fuel can spray out
on you if you open the fuel cap too quickly.
This spray can happen if your tank is nearly full,
and is more likely in hot weather. Open the fuel
cap slowly and wait for any “hiss” noise to stop.
Then unscrew the cap all the way.
Be careful not to spill fuel. Don’t top off or over�ll your
tank and wait a few seconds after you’ve �nished
pumping before you remove the nozzle. Clean fuel from
painted surfaces as soon as possible. SeeCleaning
the Outside of Your Vehicle on page 5-93.
5-8
Page 253 of 410
When you put the fuel cap back on, turn it to the right
(clockwise) until you hear a clicking sound. Make sure
you fully install the cap. The diagnostic system can
determine if the fuel cap has been left off or improperly
installed. This would allow fuel to evaporate into the
atmosphere. SeeMalfunction Indicator Lamp on
page 3-41.
{CAUTION:
If a �re starts while you are refueling, do not
remove the nozzle. Shut off the �ow of fuel by
shutting off the pump or by notifying the
station attendant. Leave the area immediately.
Notice:If you need a new fuel cap, be sure to get
the right type. Your dealer can get one for you.
If you get the wrong type, it may not �t properly.
This may cause your malfunction indicator lamp to
light and may damage your fuel tank and emissions
system. See “Malfunction Indicator Lamp” in the
Index.
Filling a Portable Fuel Container
{CAUTION:
Never �ll a portable fuel container while it is in
your vehicle. Static electricity discharge from
the container can ignite the gasoline vapor.
You can be badly burned and your vehicle
damaged if this occurs. To help avoid injury to
you and others:
Dispense gasoline only into approved
containers.
Do not �ll a container while it is inside a
vehicle, in a vehicle’s trunk, pickup bed or
on any surface other than the ground.
Bring the �ll nozzle in contact with the
inside of the �ll opening before operating
the nozzle. Contact should be maintained
until the �lling is complete.
Do not smoke while pumping gasoline.
5-9