2004 BMW Z4 ROADSTER 2.5I warning lights
[x] Cancel search: warning lightsPage 14 of 120
Cockpit
12
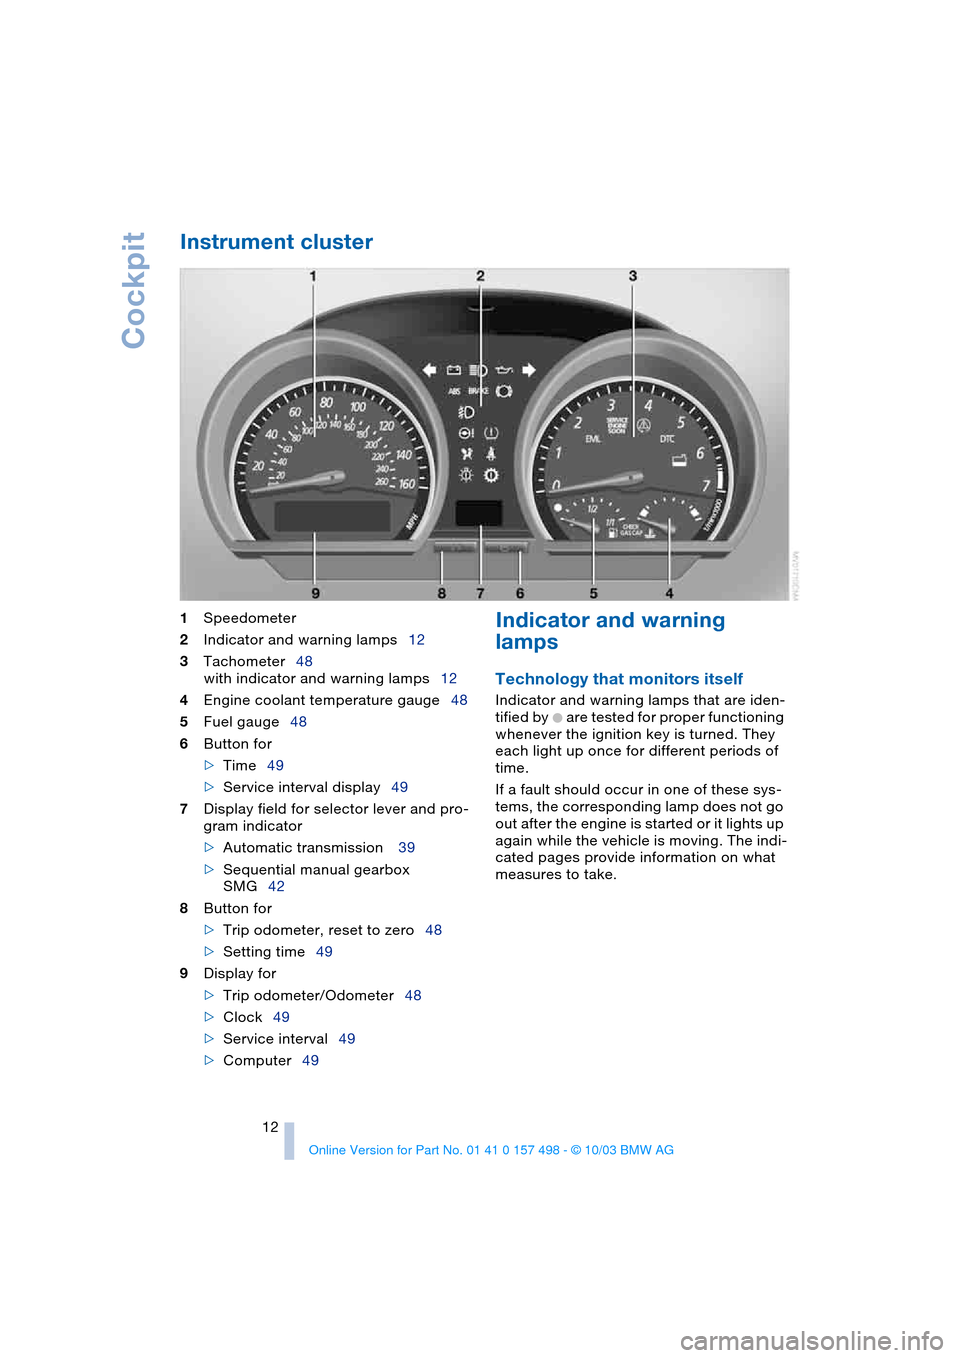
Instrument cluster
1
Speedometer
2
Indicator and warning lamps12
3
Tachometer48
with indicator and warning lamps12
4
Engine coolant temperature gauge48
5
Fuel gauge48
6
Button for
>
Time49
>Service interval display49
7Display field for selector lever and pro-
gram indicator
>Automatic transmission 39
>Sequential manual gearbox
SMG42
8Button for
>Trip odometer, reset to zero48
>Setting time49
9Display for
>Trip odometer/Odometer48
>Clock49
>Service interval49
>Computer49
Indicator and warning
lamps
Technology that monitors itself
Indicator and warning lamps that are iden-
tified by
+ are tested for proper functioning
whenever the ignition key is turned. They
each light up once for different periods of
time.
If a fault should occur in one of these sys-
tems, the corresponding lamp does not go
out after the engine is started or it lights up
again while the vehicle is moving. The indi-
cated pages provide information on what
measures to take.
Page 28 of 120

Opening and closing
26
Arming and disarming the alarm
system
When the vehicle is locked or unlocked
either via the driver's door lock or with the
remote control, the alarm system is simul-
taneously armed or disarmed.
The hazard warning flashers blink once
when the alarm system has been properly
armed.
You can have different acknowledg-
ment signals set to confirm arming
and disarming.<
You can still open the luggage compart-
ment lid when the system is armed by
pressing the remote control button, refer to
page 17. When it is closed, the lid is once
again secured.
Manual operation of the luggage
compartment lid triggers the alarm.
Refer to page 19.<
To cancel an alarm:
Press the button on the remote control,
refer to page 16, or turn the ignition key to
position 1. Refer to page 36.
Indicator lamp displays
>The indicator lamp beneath the interior
mirror flashes continuously:
The system is armed
>The indicator lamp flashes when it is
being armed:
A door, the hood or luggage compart-
ment lid is not completely closed. Even
if you do not close the area causing the alert, the remaining areas are secured
and the indicator lamp flashes continu-
ously after 10 seconds.
However, the interior motion sensor is
not activated
>If the indicator lamp goes out as soon
as the system is disarmed:
No manipulation or attempted intru-
sions have been detected in the period
since the system was armed
>If the indicator lamp flashes for
10 seconds when the system is being
disarmed:
An attempted entry has been detected
in the period since the system was
armed.
After an alarm has been triggered, the indi-
cator lamp will flash continuously.
Interior motion sensor*
The system monitors the footwells and the
seating areas of the driver and passenger.
Deactivate the interior motion sensor,
refer to Avoiding unintentional alarms,
if children or animals are to remain in the
vehicle.<
Avoiding unintentional alarms
The tilt alarm sensor and interior motion
sensor can be deactivated at the same
time. You can do this to prevent a false
alarm from being triggered, for instance in
garages with elevator ramps or when the
vehicle is transported by train.
Lock the vehicle twice = arm the system:
Press the button on the remote control
twice in succession,
or
lock the vehicle twice with the key. Refer to
page 18.
The indicator lamp lights up briefly and
then flashes continuously. The tilt alarm
sensor and the interior motion sensor are
deactivated as long as the system is
armed.
Page 32 of 120
Adjustments
30
Safety function
1.Close the driver's door and turn the
ignition key to position 0 or 2
2.Press and hold the desired memory
button 1, 2 or 3 until the adjustment
process is completed.
If you press the
MEMORY button acciden-
tally:
Press the button again; the indicator lamp
goes out.
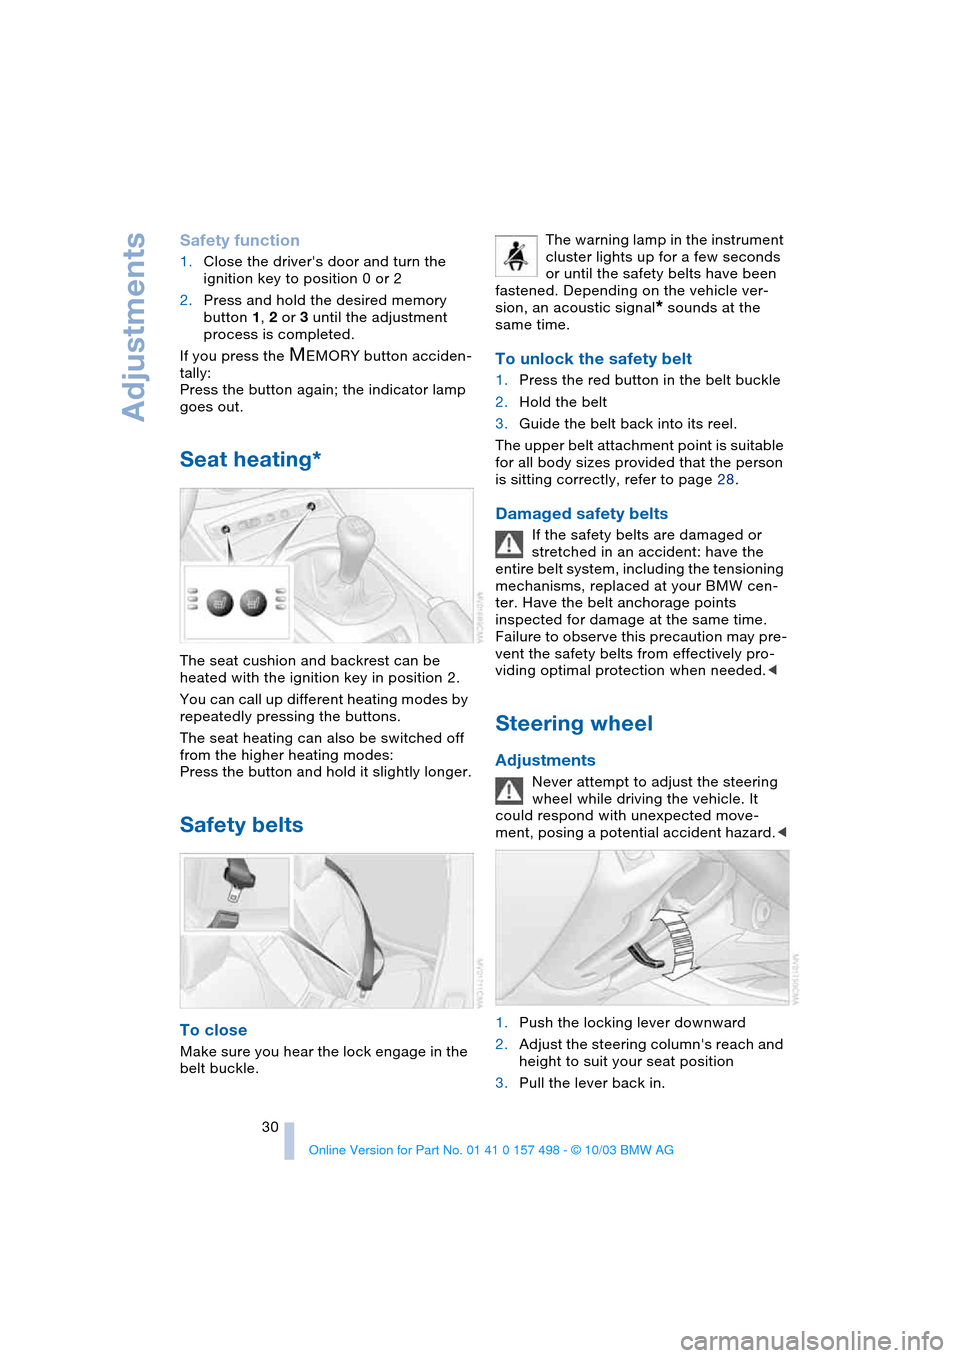
Seat heating*
The seat cushion and backrest can be
heated with the ignition key in position 2.
You can call up different heating modes by
repeatedly pressing the buttons.
The seat heating can also be switched off
from the higher heating modes:
Press the button and hold it slightly longer.
Safety belts
To close
Make sure you hear the lock engage in the
belt buckle.The warning lamp in the instrument
cluster lights up for a few seconds
or until the safety belts have been
fastened. Depending on the vehicle ver-
sion, an acoustic signal
* sounds at the
same time.
To unlock the safety belt
1.Press the red button in the belt buckle
2.Hold the belt
3.Guide the belt back into its reel.
The upper belt attachment point is suitable
for all body sizes provided that the person
is sitting correctly, refer to page 28.
Damaged safety belts
If the safety belts are damaged or
stretched in an accident: have the
entire belt system, including the tensioning
mechanisms, replaced at your BMW cen-
ter. Have the belt anchorage points
inspected for damage at the same time.
Failure to observe this precaution may pre-
vent the safety belts from effectively pro-
viding optimal protection when needed.<
Steering wheel
Adjustments
Never attempt to adjust the steering
wheel while driving the vehicle. It
could respond with unexpected move-
ment, posing a potential accident hazard.<
1.Push the locking lever downward
2.Adjust the steering column's reach and
height to suit your seat position
3.Pull the lever back in.
Page 44 of 120
Driving
42 You accelerate from higher gears, e.g. dur-
ing passing, by downshifting manually.
In the following situations, the SMG in the
sequential mode assists you:
>The transmission will only execute
upshifts and downshifts that will result
in an appropriate combination of vehi-
cle speed and engine rpm. For
instance, downshifts that would result
in excessive engine speed cannot be
executed
>During a stop the gearbox is automati-
cally downshifted into first gear
>Shortly before a gear-dependent mini-
mum speed is reached, the gearbox
shifts down automatically without you
taking any action.
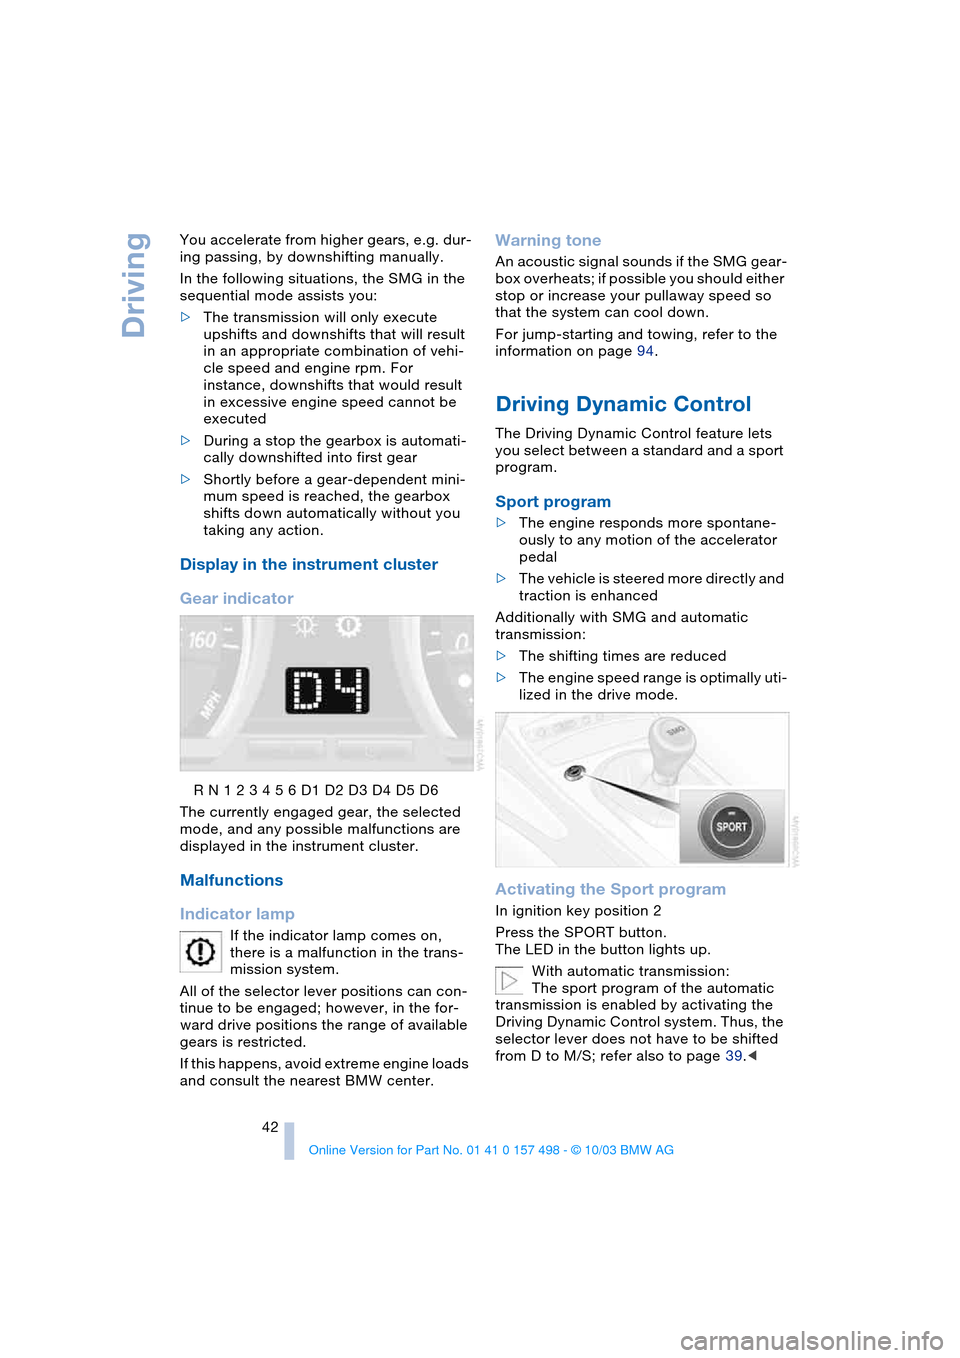
Display in the instrument cluster
Gear indicator
R N 1 2 3 4 5 6 D1 D2 D3 D4 D5 D6
The currently engaged gear, the selected
mode, and any possible malfunctions are
displayed in the instrument cluster.
Malfunctions
Indicator lamp
If the indicator lamp comes on,
there is a malfunction in the trans-
mission system.
All of the selector lever positions can con-
tinue to be engaged; however, in the for-
ward drive positions the range of available
gears is restricted.
If this happens, avoid extreme engine loads
and consult the nearest BMW center.
Warning tone
An acoustic signal sounds if the SMG gear-
box overheats; if possible you should either
stop or increase your pullaway speed so
that the system can cool down.
For jump-starting and towing, refer to the
information on page 94.
Driving Dynamic Control
The Driving Dynamic Control feature lets
you select between a standard and a sport
program.
Sport program
>The engine responds more spontane-
ously to any motion of the accelerator
pedal
>The vehicle is steered more directly and
traction is enhanced
Additionally with SMG and automatic
transmission:
>The shifting times are reduced
>The engine speed range is optimally uti-
lized in the drive mode.
Activating the Sport program
In ignition key position 2
Press the SPORT button.
The LED in the button lights up.
With automatic transmission:
The sport program of the automatic
transmission is enabled by activating the
Driving Dynamic Control system. Thus, the
selector lever does not have to be shifted
from D to M/S; refer also to page 39.<
Page 48 of 120

Lamps
46
Lamps
Parking lamps/Low beams
Parking lamps
The front, rear and side vehicle
lighting is switched on. You can use
the parking lamps to signal the
position of the vehicle when it is parked.
For information on lighting on one side of
the vehicle for parking, which is available
as an additional feature, refer to page 47.
Low beams
When you switch off the ignition
with the low beam headlamps on,
only the parking lamps will remain
on.
Defective bulbs
The indicator lamp lights up:
At least one bulb of the vehicle's
exterior lighting has failed.
For replacing bulbs refer to page 88.
Follow me home lamps
When you activate the headlamp flasher
after parking the vehicle and switching off
the lights, the low beams will come on for a
brief period.
You can also have this function acti-
vated/deactivated if you wish.<
LIGHTS ON warning
Whenever you open the driver's door after
having turned the ignition key to position 0,
you will hear an acoustic signal for a few seconds to remind you that the lamps have
not been switched off
.
Daytime driving lamps*
If you desire, the light switch can be left in
the second position:
When the ignition is switched off, the exter-
nal lighting is also switched off.
You can have the activation settings
for the daytime driving lamps pro-
grammed on your vehicle.<
Automatic headlamp control*
When the switch is set to this posi-
tion, the system automatically acti-
vates and cancels the low beams in
response to changes in ambient light, for
example in tunnels, at dusk, and when it is
raining or snowing.
The vehicle's external lights remain
on constantly when you switch on the
front fog lamps after the headlamps have
come on automatically.<
Automatic headlamp control cannot
serve as a substitute for the driver's
judgement in determining when the vehicle
lights should be switched on. For example,
the sensors are not able to detect fog. To
avoid safety risks, you should respond to
these kinds of low-visibility situations by
switching the headlamps on manually.<
You can have the sensitivity of your
vehicle's automatic headlamp control
adjusted.<
Page 54 of 120

Technology for safety and driving convenience
52
Technology for safety and driving
convenience
Dynamic Stability Control
DSC
The concept
This system optimizes driving stability and
traction, especially when just starting off,
when accelerating or when cornering. It
also maintains vehicle stability, even in crit-
ical driving situations.
DSC recognizes unstable vehicle condi-
tions, such as understeering or oversteer-
ing, and, within physically feasible limits,
helps keeping the vehicle on a steady
course by reducing engine speed and by
brake applications at individual wheels.
The DSC is operational every time you start
the engine. It includes the following func-
tions:
>Automatic Stability Control plus Trac-
tion ASC+T
>Dynamic Traction Control DTC
>Dynamic Brake Control DBC
The laws of physics cannot be
repealed even with DSC. It will always
be the driver's responsibility to drive in a
manner that matches road conditions. We
therefore urge you to avoid using the addi-
tional safety margin of the system as an
excuse for taking risks.
Do not make any modifications to the DSC
system. Allow only authorized technicians
to perform service procedures on the
DSC.<
Indicator lamps
The indicator lamps in the instrument clus-
ter go out shortly after you switch on the
ignition.
Dynamic Stability Control DSC indi-
cator lamp flashes:
The system is active and governs
drive torque and braking forces.The indicator lamp stays lit:
Dynamic Stability Control DSC and
Dynamic Traction Control DTC have been
switched off via the button.
Dynamic Traction Control DTC indi-
cator lamp lights up permanently:
DTC has been deactivated via the
DSC button.
Dynamic Stability Control DSC indi-
cator lamp flashes:
Dynamic Traction Control DTC indi-
cator lamp lights up permanently:
DTC is actively regulating drive
torque and braking forces.
Interventions to increase stability are
being performed to a limited degree
only.<
The Dynamic Stability Control DSC
indicator lamp and yellow brake
warning lamp for Dynamic Brake
Control DBC light up continuously:
Dynamic Stability Control DSC,
Dynamic Traction Control DTC and
Dynamic Brake Control DBC are malfunc-
tioning.
Have the system repaired at your BMW
center.
Dynamic Stability Control DSC indi-
cator lamp and yellow brake warn-
ing lamp for Dynamic Brake Control
DBC for Canadian models:
The vehicle remains completely oper-
ational without the DSC, DTC and
DBC functions.<
In the event of a malfunction, please see
your BMW center.
Page 56 of 120
Technology for safety and driving convenience
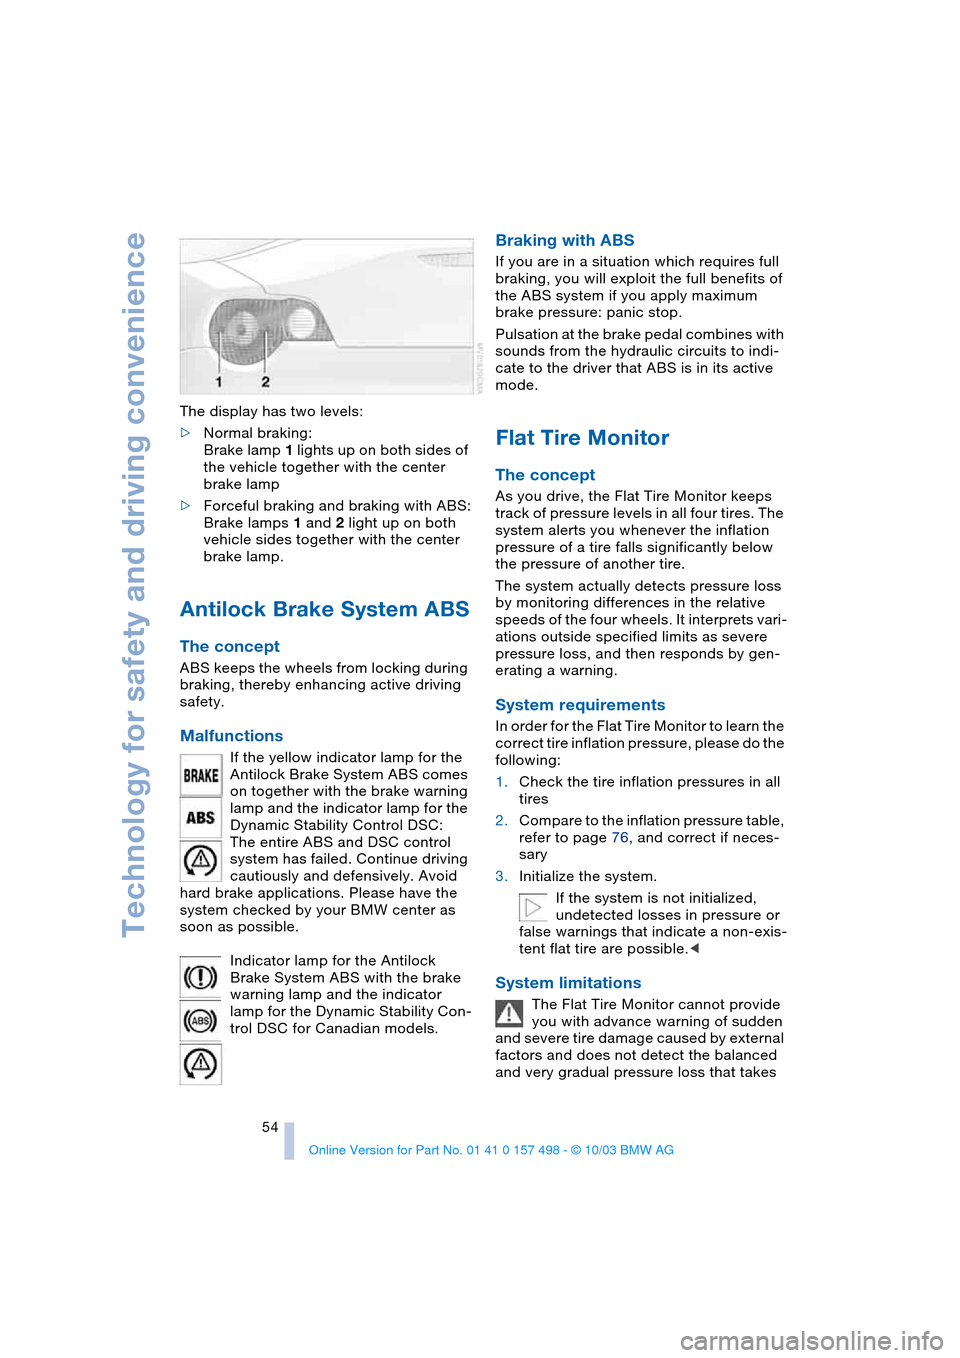
54 The display has two levels:
>Normal braking:
Brake lamp 1 lights up on both sides of
the vehicle together with the center
brake lamp
>Forceful braking and braking with ABS:
Brake lamps 1 and 2 light up on both
vehicle sides together with the center
brake lamp.
Antilock Brake System ABS
The concept
ABS keeps the wheels from locking during
braking, thereby enhancing active driving
safety.
Malfunctions
If the yellow indicator lamp for the
Antilock Brake System ABS comes
on together with the brake warning
lamp and the indicator lamp for the
Dynamic Stability Control DSC:
The entire ABS and DSC control
system has failed. Continue driving
cautiously and defensively. Avoid
hard brake applications. Please have the
system checked by your BMW center as
soon as possible.
Indicator lamp for the Antilock
Brake System ABS with the brake
warning lamp and the indicator
lamp for the Dynamic Stability Con-
trol DSC for Canadian models.
Braking with ABS
If you are in a situation which requires full
braking, you will exploit the full benefits of
the ABS system if you apply maximum
brake pressure: panic stop.
Pulsation at the brake pedal combines with
sounds from the hydraulic circuits to indi-
cate to the driver that ABS is in its active
mode.
Flat Tire Monitor
The concept
As you drive, the Flat Tire Monitor keeps
track of pressure levels in all four tires. The
system alerts you whenever the inflation
pressure of a tire falls significantly below
the pressure of another tire.
The system actually detects pressure loss
by monitoring differences in the relative
speeds of the four wheels. It interprets vari-
ations outside specified limits as severe
pressure loss, and then responds by gen-
erating a warning.
System requirements
In order for the Flat Tire Monitor to learn the
correct tire inflation pressure, please do the
following:
1.Check the tire inflation pressures in all
tires
2.Compare to the inflation pressure table,
refer to page 76, and correct if neces-
sary
3.Initialize the system.
If the system is not initialized,
undetected losses in pressure or
false warnings that indicate a non-exis-
tent flat tire are possible.<
System limitations
The Flat Tire Monitor cannot provide
you with advance warning of sudden
and severe tire damage caused by external
factors and does not detect the balanced
and very gradual pressure loss that takes
Page 57 of 120
Reference
At a glance
Controls
Driving tips
Mobility
55
place in all four tires over an extended
period of time.<
On the other hand, the following situations
can lead to false warning, a delayed detec-
tion of pressure loss and even to the sys-
tem not functioning:
>Driving on snow-covered or slippery
roads
>Performance-oriented driving: slip at
the drive wheels, high levels of lateral
acceleration
>When driving with snow chains, false
warnings and undetected pressure
losses may occur
>If the Flat Tire Monitor was not initial-
ized after the last time the tire inflation
pressures were corrected, undetected
losses in pressure or false warnings
that indicate a non-existent flat tire are
possible.
Initializing the system
Each time you correct the pressure in
a tire, or change a wheel or tire, reini-
tialize the system immediately afterwards.
This requires driving.<
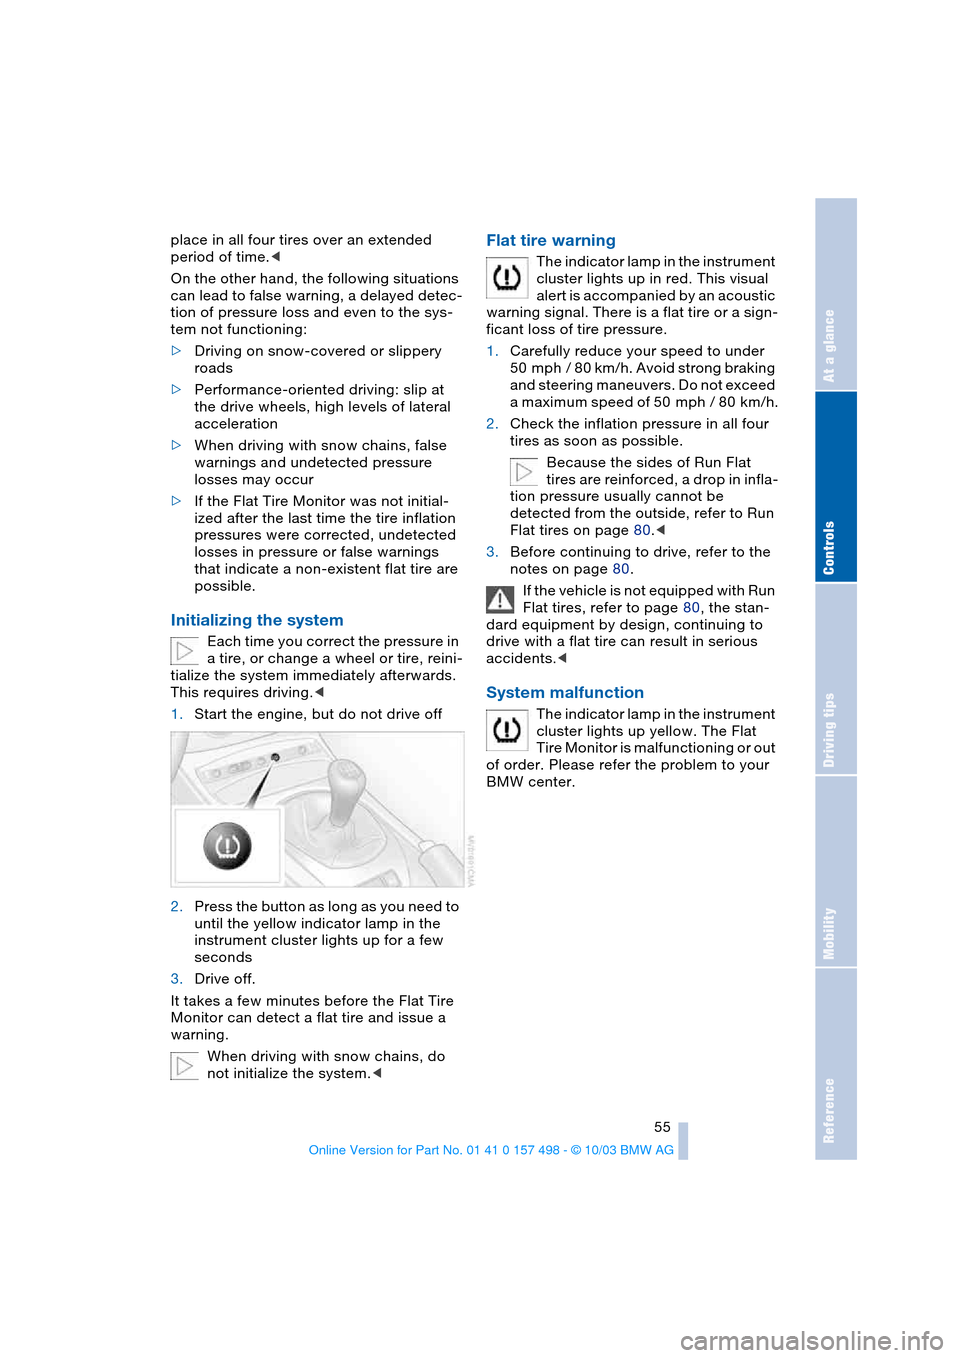
1.Start the engine, but do not drive off
2.Press the button as long as you need to
until the yellow indicator lamp in the
instrument cluster lights up for a few
seconds
3.Drive off.
It takes a few minutes before the Flat Tire
Monitor can detect a flat tire and issue a
warning.
When driving with snow chains, do
not initialize the system.<
Flat tire warning
The indicator lamp in the instrument
cluster lights up in red. This visual
alert is accompanied by an acoustic
warning signal. There is a flat tire or a sign-
ficant loss of tire pressure.
1.Carefully reduce your speed to under
50 mph / 80 km/h. Avoid strong braking
and steering maneuvers. Do not exceed
a maximum speed of 50 mph / 80 km/h.
2.Check the inflation pressure in all four
tires as soon as possible.
Because the sides of Run Flat
tires are reinforced, a drop in infla-
tion pressure usually cannot be
detected from the outside, refer to Run
Flat tires on page 80.<
3.Before continuing to drive, refer to the
notes on page 80.
If the vehicle is not equipped with Run
Flat tires, refer to page 80, the stan-
dard equipment by design, continuing to
drive with a flat tire can result in serious
accidents.<
System malfunction
The indicator lamp in the instrument
cluster lights up yellow. The Flat
Tire Monitor is malfunctioning or out
of order. Please refer the problem to your
BMW center.