2004 BMW Z4 ROADSTER 2.5I turn signal
[x] Cancel search: turn signalPage 39 of 120
Reference
At a glance
Controls
Driving tips
Mobility
37
the ignition key immediately when the
engine starts.<
Extended starting attempts, charac-
terized by excessively frequent or
long periods with the starter engaged, can
damage the catalytic converter.<
If the engine fails to start on the first
attempt, for instance if it is very hot or cold:
>Press the accelerator pedal halfway
down.
Cold starts at very low temperatures, start-
ing at approx. 57/–156:
>Press the accelerator pedal halfway
down.
>On the first start attempt, engage the
starter for a longer period, approx.
10 seconds.
Manual transmission
1.Engage the parking brake
2.Gearshift lever in idling position
3.Depress clutch pedal
4.Start the engine.
Automatic transmission
1.Depress footbrake
2.Place selector lever in position P or N
3.Start the engine.
Before leaving the vehicle with the
engine running, place the selector
lever in position P and pull the parking
brake.
Do not leave the vehicle unattended with
the engine running. An unattended vehicle
with a running engine poses a safety haz-
ard.<
Sequential manual gearbox SMG
1.Depress footbrake
2.Move selector lever to neutral
position N
3.Start the engine.
If the engine does not start, re-
engage the gear last selected, refer to
the display in the instrument cluster, and move the selector lever to neutral position
N again.<
Before leaving the vehicle with the
engine running, place the selector
lever in position N and pull the parking
brake.
Do not leave the vehicle unattended with
the engine running. An unattended vehicle
with a running engine poses a safety haz-
ard.<
Switching off the engine
Do not remove the ignition key while
the vehicle is still moving. If you did
so, the steering lock would engage when
the steering wheel is turned.
When you leave the vehicle, always remove
the ignition key and engage the steering
lock.
Always engage the parking brake when
parking on downhill roads.<
You can have an acoustic signal set
as a reminder that the ignition key is
still in the ignition switch after the driver's
door has been opened.<
Manual transmission
Turn the ignition key to position 1 or 0.
Automatic transmission
Place the selector lever in position P and
turn the ignition key to position 1 or 0.
Sequential manual gearbox SMG
If you turn the ignition key to position 1 or 0
with the selector lever in position R, or in
sequential mode, a gear automatically
remains engaged.
If you turn the ignition key to position 1 or 0
with the selector lever in neutral position N,
a warning tone and the flashing gear indi-
cator in the display remind you that the
vehicle is not secured against rolling.
The warning stops after approx. 9 seconds.
Always engage the parking brake
when parking on downhill roads.
Engaging a gear may not sufficiently secure
the vehicle against rolling.<
Page 40 of 120
Driving
38
Parking brake
The parking brake is designed primarily to
prevent the vehicle from rolling when
parked. It operates against the rear wheels.
Indicator lamp
The indicator lamp lights up when
the parking brake is engaged; if you
start driving, an acoustic signal is
heard as well.
The indicator lamp for Canadian
models lights up when the parking
brake is engaged; if you start driv-
ing, an acoustic signal is heard as well.
To engage
The detent engages automatically and the
indicator lamp in the instrument cluster
comes on when the ignition key is in posi-
tion 2.
To release
Pull up slightly on the lever, press the but-
ton and lower the lever.
If, in exceptional circumstances, it
should be necessary to engage the
parking brake while the vehicle is in motion,
do not pull it with excessive pressure. Keep
the release button on the parking brake
lever pressed down while pulling up the
lever.
Excessive pressure can lead to overbraking
and loss of traction, fishtailing, at the rear
axle.
The brake lamps do not come on when the
parking brake is engaged.<
Vehicles with manual transmission:
Always engage the parking brake when parking on slopes and inclined sur-
faces, since shifting into 1st gear or reverse
may not provide adequate resistance to
rolling. Vehicles with automatic transmis-
sion: place the selector lever in
position P.<
To avoid corrosion and one-sided
braking, apply the parking brake
lightly from time to time when coasting to a
standstill – at a traffic signal, for example –
provided that it is safe to do so.<
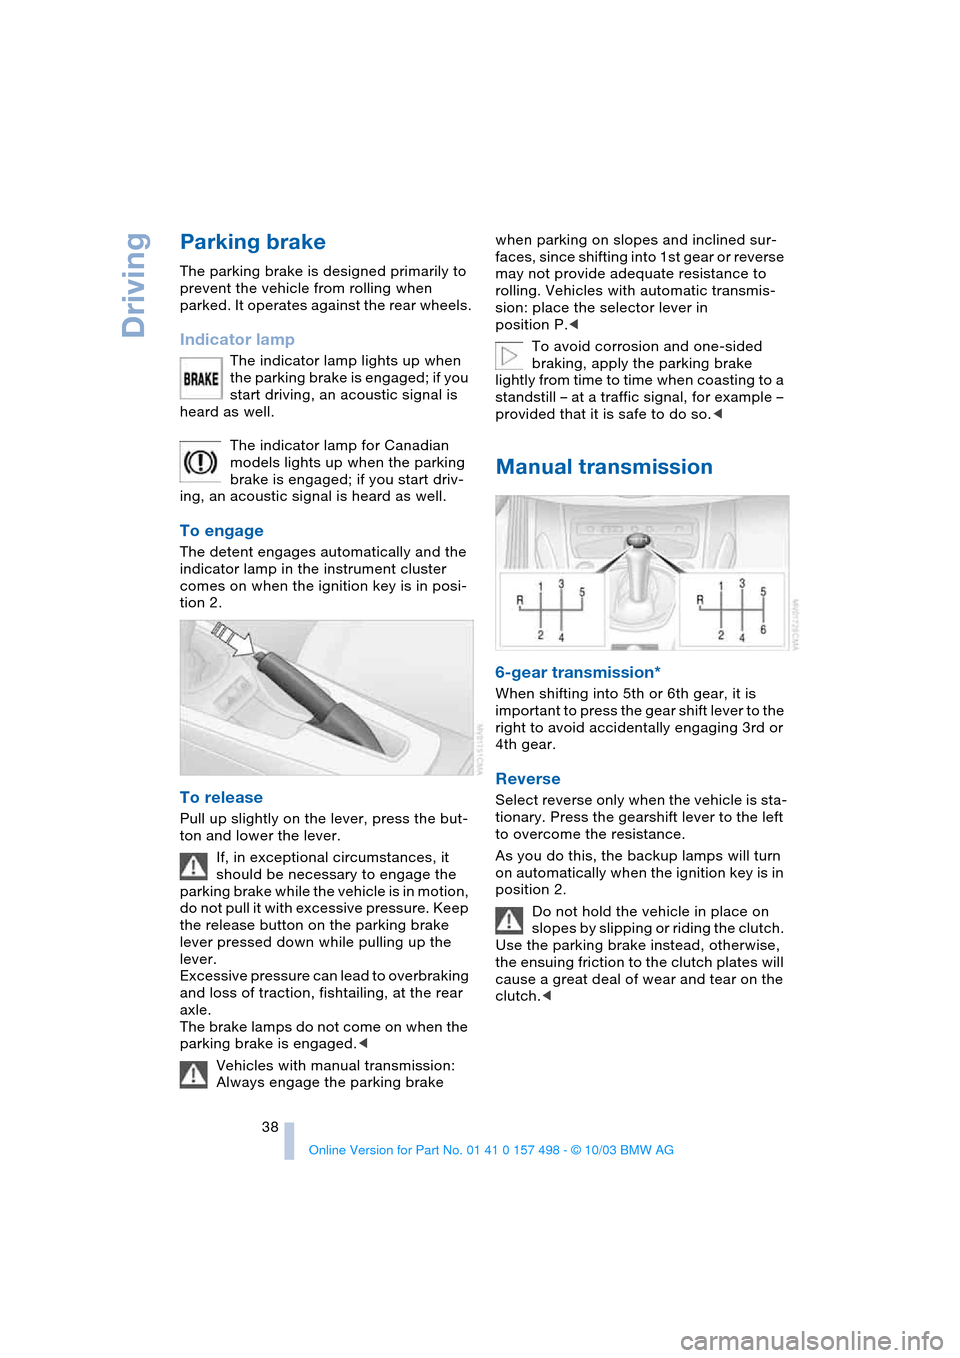
Manual transmission
6-gear transmission*
When shifting into 5th or 6th gear, it is
important to press the gear shift lever to the
right to avoid accidentally engaging 3rd or
4th gear.
Reverse
Select reverse only when the vehicle is sta-
tionary. Press the gearshift lever to the left
to overcome the resistance.
As you do this, the backup lamps will turn
on automatically when the ignition key is in
position 2.
Do not hold the vehicle in place on
slopes by slipping or riding the clutch.
Use the parking brake instead, otherwise,
the ensuing friction to the clutch plates will
cause a great deal of wear and tear on the
clutch.<
Page 45 of 120

Reference
At a glance
Controls
Driving tips
Mobility
43
Deactivating the Sport program
Press the SPORT button again.
The LED in the button goes out.
Acceleration assistant with SMG
The acceleration assistant permits opti-
mum racing-style acceleration on skid-
resistant roads.
Do not use the acceleration assistant
too often, as this could cause the
vehicle's parts to wear prematurely.<
1.Activate the Sport program
2.Press and hold the DSC button for more
than three seconds, refer to page 53
3.Depress the accelerator all the way
down rapidly: kickdown. The optimum
rpm for driving off will be adjusted.
To maintain vehicle stability, drive
with the DSC switched on whenever
possible.<
Electric Power Steering
EPS
The concept
The electric power steering is a direct,
sporting steering system that is speed-sen-
sitive.
Power support is reduced with an increase
in driving speed.
Indicator lamp
The indicator lamp stays lit:
The system has malfunctioned or is
faulty.
Please have the system inspected by the
nearest BMW center.
Steering remains operational.
Turn signal indicators/
Headlamp flasher
1High beams: blue indicator lamp
2Headlamp flasher: blue indicator lamp
3Turn signal indicator: green indicator
lamps accompanied by a periodic click-
ing sound from the relay
If the flashing of the indicator lamp
and the clicking from the relay are
both faster than normal, one of the turn
signal indicators has failed.<
To signal briefly
Press the lever up to the detent but not
beyond. It then returns to the center posi-
tion when released.
Washer/wiper system and
rain sensor*
0Wipers retracted
1Intermittent operation or rain sensor
2Normal wiper speed
3Fast wiper speed
4Brief wipe
Page 48 of 120

Lamps
46
Lamps
Parking lamps/Low beams
Parking lamps
The front, rear and side vehicle
lighting is switched on. You can use
the parking lamps to signal the
position of the vehicle when it is parked.
For information on lighting on one side of
the vehicle for parking, which is available
as an additional feature, refer to page 47.
Low beams
When you switch off the ignition
with the low beam headlamps on,
only the parking lamps will remain
on.
Defective bulbs
The indicator lamp lights up:
At least one bulb of the vehicle's
exterior lighting has failed.
For replacing bulbs refer to page 88.
Follow me home lamps
When you activate the headlamp flasher
after parking the vehicle and switching off
the lights, the low beams will come on for a
brief period.
You can also have this function acti-
vated/deactivated if you wish.<
LIGHTS ON warning
Whenever you open the driver's door after
having turned the ignition key to position 0,
you will hear an acoustic signal for a few seconds to remind you that the lamps have
not been switched off
.
Daytime driving lamps*
If you desire, the light switch can be left in
the second position:
When the ignition is switched off, the exter-
nal lighting is also switched off.
You can have the activation settings
for the daytime driving lamps pro-
grammed on your vehicle.<
Automatic headlamp control*
When the switch is set to this posi-
tion, the system automatically acti-
vates and cancels the low beams in
response to changes in ambient light, for
example in tunnels, at dusk, and when it is
raining or snowing.
The vehicle's external lights remain
on constantly when you switch on the
front fog lamps after the headlamps have
come on automatically.<
Automatic headlamp control cannot
serve as a substitute for the driver's
judgement in determining when the vehicle
lights should be switched on. For example,
the sensors are not able to detect fog. To
avoid safety risks, you should respond to
these kinds of low-visibility situations by
switching the headlamps on manually.<
You can have the sensitivity of your
vehicle's automatic headlamp control
adjusted.<
Page 49 of 120
Reference
At a glance
Controls
Driving tips
Mobility
47
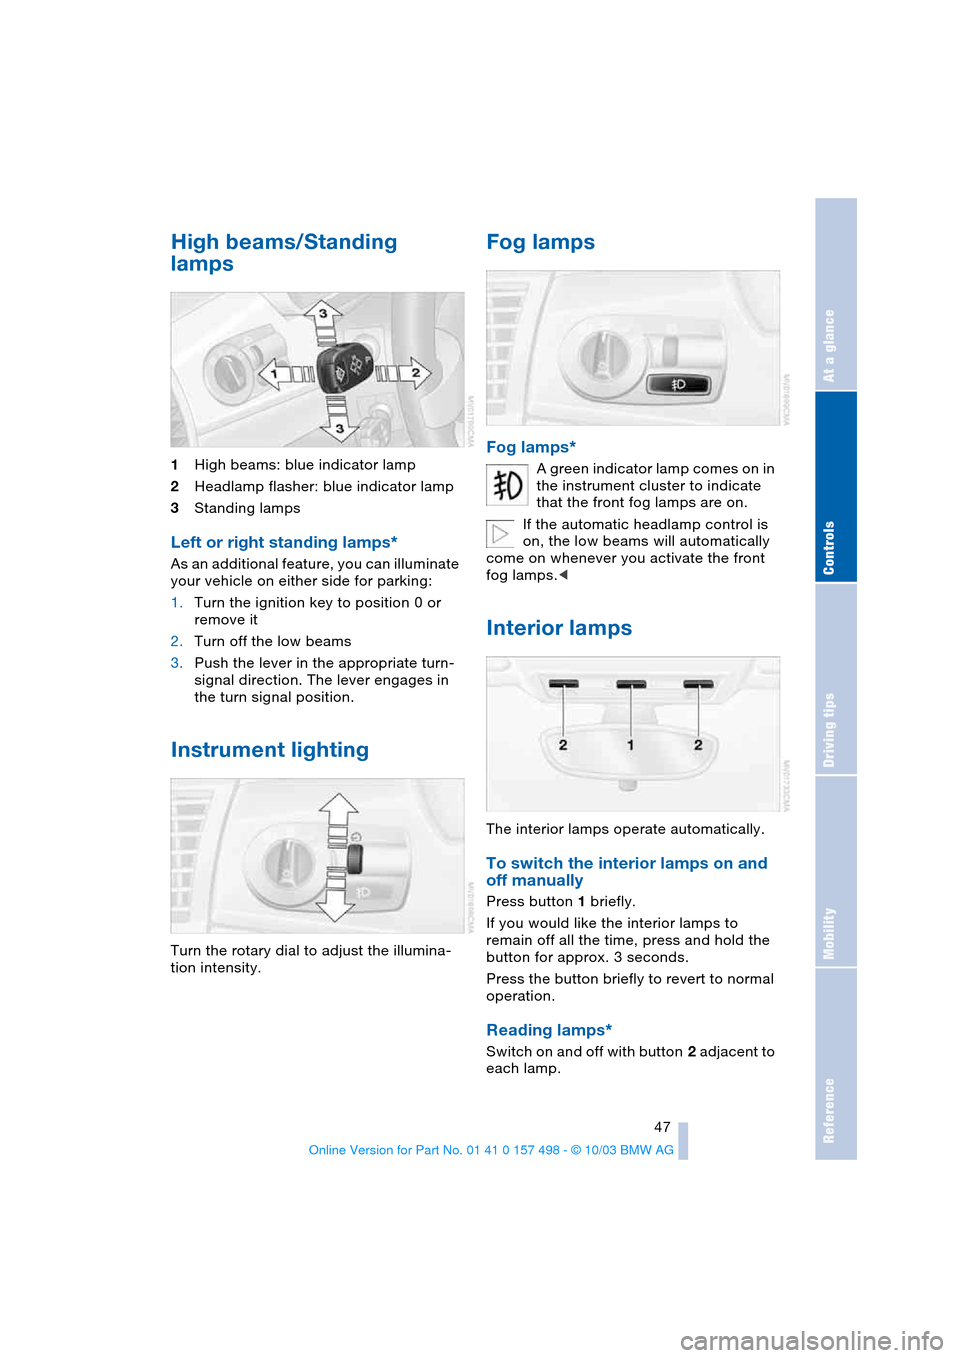
High beams/Standing
lamps
1High beams: blue indicator lamp
2Headlamp flasher: blue indicator lamp
3Standing lamps
Left or right standing lamps*
As an additional feature, you can illuminate
your vehicle on either side for parking:
1.Turn the ignition key to position 0 or
remove it
2.Turn off the low beams
3.Push the lever in the appropriate turn-
signal direction. The lever engages in
the turn signal position.
Instrument lighting
Turn the rotary dial to adjust the illumina-
tion intensity.
Fog lamps
Fog lamps*
A green indicator lamp comes on in
the instrument cluster to indicate
that the front fog lamps are on.
If the automatic headlamp control is
on, the low beams will automatically
come on whenever you activate the front
fog lamps.<
Interior lamps
The interior lamps operate automatically.
To switch the interior lamps on and
off manually
Press button 1 briefly.
If you would like the interior lamps to
remain off all the time, press and hold the
button for approx. 3 seconds.
Press the button briefly to revert to normal
operation.
Reading lamps*
Switch on and off with button 2 adjacent to
each lamp.
Page 52 of 120
Everything under control
50 4.Press button 1 repeatedly until the
required minutes are set
5.Press button 2 to confirm the settings.
The set time of day is transferred to the car
radio display or appears in the instrument
cluster display.
Display mode
In ignition key position 0:
Press button 1.
The time of day is displayed for several
seconds.
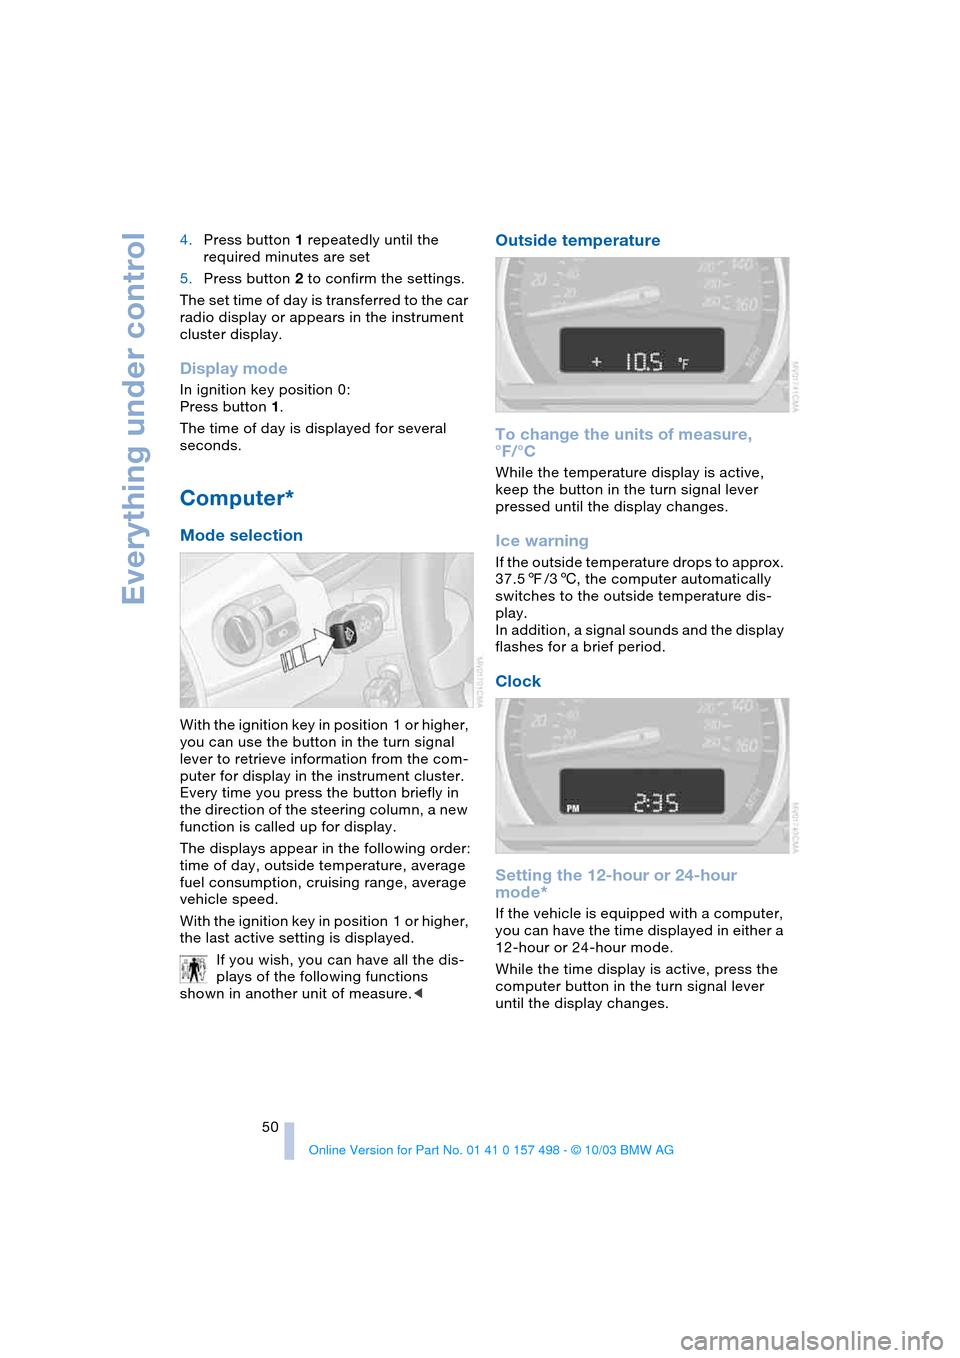
Computer*
Mode selection
With the ignition key in position 1 or higher,
you can use the button in the turn signal
lever to retrieve information from the com-
puter for display in the instrument cluster.
Every time you press the button briefly in
the direction of the steering column, a new
function is called up for display.
The displays appear in the following order:
time of day, outside temperature, average
fuel consumption, cruising range, average
vehicle speed.
With the ignition key in position 1 or higher,
the last active setting is displayed.
If you wish, you can have all the dis-
plays of the following functions
shown in another unit of measure.<
Outside temperature
To change the units of measure,
°F/°C
While the temperature display is active,
keep the button in the turn signal lever
pressed until the display changes.
Ice warning
If the outside temperature drops to approx.
37.57/36, the computer automatically
switches to the outside temperature dis-
play.
In addition, a signal sounds and the display
flashes for a brief period.
Clock
Setting the 12-hour or 24-hour
mode*
If the vehicle is equipped with a computer,
you can have the time displayed in either a
12-hour or 24-hour mode.
While the time display is active, press the
computer button in the turn signal lever
until the display changes.
Page 53 of 120
Reference
At a glance
Controls
Driving tips
Mobility
51
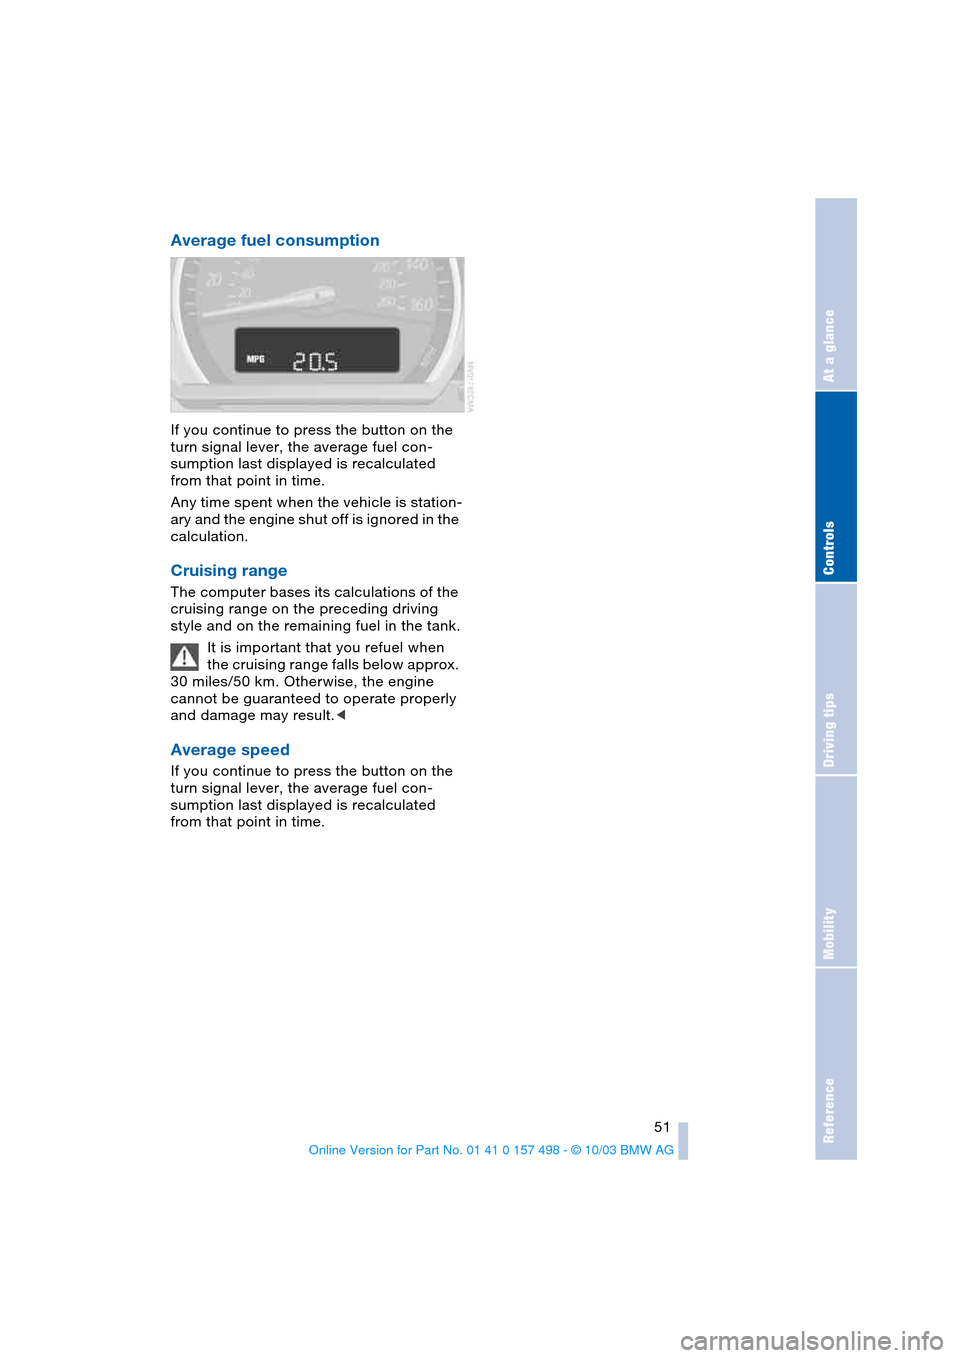
Average fuel consumption
If you continue to press the button on the
turn signal lever, the average fuel con-
sumption last displayed is recalculated
from that point in time.
Any time spent when the vehicle is station-
ary and the engine shut off is ignored in the
calculation.
Cruising range
The computer bases its calculations of the
cruising range on the preceding driving
style and on the remaining fuel in the tank.
It is important that you refuel when
the cruising range falls below approx.
30 miles/50 km. Otherwise, the engine
cannot be guaranteed to operate properly
and damage may result.<
Average speed
If you continue to press the button on the
turn signal lever, the average fuel con-
sumption last displayed is recalculated
from that point in time.
Page 92 of 120
Replacement procedures
90
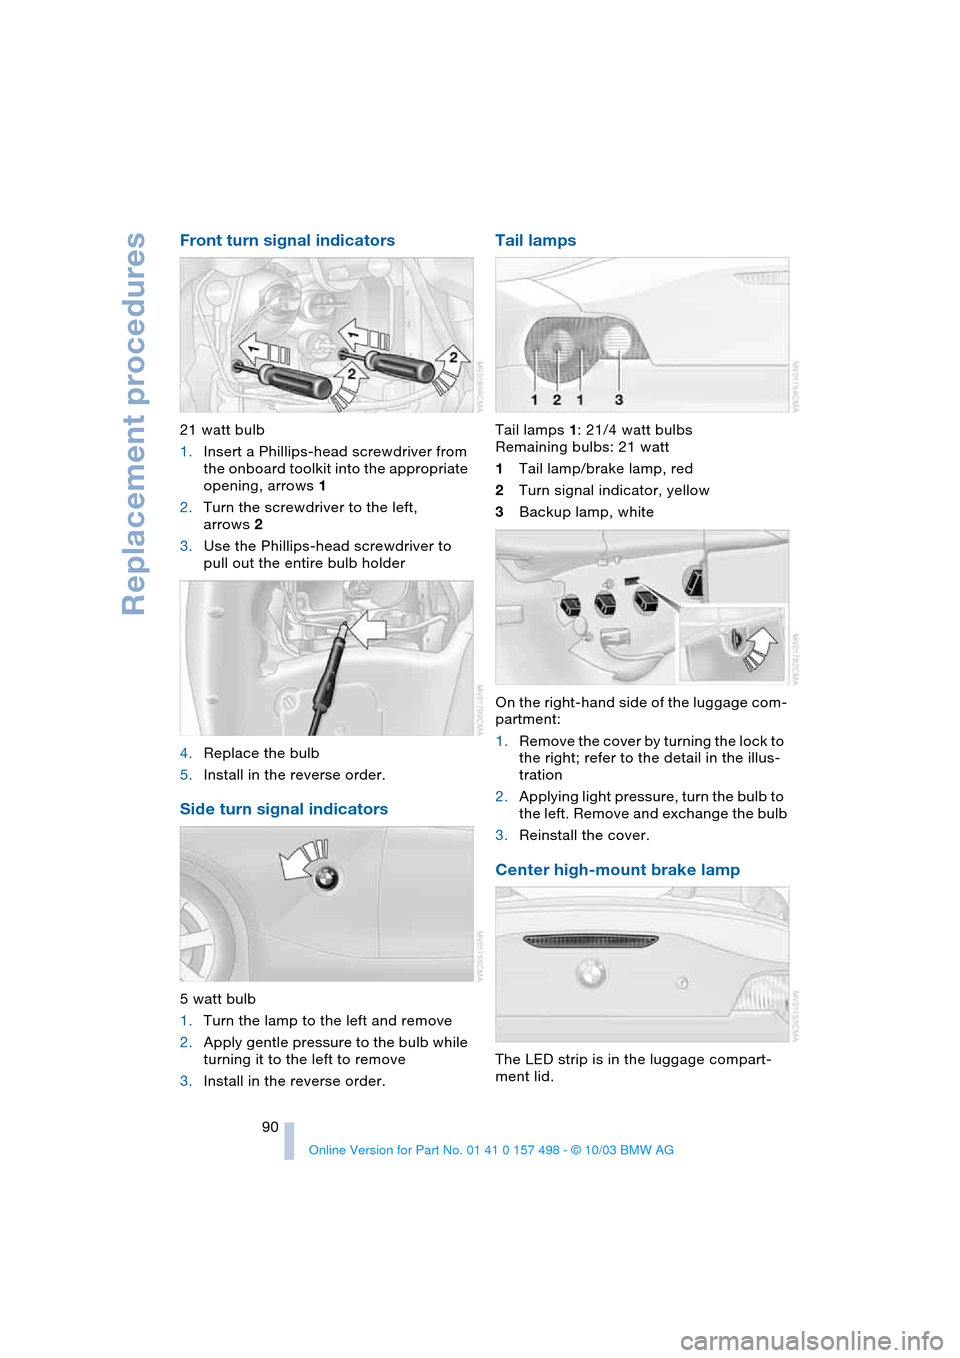
Front turn signal indicators
21 watt bulb
1.Insert a Phillips-head screwdriver from
the onboard toolkit into the appropriate
opening, arrows 1
2.Turn the screwdriver to the left,
arrows 2
3.Use the Phillips-head screwdriver to
pull out the entire bulb holder
4.Replace the bulb
5.Install in the reverse order.
Side turn signal indicators
5 watt bulb
1.Turn the lamp to the left and remove
2.Apply gentle pressure to the bulb while
turning it to the left to remove
3.Install in the reverse order.
Tail lamps
Tail lamps 1: 21/4 watt bulbs
Remaining bulbs: 21 watt
1Tail lamp/brake lamp, red
2Turn signal indicator, yellow
3Backup lamp, white
On the right-hand side of the luggage com-
partment:
1.Remove the cover by turning the lock to
the right; refer to the detail in the illus-
tration
2.Applying light pressure, turn the bulb to
the left. Remove and exchange the bulb
3.Reinstall the cover.
Center high-mount brake lamp
The LED strip is in the luggage compart-
ment lid.