Page 73 of 162
471Riding
ABS anti-lock braking
system
ABS prevents the wheels from
locking on braking, making a
major contribution to road
safety.
Lifting up the rear wheel
With strong adhesion between
the tyres and the road, the
front wheel locks either very
late or not at all when the
brakes are applied hard.
Accordingly, the ABS control
only has to intervene very late
or not at all. In this case, the
rear wheel can lift up, which
can lead to the motorcycle
rolling over. Heavy braking can cause
the rear wheel to rise.
Bear in mind that the ABS
control is unable to prevent
the rear wheel from lifting up in
every instance.c
Residual braking function
With the ignition switched off,
during the self-diagnosis and
in the event of a fault in the
BMW Integral ABS, the brake
circuits concerned only have
the residual braking function.
The residual braking function
is the braking power without
the hydraulic servo assistance
of the BMW Integral ABS.
Under these circumstances,
therefore, you must apply con-
siderably higher pressure to
the brake levers in question in
order to apply the brakes, and
lever travel is longer. When the residual braking function is
active, the ABS function is
unavailable in the brake sys-
tem in question. When the
residual braking function is
active, the integral braking
function is partially or entirely
unavailable.
Without the ABS func-
tion, the wheels may lock
under braking; without braking
power assistance, considera-
bly greater force is required to
brake.
Brake carefully and safely.
Avoid braking sharply. Have
the fault remedied as soon as
possible by a specialist work-
shop, preferably an authorised
BMW motorcycle dealer.c
Page 79 of 162
577Accessories
Luggage systemCorrect loading
Overloading and uneven
loading can adversely
affect the riding stability of
your motorcycle.
Do not exceed the permissible
gross weight and permissible
wheel loads (
b 137). Observe
the following information on
loading.c
• Adapt the settings for spring
preload (
b 47), damping
(
b 44, 46) and tyre pressure
(b 126) to the gross weight.
• Ensure that the case vol-
umes on the left and right are
equal.
• Ensure that the weight is
equally distributed on the left
and right.• Pack heavy items of luggage
downwards and inwards.
• Load the left-hand and
right-hand cases
OA with a
maximum of 8 kg each.
• Load the tank rucksack with
a maximum of 5 kg.
Release leversThere is a release lever on the
left and right of each case
lock.
The grey lever with the inscrip-
tion OPEN is used to open and
close the cases.
The black lever with the
inscription RELEASE is used
to remove and attach the
cases.
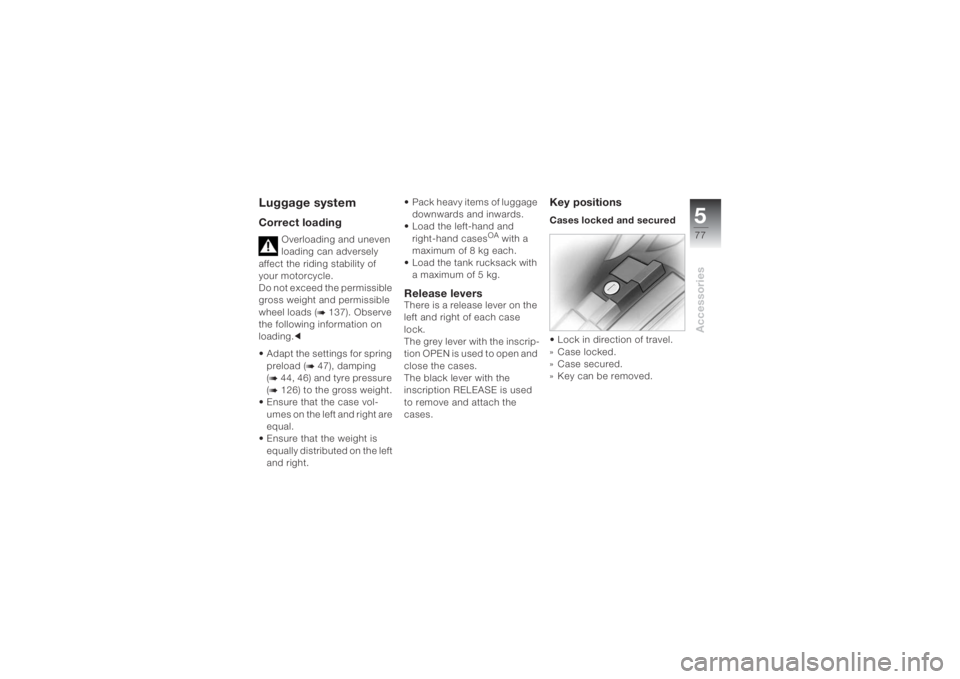
Key positionsCases locked and secured • Lock in direction of travel.
» Case locked.
»Case secured.
» Key can be removed.
Page 85 of 162
683Maintenance
Toolkit............................................. 85
Engine oil ....................................... 86
Coolant ........................................... 88
Brakes ............................................ 89
Clutch ............................................. 93
Wheels ............................................ 94
Front-wheel stand ....................... 103
Rear wheel stand ........................ 104
Bulbs............................................. 105
Jump starting............................... 111
Battery .......................................... 112
Splash guard................................ 116
Page 96 of 162
Maintenance694
The clutch system is filled
with a special hydraulic
fluid that does not require
changing.c
WheelsFor each tyre size, certain tyre
makes have been tested by
BMW Motorrad, classified as
safe for road traffic and
approved. If BMW Motorrad
has not approved the wheels
and tyres, it cannot assess
their suitability or provide any
guarantee of road safety. Use
only wheels and tyres
approved by BMW Motorrad
for your type of motorcycle.
You can obtain detailed infor-
mation from your authorised
BMW motorcycle dealer or on
the Internet at www.bmw-
motorrad.com.
Checking the rims• Place the motorcycle on the
centre stand
OA or side
stand, ensuring that the
ground is firm and level.
• Perform a visual inspection
to check for defective points.
• Have damaged rims
checked and, if necessary,
replaced by a specialist
workshop, preferably an
authorised BMW motorcycle
dealer.
Checking the tyre tread
depth The minimum tyre tread depths
legally prescribed in each coun-
try apply.
The handling characteris-
tics of your motorcycle
can deteriorate even before the
legally prescribed minimum
tread depth has been reached. Have the tyres replaced before
this minimum tread depth is
reached.c
There is a wear indicating
mark on each tyre, inte-
grated in the main tread
grooves. If the tyre tread has
worn down to the level of the
marks, the tyre is completely
worn. The locations of the
marks are indicated on the
edge of the tyre, e.g. by the
letters TI, TWI or by an arrow.c
• Only measure the tyre tread
depth in the main tread
grooves with wear indicating
marks.
Page 97 of 162
695Maintenance
Removing the front wheel
You will find an overview
of the types of screw
used on (
b 124).c
During the following
work, parts of the front
brake, in particular of the
BMW Integral ABS, can be
damaged.
Ensure that no parts of the
brake system are damaged, in
particular the ABS sensor with
cable and the ABS sensor
ring.c
Motorcycles without centre
stands
OA
:
To ensure a secure stance of
the motorcycle during the
following work:
• Place the motorcycle on the
BMW Motorrad rear wheel
stand (b 104). • The rest of the procedure is
the same as for motorcycles
with centre stands.
Motorcycles with centre
stands
OA
:
• Place the motorcycle on the
centre stand
OA.
• Remove screws1 on the left
and right.
• Pull out the front wheel
mudguard towards the front.• Remove the mounting
bolts2 of the brake calipers
on the left and right.
Page 98 of 162
Maintenance696
• Press the brake calipers3
apart slightly using rotary
motionsA against the brake
discs4.
When removed, the
brake pads can be
pressed together to such a
degree that they do not make
contact with the brake disc on
fitting.
Do not operate the handbrake
lever when the brake calipers
are removed.c
• Mask off areas of the rim
that could be scratched on
removal of the brake
calipers.
• Pull the brake calipers back-
wards and outwards from
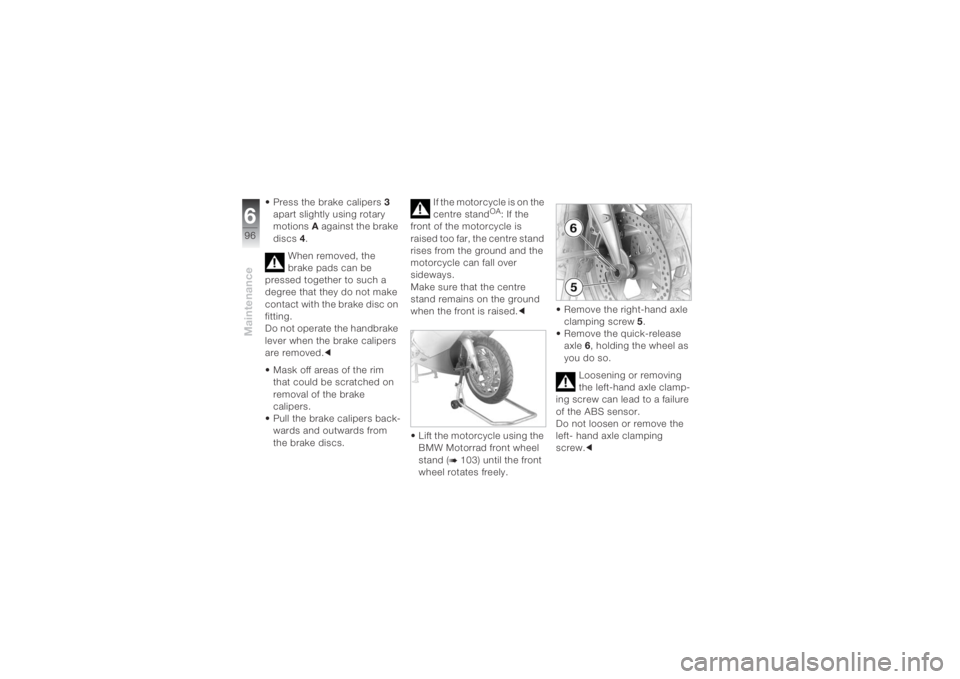
the brake discs. If the motorcycle is on the
centre stand
OA: If the
front of the motorcycle is
raised too far, the centre stand
rises from the ground and the
motorcycle can fall over
sideways.
Make sure that the centre
stand remains on the ground
when the front is raised.c
• Lift the motorcycle using the
BMW Motorrad front wheel
stand (
b 103) until the front
wheel rotates freely.• Remove the right-hand axle
clamping screw 5.
• Remove the quick-release
axle 6, holding the wheel as
you do so.
Loosening or removing
the left-hand axle clamp-
ing screw can lead to a failure
of the ABS sensor.
Do not loosen or remove the
left- hand axle clamping
screw.c
Page 99 of 162
697Maintenance
BMW Motorrad provides
an adapter for removing
the quick-release axle. This
adapter can be combined with
any commercially available
open-end or ring spanner with
width across flats 22. The
adapter with BMW special tool
number 36 3 690 can be ob-
tained from your authorised
BMW motorcycle dealer.c
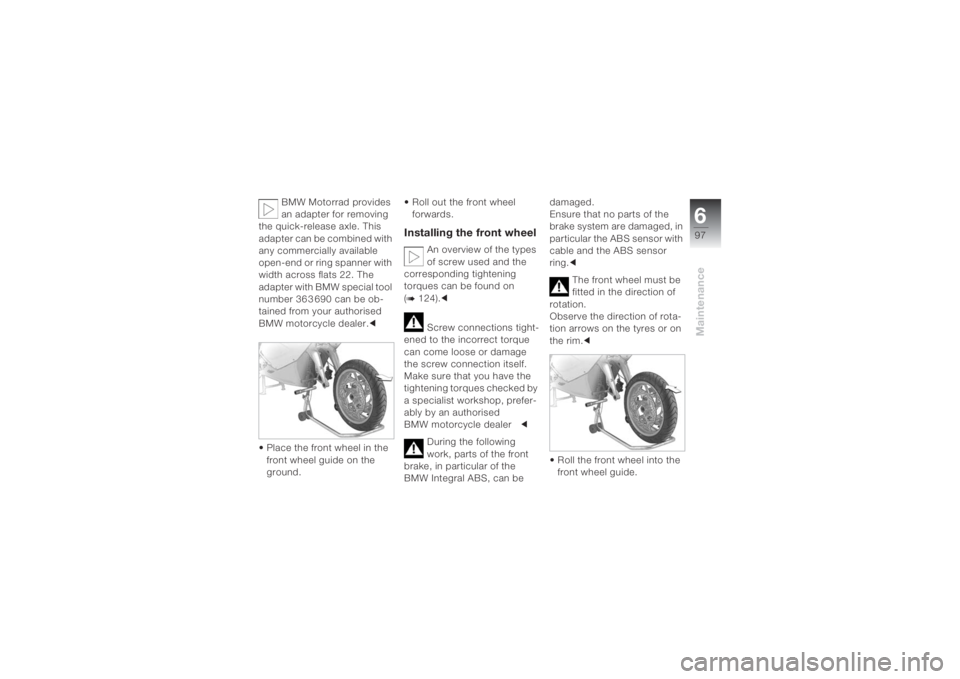
• Place the front wheel in the
front wheel guide on the
ground.• Roll out the front wheel
forwards.
Installing the front wheel
An overview of the types
of screw used and the
corresponding tightening
torques can be found on
(
b 124).c
Screw connections tight-
ened to the incorrect torque
can come loose or damage
the screw connection itself.
Make sure that you have the
tightening torques checked by
a specialist workshop, prefer-
ably by an authorised
BMW motorcycle dealerc
During the following
work, parts of the front
brake, in particular of the
BMW Integral ABS, can be damaged.
Ensure that no parts of the
brake system are damaged, in
particular the ABS sensor with
cable and the ABS sensor
ring.c
The front wheel must be
fitted in the direction of
rotation.
Observe the direction of rota-
tion arrows on the tyres or on
the rim.c
• Roll the front wheel into the
front wheel guide.
Page 100 of 162
Maintenance698
• Raise the front wheel, fit
quick-release axle 6 and
tighten to the appropriate
tightening torque.
• Tighten right-hand axle
clamping screw 5 to the
appropriate tightening
torque.
• Remove the front wheel
stand.
• Fit the brake calipers onto
the brake discs.• Fit mounting bolts 2 of the
brake calipers on the left and
right and use the appropriate
tightening torque.
The ABS sensor cable
could be abraded if it
comes into contact with the
brake disc.
Ensure that the ABS sensor
cable is routed tightly.c• Fit the mudguard and tighten
the mounting bolts1 to the
appropriate tightening
torque.
• Remove the masking from
the rim.
To apply the brake pads to the
brake discs, the front brake
must be operated a number of
times.