Page 10 of 174
Contents
Owner service procedures
Replacement procedures:
Onboard tool kit136
Windshield wiper blades136
Lamps and bulbs137
Repairing a flat tire140
Battery144
Fuses145
Giving and receiving
assistance:
Receiving assistance146
Jump-starting147
Towing the vehicle148
Technical data
Engine data154
Dimensions155
Weights156
Capacities157
Index
Everything from A to Z160
Page 106 of 174

106
Cargo loading
Avoid overloading the vehicle so
that the permitted load on the tires
is not exceeded. Overloading can lead
to overheating and internal tire damage.
This can result in a sudden loss of tire
inflation pressure.<
Determining the maximum load1. Locate the following statement on
your vehicle's placard*:
The combined weight of occu-
pants and cargo should never
exceed XXX kg or YYY lbs., as this
could otherwise result in damage to the
vehicle or unstable driving conditions.<
2. Determine the combined weight of
the driver and passengers that will be
riding in your vehicle
3. Subtract the combined weight of the
driver and passengers from
XXX kilograms or YYY pounds
4. The resulting figure equals the avail-
able amount of cargo and luggage
load capacity.
For example, if the XXX amount
equals 1,400 lbs. and there will be
five 150 lbs. passengers in your vehi-
cle, the amount of available cargo
and luggage load capacity is
650 lbs.:
1,400 lbs. minus 750 lbs. = 650 lbs.
5. Determine the combined weight of
luggage and cargo being loaded on
the vehicle. That weight may not
safely exceed the available cargo
and luggage load capacity calculated
in Step 4
6. If your vehicle will be towing a trailer,
load from your trailer will be trans-
fered to your vehicle. Consult the
manual for transporting a trailer to
determine how this may reduce the
available cargo and luggage load
capacity of your vehicle.
Page 107 of 174

107
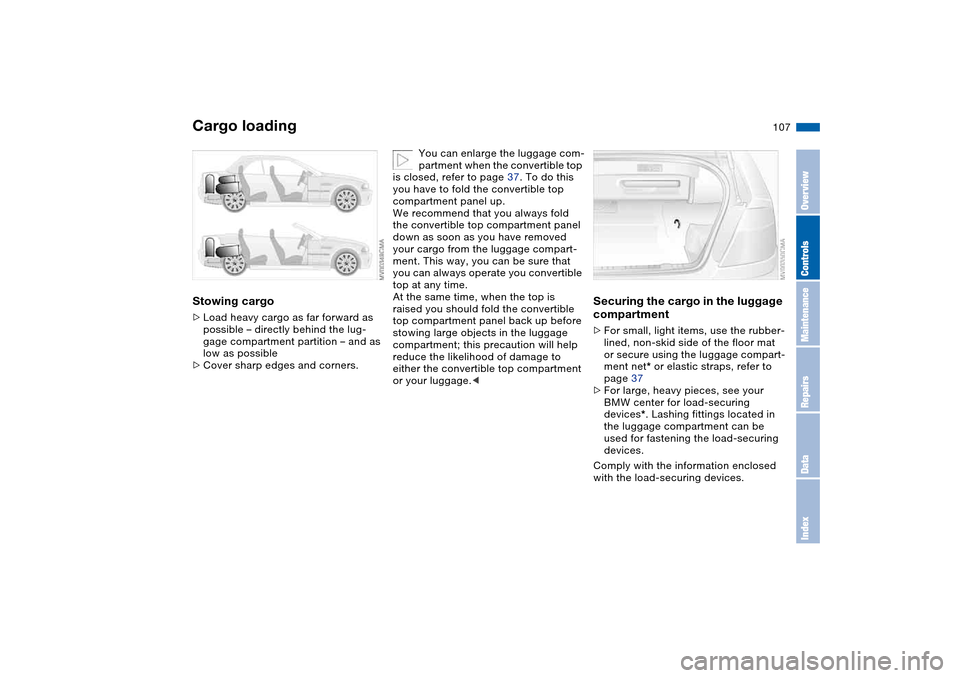
Stowing cargo>Load heavy cargo as far forward as
possible – directly behind the lug-
gage compartment partition – and as
low as possible
>Cover sharp edges and corners.
You can enlarge the luggage com-
partment when the convertible top
is closed, refer to page 37. To do this
you have to fold the convertible top
compartment panel up.
We recommend that you always fold
the convertible top compartment panel
down as soon as you have removed
your cargo from the luggage compart-
ment. This way, you can be sure that
you can always operate you convertible
top at any time.
At the same time, when the top is
raised you should fold the convertible
top compartment panel back up before
stowing large objects in the luggage
compartment; this precaution will help
reduce the likelihood of damage to
either the convertible top compartment
or your luggage.<
Securing the cargo in the luggage
compartment >For small, light items, use the rubber-
lined, non-skid side of the floor mat
or secure using the luggage compart-
ment net* or elastic straps, refer to
page 37
>For large, heavy pieces, see your
BMW center for load-securing
devices*. Lashing fittings located in
the luggage compartment can be
used for fastening the load-securing
devices.
Comply with the information enclosed
with the load-securing devices.
Cargo loading
OverviewControlsMaintenanceRepairsDataIndex
Page 136 of 174
136Replacement procedures
Onboard tool kitThe onboard tool kit is located in the
luggage compartment lid.
To open, loosen the wing nut. For stor-
age place of towing eyelet, refer to
page 148.
Windshield wiper blades1. Switch off the engine
2. Fold the wiper arm completely out
from the windshield
3. Position the wiper blade at an angle
and pull the release spring – see
arrow
4. Fold the wiper blade down and
unhook it toward the windshield
5. Pull the wiper blade past the wiper
arm toward the top
6. Insert a new wiper blade and apply
pressure until you hear it engage.
Page 148 of 174
148
2. Start the engine of the other vehicle
as usual.
If the first start attempt is not suc-
cessful, wait a few minutes before
another attempt in order to allow the
discharged battery to recharge
3. Allow the engines to run for several
minutes
4. Disconnect the jumper cables in
reverse sequence.
Have the battery recharged at your
BMW center as required.
Do not use spray starter fluids to
start the engine.<
Towing the vehicle
Always observe all applicable
towing laws and regulations.<
Towing with a commercial tow
truck>Use wheel lift or flat bed carrier
>Do not tow with sling-type equip-
ment.
Never allow passengers to ride in
a towed vehicle for any reason.
Never attach tie-down hooks, chains,
straps, or tow hooks to tie rods, control
arms, or any other part of the vehicle
suspension, as severe damage to these
components will occur, possibly lead-
ing to accidents.<
Jump-starting
Page 149 of 174

149
Towing the vehicle with the front
axle raisedVehicles with sequential manual gear-
box SMG:
While the ignition is on move the selec-
tor lever to position N, then turn off the
ignition.Towing eyeletThe screw-in towing eyelet is in the lug-
gage compartment under the floor mat
and must remain in the vehicle. It can
be attached at the front or rear of the
vehicle.
The towing eyelet should not be used
to pull a vehicle out of deep snow, mud,
sand, etc.
Comply with all applicable towing laws
and regulations at all times.
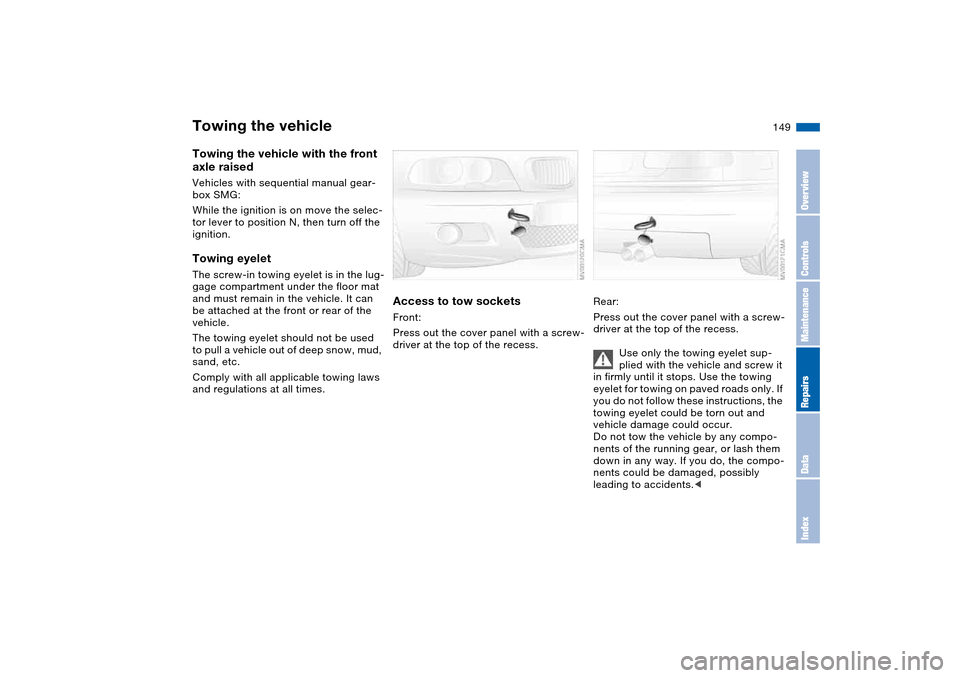
Access to tow socketsFront:
Press out the cover panel with a screw-
driver at the top of the recess.
Rear:
Press out the cover panel with a screw-
driver at the top of the recess.
Use only the towing eyelet sup-
plied with the vehicle and screw it
in firmly until it stops. Use the towing
eyelet for towing on paved roads only. If
you do not follow these instructions, the
towing eyelet could be torn out and
vehicle damage could occur.
Do not tow the vehicle by any compo-
nents of the running gear, or lash them
down in any way. If you do, the compo-
nents could be damaged, possibly
leading to accidents.<
Towing the vehicle
OverviewControlsMaintenanceRepairsDataIndex
Page 150 of 174
150
Keep the vehicles in line and avoid
towing at an offset angle. Ensure
that the towing strap connecting the
two vehicles is tight, with no slack,
before starting off.<
Use only a nylon towing strap to tow
the vehicle, since the inherent resil-
ience of this material helps protect both
vehicles from sudden jerking move-
ments.
The towed vehicle should always
be the lighter of the two vehicles.
If this is not the case, it will not be pos-
sible to control vehicle handling.<
Tow-startingFor instructions on jump-starting, refer
to page 147.
Never attempt to use your vehicle to
push another vehicle, since damage to
the energy-absorbing bumpers could
result.Towing the vehicle
Page 160 of 174

Everything from A to ZA
ABS Antilock Brake
System 114
indicator lamp 19
Accessories, refer to For
your own safety 5
Accident, refer to Emer-
gency call 146
Activated-charcoal filter 100
Adding brake fluid 129
Adding liquid sealant
Mobility system 142
Additional sources of infor-
mation 4
Air conditioning mode
automatic climate
control 98
Air distribution
automatic climate
control 98
Air distribution, individual 98
Air outlets, refer to Ventila-
tion 96
Air pressure, refer to Tire
inflation pressure 25, 118
Air recirculation, refer to
Recirculated-air mode 99
Air supply
automatic climate
control 98
Air, drying, refer to Air con-
ditioning mode 98Airbags 55
deactivating 55
indicator lamp 18, 57
sitting safely 46
Airing out, refer to Ventila-
tion 96
AKI, refer to Fuel specifica-
tions 25
All-season tires, refer to
Winter tires 122
Alternative oils 127
Antifreeze
coolant 128
washer fluid 126
Antilock Brake System
(ABS) 114
indicator lamp 19
Anti-theft system 30
Approved axle loads, refer
to Weights 156
Approved gross weight,
refer to Weights 156
Armrest 101
Artificial leather, refer to the
Caring for your vehicle
brochure
Ashtray
front 103
rear 103
Assistant systems, refer to
Dynamic Stability Control
(DSC) 86AUC Automatic recircu-
lated-air control 99
AUTO program, refer
to Automatic air distribu-
tion 98
Automatic
air distribution 98
air supply 98
cruise control 77
headlamp control 91
Automatic car wash, refer to
the Caring for your vehicle
brochure
Automatic climate control 96
Automatic curb monitor 52
Automatic dimming, interior
rearview mirror 54
Automatic recirculated-air
control (AUC) 99
Automatic windshield
washer, refer to Rain sen-
sor 76
Average fuel
consumption 84
Average speed 84
Axle loads, refer to
Weights 156
B
Backrest
unlocking 49Backrest, refer to Seat
adjustment 47
Backup lamps 69
bulb replacement 139
Bandages, refer to First-aid
kit 23
Bar, towing 149
Battery 144
charge 144
disposal 144
indicator lamp 18
jump-starting 147
remote control 30, 31
Battery charge current 18
Battery charge indicator
lamp 18
Belts, refer to Safety
belts 50
Beverage holders 102
Blower
automatic climate
control 98
BMW Maintenance
System 130
BMW sports seat 47
Bore, refer to Engine
data 154
Bottle holders, see Bever-
age holders 102
Brake fluid 129
indicator lamp 18, 129
level 129