2004 BMW M3 CONVERTIBLE lock
[x] Cancel search: lockPage 114 of 174

114
Antilock Brake System (ABS)The conceptABS keeps the wheels from locking
during braking, thereby enhancing
active driving safety.Braking with ABSIf you are in a situation that requires full
braking, you will exploit the full benefits
of ABS system if you apply maximum
pedal pressure – panic stop. Since the
vehicle maintains steering responsive-
ness, you can avoid possible obstacles
with a minimum of steering effort,
despite the full brake application.
Pulsation at the brake pedal combined
with sounds from the hydraulic circuits
indicates to the driver that ABS is in its
active mode.Dynamic Brake Control (DBC)DBC is included in the DSC, refer to
page 86.
If you apply the brakes rapidly, this sys-
tem automatically generates maximum
braking force boost and thus helps to
achieve the shortest possible braking
distance in panic braking situations. All
of the benefits of the ABS are exploited
under these circumstances.Do not reduce the pressure on the
brake pedal for the duration of the
brake application. When the brake
pedal is released, the DBC is deacti-
vated.
Cornering Brake Control (CBC)CBC is an advanced engineering devel-
opment of ABS. When braking during
cornering with high lateral accelera-
tion, or when braking during a lane
change, vehicle stability is improved
and the steering response is enhanced.
Brake systemBrake fluid levelLow brake fluid level in the reservoir
combined with longer than usual pedal
travel may indicate a defect in one of
the brake system's hydraulic circuits.
Proceed to the nearest autho-
rized BMW center. Higher brake
application pressure may be necessary
when stopping, and the vehicle may
exhibit a slight tendency to pull to one
side. Brake distances may even be
longer. Please remember to adapt your
driving style accordingly.
and operating conditions in which brak-
ing is restricted to gentle, low-pressure
applications will all increase the ten-
dency for corrosion to form on the
rotors; this is often accompanied by a
simultaneous accumulation of contami-
nation on the brake pads. The pads
must exert a certain minimal level of
pressure against the rotors for the disc
brakes' inherent self-cleaning effect to
remain effective.
Page 116 of 174

116
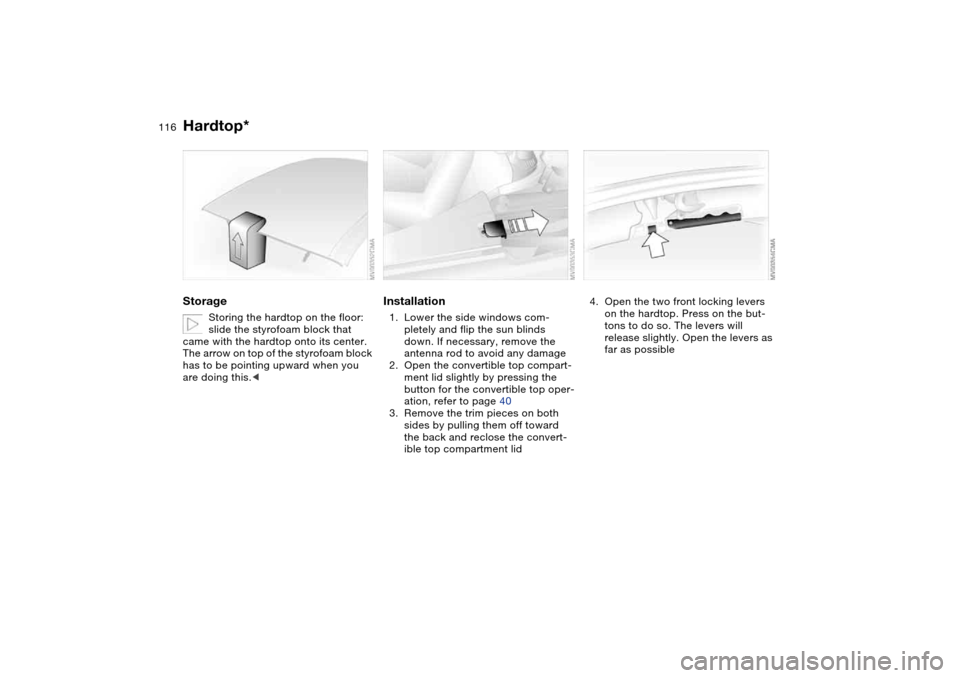
Storage
Storing the hardtop on the floor:
slide the styrofoam block that
came with the hardtop onto its center.
The arrow on top of the styrofoam block
has to be pointing upward when you
are doing this.<
Installation1. Lower the side windows com-
pletely and flip the sun blinds
down. If necessary, remove the
antenna rod to avoid any damage
2. Open the convertible top compart-
ment lid slightly by pressing the
button for the convertible top oper-
ation, refer to page 40
3. Remove the trim pieces on both
sides by pulling them off toward
the back and reclose the convert-
ible top compartment lid
4. Open the two front locking levers
on the hardtop. Press on the but-
tons to do so. The levers will
release slightly. Open the levers as
far as possible
Hardtop*
Page 117 of 174

117
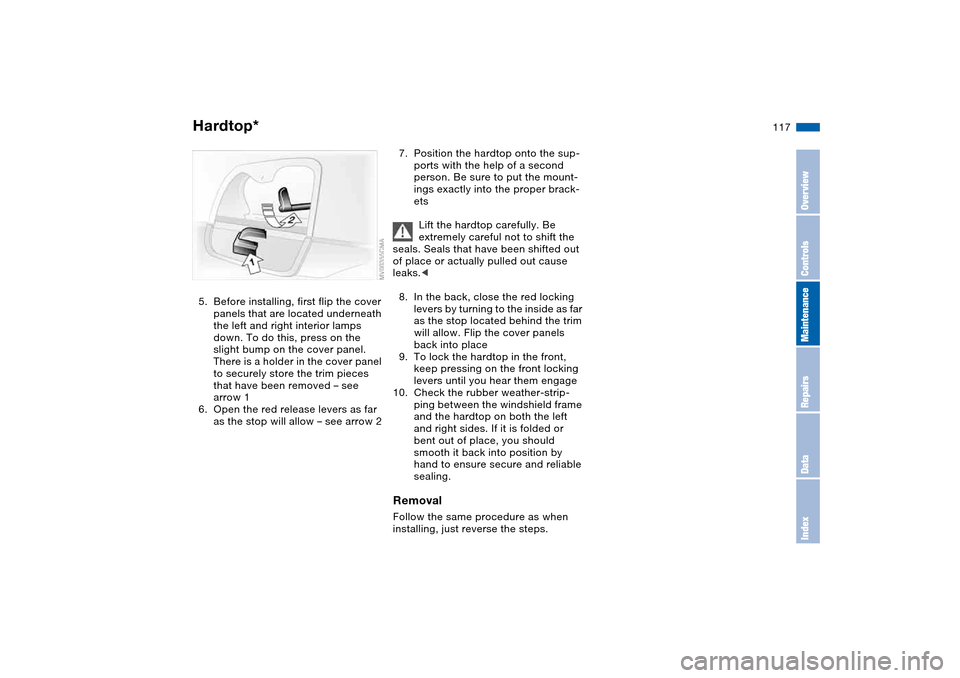
5. Before installing, first flip the cover
panels that are located underneath
the left and right interior lamps
down. To do this, press on the
slight bump on the cover panel.
There is a holder in the cover panel
to securely store the trim pieces
that have been removed – see
arrow 1
6. Open the red release levers as far
as the stop will allow – see arrow 2
7. Position the hardtop onto the sup-
ports with the help of a second
person. Be sure to put the mount-
ings exactly into the proper brack-
ets
Lift the hardtop carefully. Be
extremely careful not to shift the
seals. Seals that have been shifted out
of place or actually pulled out cause
leaks.<
8. In the back, close the red locking
levers by turning to the inside as far
as the stop located behind the trim
will allow. Flip the cover panels
back into place
9. To lock the hardtop in the front,
keep pressing on the front locking
levers until you hear them engage
10. Check the rubber weather-strip-
ping between the windshield frame
and the hardtop on both the left
and right sides. If it is folded or
bent out of place, you should
smooth it back into position by
hand to ensure secure and reliable
sealing.RemovalFollow the same procedure as when
installing, just reverse the steps.
Hardtop*
OverviewControlsMaintenanceRepairsDataIndex
Page 123 of 174

123 In the engine compartment
HoodTo releasePull the lever located under the left-
hand side of the instrument panel.
Do not attempt to service your
vehicle if you do not have the
required technical background. Failure
to work in an informed, professional
manner when servicing components
and materials constitutes a safety haz-
ard for vehicle occupants and other
road users. If you are not familiar with
the guidelines, BMW recommends that
you have the operations performed by
your BMW center.<
To openPull the release handle and open the
hood.
It is not possible to drive off using
SMG Drivelogic when the hood is
open.<
To closePull the hood downwards and allow the
hood to fall from a minimum height of
1 ft/30 cm so that it audibly engages.
Check for proper locking by pulling on
the hood at the left and right above the
headlamps.
To avoid injuries, be sure that the
travel path of the hood is clear
when it is closed, following the same
safety precautions used in all closing
procedures.
If you notice while driving that the hood
is not completely closed, stop immedi-
ately and close it securely.<
OverviewControlsMaintenanceRepairsDataIndex
Page 128 of 174

128
However, if the vehicle is exposed to
temperatures below –47/–206 for
extended periods, please have your
BMW center recommend a suitable oil.
Coolant
Do not add coolant to the cooling
system when the engine is hot. If
you attempt to do so, escaping coolant
can cause burns.
Antifreeze and anti-corrosion agents
are hazardous to health. You should
always store them in their closed origi-
nal containers and in a location inac-
cessible to children. Antifreeze and
anti-corrosion agents are inflammable.
For this reason, do not spill them on hot
engine parts. They could ignite and
cause burns. Comply with the instruc-
tions on the containers.<
Comply with the applicable envi-
ronmental laws regulating the dis-
posal of antifreeze agents with corro-
sion inhibitor.<
Checking coolant level and
adding coolant Check the coolant level when the
engine is cold, approx. 687/+206.
1. Open the cap for the expansion tank
by turning it slightly counterclock-
wise to allow accumulated pressure
to escape. Then open
2. The coolant level is correct when the
upper end of the red float is at least
even with the upper edge of the filler
neck – refer to the arrow in the illus-
tration – but no more than 3/4 in /
2 cm above it – that is, up to the sec-
ond mark on the float. Refer also to
the schematic diagram next to the
filler neck
Engine oil
Page 140 of 174

140
Center high-mount brake lampLED strip in luggage compartment lid.
Please contact a BMW center in case of
a malfunction.
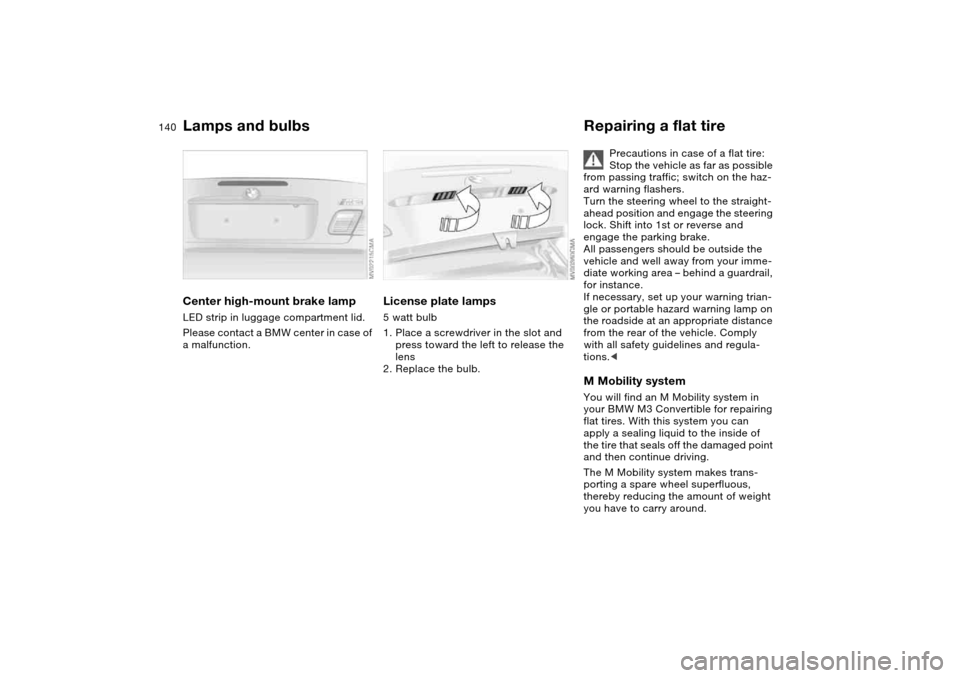
License plate lamps5 watt bulb
1. Place a screwdriver in the slot and
press toward the left to release the
lens
2. Replace the bulb.
Repairing a flat tire
Precautions in case of a flat tire:
Stop the vehicle as far as possible
from passing traffic; switch on the haz-
ard warning flashers.
Turn the steering wheel to the straight-
ahead position and engage the steering
lock. Shift into 1st or reverse and
engage the parking brake.
All passengers should be outside the
vehicle and well away from your imme-
diate working area – behind a guardrail,
for instance.
If necessary, set up your warning trian-
gle or portable hazard warning lamp on
the roadside at an appropriate distance
from the rear of the vehicle. Comply
with all safety guidelines and regula-
tions.<
M Mobility systemYou will find an M Mobility system in
your BMW M3 Convertible for repairing
flat tires. With this system you can
apply a sealing liquid to the inside of
the tire that seals off the damaged point
and then continue driving.
The M Mobility system makes trans-
porting a spare wheel superfluous,
thereby reducing the amount of weight
you have to carry around.
Lamps and bulbs
Page 160 of 174

Everything from A to ZA
ABS Antilock Brake
System 114
indicator lamp 19
Accessories, refer to For
your own safety 5
Accident, refer to Emer-
gency call 146
Activated-charcoal filter 100
Adding brake fluid 129
Adding liquid sealant
Mobility system 142
Additional sources of infor-
mation 4
Air conditioning mode
automatic climate
control 98
Air distribution
automatic climate
control 98
Air distribution, individual 98
Air outlets, refer to Ventila-
tion 96
Air pressure, refer to Tire
inflation pressure 25, 118
Air recirculation, refer to
Recirculated-air mode 99
Air supply
automatic climate
control 98
Air, drying, refer to Air con-
ditioning mode 98Airbags 55
deactivating 55
indicator lamp 18, 57
sitting safely 46
Airing out, refer to Ventila-
tion 96
AKI, refer to Fuel specifica-
tions 25
All-season tires, refer to
Winter tires 122
Alternative oils 127
Antifreeze
coolant 128
washer fluid 126
Antilock Brake System
(ABS) 114
indicator lamp 19
Anti-theft system 30
Approved axle loads, refer
to Weights 156
Approved gross weight,
refer to Weights 156
Armrest 101
Artificial leather, refer to the
Caring for your vehicle
brochure
Ashtray
front 103
rear 103
Assistant systems, refer to
Dynamic Stability Control
(DSC) 86AUC Automatic recircu-
lated-air control 99
AUTO program, refer
to Automatic air distribu-
tion 98
Automatic
air distribution 98
air supply 98
cruise control 77
headlamp control 91
Automatic car wash, refer to
the Caring for your vehicle
brochure
Automatic climate control 96
Automatic curb monitor 52
Automatic dimming, interior
rearview mirror 54
Automatic recirculated-air
control (AUC) 99
Automatic windshield
washer, refer to Rain sen-
sor 76
Average fuel
consumption 84
Average speed 84
Axle loads, refer to
Weights 156
B
Backrest
unlocking 49Backrest, refer to Seat
adjustment 47
Backup lamps 69
bulb replacement 139
Bandages, refer to First-aid
kit 23
Bar, towing 149
Battery 144
charge 144
disposal 144
indicator lamp 18
jump-starting 147
remote control 30, 31
Battery charge current 18
Battery charge indicator
lamp 18
Belts, refer to Safety
belts 50
Beverage holders 102
Blower
automatic climate
control 98
BMW Maintenance
System 130
BMW sports seat 47
Bore, refer to Engine
data 154
Bottle holders, see Bever-
age holders 102
Brake fluid 129
indicator lamp 18, 129
level 129
Page 161 of 174

Everything from A to Z
161
Brake force display 90
Brake hydraulics 114
Brake lamps
bulb replacement 139
indicator lamp, defective
lamp 81
Brake lights
brake force display 90
Brake pads 115
brake fluid level
18, 114, 129
breaking in 112
disc brakes 114
Brake rotors
brake system 114
breaking in 112
Brake system
brake pads, indicator
lamp 19
Brake wear warning
indicator lamp 19
Brakes
ABS 114
brake fluid 129
breaking in 112
indicator/warning lamp
18, 19
parking brake 68
Break-in procedures 112
Bulb replacement 137
Bulb replacement, refer to
Lamps and bulbs 137Buttons in steering wheel 22
C
California Proposition
65 warning 132
Can holders, see Beverage
holders 102
Capacities 157
Car battery 144
Car care, refer to the Caring
for your vehicle brochure
Car keys, refer to Keys 30
Car radio, refer to the
Owner's Manual for Radio
Car telephone
preparation 102
Car telephone, refer to the
separate Owner's Manual
Car vacuum cleaner, con-
necting 103
Car wash, refer to the Caring
for your vehicle brochure
Carpet care, refer to the
Caring for your vehicle
brochure
Cassette operation, refer to
the Owner's Manual for
Radio/Onboard Computer
CBC Cornering Brake Con-
trol 114
warning lamp 19CD changer, refer to the
Owner's Manual for
Radio/Onboard Computer
CD operation, refer to the
Owner's Manual for
Radio/Onboard Computer
Cellular phone 102
Center armrest
front 101
Center high-mount brake
lamp
bulb replacement 140
Central locking system 30
button 34
passenger
compartment 34
Check Control 81
Check Gas Cap
indicator lamp 19
Child seats, refer to Child-
restraint systems 58
Child-restraint mounting
system LATCH 60
Child-restraint systems 58
Cigarette lighter 103
Cigarette lighter socket 103
Cleaning chrome parts, refer
to the Caring for your vehi-
cle brochure
Cleaning light alloy wheels,
refer to the Caring for your
vehicle brochureCleaning position, convert-
ible top 44
Cleaning the vehicle, refer to
the Caring for your vehicle
brochure
Cleaning windshield 77
Clock 82
12-/24-hour mode 82
setting, refer also to the
Owner's Manual for
Radio/Onboard Computer
Closing
from inside 34
from outside 31
Clothes hooks 113
Clutch
breaking in 113
Cockpit 14
Code, refer to the Owner's
Manual for Radio/Onboard
Computer
Coin box 102
Cold start, refer to Starting
the engine 66
Compact disc operation,
refer to the Owner's Man-
ual for Radio/Onboard
Computer
Compression ratio, refer to
Engine data 154
Computer 83
OverviewControlsMaintenanceRepairsDataIndex