2004 BMW 645CI COUPE&CONVERTIBLE lights
[x] Cancel search: lightsPage 87 of 216
Controls
85Reference
At a glance
Driving tips
Communications
Navigation
Entertainment
Mobility
Lamps
Parking lamps/low beams
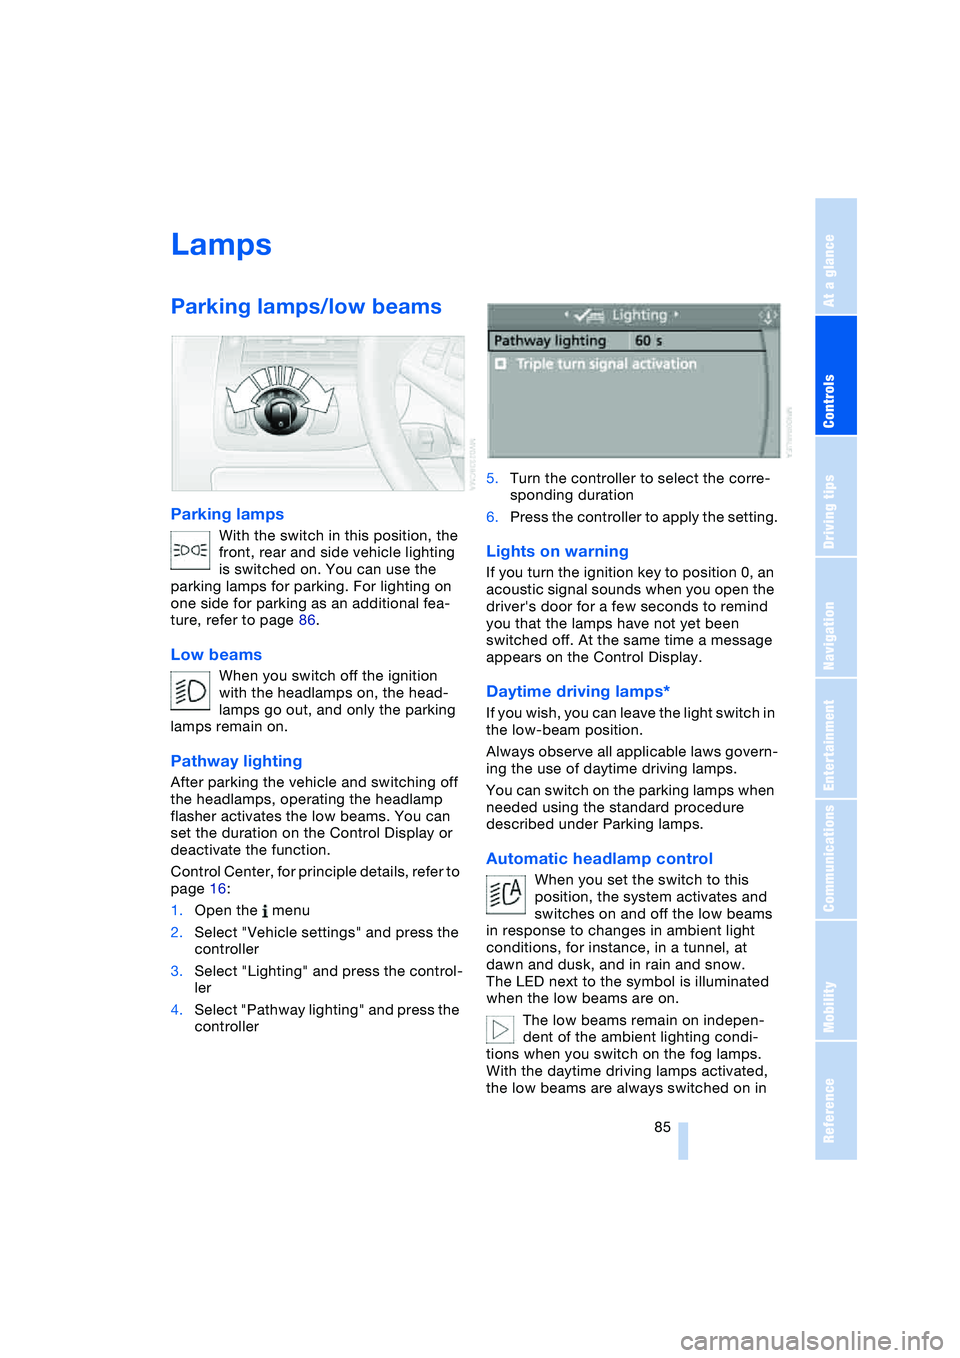
Parking lamps
With the switch in this position, the
front, rear and side vehicle lighting
is switched on. You can use the
parking lamps for parking. For lighting on
one side for parking as an additional fea-
ture, refer to page 86.
Low beams
When you switch off the ignition
with the headlamps on, the head-
lamps go out, and only the parking
lamps remain on.
Pathway lighting
After parking the vehicle and switching off
the headlamps, operating the headlamp
flasher activates the low beams. You can
set the duration on the Control Display or
deactivate the function.
Control Center, for principle details, refer to
page 16:
1.Open the menu
2.Select "Vehicle settings" and press the
controller
3.Select "Lighting" and press the control-
ler
4.Select "Pathway lighting" and press the
controller5.Turn the controller to select the corre-
sponding duration
6.Press the controller to apply the setting.
Lights on warning
If you turn the ignition key to position 0, an
acoustic signal sounds when you open the
driver's door for a few seconds to remind
you that the lamps have not yet been
switched off. At the same time a message
appears on the Control Display.
Daytime driving lamps*
If you wish, you can leave the light switch in
the low-beam position.
Always observe all applicable laws govern-
ing the use of daytime driving lamps.
You can switch on the parking lamps when
needed using the standard procedure
described under Parking lamps.
Automatic headlamp control
When you set the switch to this
position, the system activates and
switches on and off the low beams
in response to changes in ambient light
conditions, for instance, in a tunnel, at
dawn and dusk, and in rain and snow.
The LED next to the symbol is illuminated
when the low beams are on.
The low beams remain on indepen-
dent of the ambient lighting condi-
tions when you switch on the fog lamps.
With the daytime driving lamps activated,
the low beams are always switched on in
Page 88 of 216
Lamps
86 this switch position with the ignition key in
position 2.<
The automatic headlamp control can-
not serve as a substitute for your per-
sonal judgment in determining when the
lamps should be switched on in response
to ambient lighting conditions. For exam-
ple, the system cannot detect fog. To avoid
safety risks, you should always switch on
the lamps manually under these condi-
tions.<
Adaptive Head Light*
The concept
Adaptive Head Light is a variable headlamp
control system that enables better illumina-
tion of the road surface. Depending on the
steering angle and other assumptions, the
light from the headlamp follows the course
of the road.
Activating Adaptive Head Light
In ignition key position 2, turn the
light switch to the position 'Auto-
matic headlamp control', refer to
page 85.
So that oncoming traffic is not dazzled,
Adaptive Head Light is
>not active when the vehicle is reversing
>only active toward passenger's side
when stopped.
Malfunction
The LED beside the symbol for automatic
headlamp control flashes. The Adaptive
Head Light has a malfunction or has failed.
Have the system checked as soon as pos-
sible.
High beams/roadside
parking lamps
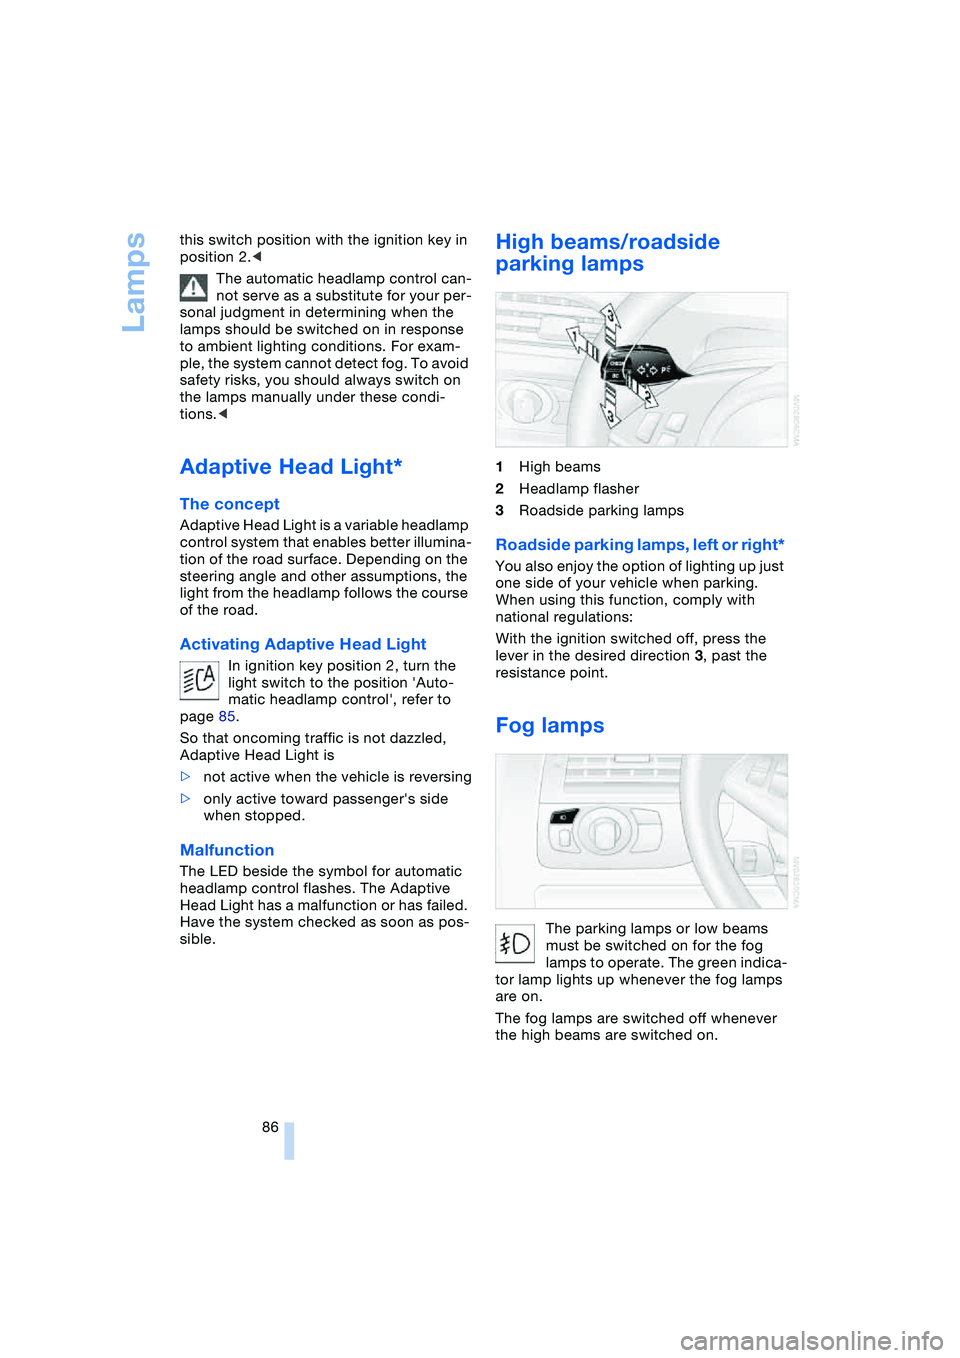
1High beams
2Headlamp flasher
3Roadside parking lamps
Roadside parking lamps, left or right*
You also enjoy the option of lighting up just
one side of your vehicle when parking.
When using this function, comply with
national regulations:
With the ignition switched off, press the
lever in the desired direction 3, past the
resistance point.
Fog lamps
The parking lamps or low beams
must be switched on for the fog
lamps to operate. The green indica-
tor lamp lights up whenever the fog lamps
are on.
The fog lamps are switched off whenever
the high beams are switched on.
Page 92 of 216
A congenial climate
90 rently within the vehicle. AUC executes this
function automatically.
Press the button repeatedly to run through
the following control sequence:
>Indicator lamps off: outside air flows
into the vehicle continuously
>Right indicator lamp on, AUC mode: the
system detects pollutants in the outside
air and responds by blocking the supply
of outside air when required.
Depending upon air quality require-
ments, in the automatic mode the sys-
tem alternates between its outside-air
and recirculated-air modes
>Left indicator lamp on, recirculated-air
mode: the supply of outside air into the
vehicle is continuously blocked.
If condensation starts to form on the
inside window surfaces during opera-
tion in the recirculated-air mode, you
should switch it off while also increasing
the air volume as required.
The recirculated-air mode should not be
used over a longer period of time, as the air
quality inside the vehicle deteriorates con-
tinuously.<
Residual heat mode
If you press this button with the
engine switched off, the system
uses the warmth stored in the
engine to heat the interior, for
instance, while the vehicle is
stationary at a school to pick up a child.
You can adjust the automatic climate con-
trol settings as of ignition key position 2.
Provided that the engine has warmed to its
normal operating temperature and the bat-
tery is charged, you can use this function
for up to 15 minutes after switching off the
ignition. The LED within the button lights up
to confirm compliance with both of these
conditions.
Switching off automatic climate
control
The air volume, the heater and
the cooling function are all
switched off. You can restart
the automatic climate control
by pressing any of its buttons
except the REST button.
Settings using Control Center
Ignition key:
>On vehicles with separate drives for
audio CDs and navigation DVDs, igni-
tion key in position 2
>On vehicles with one drive for audio
CDs, ignition key in position 1.
Control Center, for principle details, refer to
page 16:
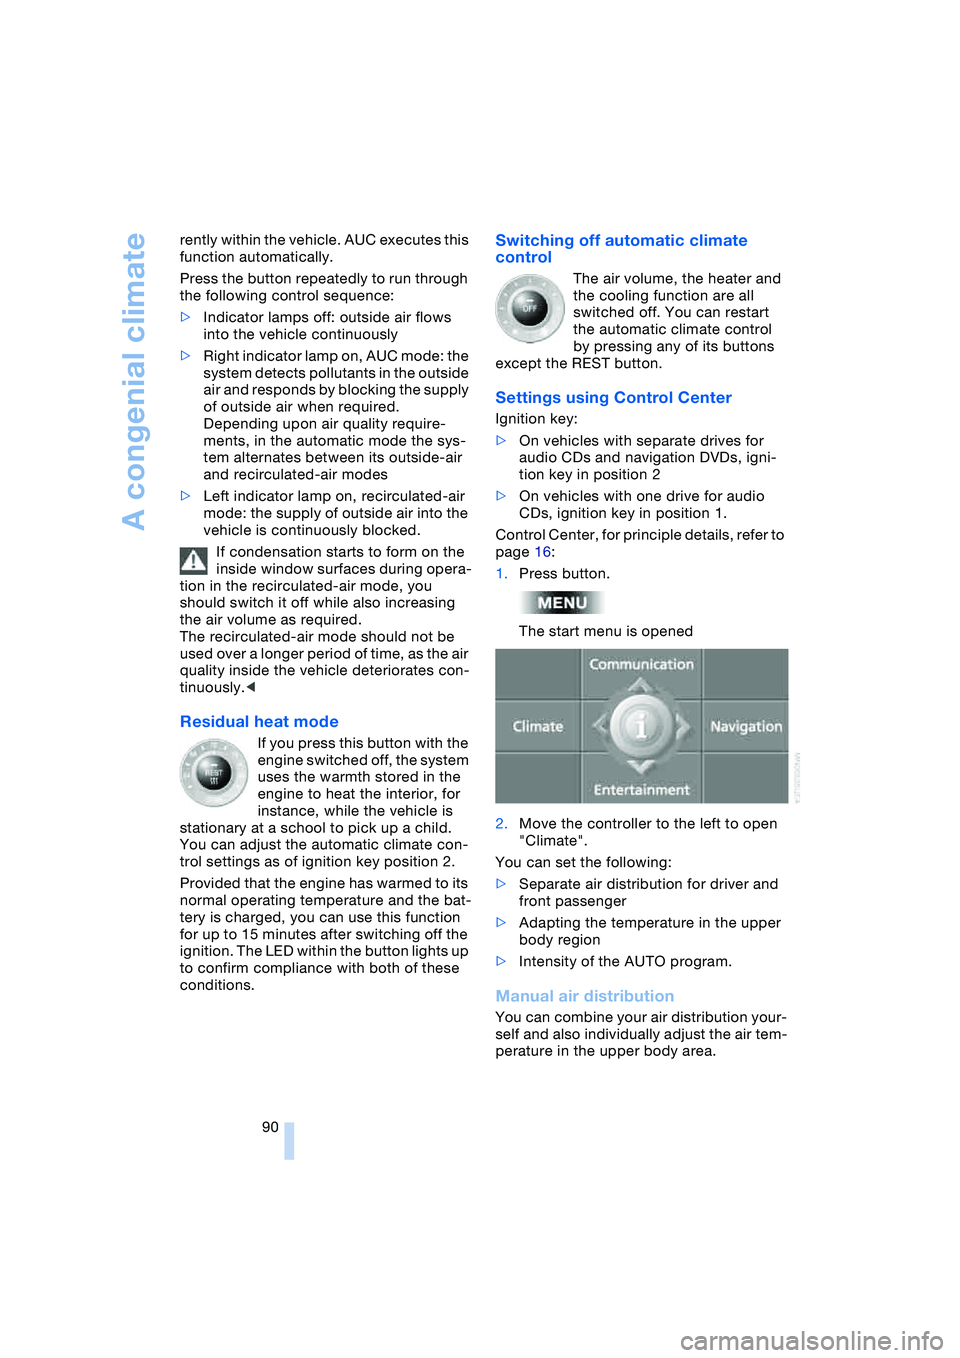
1.Press button.
The start menu is opened
2.Move the controller to the left to open
"Climate".
You can set the following:
>Separate air distribution for driver and
front passenger
>Adapting the temperature in the upper
body region
>Intensity of the AUTO program.
Manual air distribution
You can combine your air distribution your-
self and also individually adjust the air tem-
perature in the upper body area.
Page 97 of 216
Controls
95Reference
At a glance
Driving tips
Communications
Navigation
Entertainment
Mobility
The corresponding memory button 1 is
now programmed with the signal of the
original hand-held transmitter.
The equipment can be used in ignition key
position 2.
If the device cannot be operated after
repeated programming, check
whether the original hand-held transmitter
uses an alternating-code system. Here,
either read the instructions for the original
hand-held transmitter or hold down the
programmed memory button 1 of the inte-
grated universal remote control. If the indi-
cator lamp 2 on the integrated universal
remote control flashes rapidly for a short
time then lights up for approx. 2 seconds,
this indicates that the original hand-held
transmitter uses an alternating-code sys-
tem. In the case of an alternating-code sys-
tem, program the memory buttons 1 as
described at Alternating-code hand-held
transmitters.<
Alternating-code hand-held
transmitters
To program the integrated universal remote
control, consult the Operating Instructions
for the equipment to be set. You will find
information there on the possibilities for
synchronization.
When programming hand-held transmitters
that employ an alternating code, please
observe the following supplementary
instructions:
Programming will be easier with the
aid of a second person.<
1.Park your vehicle within the range of the
remote-controlled equipment
2.Program the integrated universal
remote control as described above at
Fixed-code hand-held transmitters
3.Locate the button at the receiver of the
equipment to be set, e.g. on the drive
4.Press the button on the receiver of the
equipment to be set. After step 4, you
have approx. 30 seconds for step 55.Press the programmed memory
button 1 of the integrated universal
remote control three times.
The corresponding memory button 1 is
now programmed with the signal of the
original hand-held transmitter.
If you have any additional questions,
please contact your BMW center.<
Clearing memory buttons
Press both outer buttons 1 of the inte-
grated universal remote control for approx.
20 seconds, maintaining pressure until the
indicator lamp 2 starts to flash. All three
memory buttons are cleared.
The memory of individual memory but-
tons 1 cannot be cleared.
Glove compartment
Opening
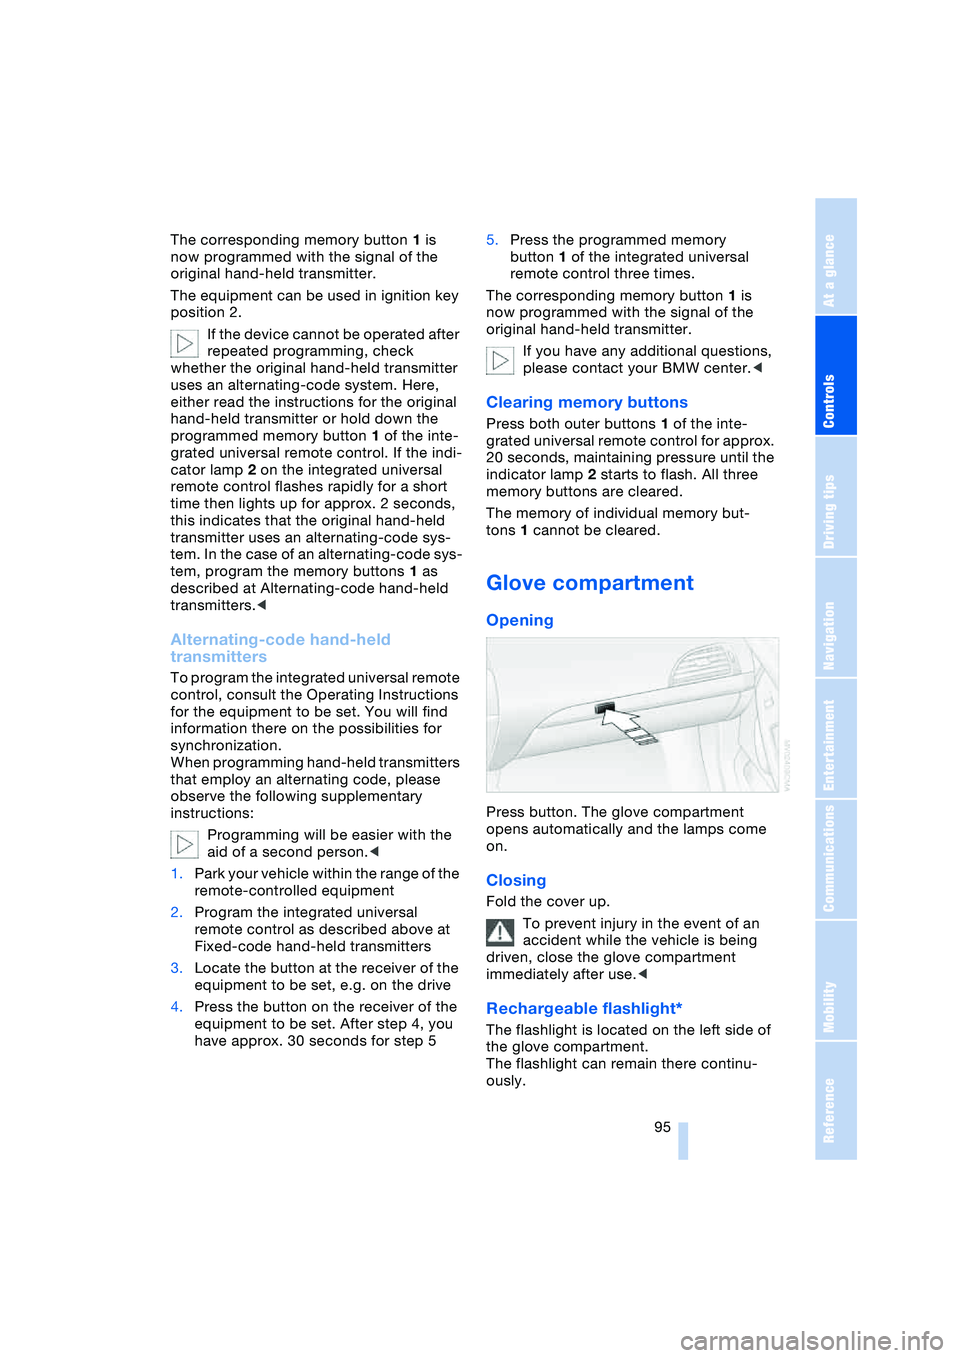
Press button. The glove compartment
opens automatically and the lamps come
on.
Closing
Fold the cover up.
To prevent injury in the event of an
accident while the vehicle is being
driven, close the glove compartment
immediately after use.<
Rechargeable flashlight*
The flashlight is located on the left side of
the glove compartment.
The flashlight can remain there continu-
ously.
Page 99 of 216
Controls
97Reference
At a glance
Driving tips
Communications
Navigation
Entertainment
Mobility
could cause personal injury to occupants
during braking or evasive maneuvers.<
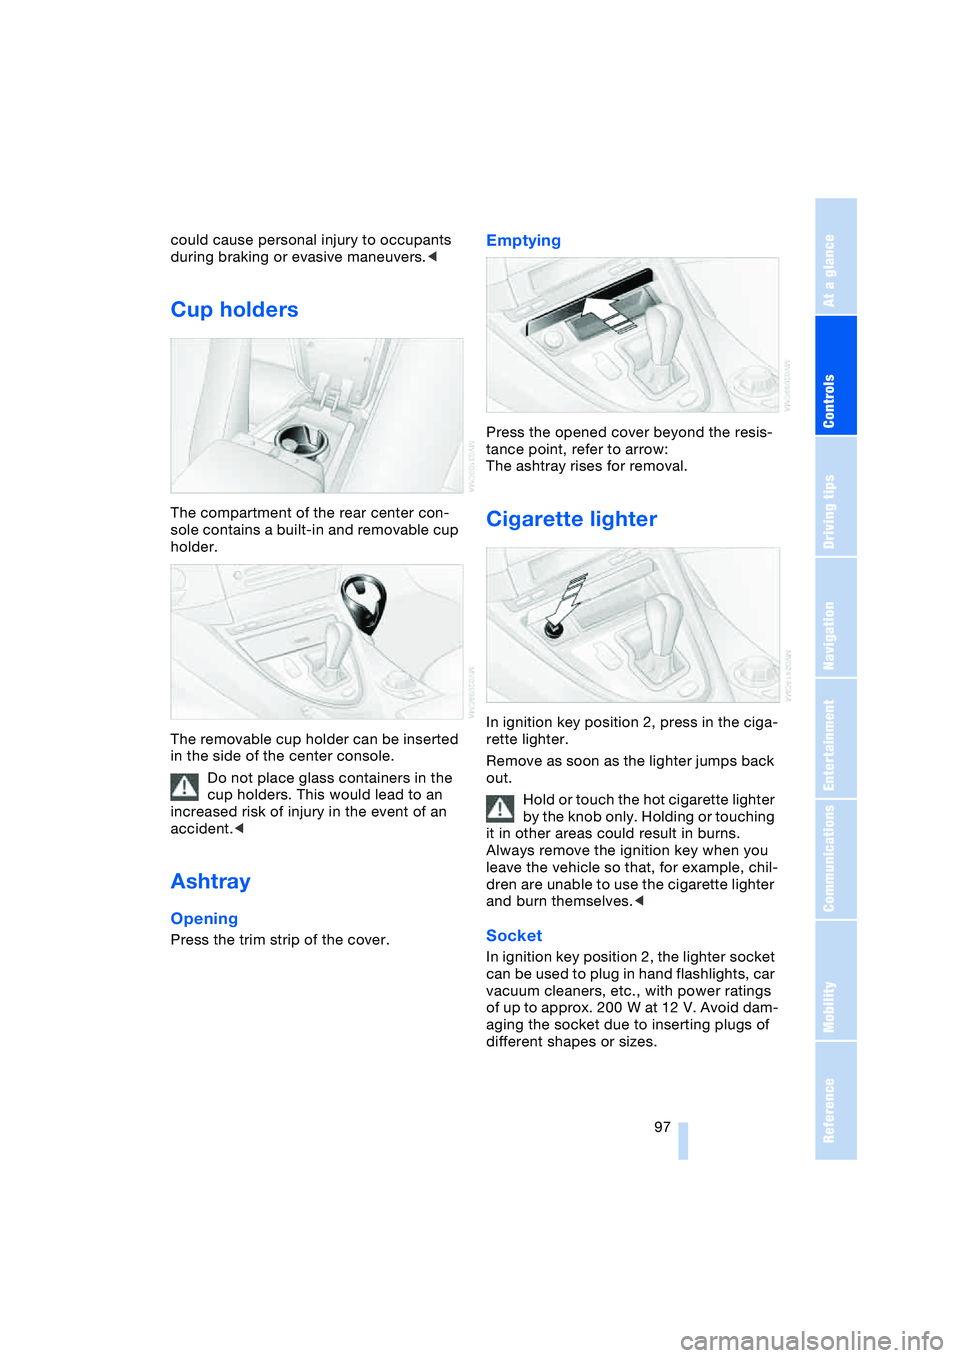
Cup holders
The compartment of the rear center con-
sole contains a built-in and removable cup
holder.
The removable cup holder can be inserted
in the side of the center console.
Do not place glass containers in the
cup holders. This would lead to an
increased risk of injury in the event of an
accident.<
Ashtray
Opening
Press the trim strip of the cover.
Emptying
Press the opened cover beyond the resis-
tance point, refer to arrow:
The ashtray rises for removal.
Cigarette lighter
In ignition key position 2, press in the ciga-
rette lighter.
Remove as soon as the lighter jumps back
out.
Hold or touch the hot cigarette lighter
by the knob only. Holding or touching
it in other areas could result in burns.
Always remove the ignition key when you
leave the vehicle so that, for example, chil-
dren are unable to use the cigarette lighter
and burn themselves.<
Socket
In ignition key position 2, the lighter socket
can be used to plug in hand flashlights, car
vacuum cleaners, etc., with power ratings
of up to approx. 200 W at 12 V. Avoid dam-
aging the socket due to inserting plugs of
different shapes or sizes.
Page 165 of 216
Mobility
163Reference
At a glance
Controls
Driving tips
Communications
Navigation
Entertainment
Warning lamp* lights up.
Fuel filler cap is not properly closed
or is missing. Check whether the
fuel filler cap is properly closed.
Fuel specifications
The engine uses lead-free gasoline only.
Required fuel
Premium Unleaded Gasoline,
Minimum Octane Rating: 91.
Minimum Octane Rating corresponds to
the Anti Knock Index AKI and is deter-
mined according to the so-called (R+M)/
2 method.
Do not use leaded gasoline, as other-
wise the lambda probe and catalytic
converter will be permanently damaged.<
Use high-quality brands
Field experience has indicated significant
differences in fuel quality: volatility, compo-
sition, additives, etc., among gasolines
offered for sale in the United States and
Canada. Fuels containing up to and includ-
ing 10 % ethanol or other oxygenates with
up to 2.8 % oxygen by weight, that is,
15 % MTBE or 3 % methanol plus an equiv-
alent amount of co-solvent, will not void
the applicable warranties with respect to
defects in materials or workmanship.
The use of poor-quality fuels may
result in drivability, starting and stall-
ing problems, especially under certain
environmental conditions such as high
ambient temperature and high altitude.
Should you encounter drivability problems
which you suspect could be related to the
fuel you are using, we recommend that you
respond by switching to a recognized high-
quality brand.
Failure to comply with these recommenda-
tions may also result in unscheduled main-
tenance.<
Page 175 of 216
Mobility
173Reference
At a glance
Controls
Driving tips
Communications
Navigation
Entertainment
3.The coolant level is correct when the
measuring range of the fill level indica-
tor is at the level of the upper edge of
the filler neck, also refer to the drawing
next to the filler neck
4.If the coolant is low, slowly add coolant
up to the specified level – do not overfill
5.Turn the cap until you hear a click
6.Have the reason for the coolant loss
eliminated as soon as possible.
Brake system
Malfunction
Brake fluid
The warning lamp lights up in red
in spite of the handbrake being
released; a message appears on
the Control Display.
Stop the vehicle immediately.
The brake fluid in the reservoir has fallen to
below the minimum level. At the same time,
a significantly longer brake pedal path is
noticeable. Have the system checked
immediately by a BMW center.
Warning lamp for Canadian models.
When you continue driving, an
increased brake pedal path can be
necessary, and significantly longer braking
distances might be required. Please adapt
your driving style accordingly.<
Brake pads
The warning lamp lights up in red
in spite of the handbrake being
released; a message appears on
the Control Display. The brake pads have
reached their minimum pad thickness.
Have the brake pads replaced as soon as
possible.
Warning lamp for Canadian models.For your own safety: use only brake
pads that BMW has approved for your
particular vehicle model. As BMW cannot
assess the suitability of other brake pads
for use on your vehicle, BMW is unable to
assume continued responsibility for the
vehicle's operating safety if non-approved
pads are installed.<
Page 180 of 216
Replacing components
178
Replacing components
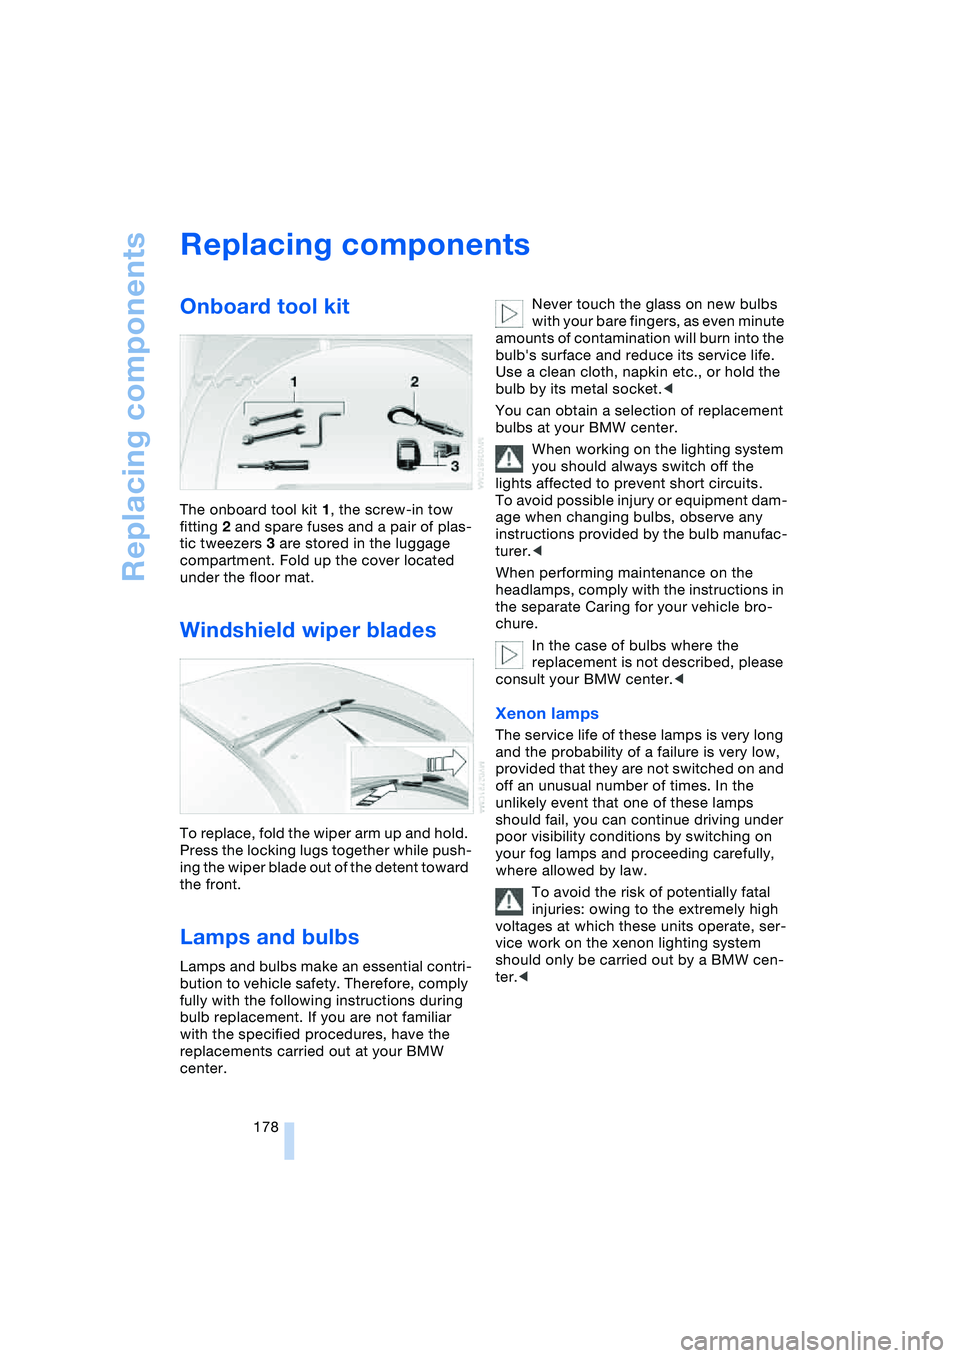
Onboard tool kit
The onboard tool kit 1, the screw-in tow
fitting 2 and spare fuses and a pair of plas-
tic tweezers 3 are stored in the luggage
compartment. Fold up the cover located
under the floor mat.
Windshield wiper blades
To replace, fold the wiper arm up and hold.
Press the locking lugs together while push-
ing the wiper blade out of the detent toward
the front.
Lamps and bulbs
Lamps and bulbs make an essential contri-
bution to vehicle safety. Therefore, comply
fully with the following instructions during
bulb replacement. If you are not familiar
with the specified procedures, have the
replacements carried out at your BMW
center.Never touch the glass on new bulbs
with your bare fingers, as even minute
amounts of contamination will burn into the
bulb's surface and reduce its service life.
Use a clean cloth, napkin etc., or hold the
bulb by its metal socket.<
You can obtain a selection of replacement
bulbs at your BMW center.
When working on the lighting system
you should always switch off the
lights affected to prevent short circuits.
To avoid possible injury or equipment dam-
age when changing bulbs, observe any
instructions provided by the bulb manufac-
turer.<
When performing maintenance on the
headlamps, comply with the instructions in
the separate Caring for your vehicle bro-
chure.
In the case of bulbs where the
replacement is not described, please
consult your BMW center.<
Xenon lamps
The service life of these lamps is very long
and the probability of a failure is very low,
provided that they are not switched on and
off an unusual number of times. In the
unlikely event that one of these lamps
should fail, you can continue driving under
poor visibility conditions by switching on
your fog lamps and proceeding carefully,
where allowed by law.
To avoid the risk of potentially fatal
injuries: owing to the extremely high
voltages at which these units operate, ser-
vice work on the xenon lighting system
should only be carried out by a BMW cen-
ter.<