2004 BMW 545I SEDAN brake
[x] Cancel search: brakePage 81 of 220
Controls
79Reference
At a glance
Driving tips
Communications
Navigation
Entertainment
Mobility
Indicator and warning lamps for
Canadian models.
DTC Dynamic Traction Control
In special driving states, e.g. in deep snow,
DTC ensures maximum forward momen-
tum. The gain in forward momentum also
involves a reduction in driving stability.
DTC is active up to 45 mph/70 km/h.
Activating DTC
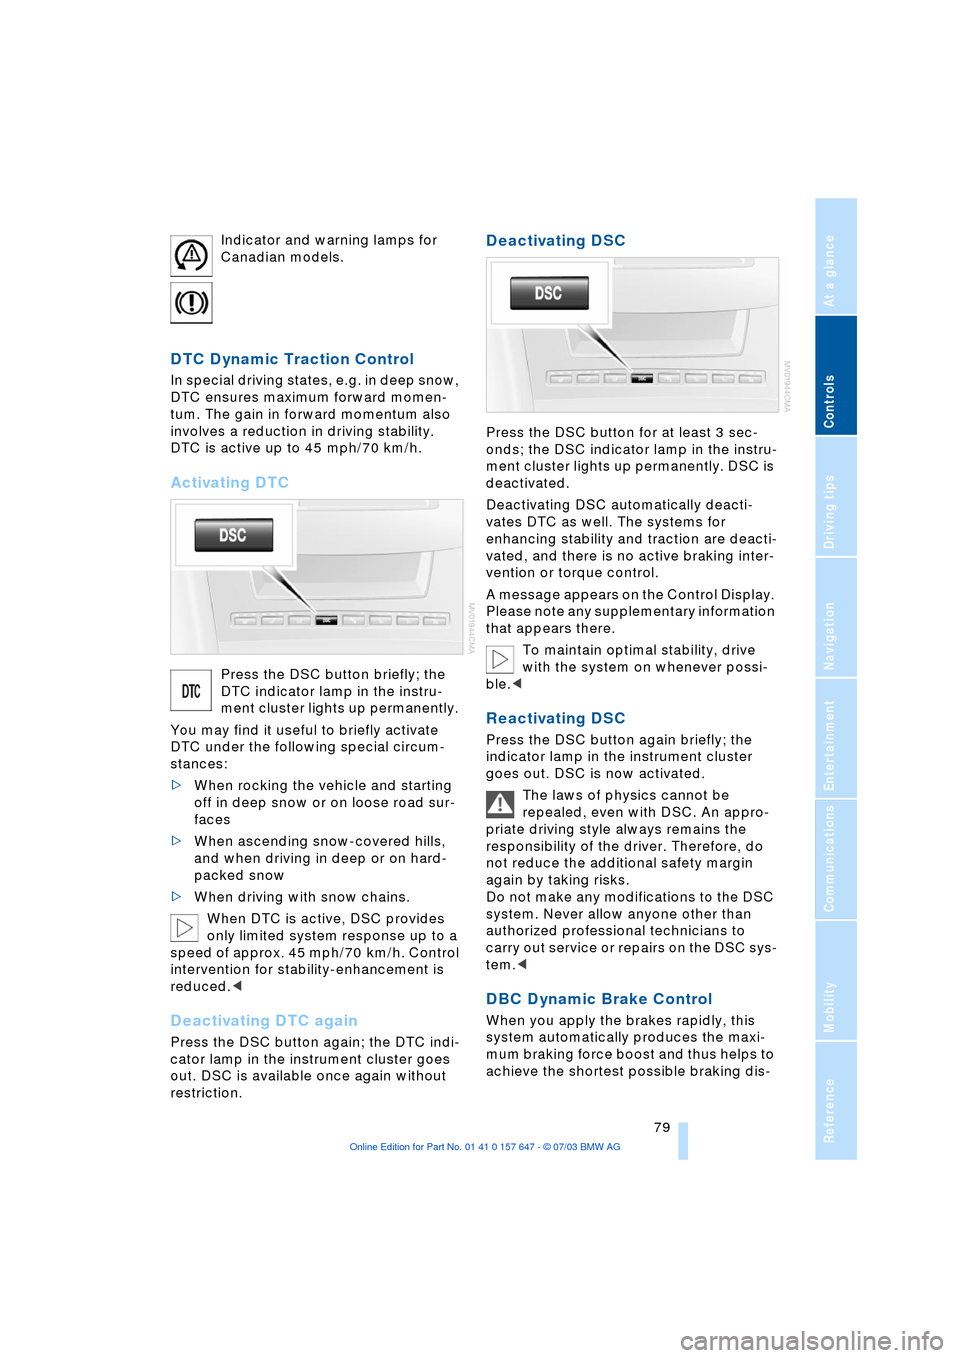
Press the DSC button briefly; the
DTC indicator lamp in the instru-
ment cluster lights up permanently.
You may find it useful to briefly activate
DTC under the following special circum-
stances:
>When rocking the vehicle and starting
off in deep snow or on loose road sur-
faces
>When ascending snow-covered hills,
and when driving in deep or on hard-
packed snow
>When driving with snow chains.
When DTC is active, DSC provides
only limited system response up to a
speed of approx. 45 mph/70 km/h. Control
intervention for stability-enhancement is
reduced.<
Deactivating DTC again
Press the DSC button again; the DTC indi-
cator lamp in the instrument cluster goes
out. DSC is available once again without
restriction.
Deactivating DSC
Press the DSC button for at least 3 sec-
onds; the DSC indicator lamp in the instru-
ment cluster lights up permanently. DSC is
deactivated.
Deactivating DSC automatically deacti-
vates DTC as well. The systems for
enhancing stability and traction are deacti-
vated, and there is no active braking inter-
vention or torque control.
A message appears on the Control Display.
Please note any supplementary information
that appears there.
To maintain optimal stability, drive
with the system on whenever possi-
ble.<
Reactivating DSC
Press the DSC button again briefly; the
indicator lamp in the instrument cluster
goes out. DSC is now activated.
The laws of physics cannot be
repealed, even with DSC. An appro-
priate driving style always remains the
responsibility of the driver. Therefore, do
not reduce the additional safety margin
again by taking risks.
Do not make any modifications to the DSC
system. Never allow anyone other than
authorized professional technicians to
carry out service or repairs on the DSC sys-
tem.<
DBC Dynamic Brake Control
When you apply the brakes rapidly, this
system automatically produces the maxi-
mum braking force boost and thus helps to
achieve the shortest possible braking dis-
Page 82 of 220

Technology for comfort, convenience and safety
80 tance during panic stops. This system
exploits all of the benefits provided by ABS.
Do not reduce the pressure on the brake
pedal for the duration of the brake applica-
tion. When the brake pedal is released,
DBC is deactivated.
In the event of a malfunction, the
warning lamp in the instrument
cluster lights up yellow.
Have the system checked and repaired at
your BMW center as soon as possible.
Please note any information that appears
on the Control Display.
Warning lamp for Canadian models.
Active roll stabilization*
The concept
Active roll stabilization minimizes body roll
and optimizes vehicle stability during cor-
nering and evasive maneuvers.
Dynamic stabilizers at the front and rear
axles form the basis for active roll stabiliza-
tion. Suspension compliance adapts to suit
driving conditions, varying from perfor-
mance-oriented during cornering to
smooth and comfort-oriented when the
vehicle is proceeding in a straight line.
The system assumes operational status
each time you start the engine.
Driving with active roll stabilization
During vehicle operation, the system con-
tinuously runs through closed-loop control
cycles lasting only fractions of a second.
In case of malfunction
The symbol in the instrument clus-
ter lights up and a message
appears on the Control Display.
Please note any supplementary information
that appears there.
You can find more information on the
Check Control starting on page 68. If the active roll stabilization system is
deactivated in response to malfunc-
tion, please remember to adapt your speed
accordingly, especially in curves.
The suspension will be noticeably softer
and the vehicle will display a greater ten-
dency to tilt during cornering and in cross-
winds.
If a message stating that you should stop
appears on the Control Display in addition
to the red symbol, stop immediately and
switch off the engine. In this case the oil
level in the reservoir may have dropped
below the minimum, possibly owing to a
leak in the hydraulic system.
Please note any supplementary information
that appears on the Control Display.<
Flat Tire Monitor
The concept
The Flat Tire Monitor keeps track of the
inflation pressures in the four fitted tires as
you drive. The system provides an alert
whenever the inflation pressure drops sig-
nificantly in relation to the pressure in
another tire.
The check of the tire inflation pressure is
based on monitoring the relative speeds of
the wheels. A flat tire is detected and
reported on the basis of a deviation in cer-
tain speed ratios.
Functional requirement
So that the Flat Tire Monitor can learn the
correct inflation pressure, please perform
the following:
1.Check the inflation pressures in all tires
2.Compare with the inflation pressure
table on page 170 and correct if neces-
sary
3.Initialize the system.
Limits of the system
The Flat Tire Monitor cannot indicate
sudden severe tire damage caused
by outside factors and does not detect a
Page 84 of 220
Technology for comfort, convenience and safety
82
System malfunctions
Indicator lamp
The symbol in the instrument clus-
ter lights up yellow and a message
appears on the Control Display.
Please contact your BMW center.
Please note any supplementary information
that appears on the Control Display.
Active steering*
The concept
The active steering is a system that actively
varies the steering angle of the front wheels
in relation to the steering wheel move-
ments.
When you are driving in the low road speed
range, e.g. in a town or when parking, the
steering angle is reinforced, i.e. the steer-
ing becomes very direct and significantly
improves the handling capability of your
BMW.
In the higher road speed range, on the
other hand, the steering angle is reduced,
also optimizing the handling capability.
In critical situations, the system can make
targeted changes to the steering angle pro-
vided by the driver and thus stabilize the
vehicle before the driver intervenes.
Indicator lamp
The indicator lamp lights up perma-
nently: malfunction in the system.
Please have the system inspected
at your BMW center.
Conventional steering efficiency remains
available without limitations.
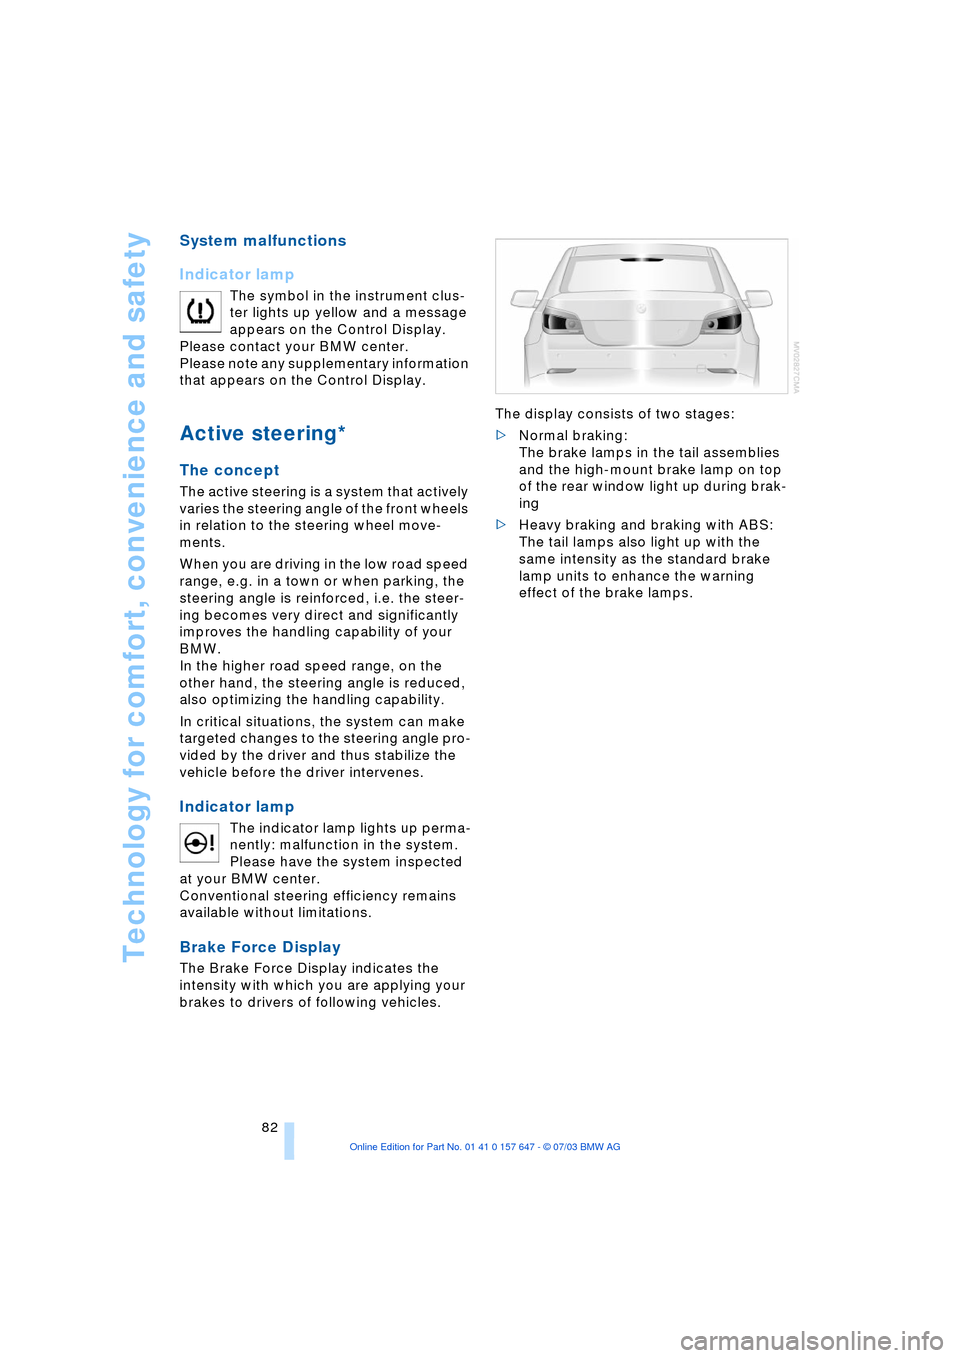
Brake Force Display
The Brake Force Display indicates the
intensity with which you are applying your
brakes to drivers of following vehicles. The display consists of two stages:
>Normal braking:
The brake lamps in the tail assemblies
and the high-mount brake lamp on top
of the rear window light up during brak-
ing
>Heavy braking and braking with ABS:
The tail lamps also light up with the
same intensity as the standard brake
lamp units to enhance the warning
effect of the brake lamps.
Page 108 of 220
Things to remember when driving
106
Things to remember when driving
Break-in procedures
To ensure that your vehicle continues to
provide optimized economy of operation
throughout an extended service life, we
request that you devote careful attention to
the following section.
Engine and differential
Up to 1,200 miles/2,000 km:
You should attempt to vary both vehicle
and engine speeds. Until the break-in
period has been completed, you should
also refrain from exceeding an engine
speed of 4,500 rpm or a driving speed of
100 mph/160 km/h.
Always obey all official speed limits.
Avoid full-throttle operation and use of the
transmission's kickdown mode during
these initial miles.
Once you have driven 1,200 miles/
2,000 km, the engine and vehicle speeds
can be gradually increased.
You should also comply with these break-in
procedures should the engine or differen-
tial need to be replaced at a later point.
Sequential manual transmission
SMG
Do not use the acceleration assistant dur-
ing the break-in period.
Tires
Due to technical factors associated with
their manufacture, tires do not achieve their
full traction potential until after an initial
break-in period. Therefore, drive reservedly
during the first 200 miles/300 km.
Brake system
Brakes require an initial break-in period of
approx. 300 miles/500 km to achieve opti-
mized contact and wear patterns between
brake pads and rotors.
Clutch
The function of the clutch is only at its opti-
mized level after a distance driven of
approx. 300 miles/500 km. During this
break-in period, engage the clutch gently.
General driving notes
High temperatures
Extreme temperatures occur at the
catalytic converter on this and every
catalyst-equipped vehicle. Do not remove
the heat shields installed adjacent to vari-
ous sections of the exhaust system, and
never apply undercoating to them. When
driving, standing at idle and while parking
take care to avoid possible contact
between the hot exhaust system and any
highly flammable materials such as hay,
leaves, grass, etc. Such contact could lead
to a fire, and with it the risk of serious prop-
erty damage as well as personal injury.<
Parking the vehicle
Condensation forms in the air conditioner
system during operation, and then exits
under the vehicle. Traces of condensed
water under the vehicle are thus normal.
Before driving into the car wash
Fold in the exterior mirrors, refer to
page 42, as otherwise they could be dam-
aged due to the width of the vehicle.
Hydroplaning
When driving on wet or slushy roads,
reduce road speed. If you do not, a
wedge of water can form between tires and
road surface.This phenomenon is referred
to as hydroplaning, and is characterized by
a partial or complete loss of contact
between the tires and the road surface, ulti-
mately undermining your ability to steer
and brake the vehicle.<
Page 109 of 220

Driving tips
107Reference
At a glance
Controls
Communications
Navigation
Entertainment
Mobility
The risk of hydroplaning increases as the
tread depth of the tires decreases, refer
also to Tire tread on page 173.
Water on the road
Do not drive through water on the
road if it is deeper than 1 ft/30 cm,
and then only at walking speed at the most.
Otherwise, the vehicle's engine, the electri-
cal systems and the transmission may be
damaged.<
Brakes
Your BMW is equipped with ABS as stan-
dard. The best way to achieve optimized
response from the ABS is to apply maxi-
mum pressure to the brake pedal during
emergency: panic stops. Since the vehicle
maintains steering responsiveness, you
can nevertheless avoid possible obstacles
with a minimum of steering effort.
Pulsation at the brake pedal combines with
sounds from the hydraulic circuits to indi-
cate to the driver that ABS is in its active
mode.
Do not drive with your foot resting on
the brake pedal. Even light but con-
sistent pedal pressure can lead to high
temperatures, brake wear and possibly
even brake failure.<
Driving in wet conditions
While driving in wet conditions and in
heavy rain, it is a good idea to apply light
pressure to the brake pedal every few
miles. Monitor traffic conditions to ensure
that this maneuver does not endanger
other road users. The heat generated in this
process helps dry the pads and rotors to
ensure that full braking efficiency will then
be available when you need it.
Hills
You can retain full and unimpaired braking
efficiency by downshifting to a gear in
which only minimal brake applications are
needed when descending long or steep
downhill stretches. You can further enhance the engine's brak-
ing effect by selecting a lower gear in the
automatic transmission's manual mode,
downshifting as far as first gear on
extremely steep stretches, refer to
pages 50 and 55. This strategy helps you
avoid placing excessive loads on the brake
system.
Never drive with the clutch pressed or
allow the vehicle to coast with the
transmission in Neutral Ð or with the engine
switched off Ð there is no engine braking
when the transmission is in Neutral, and no
power-assist for brakes and steering when
the engine is not running.
Never allow floor mats, carpets or any other
objects to protrude into the area around the
accelerator and brake pedals and obstruct
their movement.<
Corrosion on the brake rotors
When the vehicle is driven only occasion-
ally, during extended periods when the
vehicle is not used at all, and in operating
conditions where brake applications are
less frequent, there is an increased ten-
dency for corrosion to form on rotors, while
contaminants accumulate on the brake
pads. This occurs because the minimum
pressure which must be exerted by the
pads during brake applications to clean the
rotors is not reached.
Should corrosion form on the brake rotors,
the brakes will tend to respond with a pul-
sating effect that even extended applica-
tion will fail to cure.
Brake pads
The brake pad wear warning lamp
lights up and a message appears on
the Check Control. Please note any
supplementary information that appears
there.
Warning lamp for Canadian models.
The brake pads have reached their mini-
mum pad thickness. Have them replaced at
your BMW center as soon as possible.
Page 110 of 220
Things to remember when driving
108 For your own safety: use only brake
pads that BMW has approved for your
particular vehicle model. As BMW cannot
assess the suitability of other brake pads
for use on your vehicle, we are unable to
assume continued responsibility for the
vehicle's operating safety if non-approved
pads are installed.<
Mobile communication in the vehicle
BMW recommends using mobile communi-
cation devices, e.g. portable phones, in the
interior of the vehicle with a suitable exter-
nal antenna. Otherwise, the vehicle elec-
tronics and mobile communication device
can influence one another.
Loading
To avoid loading the tires beyond
their approved carrying capacity,
never overload the vehicle. Overloading
can lead to overheating and increases the
rate at which damage develops inside the
tires. The ultimate result can assume the
form of a sudden air loss.<
Determining loading limit
1.Locate the following statement on the
driver's door pillar
*:
The combined weight of occu-
pants and cargo should never
exceed XXX kg or YYY lbs, as otherwise
the vehicle may be damaged and unsta-
ble driving conditions may result.<
2.Determine the combined weight of the
driver and passengers that will be riding
in your vehicle 3.Subtract the combined weight of the
driver and passengers from XXX kilo-
grams or YYY pounds
4.The resulting figure equals the available
amount of cargo and luggage load
capacity.
For example, if the XXX amount equals
1,400 lbs. and there will be five 150-lbs.
passengers in your vehicle, the amount
of available cargo and luggage load
capacity is 650 lbs.:
1,400 lbs. minus 750 lbs. = 650 lbs.
5.Determine the combined weight of lug-
gage and cargo being loaded on the
vehicle. That weight must not exceed
the available cargo and luggage load
capacity calculated in step 4
6.If your vehicle will be towing a trailer,
part of the load from your trailer will be
transferred to your vehicle. Consult the
manual for transporting a trailer to
determine how this may reduce the
available cargo and luggage load
capacity of your vehicle.
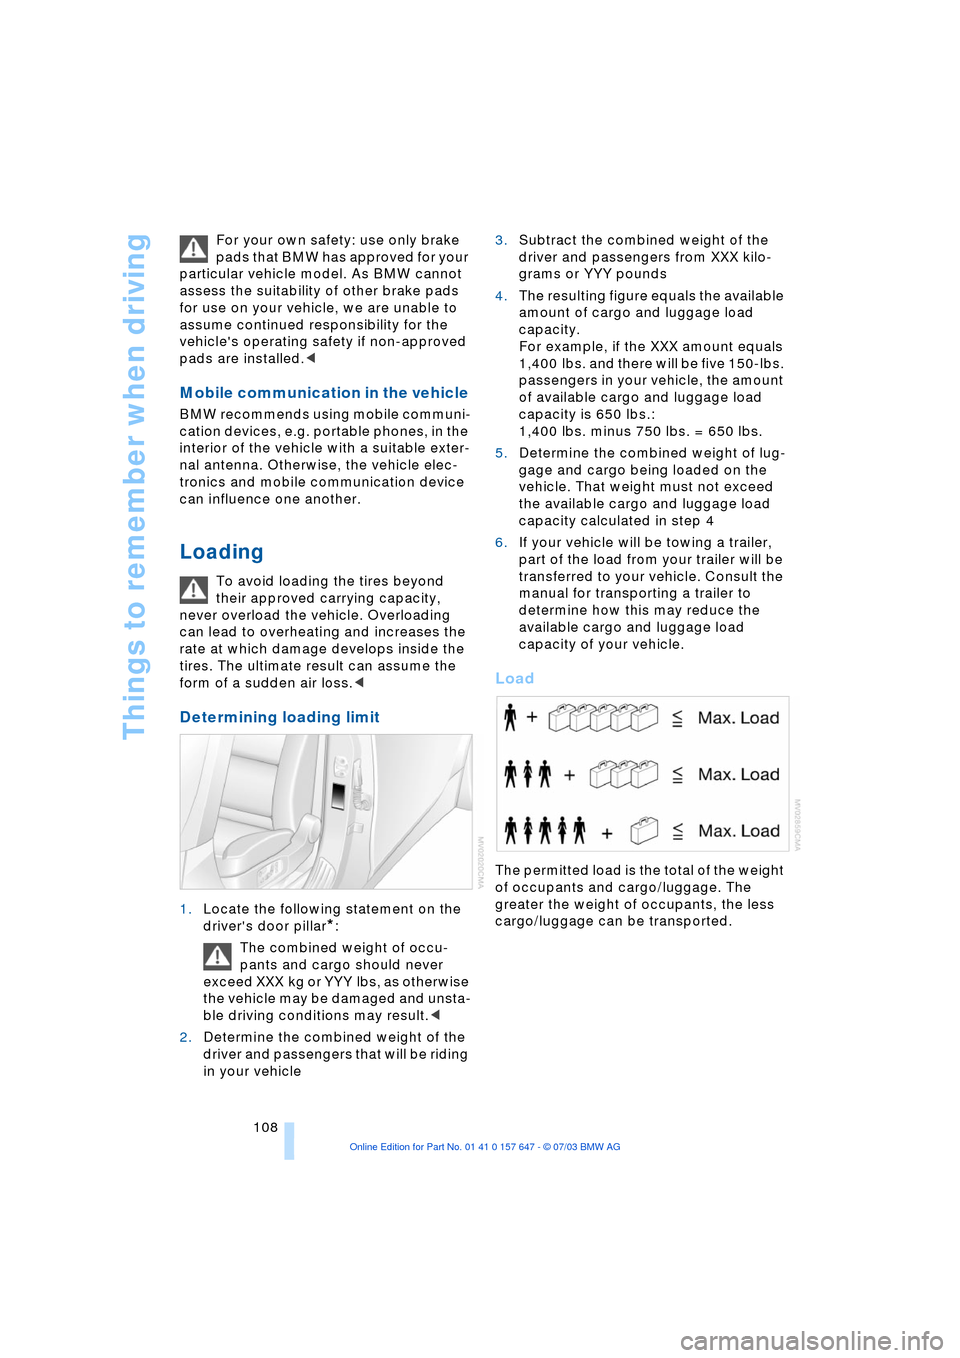
Load
The permitted load is the total of the weight
of occupants and cargo/luggage. The
greater the weight of occupants, the less
cargo/luggage can be transported.
Page 180 of 220
Under the hood
178
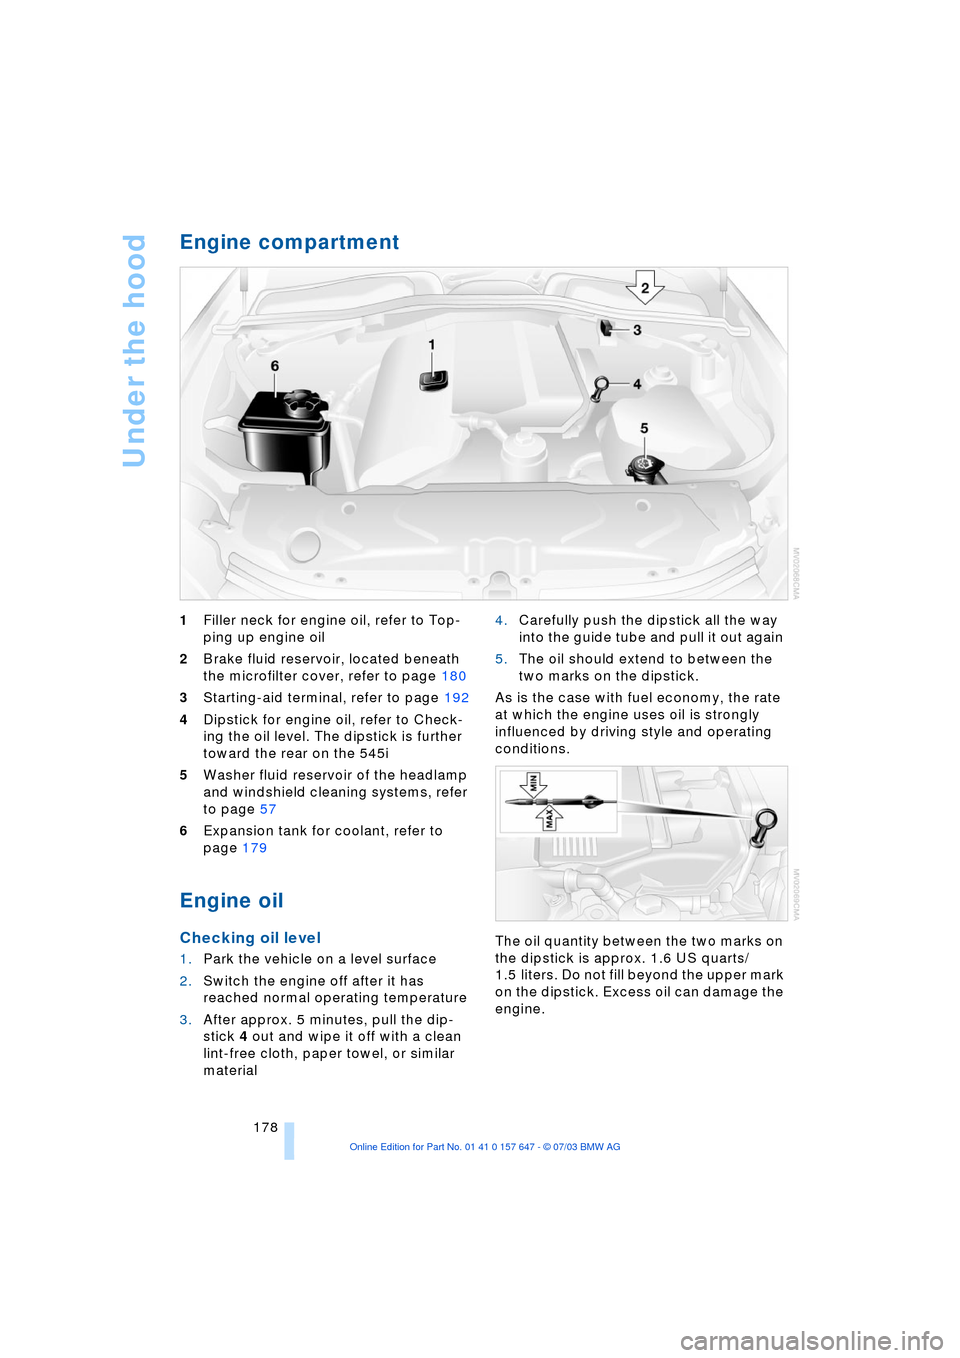
Engine compartment
1Filler neck for engine oil, refer to Top-
ping up engine oil
2Brake fluid reservoir, located beneath
the microfilter cover, refer to page 180
3Starting-aid terminal, refer to page 192
4Dipstick for engine oil, refer to Check-
ing the oil level. The dipstick is further
toward the rear on the 545i
5Washer fluid reservoir of the headlamp
and windshield cleaning systems, refer
to page 57
6Expansion tank for coolant, refer to
page 179
Engine oil
Checking oil level
1.Park the vehicle on a level surface
2.Switch the engine off after it has
reached normal operating temperature
3.After approx. 5 minutes, pull the dip-
stick 4 out and wipe it off with a clean
lint-free cloth, paper towel, or similar
material 4.Carefully push the dipstick all the way
into the guide tube and pull it out again
5.The oil should extend to between the
two marks on the dipstick.
As is the case with fuel economy, the rate
at which the engine uses oil is strongly
influenced by driving style and operating
conditions.
The oil quantity between the two marks on
the dipstick is approx. 1.6 US quarts/
1.5 liters. Do not fill beyond the upper mark
on the dipstick. Excess oil can damage the
engine.
Page 182 of 220

Under the hood
180
Checking coolant level
Correct coolant level with the engine cold,
approx. +687/206:
1.Turn the cap of the expansion tank
counterclockwise to allow any accumu-
lated pressure to escape, then continue
turning to open
2.The coolant level is correct when the
coolant extends to between the MIN
and MAX marks on the filler neck, refer
to the diagram adjacent to the filler
neck
3.If the coolant is low, slowly add coolant
up to the specified level Ð do not overfill.
Brake fluid
The symbol lights up and a mes-
sage appears on the Control Dis-
play: the brake-fluid level in the
container is too low.
The brake fluid reservoir is located under
the microfilter housing trim panel on the
driver's side of the vehicle. To have brake
fluid added to the system, or to have the
source of any brake fluid loss traced and
rectified, please contact your BMW center,
which can also supply the factory-
approved Ð DOT 4 Ð brake fluids.
Brake fluid is hygroscopic: it absorbs
moisture from the atmosphere over
the course of time.
To ensure that the brake system continues
to provide safe and reliable performance,
remember to have the brake fluid changed
every 2 years at the latest, refer to page 66
and to the Service and Warranty Informa-
tion Booklet for US models or the Warranty and Service Guide Booklet for Canadian
models.
Brake fluid is toxic and also damages vehi-
cle paintwork. Always store these agents in
tightly-closed original containers kept well
away from the reach of children.
Do not spill the fluid and do not refill the
brake fluid reservoir to beyond the MAX
mark. Should it come into contact with hot
engine components, the brake fluid could
ignite and cause personal injury in the form
of burns.<
Always observe all applicable rules
and regulations for environmental
protection when disposing of used brake
fluid.<
Warning lamp for Canadian models.
Brake hydraulic systems
A low brake-fluid level combined with
longer-than-usual pedal travel could be a
sign that one of the brake system's hydrau-
lic circuits has failed.
Proceed to the nearest BMW center.
Remember that pedal travel may be
increased, and there may also be a sub-
stantial increase in the amount of pedal
pressure required to brake the vehicle.
Please adapt your driving style accord-
ingly.<