2004 BMW 530I SEDAN Brake signal
[x] Cancel search: Brake signalPage 15 of 220

At a glance
13Reference
Controls
Driving tips
Communications
Navigation
Entertainment
Mobility
Indicator and warning
lamps
Technology that monitors itself
The indicator and warning lamps identified
by the
+ symbol are subjected to an oper-
ation check each time you switch on the
ignition or start the engine. They each light
up once for different periods of time.
When a malfunction occurs in a monitored
system, the corresponding lamp will either
fail to go out when the engine is started, or
it will come on again during normal driving.
For information on how you should respond
when this happens, please refer to the
pages indicated.
Colors
The indicator and warning lamps can light
up in different colors and combinations.
The following section explains the signifi-
cance of the individual colors as well as
how you should respond when they
appear.
>Red:
Stop immediately
or
important reminder
>Red and yellow:
Continue driving moderately
>Yellow:
Have checked soon
or
for your information
>Green or blue:
For your information.
Indicator and warning lamps of the
Check Control
Other indicator and warning lamps appear
in display 6 of the instrument cluster as
necessary, accompanied by supplemen-
tary text on the Control Display, refer to
Check Control, page 68. Turn signal indicators 56
Active steering
+82
Handbrake/brake fluid, brake
hydraulics/DBC Dynamic Brake
Control
+50/ 180/ 79
Handbrake/brake fluid, brake
hydraulics/DBC Dynamic Brake
Control for Canadian models
Airbags
+83
Service Engine Soon
+183
If the indicator lamp comes on
either continuously or intermit-
tently, this indicates a fault in the
emissions-related electronic sys-
tems. Although the vehicle
remains operational, you should
have the systems checked by your
BMW center at the earliest possi-
ble opportunity.
Service Engine Soon indicator
lamp for Canadian models.
Front fog lamps 89
ABS Antilock Brake System
+77
DTC Dynamic Traction Control79
High beams/headlamp flasher 88
Please fasten safety belt
+40
DSC Dynamic Stability
Control
+78
Check Gas Cap168
lamp for US models
Page 52 of 220
Driving
50 lever in idle position and apply the hand-
brake.
Never leave an unattended vehicle with the
engine running, as such a vehicle repre-
sents a potential safety hazard.<
Automatic transmission
1.Press the brake pedal
2.Place the selector lever in position P
or N
3.Start the engine.
To prevent the vehicle from rolling,
always select position P or N and
engage the handbrake before leaving the
vehicle with the engine running.
Never leave an unattended vehicle with the
engine running, as such a vehicle repre-
sents a potential safety hazard.<
Sequential manual transmission
SMG
1.Press the brake pedal
2.Place the selector lever in the idle posi-
tion N
3.Start the engine.
If the engine does not start, engage
the last gear selected, refer to Display
in the instrument cluster, and return the
selector lever to the idle position N.<
Before leaving the vehicle with the
engine running, place the selector
lever in position N and apply the hand-
brake.
Never leave an unattended vehicle with the
engine running, as such a vehicle repre-
sents a potential safety hazard.<
Switching off engine
Do not remove the ignition key while
the vehicle is rolling, as otherwise the
steering wheel lock would engage while
steering.
When leaving the vehicle, always remove
the ignition key and lock the steering.
When parking on downward inclines, apply
the handbrake.<
Manual transmission
Turn the ignition key to position 1 or 0.
Automatic transmission
1.Engage selector-lever position P
2.Turn the ignition key to position 1 or 0.
Sequential manual transmission
SMG
If the selector lever is in position R or in the
sequential mode and you turn the ignition
key to position 1 or 0, the gear remains
engaged automatically.
If the selector lever is in the idle position N
and you turn the ignition key to position 1
or 0, an acoustic signal and the flashing
gear indicator in the display reminds you
that the vehicle is not secured against roll-
ing away.
The warning stops sounding after approx.
9 seconds.
When parking on downward inclines,
apply the handbrake. Engaging a gear
is not sufficient to secure the vehicle from
rolling away under certain circumstances.<
Handbrake
The handbrake is primarily intended to pre-
vent the vehicle from rolling while parked; it
brakes the rear wheels.
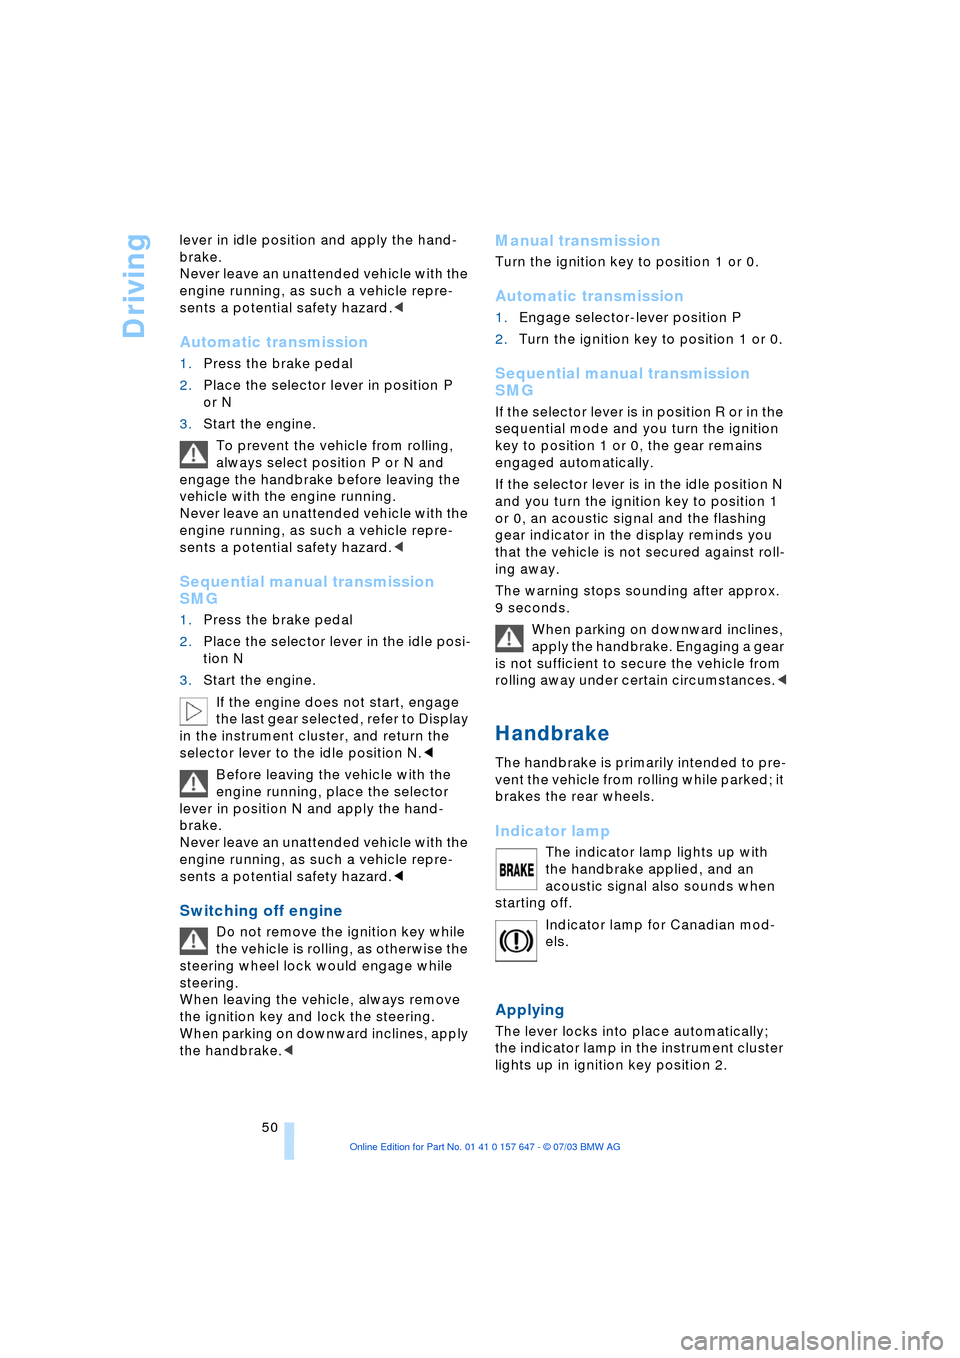
Indicator lamp
The indicator lamp lights up with
the handbrake applied, and an
acoustic signal also sounds when
starting off.
Indicator lamp for Canadian mod-
els.
Applying
The lever locks into place automatically;
the indicator lamp in the instrument cluster
lights up in ignition key position 2.
Page 54 of 220
Driving
52 >Automatic upshifts and downshifts in
the Drive mode
>Automatic downshifts with minimum
engine speed
>Kickdown function in the Drive mode
>Acceleration assistant, refer to
page 54.
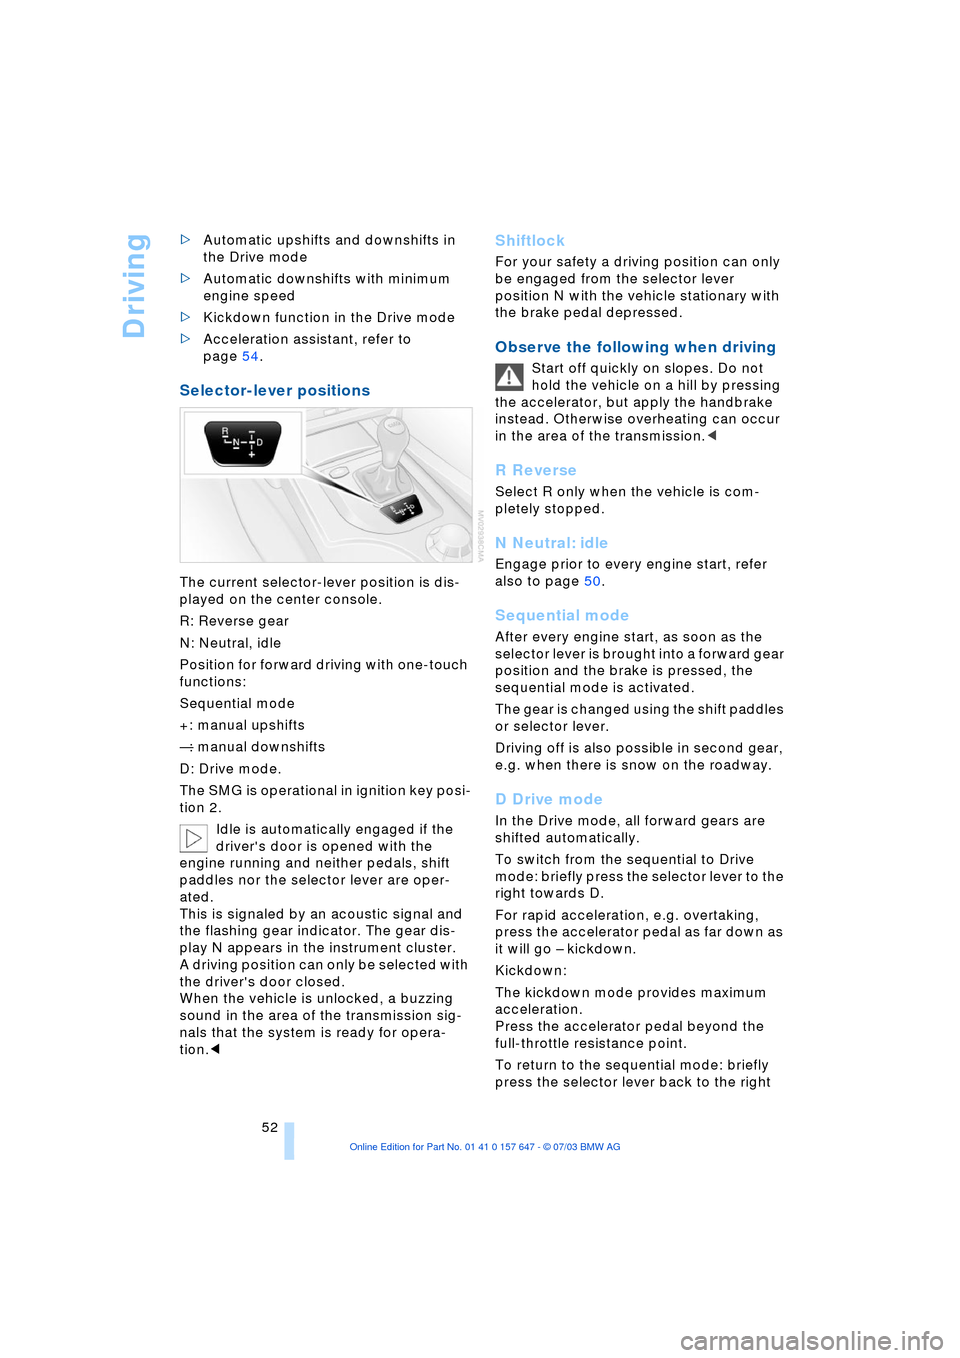
Selector-lever positions
The current selector-lever position is dis-
played on the center console.
R: Reverse gear
N: Neutral, idle
Position for forward driving with one-touch
functions:
Sequential mode
+: manual upshifts
Ñ: manual downshifts
D: Drive mode.
The SMG is operational in ignition key posi-
tion 2.
Idle is automatically engaged if the
driver's door is opened with the
engine running and neither pedals, shift
paddles nor the selector lever are oper-
ated.
This is signaled by an acoustic signal and
the flashing gear indicator. The gear dis-
play N appears in the instrument cluster.
A driving position can only be selected with
the driver's door closed.
When the vehicle is unlocked, a buzzing
sound in the area of the transmission sig-
nals that the system is ready for opera-
tion.<
Shiftlock
For your safety a driving position can only
be engaged from the selector lever
position N with the vehicle stationary with
the brake pedal depressed.
Observe the following when driving
Start off quickly on slopes. Do not
hold the vehicle on a hill by pressing
the accelerator, but apply the handbrake
instead. Otherwise overheating can occur
in the area of the transmission.<
R Reverse
Select R only when the vehicle is com-
pletely stopped.
N Neutral: idle
Engage prior to every engine start, refer
also to page 50.
Sequential mode
After every engine start, as soon as the
selector lever is brought into a forward gear
position and the brake is pressed, the
sequential mode is activated.
The gear is changed using the shift paddles
or selector lever.
Driving off is also possible in second gear,
e.g. when there is snow on the roadway.
D Drive mode
In the Drive mode, all forward gears are
shifted automatically.
To switch from the sequential to Drive
mode: briefly press the selector lever to the
right towards D.
For rapid acceleration, e.g. overtaking,
press the accelerator pedal as far down as
it will go Ð kickdown.
Kickdown:
The kickdown mode provides maximum
acceleration.
Press the accelerator pedal beyond the
full-throttle resistance point.
To return to the sequential mode: briefly
press the selector lever back to the right
Page 61 of 220
Controls
59Reference
At a glance
Driving tips
Communications
Navigation
Entertainment
Mobility
>when you press the clutch or engage
position N of the automatic transmis-
sion
>when the DSC system is in active oper-
ation.
4 Recalling stored speed
Press button 4 briefly: the vehicle acceler-
ates to and maintains the last speed stored.
Deactivating system
When the ignition is switched off, the sys-
tem is deactivated and the stored speed is
deleted.
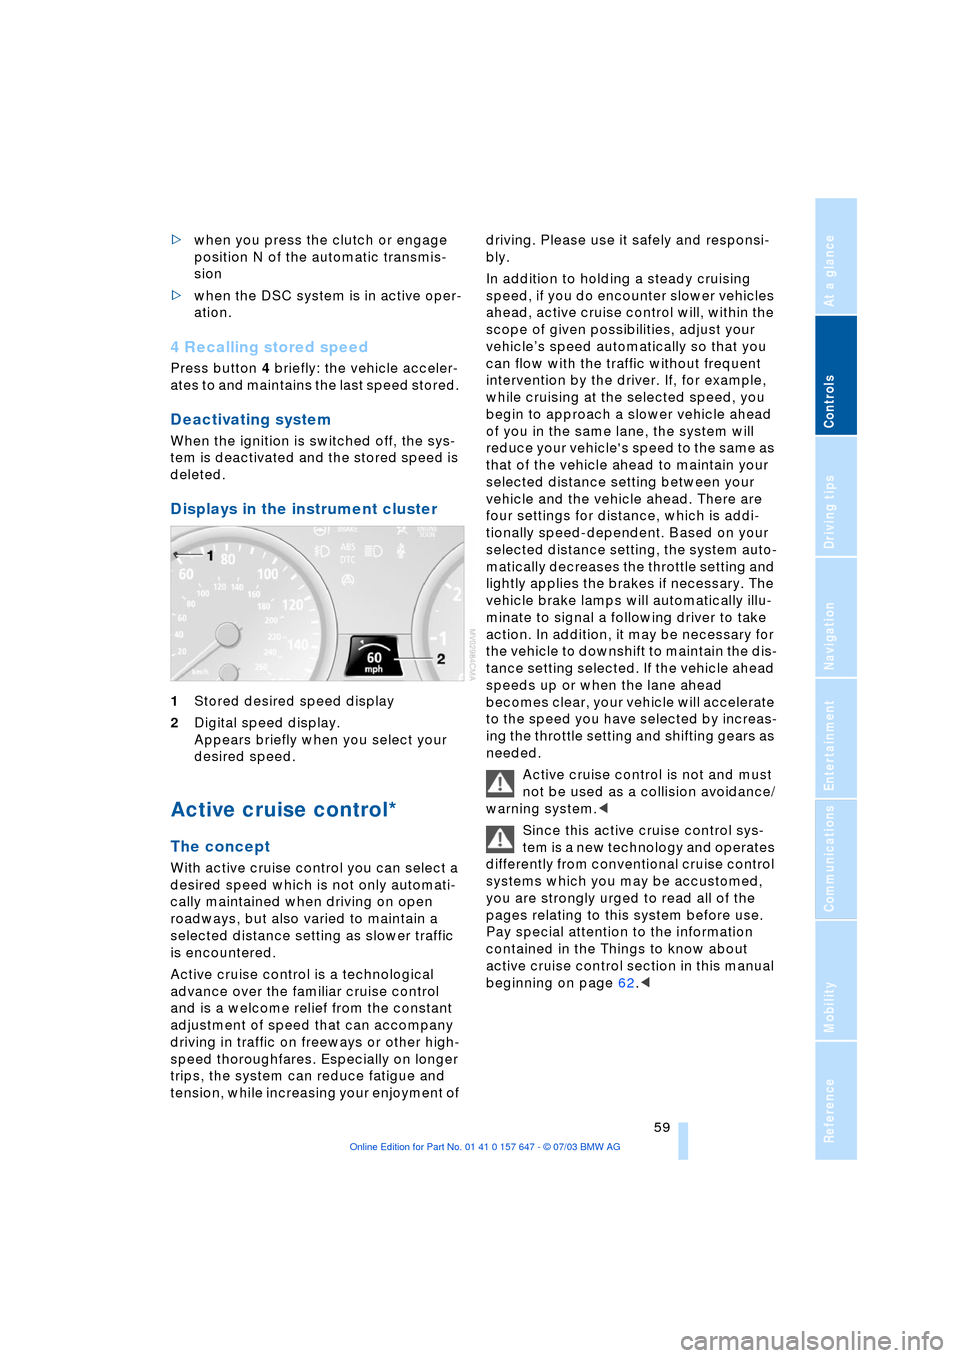
Displays in the instrument cluster
1Stored desired speed display
2Digital speed display.
Appears briefly when you select your
desired speed.
Active cruise control*
The concept
With active cruise control you can select a
desired speed which is not only automati-
cally maintained when driving on open
roadways, but also varied to maintain a
selected distance setting as slower traffic
is encountered.
Active cruise control is a technological
advance over the familiar cruise control
and is a welcome relief from the constant
adjustment of speed that can accompany
driving in traffic on freeways or other high-
speed thoroughfares. Especially on longer
trips, the system can reduce fatigue and
tension, while increasing your enjoyment of driving. Please use it safely and responsi-
bly.
In addition to holding a steady cruising
speed, if you do encounter slower vehicles
ahead, active cruise control will, within the
scope of given possibilities, adjust your
vehicleÕs speed automatically so that you
can flow with the traffic without frequent
intervention by the driver. If, for example,
while cruising at the selected speed, you
begin to approach a slower vehicle ahead
of you in the same lane, the system will
reduce your vehicle's speed to the same as
that of the vehicle ahead to maintain your
selected distance setting between your
vehicle and the vehicle ahead. There are
four settings for distance, which is addi-
tionally speed-dependent. Based on your
selected distance setting, the system auto-
matically decreases the throttle setting and
lightly applies the brakes if necessary. The
vehicle brake lamps will automatically illu-
minate to signal a following driver to take
action. In addition, it may be necessary for
the vehicle to downshift to maintain the dis-
tance setting selected. If the vehicle ahead
speeds up or when the lane ahead
becomes clear, your vehicle will accelerate
to the speed you have selected by increas-
ing the throttle setting and shifting gears as
needed.
Active cruise control is not and must
not be used as a collision avoidance/
warning system.<
Since this active cruise control sys-
tem is a new technology and operates
differently from conventional cruise control
systems which you may be accustomed,
you are strongly urged to read all of the
pages relating to this system before use.
Pay special attention to the information
contained in the Things to know about
active cruise control section in this manual
beginning on page 62.<
Page 62 of 220
Driving
60
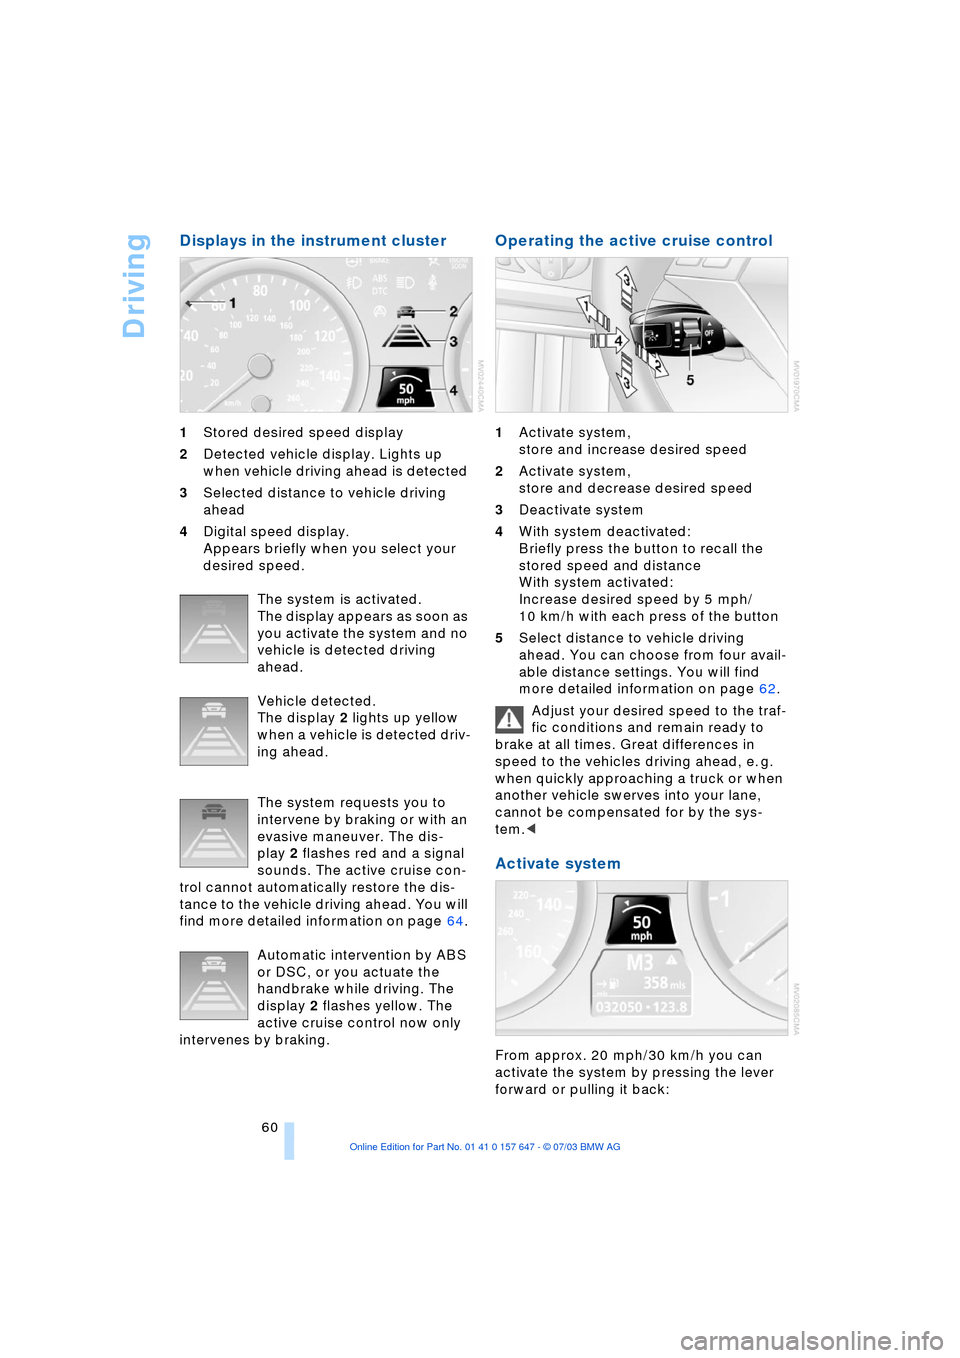
Displays in the instrument cluster
1Stored desired speed display
2Detected vehicle display. Lights up
when vehicle driving ahead is detected
3Selected distance to vehicle driving
ahead
4Digital speed display.
Appears briefly when you select your
desired speed.
The system is activated.
The display appears as soon as
you activate the system and no
vehicle is detected driving
ahead.
Vehicle detected.
The display 2 lights up yellow
when a vehicle is detected driv-
ing ahead.
The system requests you to
intervene by braking or with an
evasive maneuver. The dis-
play 2 flashes red and a signal
sounds. The active cruise con-
trol cannot automatically restore the dis-
tance to the vehicle driving ahead. You will
find more detailed information on page 64.
Automatic intervention by ABS
or DSC, or you actuate the
handbrake while driving. The
display 2 flashes yellow. The
active cruise control now only
intervenes by braking.
Operating the active cruise control
1Activate system,
store and increase desired speed
2Activate system,
store and decrease desired speed
3Deactivate system
4With system deactivated:
Briefly press the button to recall the
stored speed and distance
With system activated:
Increase desired speed by 5 mph/
10 km/h with each press of the button
5Select distance to vehicle driving
ahead. You can choose from four avail-
able distance settings. You will find
more detailed information on page 62.
Adjust your desired speed to the traf-
fic conditions and remain ready to
brake at all times. Great differences in
speed to the vehicles driving ahead, e. g.
when quickly approaching a truck or when
another vehicle swerves into your lane,
cannot be compensated for by the sys-
tem.<
Activate system
From approx. 20 mph/30 km/h you can
activate the system by pressing the lever
forward or pulling it back:
Page 66 of 220
Driving
64 choose to overcome the deceleration by
briefly pressing the accelerator pedal.
Driver interventions
Anytime the driver presses down on
the accelerator pedal, any automatic
braking action by the system is interrupted
until the pedal is fully released. After doing
this, release the accelerator and the system
again controls your cruising speed and dis-
tance setting. While driving with activated
system, resting your foot on the accelerator
pedal will cause the system not to brake
even if necessary. Be certain that floormats
or other objects on the vehicle floor do not
interfere with movement of the accelerator
pedal.<
While active cruise control is capable
of braking your vehicle automatically
when you approach a slower vehicle
ahead, it is important to be aware that the
ability of the system to apply the brakes is
also limited, if you are driving down a steep
grade or when you reduce your desired
speed sharply. The system cannot stop
your vehicle. It uses only a portion of brak-
ing system capacity and does not utilize the
full capacity of the vehicle braking system.
Therefore, the system cannot decrease
your speed for large differences in speed
between your vehicle and the vehicle
ahead. Examples: during emergency brak-
ing, when you approach a vehicle traveling
at a much lower speed than your own
speed such as approaching a toll booth or
when a much slower vehicle cuts in front of
you at close range.<
Whenever active cruise control
recognizes a situation that
requires driver braking because
the system capacity has been
reached or has been exceeded,
the system alerts the driver by flashing this
symbol in the instrument cluster and
sounding a signal.
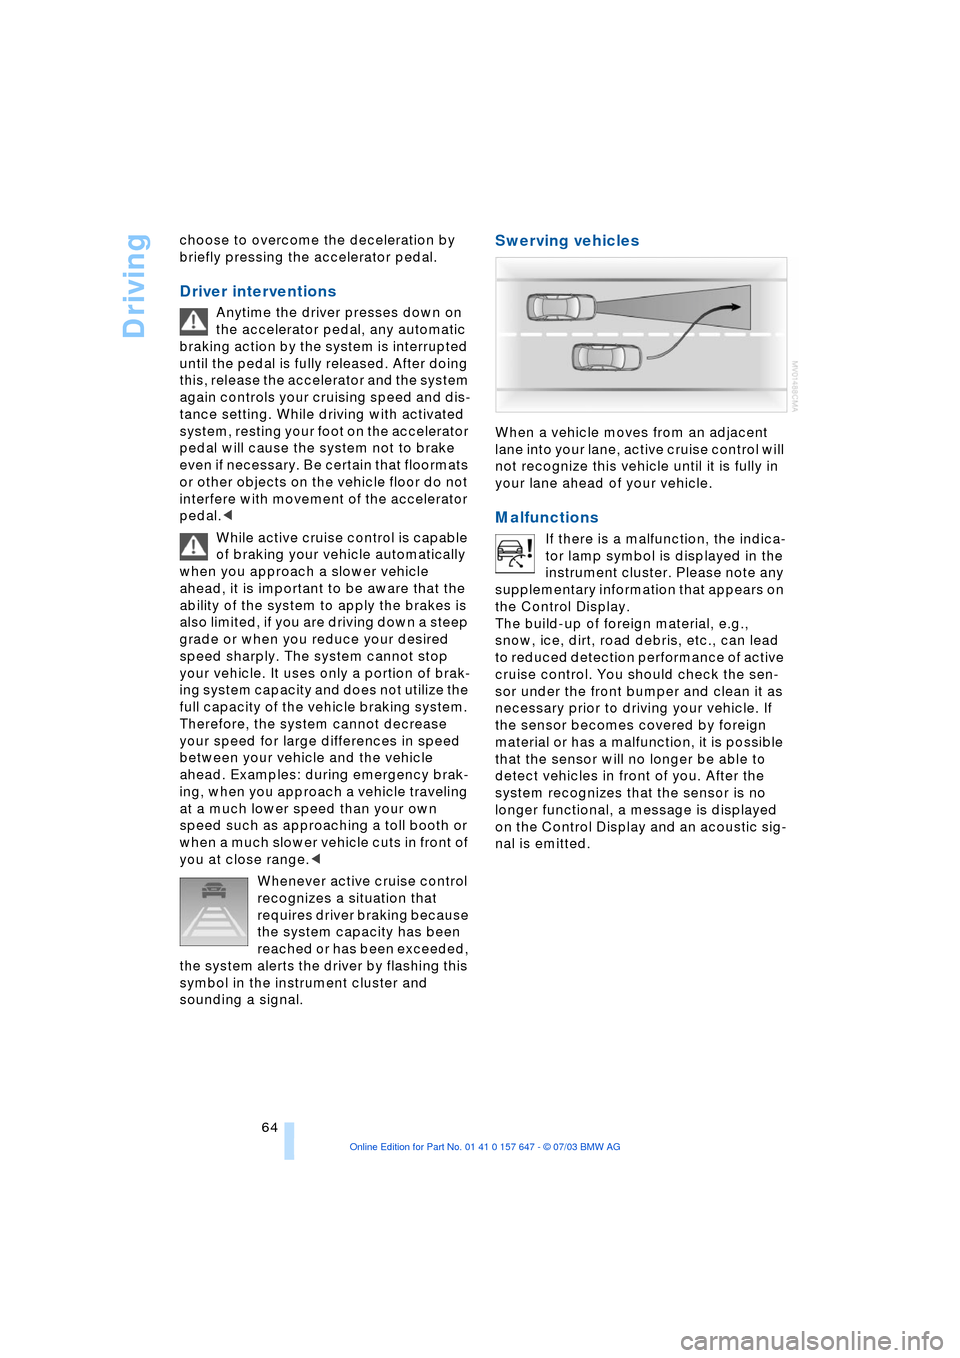
Swerving vehicles
When a vehicle moves from an adjacent
lane into your lane, active cruise control will
not recognize this vehicle until it is fully in
your lane ahead of your vehicle.
Malfunctions
If there is a malfunction, the indica-
tor lamp symbol is displayed in the
instrument cluster. Please note any
supplementary information that appears on
the Control Display.
The build-up of foreign material, e.g.,
snow, ice, dirt, road debris, etc., can lead
to reduced detection performance of active
cruise control. You should check the sen-
sor under the front bumper and clean it as
necessary prior to driving your vehicle. If
the sensor becomes covered by foreign
material or has a malfunction, it is possible
that the sensor will no longer be able to
detect vehicles in front of you. After the
system recognizes that the sensor is no
longer functional, a message is displayed
on the Control Display and an acoustic sig-
nal is emitted.
Page 79 of 220
Controls
77Reference
At a glance
Driving tips
Communications
Navigation
Entertainment
Mobility
ence of objects in green before they are
close enough to generate a signal tone.
Control Center, for principle details, refer to
page 16:
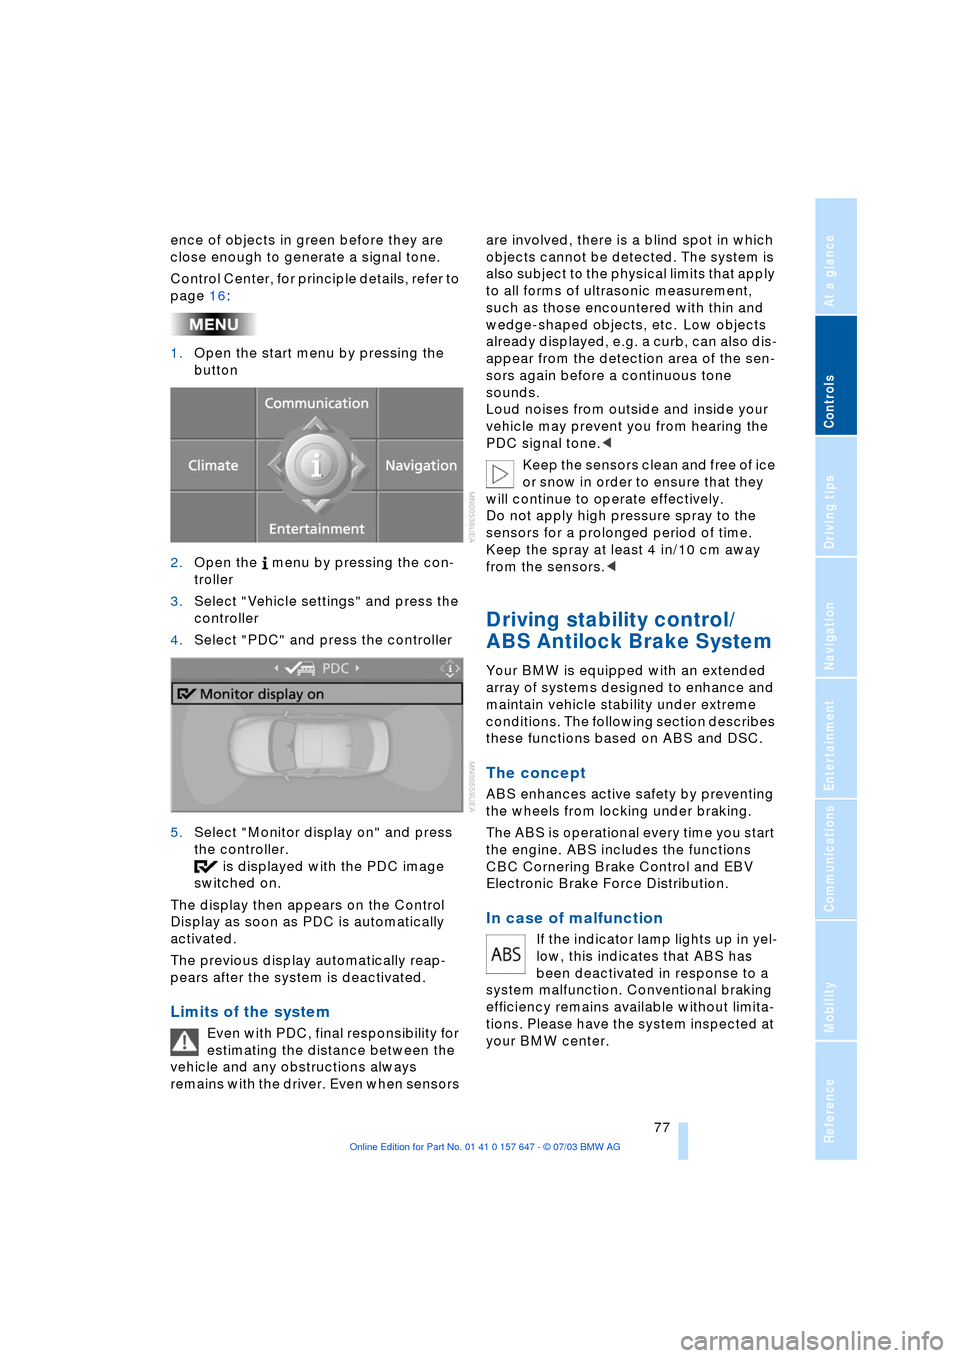
1.Open the start menu by pressing the
button
2.Open the menu by pressing the con-
troller
3.Select "Vehicle settings" and press the
controller
4.Select "PDC" and press the controller
5.Select "Monitor display on" and press
the controller.
is displayed with the PDC image
switched on.
The display then appears on the Control
Display as soon as PDC is automatically
activated.
The previous display automatically reap-
pears after the system is deactivated.
Limits of the system
Even with PDC, final responsibility for
estimating the distance between the
vehicle and any obstructions always
remains with the driver. Even when sensors are involved, there is a blind spot in which
objects cannot be detected. The system is
also subject to the physical limits that apply
to all forms of ultrasonic measurement,
such as those encountered with thin and
wedge-shaped objects, etc. Low objects
already displayed, e.g. a curb, can also dis-
appear from the detection area of the sen-
sors again before a continuous tone
sounds.
Loud noises from outside and inside your
vehicle may prevent you from hearing the
PDC signal tone.<
Keep the sensors clean and free of ice
or snow in order to ensure that they
will continue to operate effectively.
Do not apply high pressure spray to the
sensors for a prolonged period of time.
Keep the spray at least 4 in/10 cm away
from the sensors.<
Driving stability control/
ABS Antilock Brake System
Your BMW is equipped with an extended
array of systems designed to enhance and
maintain vehicle stability under extreme
conditions. The following section describes
these functions based on ABS and DSC.
The concept
ABS enhances active safety by preventing
the wheels from locking under braking.
The ABS is operational every time you start
the engine. ABS includes the functions
CBC Cornering Brake Control and EBV
Electronic Brake Force Distribution.
In case of malfunction
If the indicator lamp lights up in yel-
low, this indicates that ABS has
been deactivated in response to a
system malfunction. Conventional braking
efficiency remains available without limita-
tions. Please have the system inspected at
your BMW center.
Page 188 of 220
Replacing components
186
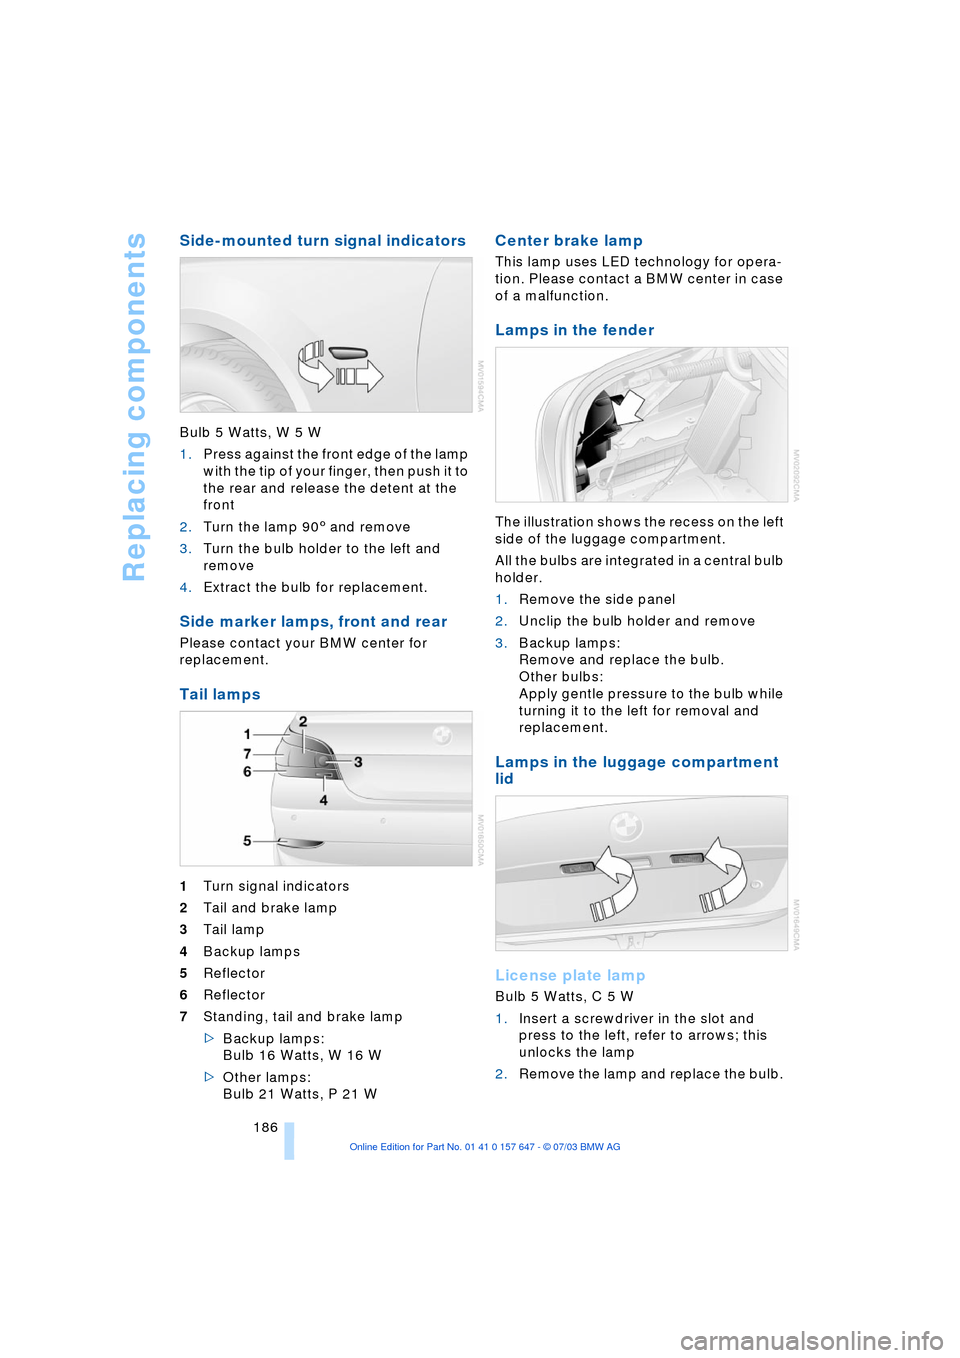
Side-mounted turn signal indicators
Bulb 5 Watts, W 5 W
1.Press against the front edge of the lamp
with the tip of your finger, then push it to
the rear and release the detent at the
front
2.Turn the lamp 903 and remove
3.Turn the bulb holder to the left and
remove
4.Extract the bulb for replacement.
Side marker lamps, front and rear
Please contact your BMW center for
replacement.
Tail lamps
1Turn signal indicators
2Tail and brake lamp
3Tail lamp
4Backup lamps
5Reflector
6Reflector
7Standing, tail and brake lamp
>Backup lamps:
Bulb 16 Watts, W 16 W
>Other lamps:
Bulb 21 Watts, P 21 W
Center brake lamp
This lamp uses LED technology for opera-
tion. Please contact a BMW center in case
of a malfunction.
Lamps in the fender
The illustration shows the recess on the left
side of the luggage compartment.
All the bulbs are integrated in a central bulb
holder.
1.Remove the side panel
2.Unclip the bulb holder and remove
3.Backup lamps:
Remove and replace the bulb.
Other bulbs:
Apply gentle pressure to the bulb while
turning it to the left for removal and
replacement.
Lamps in the luggage compartment
lid
License plate lamp
Bulb 5 Watts, C 5 W
1.Insert a screwdriver in the slot and
press to the left, refer to arrows; this
unlocks the lamp
2.Remove the lamp and replace the bulb.