2004 BMW 525I SEDAN display
[x] Cancel search: displayPage 89 of 220
Controls
87Reference
At a glance
Driving tips
Communications
Navigation
Entertainment
Mobility
Lamps
Parking lamps/low beams
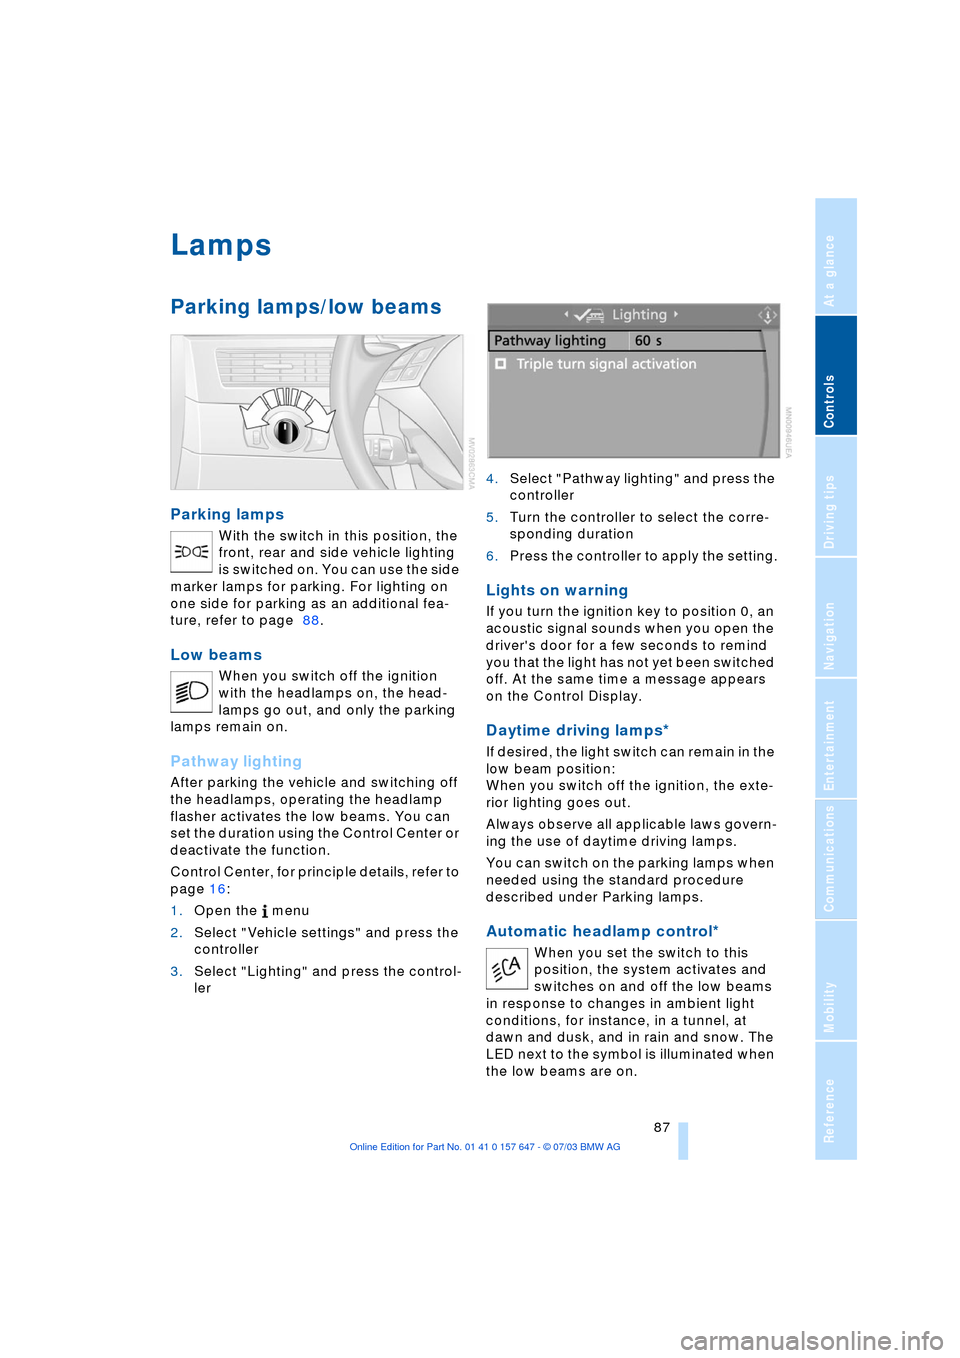
Parking lamps
With the switch in this position, the
front, rear and side vehicle lighting
is switched on. You can use the side
marker lamps for parking. For lighting on
one side for parking as an additional fea-
ture, refer to page 88.
Low beams
When you switch off the ignition
with the headlamps on, the head-
lamps go out, and only the parking
lamps remain on.
Pathway lighting
After parking the vehicle and switching off
the headlamps, operating the headlamp
flasher activates the low beams. You can
set the duration using the Control Center or
deactivate the function.
Control Center, for principle details, refer to
page 16:
1.Open the menu
2.Select "Vehicle settings" and press the
controller
3.Select "Lighting" and press the control-
ler 4.Select "Pathway lighting" and press the
controller
5.Turn the controller to select the corre-
sponding duration
6.Press the controller to apply the setting.
Lights on warning
If you turn the ignition key to position 0, an
acoustic signal sounds when you open the
driver's door for a few seconds to remind
you that the light has not yet been switched
off. At the same time a message appears
on the Control Display.
Daytime driving lamps*
If desired, the light switch can remain in the
low beam position:
When you switch off the ignition, the exte-
rior lighting goes out.
Always observe all applicable laws govern-
ing the use of daytime driving lamps.
You can switch on the parking lamps when
needed using the standard procedure
described under Parking lamps.
Automatic headlamp control*
When you set the switch to this
position, the system activates and
switches on and off the low beams
in response to changes in ambient light
conditions, for instance, in a tunnel, at
dawn and dusk, and in rain and snow. The
LED next to the symbol is illuminated when
the low beams are on.
Page 91 of 220
Controls
89Reference
At a glance
Driving tips
Communications
Navigation
Entertainment
Mobility
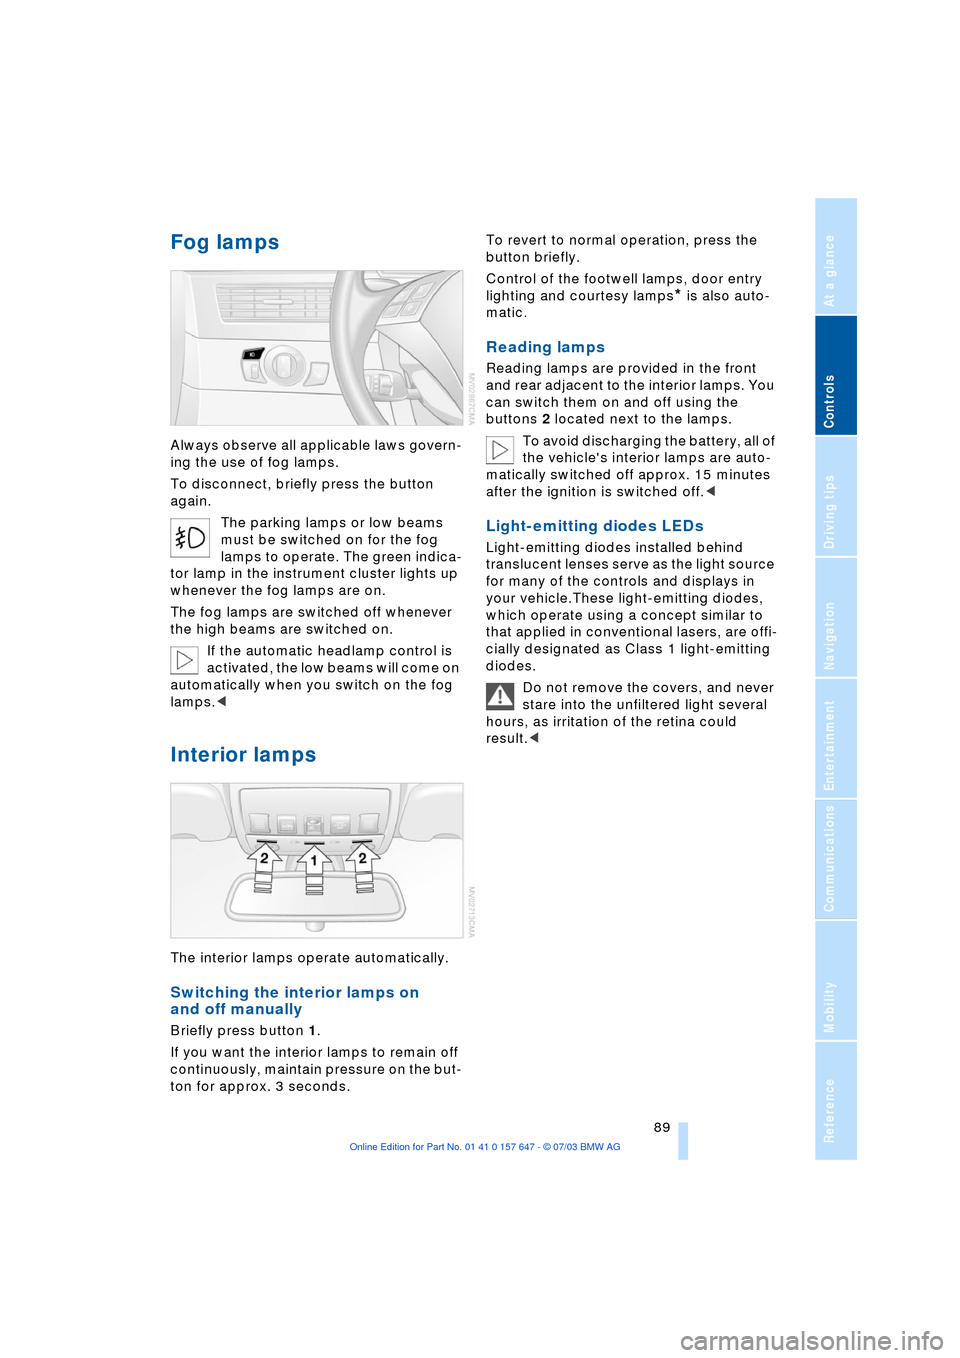
Fog lamps
Always observe all applicable laws govern-
ing the use of fog lamps.
To disconnect, briefly press the button
again.
The parking lamps or low beams
must be switched on for the fog
lamps to operate. The green indica-
tor lamp in the instrument cluster lights up
whenever the fog lamps are on.
The fog lamps are switched off whenever
the high beams are switched on.
If the automatic headlamp control is
activated, the low beams will come on
automatically when you switch on the fog
lamps.<
Interior lamps
The interior lamps operate automatically.
Switching the interior lamps on
and off manually
Briefly press button 1.
If you want the interior lamps to remain off
continuously, maintain pressure on the but-
ton for approx. 3 seconds. To revert to normal operation, press the
button briefly.
Control of the footwell lamps, door entry
lighting and courtesy lamps
* is also auto-
matic.
Reading lamps
Reading lamps are provided in the front
and rear adjacent to the interior lamps. You
can switch them on and off using the
buttons 2 located next to the lamps.
To avoid discharging the battery, all of
the vehicle's interior lamps are auto-
matically switched off approx. 15 minutes
after the ignition is switched off.<
Light-emitting diodes LEDs
Light-emitting diodes installed behind
translucent lenses serve as the light source
for many of the controls and displays in
your vehicle.These light-emitting diodes,
which operate using a concept similar to
that applied in conventional lasers, are offi-
cially designated as Class 1 light-emitting
diodes.
Do not remove the covers, and never
stare into the unfiltered light several
hours, as irritation of the retina could
result.<
Page 93 of 220
Controls
91Reference
At a glance
Driving tips
Communications
Navigation
Entertainment
Mobility
>Activation time set:
The indicator lamp lights up
>Independent ventilation switched
on:
The indicator lamp flashes
15Rear window defroster
16Air grill for interior temperature sensor,
please keep clear and unobstructed
All other setting options for the automatic
climate control can be found in the "Cli-
mate" menu and in the menu on the Con-
trol Display, as of page 92.
The current setting for air distribution is dis-
played on the Control Display.
A congenial climate
To use the automatic function, press the
AUTO button. Select an interior tempera-
ture you find pleasant.
The following section contains more
detailed information on the available set-
ting options.
The cooling function is only possible with
the engine running.
Automatic air distribution and supply
The AUTO program adjusts the
air distribution to the wind-
shield and side windows,
towards the upper body and footwell as
well as the air volume, while also using your
preselected temperature setting as the
basis for adjusting the interior climate to
adapt to external influences: summer, win-
ter.
The cooling function comes on automati-
cally when you select the AUTO program.
At the same time, a condensation sensor
controls the program in such a way that
window condensation is prevented as far
as possible.
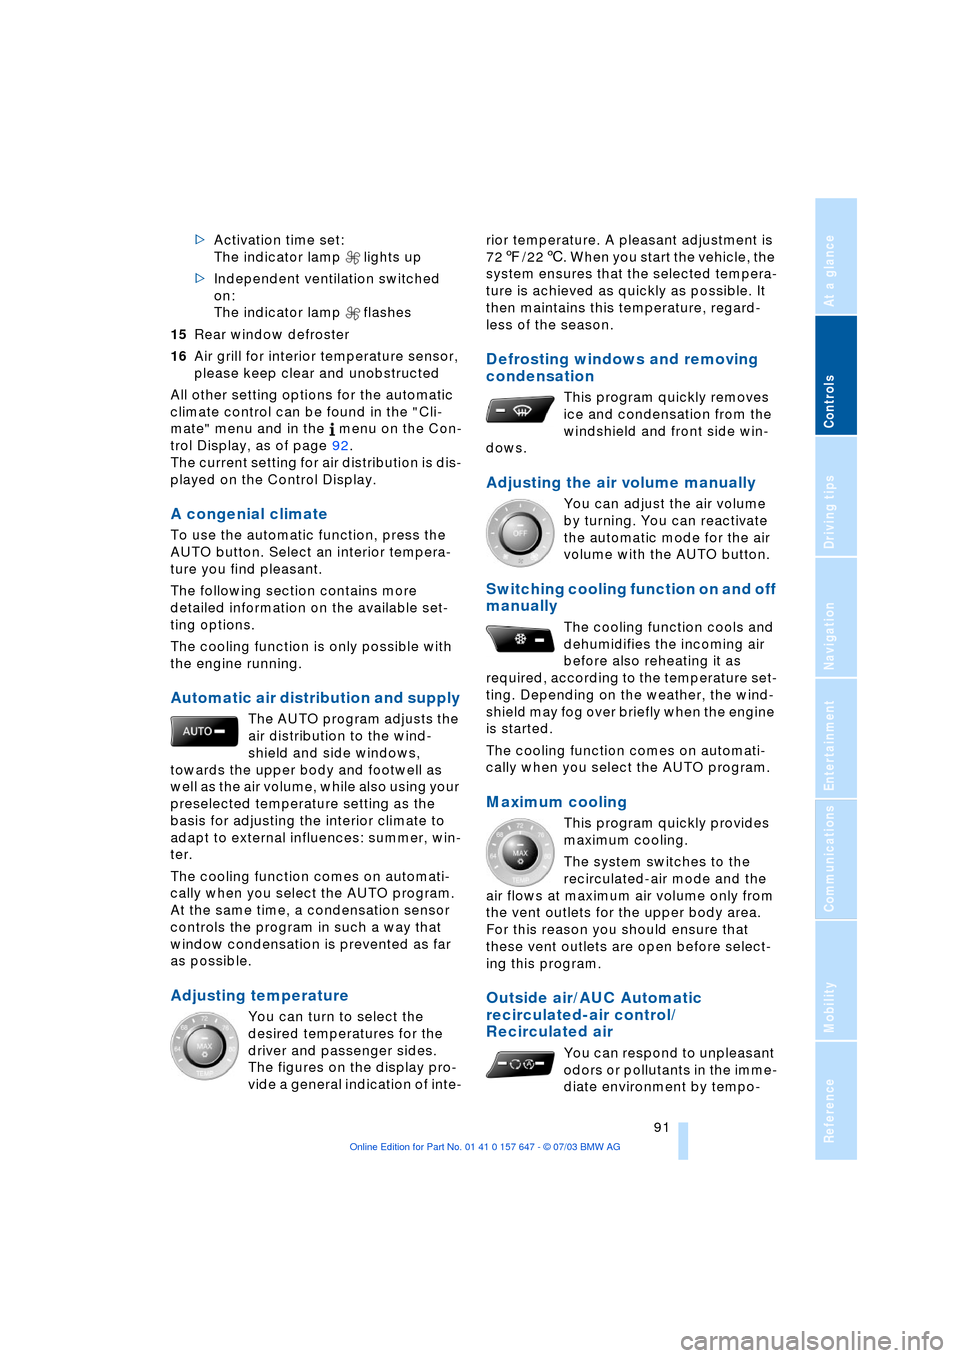
Adjusting temperature
You can turn to select the
desired temperatures for the
driver and passenger sides.
The figures on the display pro-
vide a general indication of inte-rior temperature. A pleasant adjustment is
727/226. When you start the vehicle, the
system ensures that the selected tempera-
ture is achieved as quickly as possible. It
then maintains this temperature, regard-
less of the season.
Defrosting windows and removing
condensation
This program quickly removes
ice and condensation from the
windshield and front side win-
dows.
Adjusting the air volume manually
You can adjust the air volume
by turning. You can reactivate
the automatic mode for the air
volume with the AUTO button.
Switching cooling function on and off
manually
The cooling function cools and
dehumidifies the incoming air
before also reheating it as
required, according to the temperature set-
ting. Depending on the weather, the wind-
shield may fog over briefly when the engine
is started.
The cooling function comes on automati-
cally when you select the AUTO program.
Maximum cooling
This program quickly provides
maximum cooling.
The system switches to the
recirculated-air mode and the
air flows at maximum air volume only from
the vent outlets for the upper body area.
For this reason you should ensure that
these vent outlets are open before select-
ing this program.
Outside air/AUC Automatic
recirculated-air control/
Recirculated air
You can respond to unpleasant
odors or pollutants in the imme-
diate environment by tempo-
Page 95 of 220
Controls
93Reference
At a glance
Driving tips
Communications
Navigation
Entertainment
Mobility
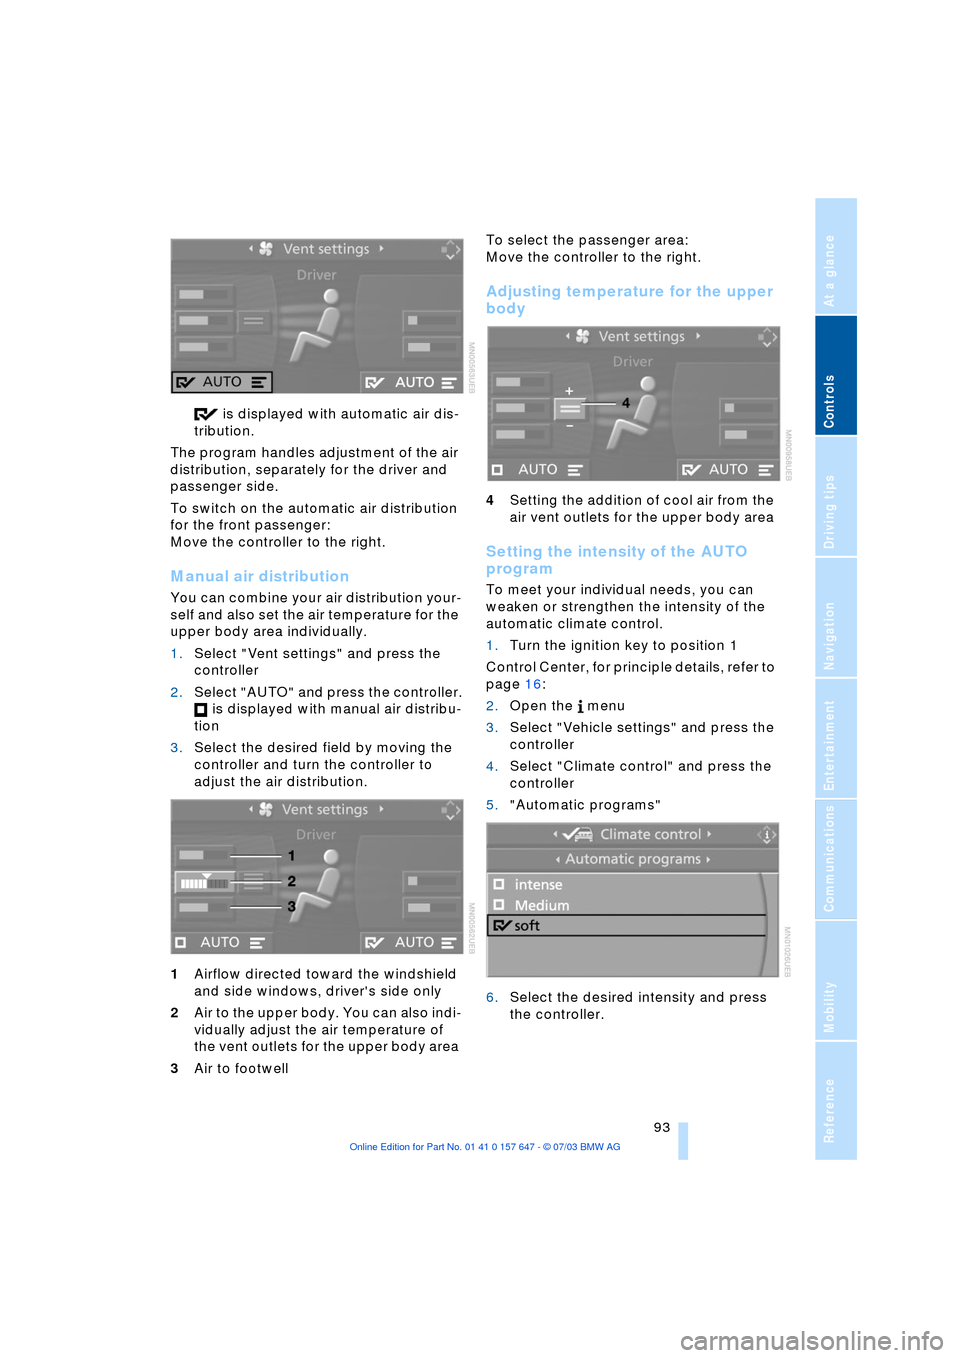
is displayed with automatic air dis-
tribution.
The program handles adjustment of the air
distribution, separately for the driver and
passenger side.
To switch on the automatic air distribution
for the front passenger:
Move the controller to the right.
Manual air distribution
You can combine your air distribution your-
self and also set the air temperature for the
upper body area individually.
1.Select "Vent settings" and press the
controller
2.Select "AUTO" and press the controller.
is displayed with manual air distribu-
tion
3.Select the desired field by moving the
controller and turn the controller to
adjust the air distribution.
1Airflow directed toward the windshield
and side windows, driver's side only
2Air to the upper body. You can also indi-
vidually adjust the air temperature of
the vent outlets for the upper body area
3Air to footwell To select the passenger area:
Move the controller to the right.
Adjusting temperature for the upper
body
4Setting the addition of cool air from the
air vent outlets for the upper body area
Setting the intensity of the AUTO
program
To meet your individual needs, you can
weaken or strengthen the intensity of the
automatic climate control.
1.Turn the ignition key to position 1
Control Center, for principle details, refer to
page 16:
2.Open the menu
3.Select "Vehicle settings" and press the
controller
4.Select "Climate control" and press the
controller
5."Automatic programs"
6.Select the desired intensity and press
the controller.
Page 97 of 220
Controls
95Reference
At a glance
Driving tips
Communications
Navigation
Entertainment
Mobility
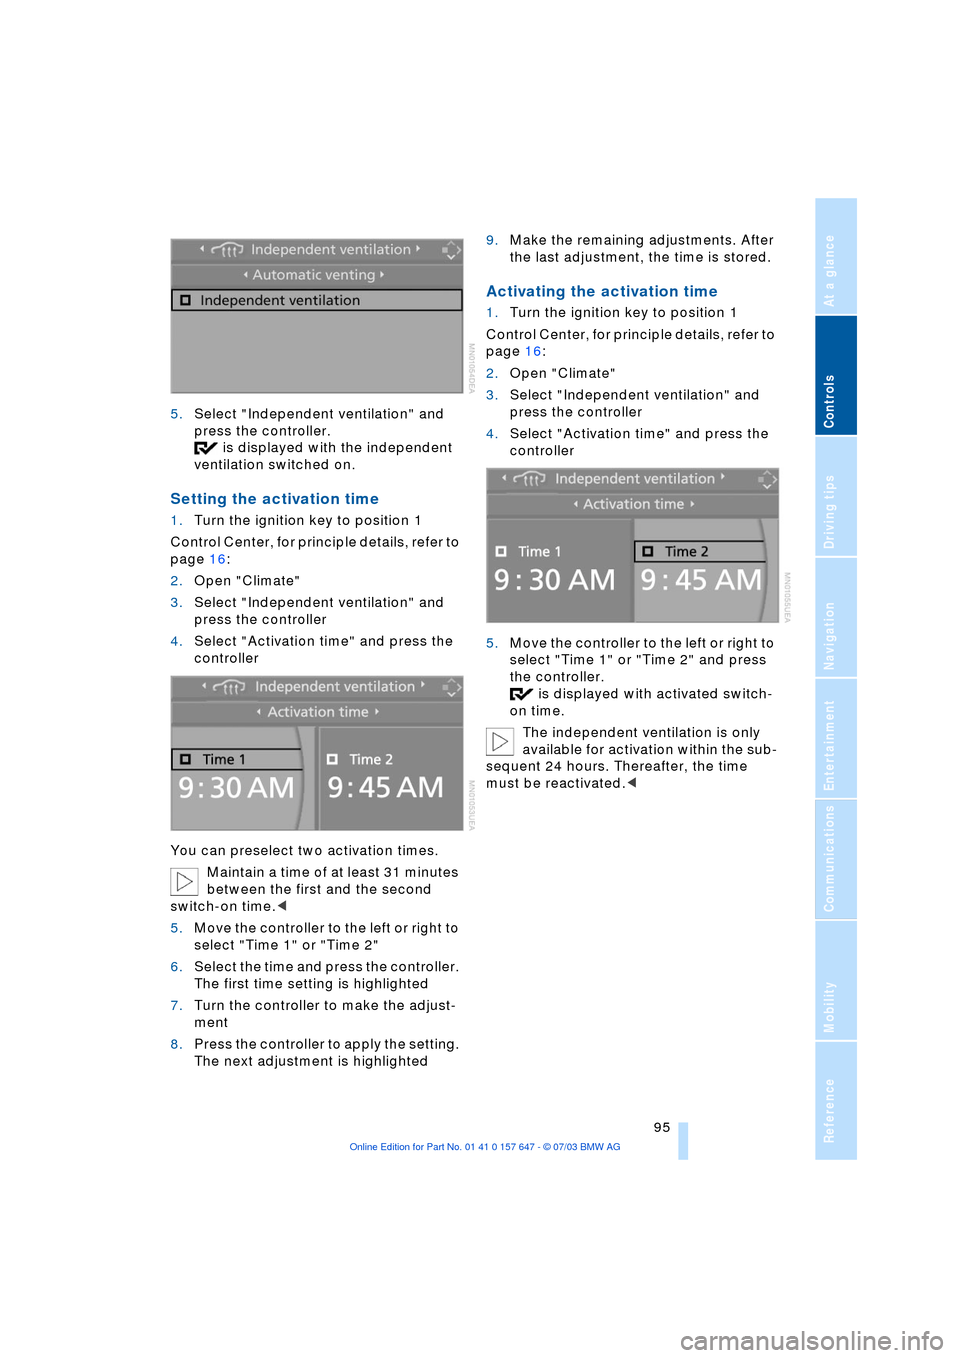
5.Select "Independent ventilation" and
press the controller.
is displayed with the independent
ventilation switched on.
Setting the activation time
1.Turn the ignition key to position 1
Control Center, for principle details, refer to
page 16:
2.Open "Climate"
3.Select "Independent ventilation" and
press the controller
4.Select "Activation time" and press the
controller
You can preselect two activation times.
Maintain a time of at least 31 minutes
between the first and the second
switch-on time.<
5.Move the controller to the left or right to
select "Time 1" or "Time 2"
6.Select the time and press the controller.
The first time setting is highlighted
7.Turn the controller to make the adjust-
ment
8.Press the controller to apply the setting.
The next adjustment is highlighted9.Make the remaining adjustments. After
the last adjustment, the time is stored.
Activating the activation time
1.Turn the ignition key to position 1
Control Center, for principle details, refer to
page 16:
2.Open "Climate"
3.Select "Independent ventilation" and
press the controller
4.Select "Activation time" and press the
controller
5.Move the controller to the left or right to
select "Time 1" or "Time 2" and press
the controller.
is displayed with activated switch-
on time.
The independent ventilation is only
available for activation within the sub-
sequent 24 hours. Thereafter, the time
must be reactivated.<
Page 117 of 220
Navigation
Driving tips
115Reference
At a glance
Controls
Communications
Entertainment
Mobility
Display in assistance
window
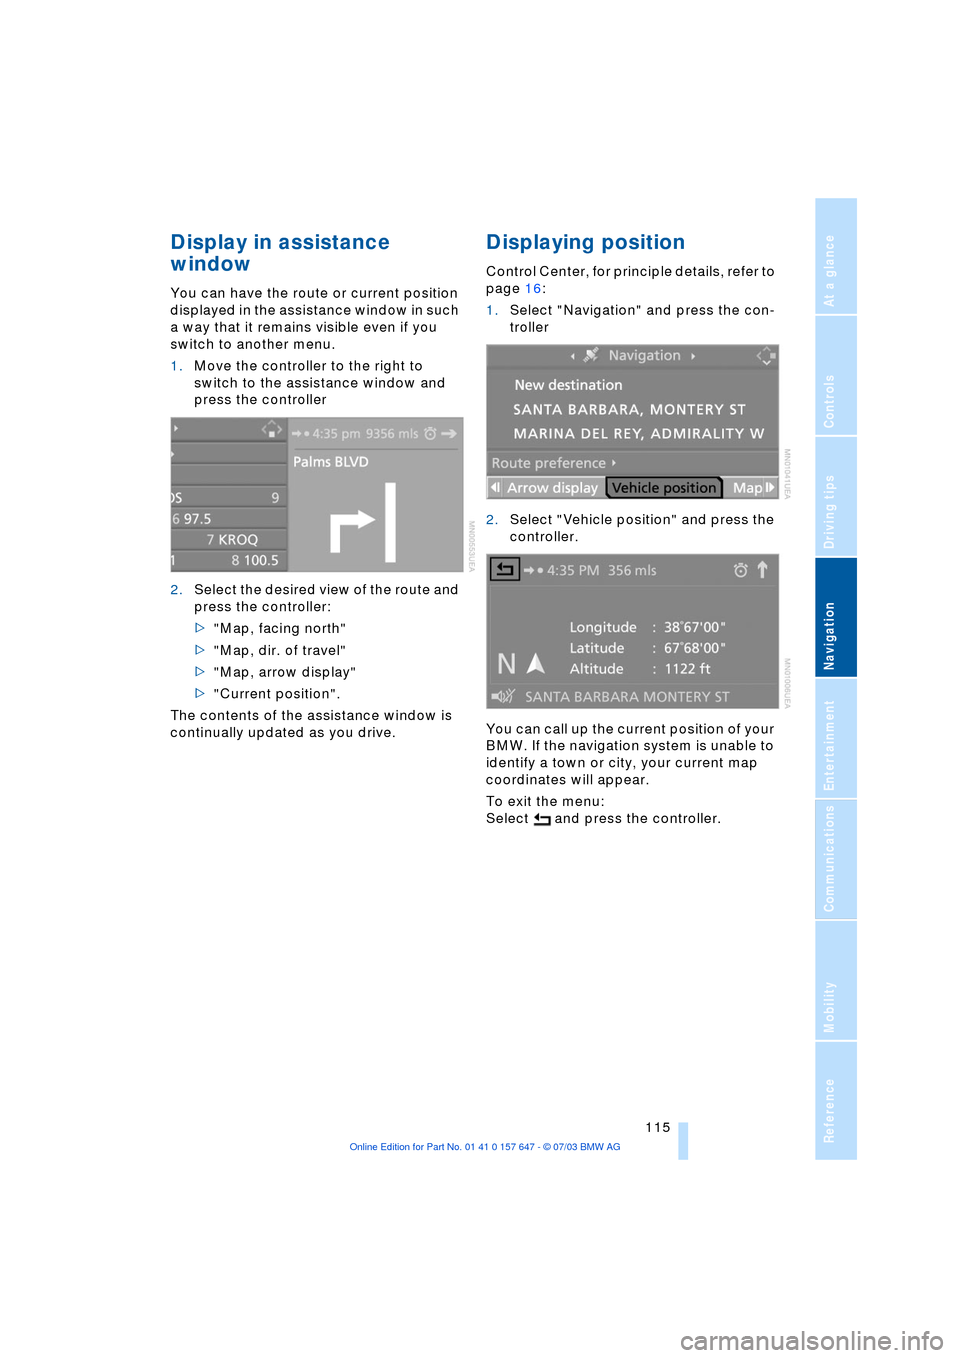
You can have the route or current position
displayed in the assistance window in such
a way that it remains visible even if you
switch to another menu.
1.Move the controller to the right to
switch to the assistance window and
press the controller
2.Select the desired view of the route and
press the controller:
>"Map, facing north"
>"Map, dir. of travel"
>"Map, arrow display"
>"Current position".
The contents of the assistance window is
continually updated as you drive.
Displaying position
Control Center, for principle details, refer to
page 16:
1.Select "Navigation" and press the con-
troller
2.Select "Vehicle position" and press the
controller.
You can call up the current position of your
BMW. If the navigation system is unable to
identify a town or city, your current map
coordinates will appear.
To exit the menu:
Select and press the controller.
Page 118 of 220
Destination entry
116
Destination entry
In entering your destination you can select
from among the following options:
>Entering a destination manually, see
below
>Selecting destination via information,
refer to page 118
>Selecting from among recent destina-
tions, refer to page 119
>Selecting destination from address
book, refer to page 120.
After selecting your destination you can
proceed to start the destination guidance
system, refer to page 123.
Enter data only when the vehicle is
stationary, and always obey the traffic
regulations and road signs in the event of
any contradiction between traffic and road
conditions and the instructions issued by
the navigation system. If you do not
observe this precaution, you may be in vio-
lation of the law, and can endanger vehicle
occupants and other road users.<
Entering a destination
manually
The system supports the wordmatch prin-
ciple to make it easier for you to enter the
names of streets or towns. This enables
input of different spellings and supple-
ments your input automatically so that
stored names can be adopted as destina-
tions as quickly as possible, refer to
page 122.
Control Center, for principle details, refer to
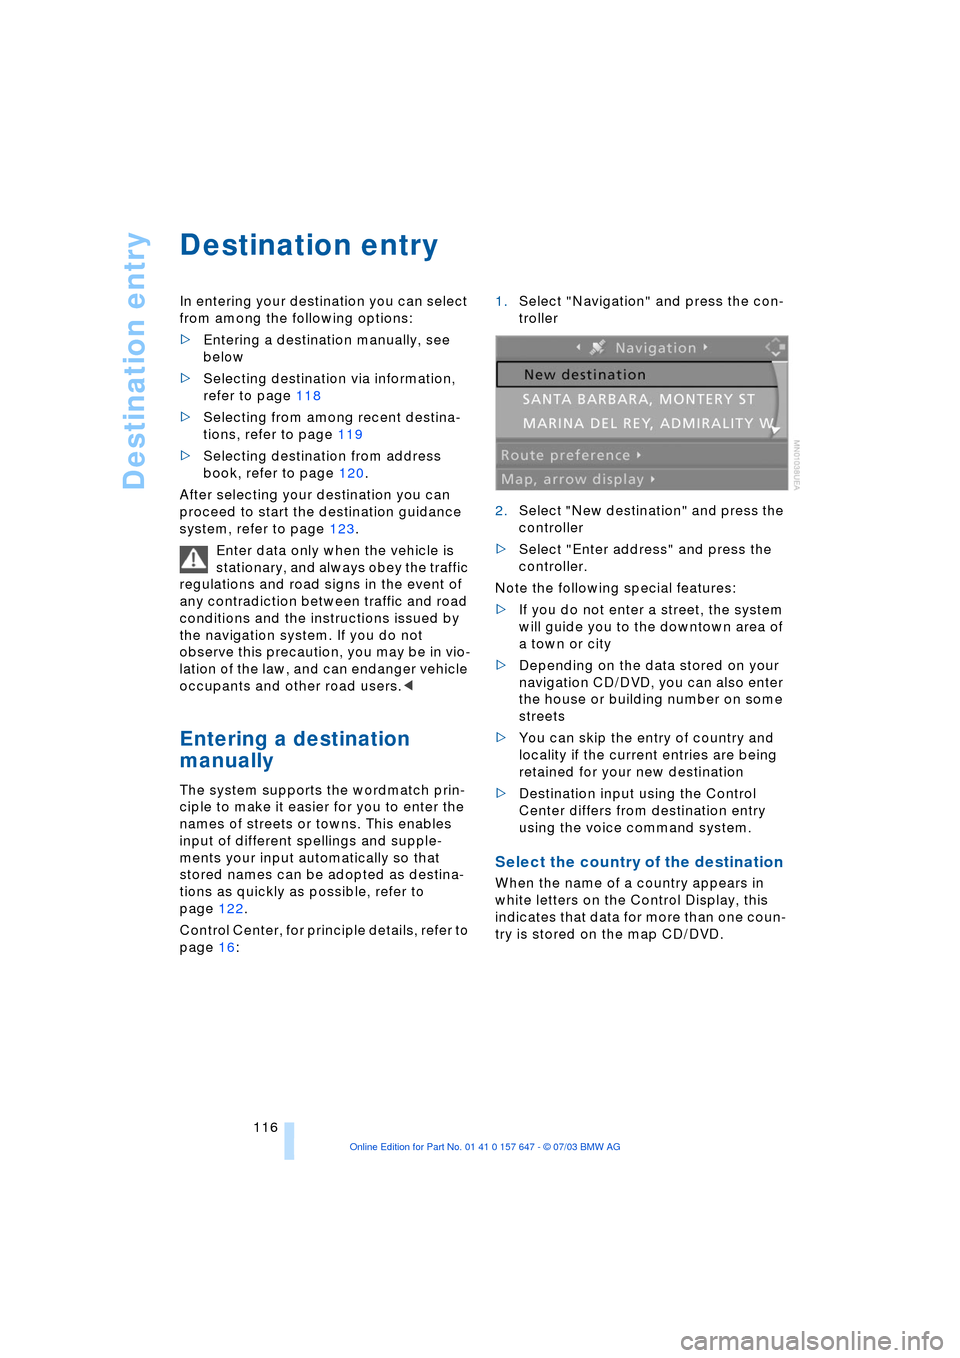
page 16: 1.Select "Navigation" and press the con-
troller
2.Select "New destination" and press the
controller
>Select "Enter address" and press the
controller.
Note the following special features:
>If you do not enter a street, the system
will guide you to the downtown area of
a town or city
>Depending on the data stored on your
navigation CD/DVD, you can also enter
the house or building number on some
streets
>You can skip the entry of country and
locality if the current entries are being
retained for your new destination
>Destination input using the Control
Center differs from destination entry
using the voice command system.
Select the country of the destination
When the name of a country appears in
white letters on the Control Display, this
indicates that data for more than one coun-
try is stored on the map CD/DVD.
Page 119 of 220
Navigation
Driving tips
117Reference
At a glance
Controls
Communications
Entertainment
Mobility
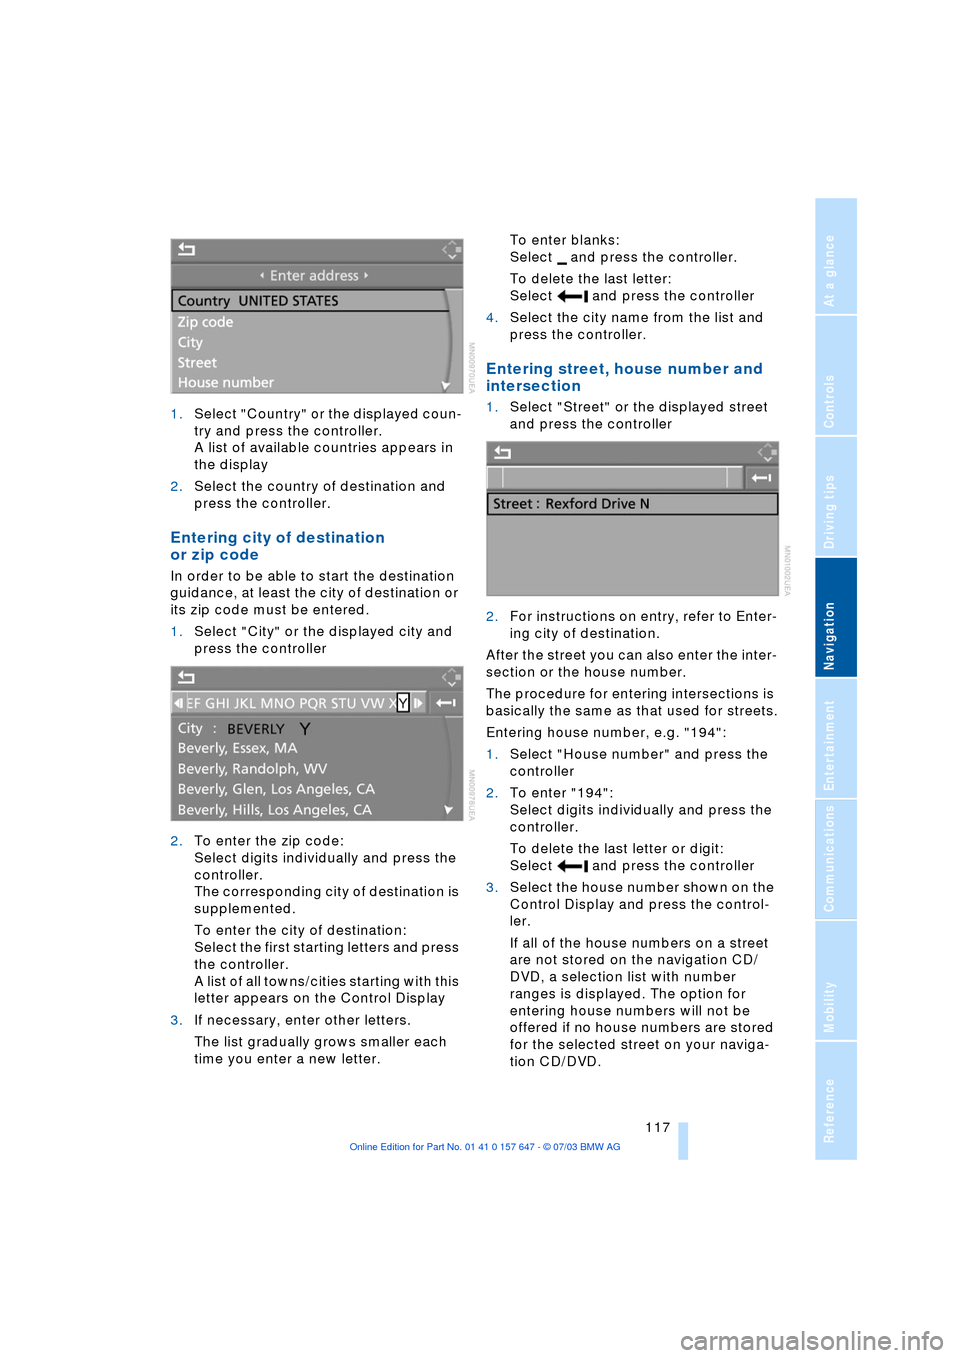
1.Select "Country" or the displayed coun-
try and press the controller.
A list of available countries appears in
the display
2.Select the country of destination and
press the controller.
Entering city of destination
or zip code
In order to be able to start the destination
guidance, at least the city of destination or
its zip code must be entered.
1.Select "City" or the displayed city and
press the controller
2.To enter the zip code:
Select digits individually and press the
controller.
The corresponding city of destination is
supplemented.
To enter the city of destination:
Select the first starting letters and press
the controller.
A list of all towns/cities starting with this
letter appears on the Control Display
3.If necessary, enter other letters.
The list gradually grows smaller each
time you enter a new letter.To enter blanks:
Select and press the controller.
To delete the last letter:
Select and press the controller
4.Select the city name from the list and
press the controller.
Entering street, house number and
intersection
1.Select "Street" or the displayed street
and press the controller
2.For instructions on entry, refer to Enter-
ing city of destination.
After the street you can also enter the inter-
section or the house number.
The procedure for entering intersections is
basically the same as that used for streets.
Entering house number, e.g. "194":
1.Select "House number" and press the
controller
2.To enter "194":
Select digits individually and press the
controller.
To delete the last letter or digit:
Select and press the controller
3.Select the house number shown on the
Control Display and press the control-
ler.
If all of the house numbers on a street
are not stored on the navigation CD/
DVD, a selection list with number
ranges is displayed. The option for
entering house numbers will not be
offered if no house numbers are stored
for the selected street on your naviga-
tion CD/DVD.