2004 BMW 525I four wheel drive
[x] Cancel search: four wheel drivePage 45 of 220

Controls
43Reference
At a glance
Driving tips
Communications
Navigation
Entertainment
Mobility
You can also adjust the mirrors manually by
pressing against the outer edges of their
lenses.
Storing the mirror positions, refer to Seat,
mirror and steering wheel memory on
page 38.
The mirror on the passenger's side
features a lens with a more convex
surface than the mirror installed on the
driver's side. When estimating the distance
between yourself and other traffic, bear in
mind that the objects reflected in the mirror
are closer than they appear. This means
that estimations of the distance to following
traffic should not be regarded as precise.<
Self-defrosting mirrors
Both exterior mirrors are automatically
heated in ignition key position 2.
Interior rearview mirror
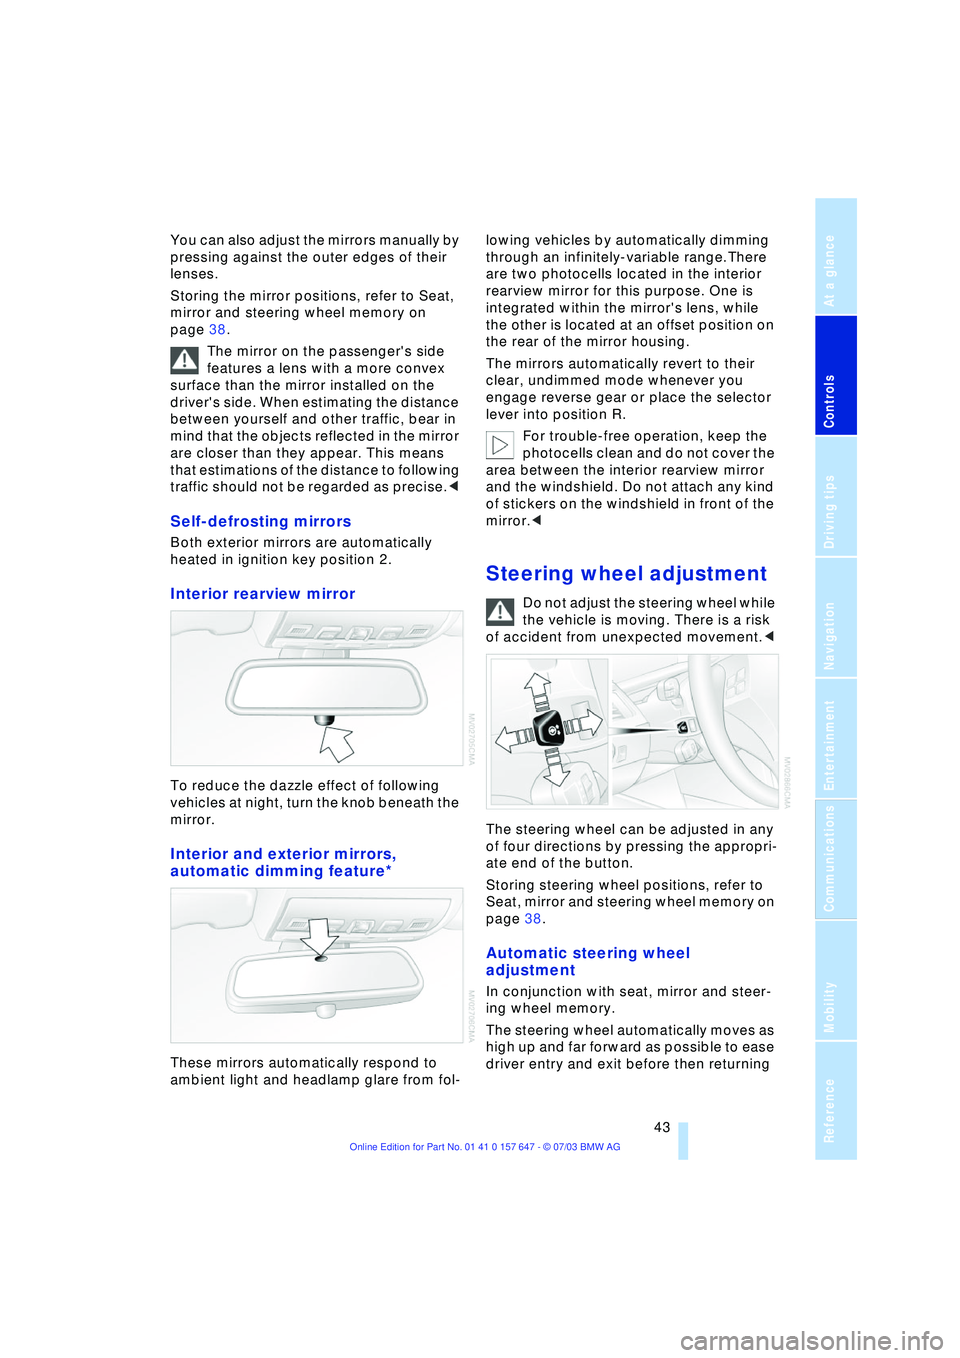
To reduce the dazzle effect of following
vehicles at night, turn the knob beneath the
mirror.
Interior and exterior mirrors,
automatic dimming feature*
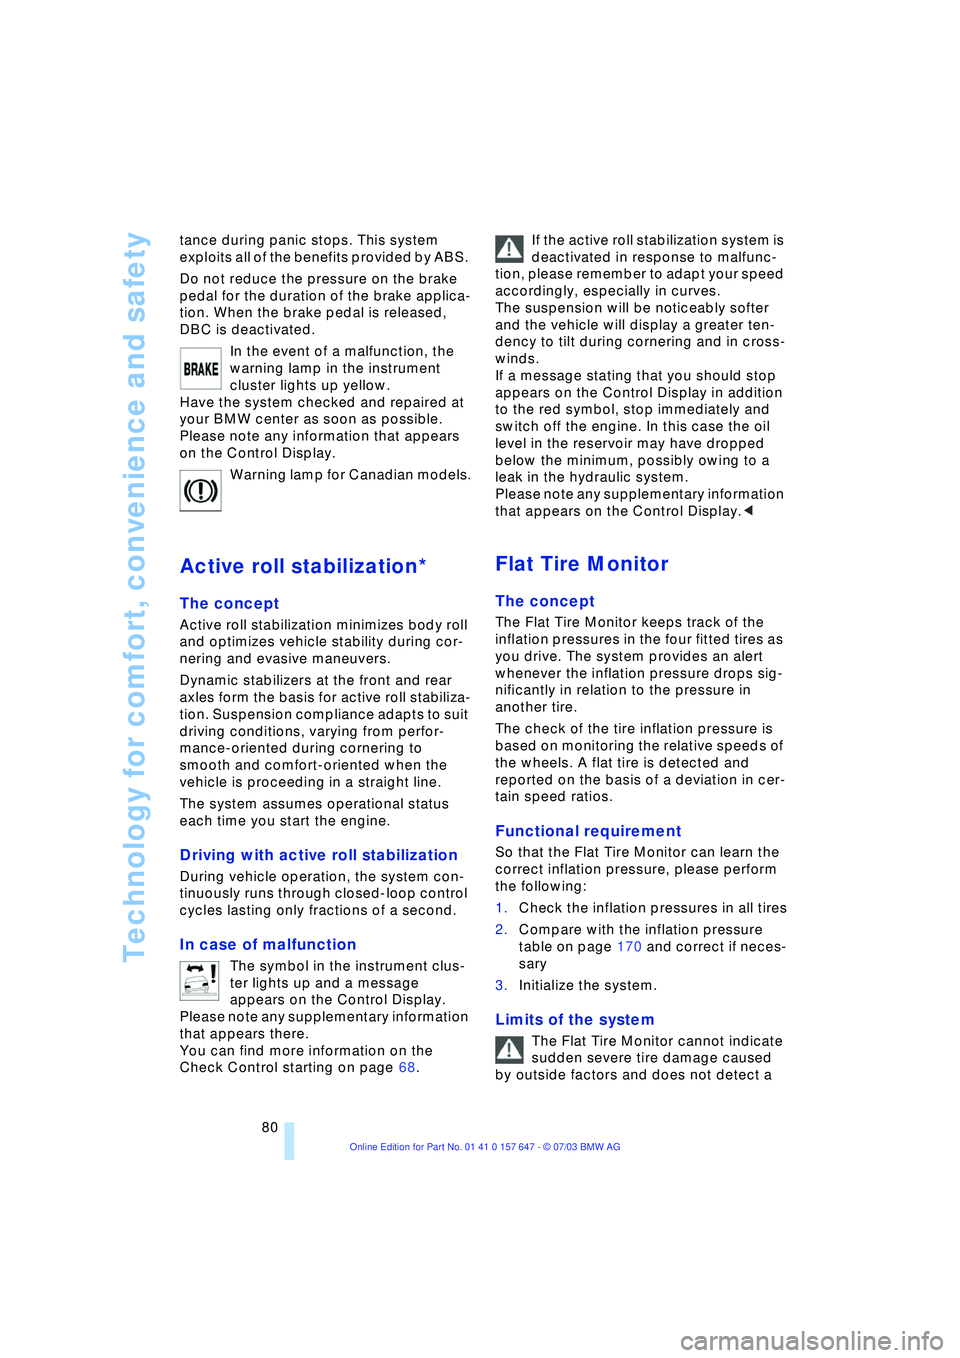
These mirrors automatically respond to
ambient light and headlamp glare from fol-lowing vehicles by automatically dimming
through an infinitely-variable range.There
are two photocells located in the interior
rearview mirror for this purpose. One is
integrated within the mirror's lens, while
the other is located at an offset position on
the rear of the mirror housing.
The mirrors automatically revert to their
clear, undimmed mode whenever you
engage reverse gear or place the selector
lever into position R.
For trouble-free operation, keep the
photocells clean and do not cover the
area between the interior rearview mirror
and the windshield. Do not attach any kind
of stickers on the windshield in front of the
mirror.<
Steering wheel adjustment
Do not adjust the steering wheel while
the vehicle is moving. There is a risk
of accident from unexpected movement.<
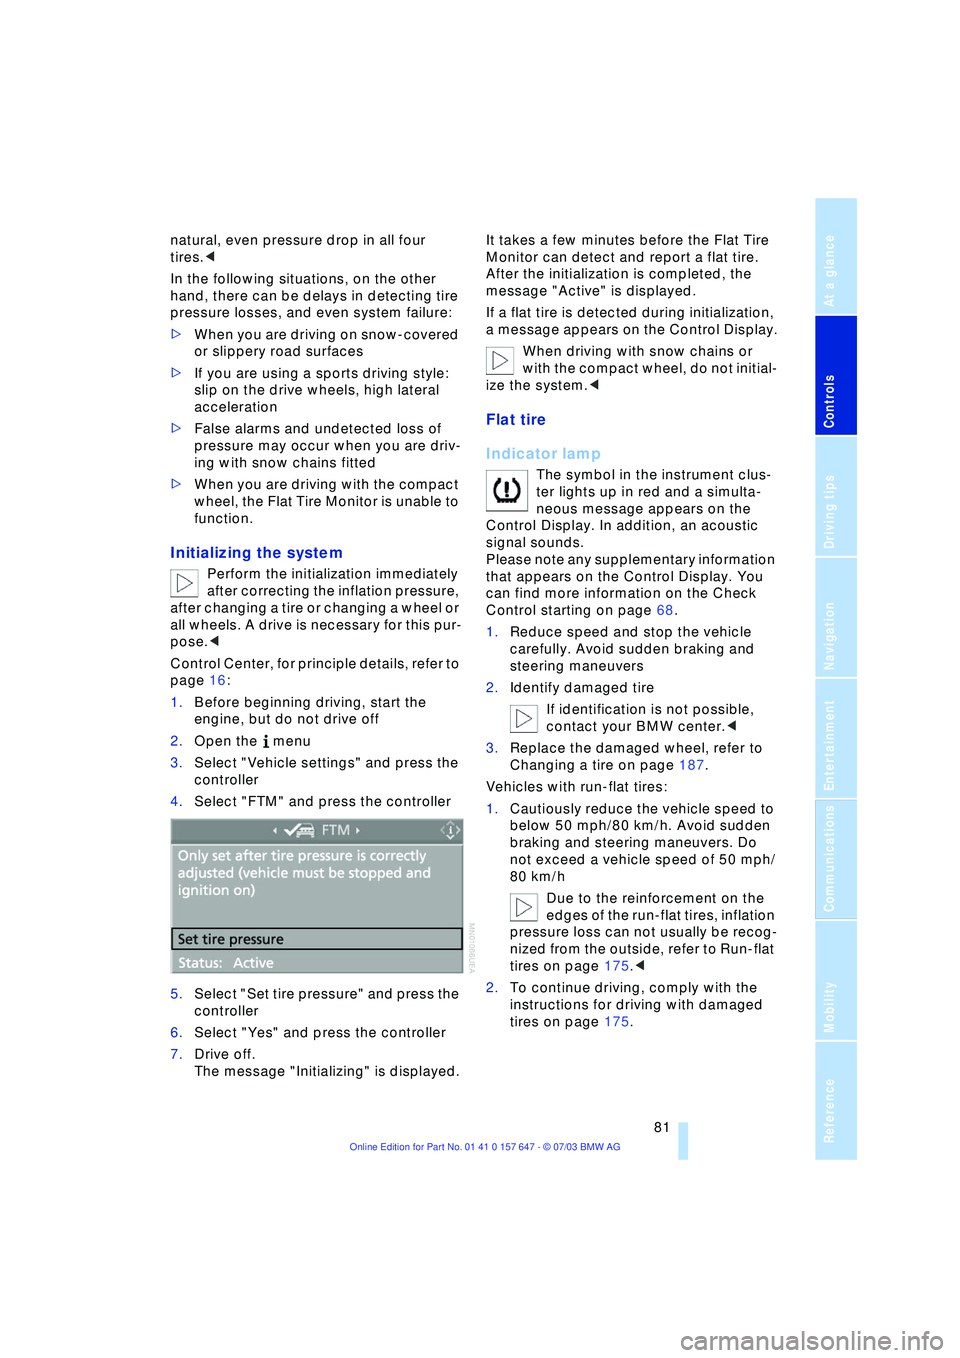
The steering wheel can be adjusted in any
of four directions by pressing the appropri-
ate end of the button.
Storing steering wheel positions, refer to
Seat, mirror and steering wheel memory on
page 38.
Automatic steering wheel
adjustment
In conjunction with seat, mirror and steer-
ing wheel memory.
The steering wheel automatically moves as
high up and far forward as possible to ease
driver entry and exit before then returning
Page 82 of 220

Technology for comfort, convenience and safety
80 tance during panic stops. This system
exploits all of the benefits provided by ABS.
Do not reduce the pressure on the brake
pedal for the duration of the brake applica-
tion. When the brake pedal is released,
DBC is deactivated.
In the event of a malfunction, the
warning lamp in the instrument
cluster lights up yellow.
Have the system checked and repaired at
your BMW center as soon as possible.
Please note any information that appears
on the Control Display.
Warning lamp for Canadian models.
Active roll stabilization*
The concept
Active roll stabilization minimizes body roll
and optimizes vehicle stability during cor-
nering and evasive maneuvers.
Dynamic stabilizers at the front and rear
axles form the basis for active roll stabiliza-
tion. Suspension compliance adapts to suit
driving conditions, varying from perfor-
mance-oriented during cornering to
smooth and comfort-oriented when the
vehicle is proceeding in a straight line.
The system assumes operational status
each time you start the engine.
Driving with active roll stabilization
During vehicle operation, the system con-
tinuously runs through closed-loop control
cycles lasting only fractions of a second.
In case of malfunction
The symbol in the instrument clus-
ter lights up and a message
appears on the Control Display.
Please note any supplementary information
that appears there.
You can find more information on the
Check Control starting on page 68. If the active roll stabilization system is
deactivated in response to malfunc-
tion, please remember to adapt your speed
accordingly, especially in curves.
The suspension will be noticeably softer
and the vehicle will display a greater ten-
dency to tilt during cornering and in cross-
winds.
If a message stating that you should stop
appears on the Control Display in addition
to the red symbol, stop immediately and
switch off the engine. In this case the oil
level in the reservoir may have dropped
below the minimum, possibly owing to a
leak in the hydraulic system.
Please note any supplementary information
that appears on the Control Display.<
Flat Tire Monitor
The concept
The Flat Tire Monitor keeps track of the
inflation pressures in the four fitted tires as
you drive. The system provides an alert
whenever the inflation pressure drops sig-
nificantly in relation to the pressure in
another tire.
The check of the tire inflation pressure is
based on monitoring the relative speeds of
the wheels. A flat tire is detected and
reported on the basis of a deviation in cer-
tain speed ratios.
Functional requirement
So that the Flat Tire Monitor can learn the
correct inflation pressure, please perform
the following:
1.Check the inflation pressures in all tires
2.Compare with the inflation pressure
table on page 170 and correct if neces-
sary
3.Initialize the system.
Limits of the system
The Flat Tire Monitor cannot indicate
sudden severe tire damage caused
by outside factors and does not detect a
Page 83 of 220

Controls
81Reference
At a glance
Driving tips
Communications
Navigation
Entertainment
Mobility
natural, even pressure drop in all four
tires.<
In the following situations, on the other
hand, there can be delays in detecting tire
pressure losses, and even system failure:
>When you are driving on snow-covered
or slippery road surfaces
>If you are using a sports driving style:
slip on the drive wheels, high lateral
acceleration
>False alarms and undetected loss of
pressure may occur when you are driv-
ing with snow chains fitted
>When you are driving with the compact
wheel, the Flat Tire Monitor is unable to
function.
Initializing the system
Perform the initialization immediately
after correcting the inflation pressure,
after changing a tire or changing a wheel or
all wheels. A drive is necessary for this pur-
pose.<
Control Center, for principle details, refer to
page 16:
1.Before beginning driving, start the
engine, but do not drive off
2.Open the menu
3.Select "Vehicle settings" and press the
controller
4.Select "FTM" and press the controller
5.Select "Set tire pressure" and press the
controller
6.Select "Yes" and press the controller
7.Drive off.
The message "Initializing" is displayed.It takes a few minutes before the Flat Tire
Monitor can detect and report a flat tire.
After the initialization is completed, the
message "Active" is displayed.
If a flat tire is detected during initialization,
a message appears on the Control Display.
When driving with snow chains or
with the compact wheel, do not initial-
ize the system.<
Flat tire
Indicator lamp
The symbol in the instrument clus-
ter lights up in red and a simulta-
neous message appears on the
Control Display. In addition, an acoustic
signal sounds.
Please note any supplementary information
that appears on the Control Display. You
can find more information on the Check
Control starting on page 68.
1.Reduce speed and stop the vehicle
carefully. Avoid sudden braking and
steering maneuvers
2.Identify damaged tire
If identification is not possible,
contact your BMW center.<
3.Replace the damaged wheel, refer to
Changing a tire on page 187.
Vehicles with run-flat tires:
1.Cautiously reduce the vehicle speed to
below 50 mph/80 km/h. Avoid sudden
braking and steering maneuvers. Do
not exceed a vehicle speed of 50 mph/
80 km/h
Due to the reinforcement on the
edges of the run-flat tires, inflation
pressure loss can not usually be recog-
nized from the outside, refer to Run-flat
tires on page 175.<
2.To continue driving, comply with the
instructions for driving with damaged
tires on page 175.