2004 BMW 525I ECO mode
[x] Cancel search: ECO modePage 57 of 220
Controls
55Reference
At a glance
Driving tips
Communications
Navigation
Entertainment
Mobility
Changing the selector-lever
positions
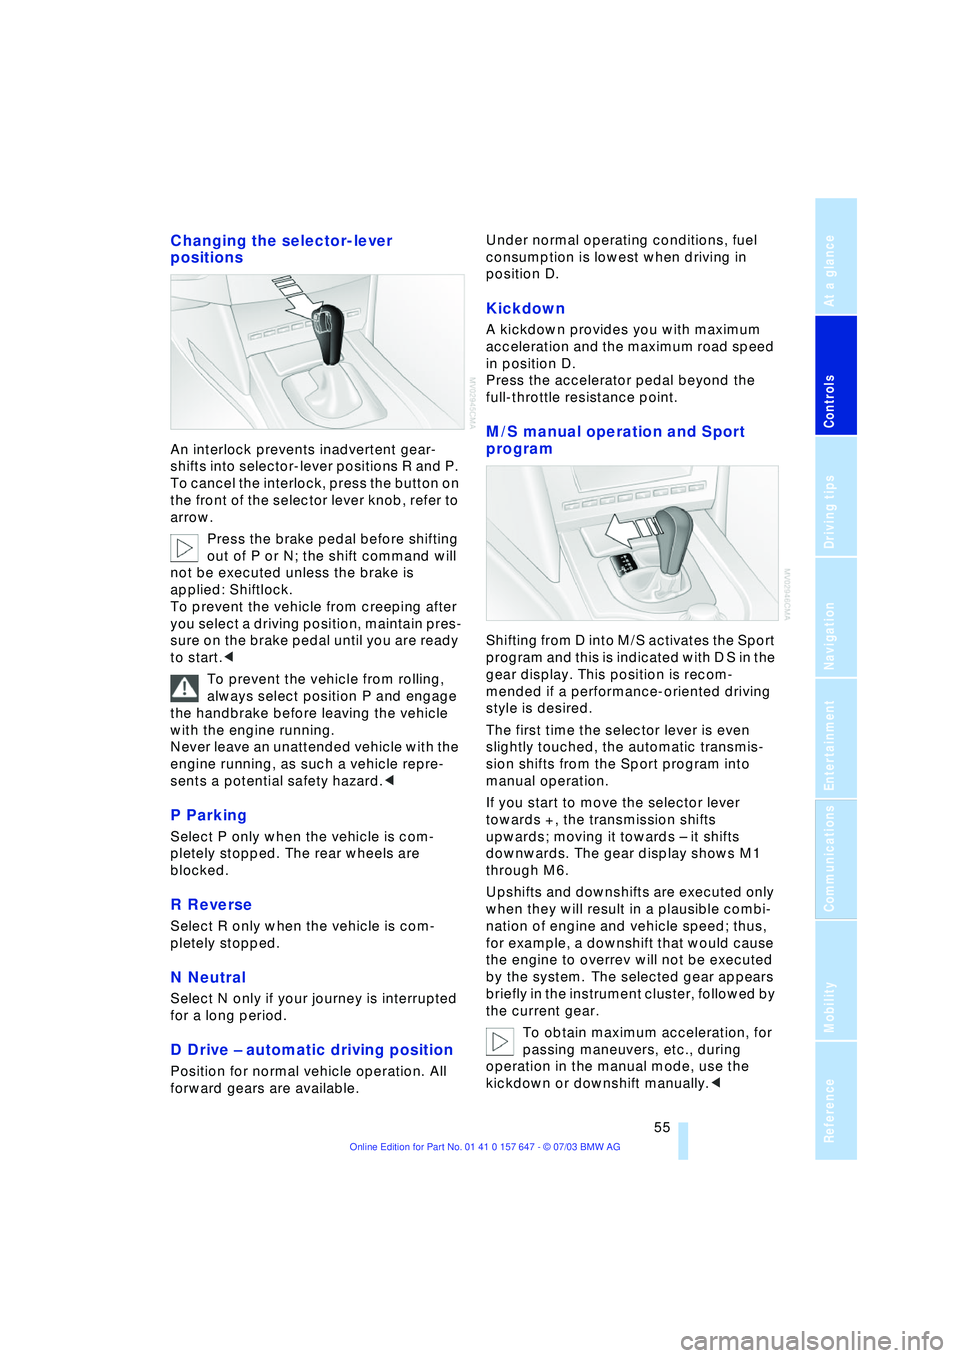
An interlock prevents inadvertent gear-
shifts into selector-lever positions R and P.
To cancel the interlock, press the button on
the front of the selector lever knob, refer to
arrow.
Press the brake pedal before shifting
out of P or N; the shift command will
not be executed unless the brake is
applied: Shiftlock.
To prevent the vehicle from creeping after
you select a driving position, maintain pres-
sure on the brake pedal until you are ready
to start.<
To prevent the vehicle from rolling,
always select position P and engage
the handbrake before leaving the vehicle
with the engine running.
Never leave an unattended vehicle with the
engine running, as such a vehicle repre-
sents a potential safety hazard.<
P Parking
Select P only when the vehicle is com-
pletely stopped. The rear wheels are
blocked.
R Reverse
Select R only when the vehicle is com-
pletely stopped.
N Neutral
Select N only if your journey is interrupted
for a long period.
D Drive Ð automatic driving position
Position for normal vehicle operation. All
forward gears are available.Under normal operating conditions, fuel
consumption is lowest when driving in
position D.
Kickdown
A kickdown provides you with maximum
acceleration and the maximum road speed
in position D.
Press the accelerator pedal beyond the
full-throttle resistance point.
M/S manual operation and Sport
program
Shifting from D into M/S activates the Sport
program and this is indicated with D S in the
gear display. This position is recom-
mended if a performance-oriented driving
style is desired.
The first time the selector lever is even
slightly touched, the automatic transmis-
sion shifts from the Sport program into
manual operation.
If you start to move the selector lever
towards +, the transmission shifts
upwards; moving it towards Ð it shifts
downwards. The gear display shows M1
through M6.
Upshifts and downshifts are executed only
when they will result in a plausible combi-
nation of engine and vehicle speed; thus,
for example, a downshift that would cause
the engine to overrev will not be executed
by the system. The selected gear appears
briefly in the instrument cluster, followed by
the current gear.
To obtain maximum acceleration, for
passing maneuvers, etc., during
operation in the manual mode, use the
kickdown or downshift manually.<
Page 80 of 220
Technology for comfort, convenience and safety
78
CBC Cornering Brake Control
CBC is a supplement to ABS. It provides
further enhancements in vehicle stability
and steering response during lane changes
and cornering at high rates of lateral accel-
eration.
EBV Electronic Brake Force
Distribution
EBV controls the brake system's applica-
tion pressure at the rear wheels to ensure
stable deceleration.
In case of malfunction
If the brake system warning lamp
lights up in red, appearing together
with the yellow indicator lamps for
ABS and DSC:
The driving stability control has
failed.
If all three lamps light up yellow:
Fault in the driving stability control.
The EBV electronic brake-force distribution
is active.
While you may continue, you should
remember to proceed cautiously and drive
defensively while avoiding full brake appli-
cations.
Please have the system checked at the
nearest BMW center.
If a message appears on the Control Dis-
play, please note the supplementary infor-
mation.
You can find more information on the
Check Control starting on page 68.
Indicator and warning lamps for
Canadian models.
Driving stability control/
DSC Dynamic Stability
Control
The concept
DSC maintains vehicle stability, even in
critical driving situations.
The DSC is operational every time you start
the engine. DSC includes the functionality
of the DTC Dynamic Traction Control and
DBC Dynamic Brake Control, refer to
page 79.
The system optimizes vehicle stability dur-
ing acceleration and when starting from a
full stop, as well as optimizing traction. The
system recognizes any tendency for the
vehicle to assume an unstable attitude
such as oversteer or understeer; it then
counteracts this tendency with a combina-
tion of graduated reductions in engine
torque and selective braking intervention at
individual wheels. DSC provides optimal
stability within the limits defined by the
laws of physics.
Indicator lamps
The indicator lamp in the instrument
cluster goes out soon after you start
the engine.
If the indicator lamp flashes:
DSC is regulating the drive and braking
forces.
If the indicator lamp lights up permanently:
DSC has been switched off using the but-
ton.
If the indicator lamp and the brake
warning lamp light up permanently:
Malfunction in DSC, DTC and DBC.
When the system is off, the stability main-
tenance functions described above are no
longer available. The vehicle will remain
completely operational, however, without
DSC.
Please respond to any malfunctions by
referring the problem to your BMW center.
Page 82 of 220
Technology for comfort, convenience and safety
80 tance during panic stops. This system
exploits all of the benefits provided by ABS.
Do not reduce the pressure on the brake
pedal for the duration of the brake applica-
tion. When the brake pedal is released,
DBC is deactivated.
In the event of a malfunction, the
warning lamp in the instrument
cluster lights up yellow.
Have the system checked and repaired at
your BMW center as soon as possible.
Please note any information that appears
on the Control Display.
Warning lamp for Canadian models.
Active roll stabilization*
The concept
Active roll stabilization minimizes body roll
and optimizes vehicle stability during cor-
nering and evasive maneuvers.
Dynamic stabilizers at the front and rear
axles form the basis for active roll stabiliza-
tion. Suspension compliance adapts to suit
driving conditions, varying from perfor-
mance-oriented during cornering to
smooth and comfort-oriented when the
vehicle is proceeding in a straight line.
The system assumes operational status
each time you start the engine.
Driving with active roll stabilization
During vehicle operation, the system con-
tinuously runs through closed-loop control
cycles lasting only fractions of a second.
In case of malfunction
The symbol in the instrument clus-
ter lights up and a message
appears on the Control Display.
Please note any supplementary information
that appears there.
You can find more information on the
Check Control starting on page 68. If the active roll stabilization system is
deactivated in response to malfunc-
tion, please remember to adapt your speed
accordingly, especially in curves.
The suspension will be noticeably softer
and the vehicle will display a greater ten-
dency to tilt during cornering and in cross-
winds.
If a message stating that you should stop
appears on the Control Display in addition
to the red symbol, stop immediately and
switch off the engine. In this case the oil
level in the reservoir may have dropped
below the minimum, possibly owing to a
leak in the hydraulic system.
Please note any supplementary information
that appears on the Control Display.<
Flat Tire Monitor
The concept
The Flat Tire Monitor keeps track of the
inflation pressures in the four fitted tires as
you drive. The system provides an alert
whenever the inflation pressure drops sig-
nificantly in relation to the pressure in
another tire.
The check of the tire inflation pressure is
based on monitoring the relative speeds of
the wheels. A flat tire is detected and
reported on the basis of a deviation in cer-
tain speed ratios.
Functional requirement
So that the Flat Tire Monitor can learn the
correct inflation pressure, please perform
the following:
1.Check the inflation pressures in all tires
2.Compare with the inflation pressure
table on page 170 and correct if neces-
sary
3.Initialize the system.
Limits of the system
The Flat Tire Monitor cannot indicate
sudden severe tire damage caused
by outside factors and does not detect a
Page 108 of 220
Things to remember when driving
106
Things to remember when driving
Break-in procedures
To ensure that your vehicle continues to
provide optimized economy of operation
throughout an extended service life, we
request that you devote careful attention to
the following section.
Engine and differential
Up to 1,200 miles/2,000 km:
You should attempt to vary both vehicle
and engine speeds. Until the break-in
period has been completed, you should
also refrain from exceeding an engine
speed of 4,500 rpm or a driving speed of
100 mph/160 km/h.
Always obey all official speed limits.
Avoid full-throttle operation and use of the
transmission's kickdown mode during
these initial miles.
Once you have driven 1,200 miles/
2,000 km, the engine and vehicle speeds
can be gradually increased.
You should also comply with these break-in
procedures should the engine or differen-
tial need to be replaced at a later point.
Sequential manual transmission
SMG
Do not use the acceleration assistant dur-
ing the break-in period.
Tires
Due to technical factors associated with
their manufacture, tires do not achieve their
full traction potential until after an initial
break-in period. Therefore, drive reservedly
during the first 200 miles/300 km.
Brake system
Brakes require an initial break-in period of
approx. 300 miles/500 km to achieve opti-
mized contact and wear patterns between
brake pads and rotors.
Clutch
The function of the clutch is only at its opti-
mized level after a distance driven of
approx. 300 miles/500 km. During this
break-in period, engage the clutch gently.
General driving notes
High temperatures
Extreme temperatures occur at the
catalytic converter on this and every
catalyst-equipped vehicle. Do not remove
the heat shields installed adjacent to vari-
ous sections of the exhaust system, and
never apply undercoating to them. When
driving, standing at idle and while parking
take care to avoid possible contact
between the hot exhaust system and any
highly flammable materials such as hay,
leaves, grass, etc. Such contact could lead
to a fire, and with it the risk of serious prop-
erty damage as well as personal injury.<
Parking the vehicle
Condensation forms in the air conditioner
system during operation, and then exits
under the vehicle. Traces of condensed
water under the vehicle are thus normal.
Before driving into the car wash
Fold in the exterior mirrors, refer to
page 42, as otherwise they could be dam-
aged due to the width of the vehicle.
Hydroplaning
When driving on wet or slushy roads,
reduce road speed. If you do not, a
wedge of water can form between tires and
road surface.This phenomenon is referred
to as hydroplaning, and is characterized by
a partial or complete loss of contact
between the tires and the road surface, ulti-
mately undermining your ability to steer
and brake the vehicle.<
Page 110 of 220
Things to remember when driving
108 For your own safety: use only brake
pads that BMW has approved for your
particular vehicle model. As BMW cannot
assess the suitability of other brake pads
for use on your vehicle, we are unable to
assume continued responsibility for the
vehicle's operating safety if non-approved
pads are installed.<
Mobile communication in the vehicle
BMW recommends using mobile communi-
cation devices, e.g. portable phones, in the
interior of the vehicle with a suitable exter-
nal antenna. Otherwise, the vehicle elec-
tronics and mobile communication device
can influence one another.
Loading
To avoid loading the tires beyond
their approved carrying capacity,
never overload the vehicle. Overloading
can lead to overheating and increases the
rate at which damage develops inside the
tires. The ultimate result can assume the
form of a sudden air loss.<
Determining loading limit
1.Locate the following statement on the
driver's door pillar
*:
The combined weight of occu-
pants and cargo should never
exceed XXX kg or YYY lbs, as otherwise
the vehicle may be damaged and unsta-
ble driving conditions may result.<
2.Determine the combined weight of the
driver and passengers that will be riding
in your vehicle 3.Subtract the combined weight of the
driver and passengers from XXX kilo-
grams or YYY pounds
4.The resulting figure equals the available
amount of cargo and luggage load
capacity.
For example, if the XXX amount equals
1,400 lbs. and there will be five 150-lbs.
passengers in your vehicle, the amount
of available cargo and luggage load
capacity is 650 lbs.:
1,400 lbs. minus 750 lbs. = 650 lbs.
5.Determine the combined weight of lug-
gage and cargo being loaded on the
vehicle. That weight must not exceed
the available cargo and luggage load
capacity calculated in step 4
6.If your vehicle will be towing a trailer,
part of the load from your trailer will be
transferred to your vehicle. Consult the
manual for transporting a trailer to
determine how this may reduce the
available cargo and luggage load
capacity of your vehicle.
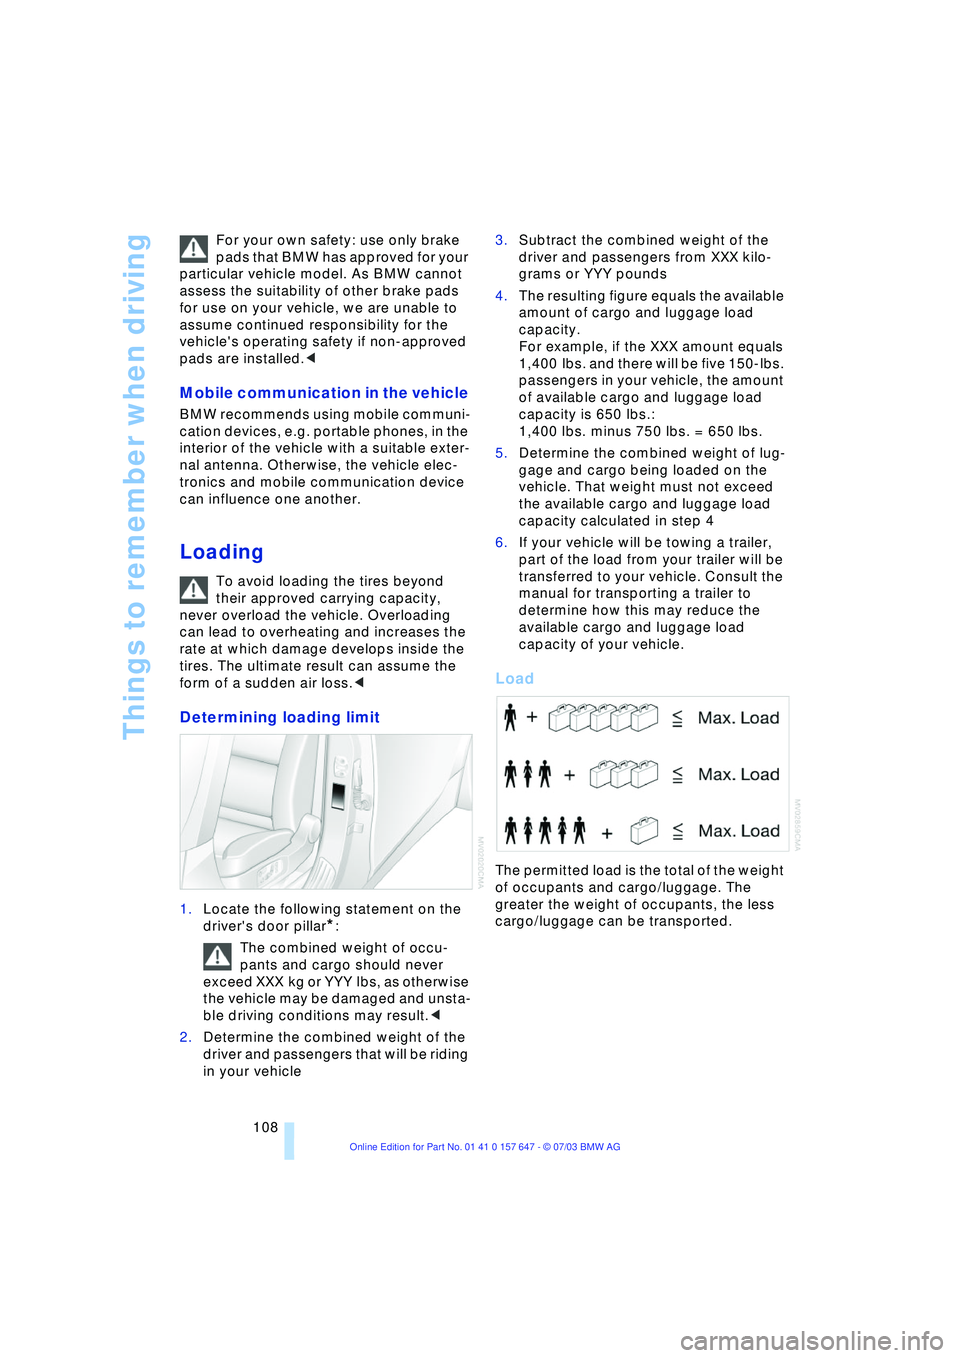
Load
The permitted load is the total of the weight
of occupants and cargo/luggage. The
greater the weight of occupants, the less
cargo/luggage can be transported.
Page 138 of 220
Radio
136 Control Center, for principle details, refer to
page 16:
1.Select "FM" or "AM" and press the con-
troller
2.Move the controller forwards to change
the field
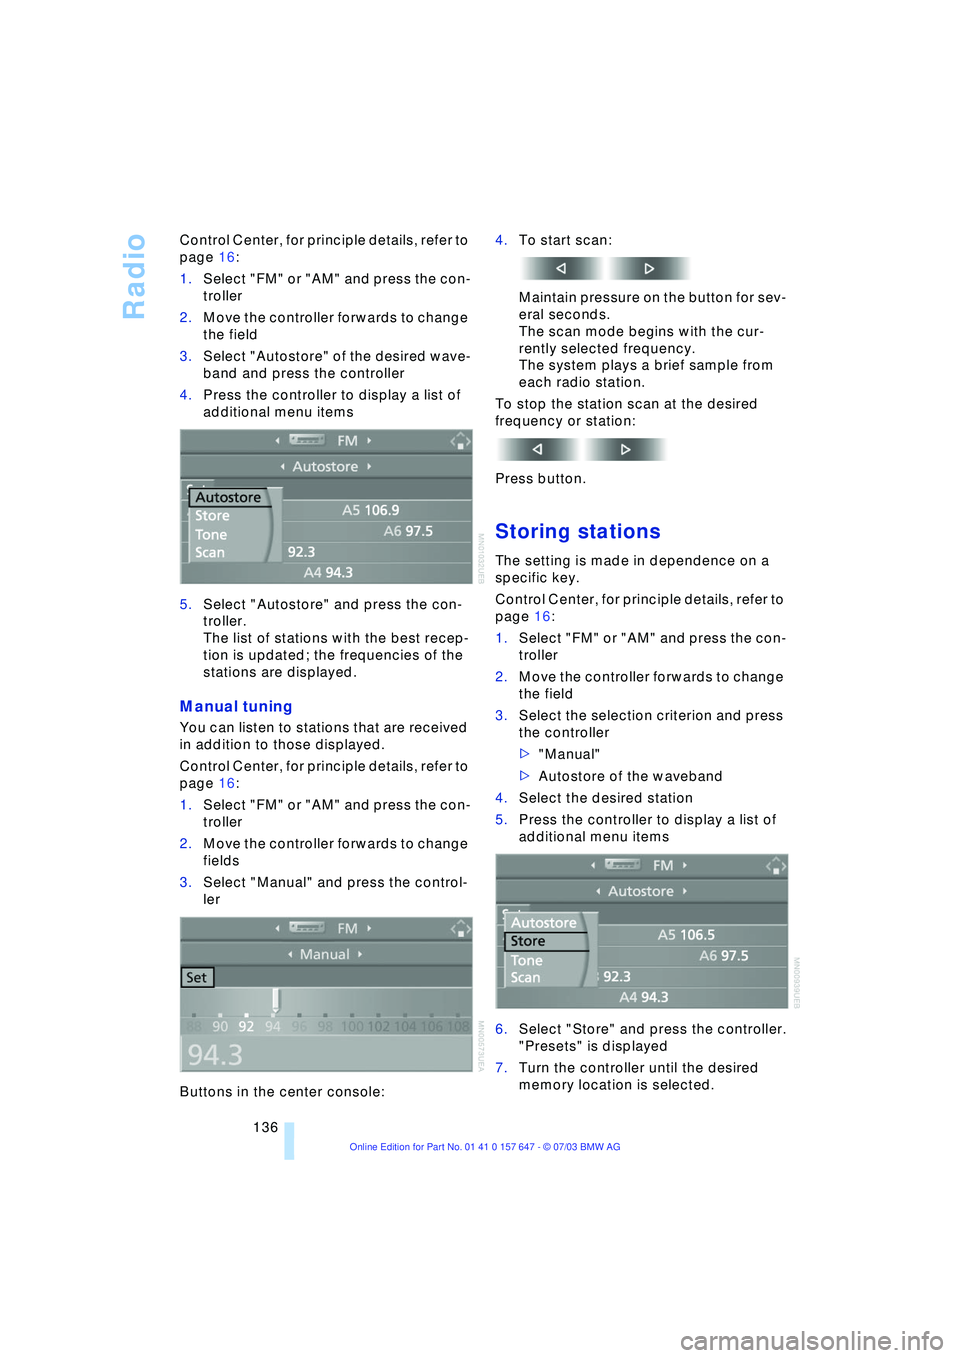
3.Select "Autostore" of the desired wave-
band and press the controller
4.Press the controller to display a list of
additional menu items
5.Select "Autostore" and press the con-
troller.
The list of stations with the best recep-
tion is updated; the frequencies of the
stations are displayed.
Manual tuning
You can listen to stations that are received
in addition to those displayed.
Control Center, for principle details, refer to
page 16:
1.Select "FM" or "AM" and press the con-
troller
2.Move the controller forwards to change
fields
3.Select "Manual" and press the control-
ler
Buttons in the center console:4.To start scan:
Maintain pressure on the button for sev-
eral seconds.
The scan mode begins with the cur-
rently selected frequency.
The system plays a brief sample from
each radio station.
To stop the station scan at the desired
frequency or station:
Press button.
Storing stations
The setting is made in dependence on a
specific key.
Control Center, for principle details, refer to
page 16:
1.Select "FM" or "AM" and press the con-
troller
2.Move the controller forwards to change
the field
3.Select the selection criterion and press
the controller
>"Manual"
>Autostore of the waveband
4.Select the desired station
5.Press the controller to display a list of
additional menu items
6.Select "Store" and press the controller.
"Presets" is displayed
7.Turn the controller until the desired
memory location is selected.
Page 148 of 220
CD changer
146
Random play sequence
In this mode, the music tracks on the cur-
rent CD are played in a random sequence.
Control Center, for principle details, refer to
page 16:
1.Select "Set" and press the controller to
display a list of additional menu items
2.Select "Random" and press the control-
ler.
To cancel the random mode:
>Press the controller, select "Random"
and press the controller
>Select another function using the Con-
trol Center.
Fast forward/reverse
Buttons in the center console:
1.Select the direction:
Press and hold the button. The tracks
can be heard, but the tone is distorted
2.To interrupt the fast forward/reverse
function, release the button.
The system will continue play at the
point on the CD at which the button was
released.
The track is displayed on the Control Dis-
play, refer to page 18.
Malfunctions
The BMW CD changer is a Class 1
laser product. Do not operate the sys-
tem if the cover is damaged, otherwise
severe eye damage can result.
Always refer repair and maintenance oper-
ations to qualified technicians.
With self-recorded CDs, labels applied
later can become detached during play-
back due to the development of heat and
cause irreparable damage to the device.<
CDs with copy protection devices
cannot be played on your CD changer
or only with certain restrictions. These CDs
differ from the CD Audio Standard Red
Book, on the basis of which all CD players
and changers are designed. In this case,
please contact the CD dealer or manufac-
turer.
You may experience playback problems,
such as skips, when using CDs that you
have copied at home.
If the display fails to detect a CD that you
have loaded in the magazine, check to
ensure that the CD has been inserted cor-
rectly and inspect it for signs of defects.
High levels of humidity inside the system
can condense on the laser's scan lens and
temporarily prevent it from reading the
CD.<
Page 183 of 220

Mobility
181Reference
At a glance
Controls
Driving tips
Communications
Navigation
Entertainment
Maintenance
The BMW Maintenance
System
The BMW Maintenance System is
designed to ensure that your vehicle will
continue to furnish consistent reliability
combined with optimal safety. The service
schedule also includes operations related
to the vehicle's comfort and convenience
features, such as replacement of the filters
for the inside air. The ultimate objective is
to ensure economical maintenance by pro-
viding the ideal service for your vehicle.
Should the day come when you decide to
sell your BMW, you will find that a complete
dealer service history is an asset of inesti-
mable value.
CBS Condition Based Service
CBS is a more advanced version of the Ser-
vice Interval Display. Sensors combine with
highly-specialized algorithms to supply
service information that reflects your vehi-
cle's actual operating conditions more pre-
cisely than ever before.
The system now provides individual dis-
plays of the times or distances remaining
until the deadlines for specific service
operations as well as legally prescribed
inspections:
>Engine oil
>Brakes: separate for front and rear
>Brake fluid
>Spark plugs >Vehicle check
>Depending on national regulations:
legally prescribed inspections.
CBS monitors both current and upcoming
service requirements. Your vehicle stores
this information continuously in the ignition
key while the vehicle is being driven. You
should therefore hand over to the BMW
Service Advisor the key you last used to
drive when you take your vehicle for ser-
vice. After accessing the data stored in the
vehicle key, your BMW Service Advisor is
able to suggest precisely the right array of
service procedures for your own individual
vehicle.
By letting you define a service and mainte-
nance regimen that reflects your own indi-
vidual requirements, Condition Based Ser-
vice builds the basis for trouble-free
driving.
You can find more detailed information on
the service requirement display on
page 66.
Make sure the date in the Control
Center is always set correctly, refer to
page 75, as otherwise the effectiveness of
Condition Based Service CBS is not
ensured.
and Service Guide Booklet for Cana-
dian models
Please consult your Service and Warranty
Information Booklet for US models and
Warranty and Service Guide Booklet for
Canadian models for additional information
on service requirements.
Have service and repair operations
performed at your BMW center.
Take the time to ensure that these service
procedures are confirmed by entries in
your vehicle's Service and Warranty Infor-
mation Booklet for US models and War-
ranty and Service Guide Booklet for Cana-