2004 BMW 330CI COUPE brake
[x] Cancel search: brakePage 128 of 174

128
Coolant
Do not add coolant to the cooling
system when the engine is hot. If
you attempt to do so, escaping coolant
can cause burns.<
Coolant consists of water as well as an
additive such as antifreeze with corro-
sion inhibitor. Not all commercially
available additives are suitable for your
BMW. Your BMW center knows which
additives are appropriate.
Only use approved additives, as
the engine could otherwise be
damaged. The additives are hazardous
to your health; therefore, follow the
instructions on the containers.<
Comply with the applicable envi-
ronmental laws regulating the dis-
posal of antifreeze with corrosion inhib-
itor.<
Checking the coolant level and
adding coolantCheck the coolant level when the
engine is cold, approx. 687/+206.
1. Open the cap for the expansion tank
by turning it slightly counterclock-
wise to allow accumulated pressure
to escape. Then open
2. The coolant level is correct when the
upper end of the red float rod is at
least even with the upper edge of the
filler neck; see arrow. The end of the
float may stick out by a maximum of
3/4 in/2 cm – that is, up to the sec-
ond mark on the float
3. If necessary, add coolant. If the cool-
ant is low, slowly add coolant until
the correct level is reached – do not
overfill.
Brake fluidIndicator lamp
The warning lamp comes on
even though the parking brake
is released:
The brake fluid level in the reservoir is
too low, refer to page 18. At the same
time, there may be significantly greater
pedal travel. Have the system checked
as soon as possible.
Warning lamp for Canadian
models.
If you continue driving, extended
pedal travel may be necessary
and braking distances may be signifi-
cantly longer. Be sure to adapt your
driving style accordingly.<
Page 129 of 174
129
Adding brake fluidFor adding brake fluid or for determin-
ing and correcting the cause of brake
fluid loss, consult your BMW center.
Your BMW center is familiar with the
specifications for factory-approved
brake fluids – DOT 4.
Brake fluid loss may result in extended
brake pedal travel.
Brake fluid is hygroscopic, that is,
it absorbs moisture from the air
over time.
In order to ensure the brake system's
safety and reliability, have the brake
fluid changed every two years by a
BMW center. Refer to the Service and
Warranty Information Booklet for US
models or the Warranty and Service
Guide Booklet for Canadian models.
Brake fluid is toxic and damages the
vehicle's paint. You should always store
it in its closed original container and in
a location which is out of reach of chil-
dren.
Do not spill the brake fluid and do not
fill the brake fluid reservoir beyond the
MAX mark. The brake fluid could ignite
upon contact with hot engine parts and
cause serious burns.<
Comply with the applicable envi-
ronmental laws regulating
the disposal of brake fluid.<
Brake fluid
OverviewControlsMaintenanceRepairsDataIndex
Page 130 of 174
130Maintenance
BMW Maintenance SystemThe BMW Maintenance System helps
maintain your vehicle's road safety and
operational safety. Comfort-related
aspects, such as the timely change of
filters for the air inside the vehicle, are
taken into consideration. The goal is to
optimize maintenance with respect to
low total cost of ownership.
If you should sell your BMW one day,
consistent service and maintenance will
prove to your advantage.
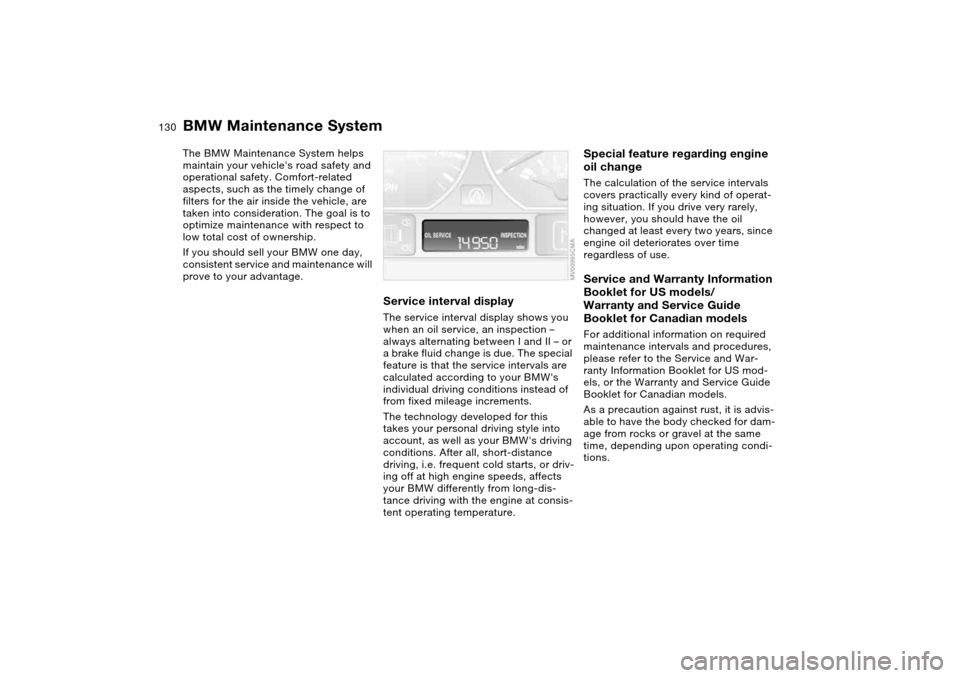
Service interval displayThe service interval display shows you
when an oil service, an inspection –
always alternating between I and II – or
a brake fluid change is due. The special
feature is that the service intervals are
calculated according to your BMW's
individual driving conditions instead of
from fixed mileage increments.
The technology developed for this
takes your personal driving style into
account, as well as your BMW's driving
conditions. After all, short-distance
driving, i.e. frequent cold starts, or driv-
ing off at high engine speeds, affects
your BMW differently from long-dis-
tance driving with the engine at consis-
tent operating temperature.
Special feature regarding engine
oil changeThe calculation of the service intervals
covers practically every kind of operat-
ing situation. If you drive very rarely,
however, you should have the oil
changed at least every two years, since
engine oil deteriorates over time
regardless of use.Service and Warranty Information
Booklet for US models/
Warranty and Service Guide
Booklet for Canadian modelsFor additional information on required
maintenance intervals and procedures,
please refer to the Service and War-
ranty Information Booklet for US mod-
els, or the Warranty and Service Guide
Booklet for Canadian models.
As a precaution against rust, it is advis-
able to have the body checked for dam-
age from rocks or gravel at the same
time, depending upon operating condi-
tions.
Page 139 of 174
139
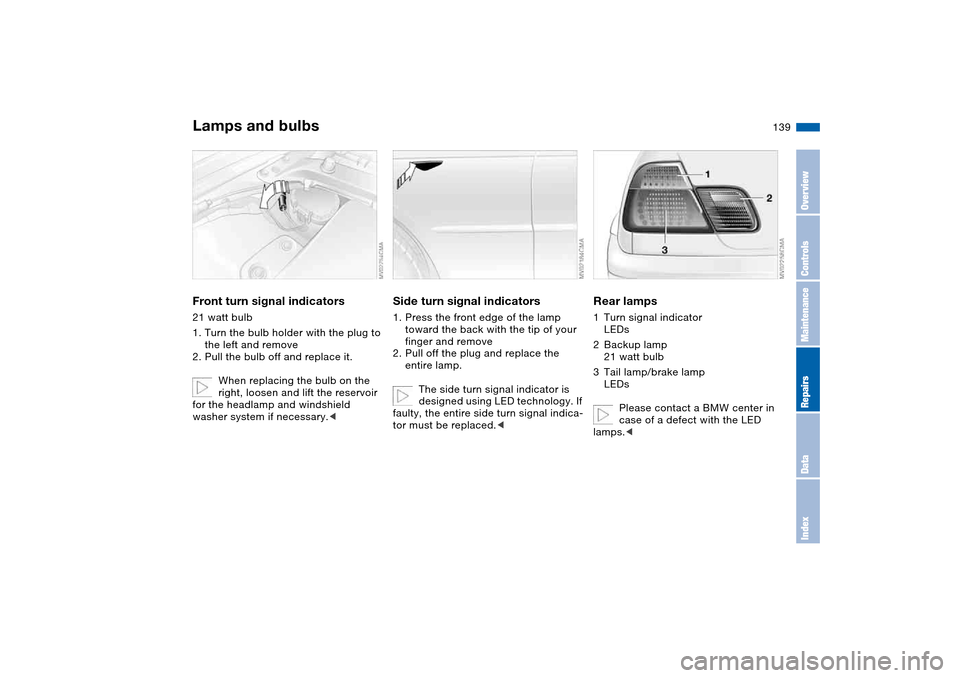
Front turn signal indicators21 watt bulb
1. Turn the bulb holder with the plug to
the left and remove
2. Pull the bulb off and replace it.
When replacing the bulb on the
right, loosen and lift the reservoir
for the headlamp and windshield
washer system if necessary.<
Side turn signal indicators1. Press the front edge of the lamp
toward the back with the tip of your
finger and remove
2. Pull off the plug and replace the
entire lamp.
The side turn signal indicator is
designed using LED technology. If
faulty, the entire side turn signal indica-
tor must be replaced.<
Rear lamps1Turn signal indicator
LEDs
2Backup lamp
21 watt bulb
3Tail lamp/brake lamp
LEDs
Please contact a BMW center in
case of a defect with the LED
lamps.<
Lamps and bulbs
OverviewControlsMaintenanceRepairsDataIndex
Page 140 of 174
140
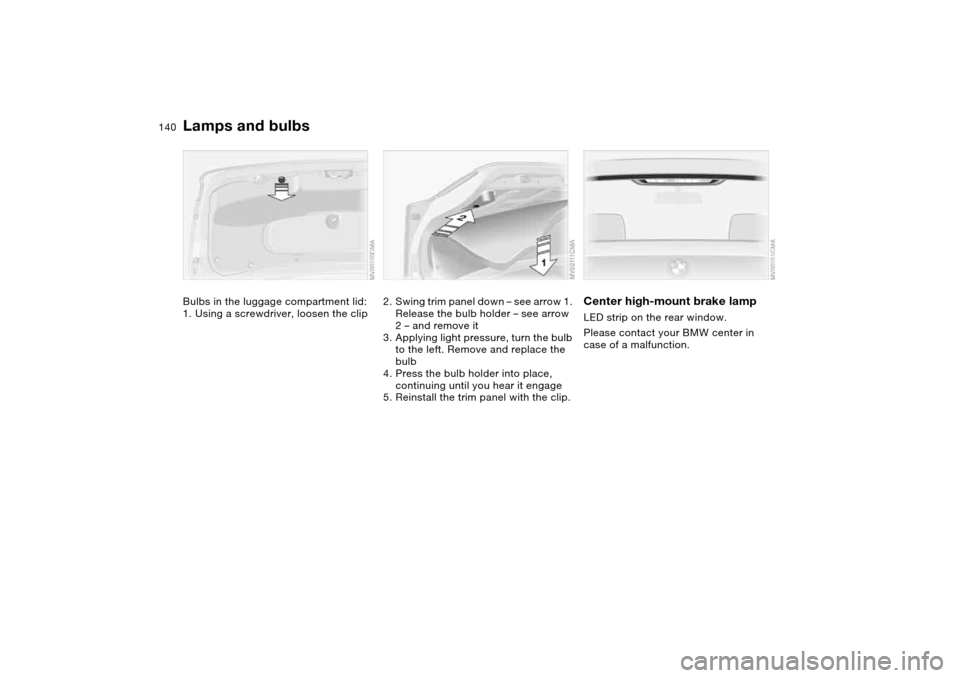
Bulbs in the luggage compartment lid:
1. Using a screwdriver, loosen the clip
2. Swing trim panel down – see arrow 1.
Release the bulb holder – see arrow
2 – and remove it
3. Applying light pressure, turn the bulb
to the left. Remove and replace the
bulb
4. Press the bulb holder into place,
continuing until you hear it engage
5. Reinstall the trim panel with the clip.
Center high-mount brake lampLED strip on the rear window.
Please contact your BMW center in
case of a malfunction.
Lamps and bulbs
Page 141 of 174
141
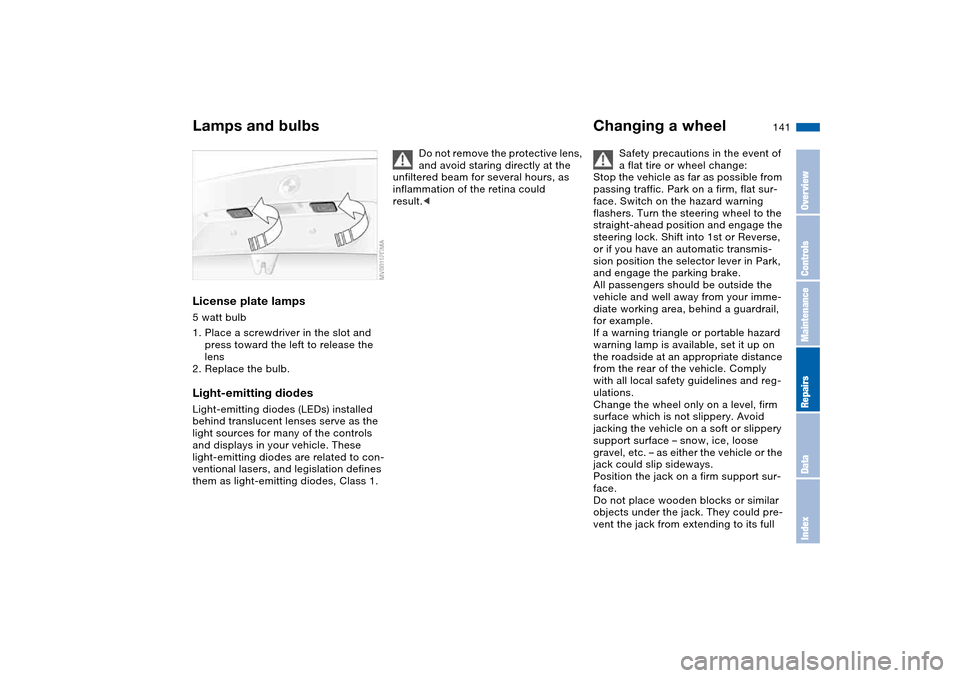
License plate lamps5 watt bulb
1. Place a screwdriver in the slot and
press toward the left to release the
lens
2. Replace the bulb.Light-emitting diodesLight-emitting diodes (LEDs) installed
behind translucent lenses serve as the
light sources for many of the controls
and displays in your vehicle. These
light-emitting diodes are related to con-
ventional lasers, and legislation defines
them as light-emitting diodes, Class 1.
Do not remove the protective lens,
and avoid staring directly at the
unfiltered beam for several hours, as
inflammation of the retina could
result.<
Changing a wheel
Safety precautions in the event of
a flat tire or wheel change:
Stop the vehicle as far as possible from
passing traffic. Park on a firm, flat sur-
face. Switch on the hazard warning
flashers. Turn the steering wheel to the
straight-ahead position and engage the
steering lock. Shift into 1st or Reverse,
or if you have an automatic transmis-
sion position the selector lever in Park,
and engage the parking brake.
All passengers should be outside the
vehicle and well away from your imme-
diate working area, behind a guardrail,
for example.
If a warning triangle or portable hazard
warning lamp is available, set it up on
the roadside at an appropriate distance
from the rear of the vehicle. Comply
with all local safety guidelines and reg-
ulations.
Change the wheel only on a level, firm
surface which is not slippery. Avoid
jacking the vehicle on a soft or slippery
support surface – snow, ice, loose
gravel, etc. – as either the vehicle or the
jack could slip sideways.
Position the jack on a firm support sur-
face.
Do not place wooden blocks or similar
objects under the jack. They could pre-
vent the jack from extending to its full
Lamps and bulbs
OverviewControlsMaintenanceRepairsDataIndex
Page 149 of 174

149
Towing and tow-starting the vehicle
Always observe all applicable
towing laws and regulations.<
Using the towing eyeletThe screw-in towing eyelet is located in
the luggage compartment under the
floor panel; be sure that it remains with
the vehicle at all times. It can be
attached at the front or rear of your
BMW.
Observe the following instruc-
tions in order to avoid damaging
the towing eyelet or the vehicle: use
only the towing eyelet supplied with the
vehicle, and screw it in firmly until it
stops. Use the towing eyelet for towing
on paved roads only. Avoid subjecting
the towing eyelet to lateral loads, e.g.
do not lift the vehicle using the towing
eyelet.<
Access to the threaded socketPress out the cover in the front or rear
bumper with a screwdriver at the top of
the recess.Being towed
Make sure that the ignition key is
in position 1, because the steering
lock could otherwise engage and the
vehicle could no longer be steered.
There is no power assist while the
engine is off. Therefore, you will need to
exert more force to brake and steer the
vehicle.<
Turn on the hazard warning flashers, if
required by national regulations. If the
electrical system has failed, clearly
identify the vehicle being towed, e.g. by
placing a sign or a warning triangle in
the rear window.
Vehicles with manual transmission:
gearshift lever in idling position.
Vehicles with automatic transmission:
selector lever in position N.
Do not exceed a towing speed of
45 mph / 70 km/h, nor a towing
distance of 90 miles/150 km, because
the automatic transmission could other-
wise be damaged.<
Vehicles with sequential manual gear-
box SMG: selector lever in position N.Towing methodsIn some countries, it is not permitted to
tow the vehicle with a tow bar or tow
rope on public roads.
Familiarize yourself with the applicable
towing regulations for the country in
which you are driving.
OverviewControlsMaintenanceRepairsDataIndex
Page 160 of 174

Everything from A to ZA
ABS Antilock Brake
System 115
indicator lamp 18
Acceleration assistant 66
Accessories, refer to For
your own safety 5
Accident, refer to Emer-
gency call 146
Activated-charcoal filter 98
Adaptive brake lamp, refer
to Brake force display 84
Adaptive headlights 86
Adding brake fluid 129
Additional sources of infor-
mation 4
Air conditioning 90
Air conditioning mode 92
automatic climate
control 96
Air distribution
air conditioning 92
automatic climate
control 96
Air distribution, individual 96
Air outlets, refer to Ventila-
tion 90, 94
Air pressure, refer to Tire
inflation pressure 116
Air recirculation, refer to
Recirculated-air mode
92, 97Air supply
air conditioning 92
automatic climate
control 96
Air, drying, refer to Air con-
ditioning mode 92, 96
Airbags 51
deactivating 54
indicator lamp 18, 53
sitting safely 41
Airing out, refer to Ventila-
tion 90, 94
AKI, refer to Fuel specifica-
tions 24
Alarm system 36
avoiding unintentional
alarms 37
All-season tires, refer to
Winter tires 121, 122
Antifreeze 128
coolant 128
washer fluid 126
Antilock Brake System
(ABS) 115
indicator lamp 18
Anti-theft system 28
Anti-theft warning system,
refer to Alarm system 36
Approved axle loads, refer
to Weights 156
Approved gross weight,
refer to Weights 156Armrest
front 100
rear 101
Artificial leather, refer to the
Caring for your vehicle
brochure
Ashtray
front 102
rear 102
Assistant systems, refer to
Dynamic Stability Control
(DSC) 81
AUC Automatic recircu-
lated-air control 97
AUTO program 96
Automatic
cruise control 72
headlamp control 85
Automatic air distribution,
refer to AUTO program 96
Automatic air supply, refer
to AUTO program 96
Automatic car wash, refer to
the Caring for your vehicle
brochure
Automatic climate control 94
Automatic curb monitor 48
Automatic dimming, interior
rearview mirror 50
Automatic recirculated-air
control (AUC) 97Automatic transmission with
Steptronic 67
indicator lamp 19, 69
interlock 59
selector lever lock 67
shiftlock 67
tow-starting 150
Automatic windshield
washer, refer to Rain sen-
sor 71
Average fuel
consumption 79
Average speed 79
Avoiding unintentional
alarms 37
Axle loads, refer to
Weights 156
B
Backrest
unlocking 45
Backrest, refer to Seat
adjustment 42, 44
Backup lamps 62
bulb replacement 139
Bandages, refer to First-aid
kit 22
Bar, for towing 149