2004 BMW 330CI COUPE fuel
[x] Cancel search: fuelPage 32 of 174

32
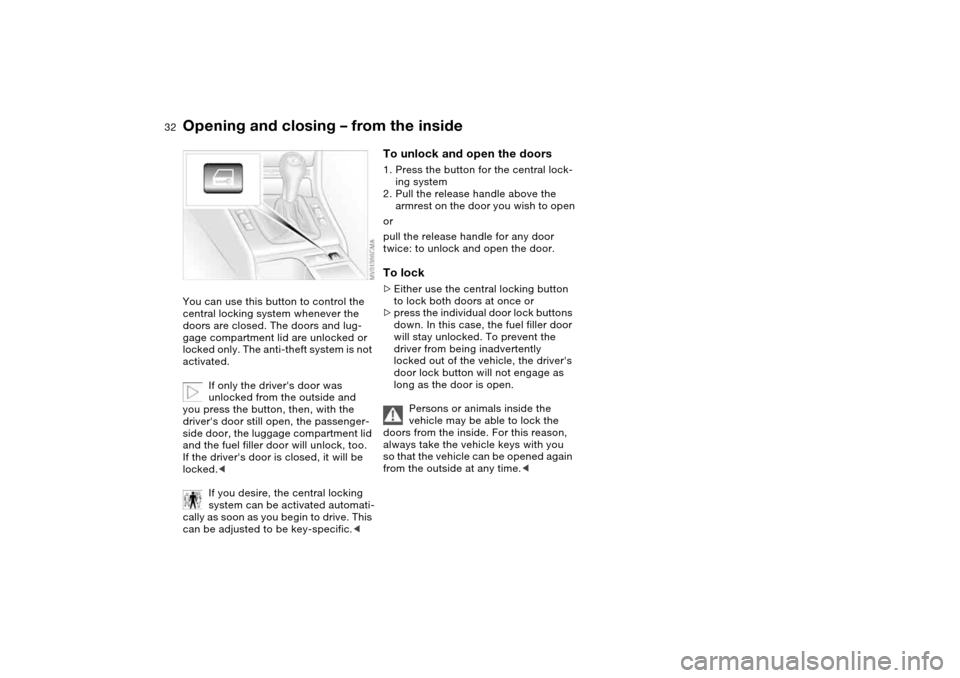
Opening and closing – from the insideYou can use this button to control the
central locking system whenever the
doors are closed. The doors and lug-
gage compartment lid are unlocked or
locked only. The anti-theft system is not
activated.
If only the driver's door was
unlocked from the outside and
you press the button, then, with the
driver's door still open, the passenger-
side door, the luggage compartment lid
and the fuel filler door will unlock, too.
If the driver's door is closed, it will be
locked.<
If you desire, the central locking
system can be activated automati-
cally as soon as you begin to drive. This
can be adjusted to be key-specific.<
To unlock and open the doors1. Press the button for the central lock-
ing system
2. Pull the release handle above the
armrest on the door you wish to open
or
pull the release handle for any door
twice: to unlock and open the door.To lock>Either use the central locking button
to lock both doors at once or
>press the individual door lock buttons
down. In this case, the fuel filler door
will stay unlocked. To prevent the
driver from being inadvertently
locked out of the vehicle, the driver's
door lock button will not engage as
long as the door is open.
Persons or animals inside the
vehicle may be able to lock the
doors from the inside. For this reason,
always take the vehicle keys with you
so that the vehicle can be opened again
from the outside at any time.<
Page 58 of 174

58
Vehicle Memory, Key MemoryHow the system functionsNo doubt you have reflected at one
time or another on how great it would
be if you could permanently configure
your vehicle's various features and
adjustments to mirror your own individ-
ual preferences. In engineering your
vehicle, BMW has provided for a num-
ber of options for personal adjustment
that can be programmed into your vehi-
cle at your BMW center.
The available configuration data fall into
two categories, according to whether
their primary orientation is the vehicle –
Vehicle Memory – or the individual –
Key Memory. Provided that each per-
son has a separate remote-control key,
you can have your BMW center enter
adjustment data for as many as four dif-
ferent individuals into the system.
The system then relies on a bilateral
data exchange to identify the individual
user and executes the selected settings
whenever the remote control unit is
used to disengage the door locks.
Distinguishing between keysColor-coded decals have been pro-
vided to help you distinguish individual
keys with different settings.What the system can doYour BMW center can provide you with
details on the capabilities of the Vehicle
Memory and Key Memory systems.
You will see this symbol through-
out the Owner's Manual. It is to
remind you at appropriate places of the
settings that are available to you.<
Examples for Vehicle Memory:
>Various signals as acknowledgment
when locking or unlocking your vehi-
cle, refer to pages 29, 31
>Activates/deactivates the 'Follow me
home' function, refer to page 85
>Activates/deactivates daytime driv-
ing lamps, refer to page 85
>Sets the units of measure for display-
ing time, outside temperature, dis-
tance traveled and fuel consumption
in the instrument cluster
>When you shift into Reverse, an
acoustic signal indicates that PDC
has been activated, refer to page 80
>Switches on rear window defroster
automatically, refer to pages 92, 97
>Activates/deactivates various alarm
system functions, refer to page 37
>After giving an ice warning, the
onboard computer display returns to
the previous setting, refer to page 78.
Examples for Key Memory:
>Unlocks driver's door first, then the
vehicle's remaining locks, refer to
page 29
>Locks the vehicle automatically after
you start off, refer to page 32
>Automatically adjusts the driver's
seat to the personal programmed
settings when the vehicle is
unlocked, refer to page 47
>Automatic tilting of the passenger-
side mirror, refer to Automatic curb
monitor, page 48.
Page 67 of 174

67
Automatic transmission with Steptronic*In addition to the fully automatic opera-
tion, you can also shift gears manually
with Steptronic, refer to page 68.
When you move the selector lever from
the D position to the left into the M/S
range, the performance-oriented shift
programs of the automatic transmission
are engaged. Steptronic enters the
manual selection mode and executes
the desired shift whenever you tap the
selector lever in the direction indicated
by + or –. Whenever you want to use
the automatic mode again, just shift the
selector lever toward the right to posi-
tion D.
Under normal operating conditions, fuel
consumption is lowest when driving in
position D.Selector lever positionsP R N D M/S + –Starting the engineThe engine can only be started in selec-
tor lever positions P – for Park – or N –
for Neutral.
Range selectionA catch prevents inadvertent movement
of the selector lever to positions R and
P. To deactivate the catch, press the
button on the front of the selector lever
knob, see arrow.
While the vehicle is stationary and
before shifting out of Park or Neu-
tral, depress the footbrake in order to
disengage the selector lever's lock
mechanism – Shiftlock.<
Hold the footbrake down until
starting off. Otherwise the vehicle
will 'creep' when a drive position is
engaged. To prevent the vehicle from
starting off on its own, always move the
selector lever to position P and engage
the parking brake before leaving your
vehicle with the engine running.
Do not leave the vehicle unattended
with the engine running. An unattended
vehicle with a running engine repre-
sents a safety hazard.<
PParkSelect only when the vehicle is station-
ary. Transmission locks to prevent rear
wheels from turning.RReverseSelect only when the vehicle is station-
ary.NNeutralEngage this, for example, when you are
driving through a car wash. The vehicle
can roll.DDrive, automatic shift programThis position is designed for driving
under all normal operating conditions.
All forward gears are available.
OverviewControlsMaintenanceRepairsDataIndex
Page 74 of 174

74Everything under control
Odometer1Odometer
2Trip odometerOdometerYou can activate the displays shown in
the illustration with the ignition key in
position 0 by pressing the left button in
the instrument cluster.Trip odometerTo reset the trip odometer to zero,
press the left button with the ignition
key in position 1 or higher.
TachometerDo not operate the engine with the nee-
dle in the red overspeed zone of the
gauge.
To protect the engine, the fuel supply is
interrupted when you approach this
sector.
Energy controlIndicates the current fuel consumption
in mpg – in liters/100 km on Canadian
models. You can check your current
driving style to see whether it is condu-
cive to economy and minimum exhaust
emissions.
When the vehicle is stationary, the dis-
play goes to Maximum – zero on Cana-
dian models.
Page 75 of 174

75
Fuel gaugeOnce the indicator lamp stays on con-
tinuously, there are still approx.
2 gallons/8 liters of fuel in the fuel tank.
Fuel tank capacity approx.
16.6 gallons/63 liters.
Certain operating conditions, such as
those encountered in mountainous
areas, may cause the needle to fluctu-
ate slightly.
Fill the fuel tank before it is com-
pletely empty. Driving to the last
drop of fuel can prevent the engine
from operating properly and result in
damage.<
When you switch on the ignition, the
indicator lamp lights up briefly as an
operation check.
Engine coolant temperature gaugeBlueThe engine is still cold. Drive at moder-
ate engine and vehicle speeds.Between the blue and red zonesNormal operating range. The needle
may rise as far as the edge of the red
sector during normal operation.RedWhen you switch on the ignition, the
warning lamp comes on briefly as an
operation check.
If the lamp comes on during normal
vehicle operation: the engine has over-
heated. Stop and switch the engine off
immediately and allow it to cool down.
To check coolant level, refer to
page 128.
OverviewControlsMaintenanceRepairsDataIndex
Page 78 of 174

78
ComputerMode selectionWith the ignition key in position 1 or
higher, you can use the onboard com-
puter button BC in the turn signal lever
to retrieve information from the com-
puter for display in the instrument clus-
ter.
Every time you tap the onboard com-
puter button BC, the display changes to
the next function in sequence.
Order of the displays:
>Clock
>Outside temperature
>Average fuel consumption
>Range
>Average speed.
When the ignition key is in position 1
and higher, the last active setting is dis-
played.
Outside temperatureYou can change the units of measure –
7/6 – for the outside temperature dis-
play by pressing the right-hand reset
button in the instrument cluster while
the temperature display is active. The
units of measure – 7/6 – in the tem-
perature display of the automatic cli-
mate control change automatically,
refer to page 94.Ice warningIf the outside temperature drops to
about 37.57/+36, then the computer
will automatically switch to a display of
the outside temperature. In addition, a
signal sounds as a warning and the dis-
play flashes for a brief period.
Page 79 of 174

79
After giving an ice warning, the
display returns to the previous
setting.<
The ice warning does not alter to
the fact that surface ice can form
at temperatures above 37.57/+36,
on bridges or shaded road surfaces, for
instance.<
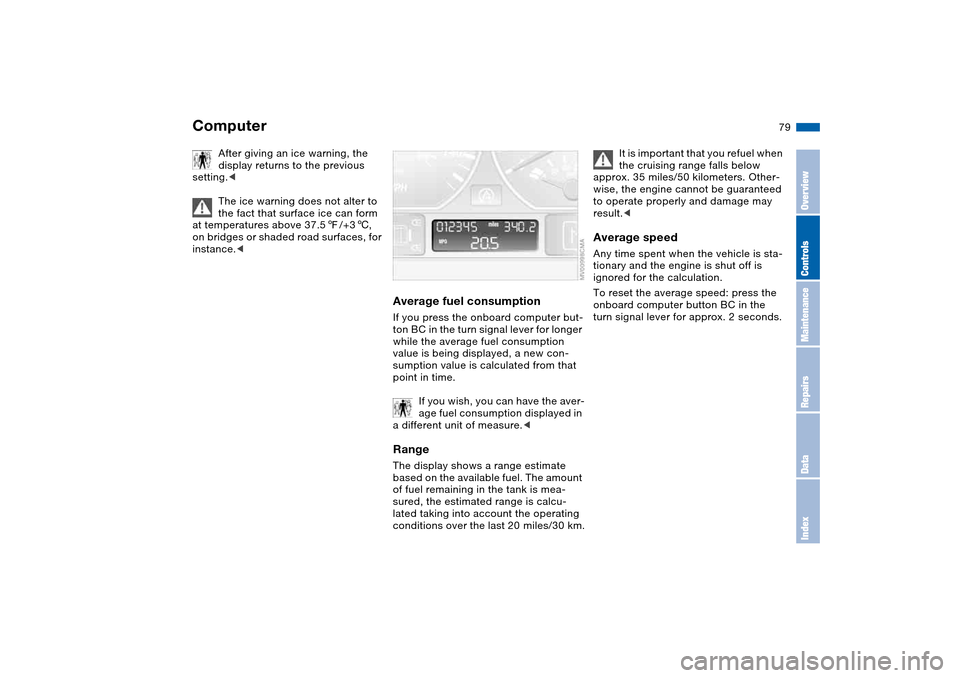
Average fuel consumptionIf you press the onboard computer but-
ton BC in the turn signal lever for longer
while the average fuel consumption
value is being displayed, a new con-
sumption value is calculated from that
point in time.
If you wish, you can have the aver-
age fuel consumption displayed in
a different unit of measure.
of fuel remaining in the tank is mea-
sured, the estimated range is calcu-
lated taking into account the operating
conditions over the last 20 miles/30 km.
It is important that you refuel when
the cruising range falls below
approx. 35 miles/50 kilometers. Other-
wise, the engine cannot be guaranteed
to operate properly and damage may
result.<
Average speedAny time spent when the vehicle is sta-
tionary and the engine is shut off is
ignored for the calculation.
To reset the average speed: press the
onboard computer button BC in the
turn signal lever for approx. 2 seconds.
Computer
OverviewControlsMaintenanceRepairsDataIndex
Page 109 of 174

109
Roof-mounted luggage rack*A special roof-rack system is available
as an optional extra for your BMW.
Please observe the precautions
included with the installation instruc-
tions.AnchoragesAccess to the anchorages:
To fold up the covers, please use the
tool provided with the roof-rack system.Loading and driving notesRoof-mounted luggage racks raise the
center of gravity of the vehicle when
they are loaded. For this reason, they
have a major effect on the vehicle's
handling and steering response.
You should therefore always remember
not to exceed the approved roof load
capacity, the approved gross vehicle
weight or the axle loads when loading
the rack. These weights are listed under
Technical data on page 156.
Make sure that the load is not too bulky,
and attempt to distribute it evenly.
Always load the heaviest pieces first so
that they are at the bottom. Be sure that
adequate clearance is maintained for
raising the glass sunroof, and that
objects do not project into the opening
path of the luggage compartment lid.
Secure the roof-mounted luggage cor-
rectly and safely to prevent it from shift-
ing or being lost during driving.
Drive smoothly and avoid sudden
acceleration and braking. Do not corner
at high speeds.
The luggage rack and the roof load
increase aerodynamic resistance:
increased fuel consumption and addi-
tional stress on the vehicle's body are
the result.
OverviewControlsMaintenanceRepairsDataIndex