2004 BMW 330CI COUPE door lock
[x] Cancel search: door lockPage 36 of 174

36
Floor matYou can turn the floor mat over to trans-
port soiled objects, etc. The rubber-
coated side is suitable for washing and
is also designed to inhibit sliding.
The fittings at the corners of the lug-
gage compartment provide you with a
convenient means of attaching luggage
compartment nets* and flexible straps
for securing luggage.
Refer also to Cargo loading on
page 106.
Alarm system*The conceptThe vehicle alarm system responds:
>When a door, the hood or the lug-
gage compartment lid is opened
>To movement inside the vehicle –
interior motion sensor
>To variations in the vehicle's tilt angle
such as those occurring during
attempts to steal the wheels or tow
the vehicle – tilt alarm sensor.
>To interruption of battery voltage.
The system responds to unauthorized
vehicle entry and attempted theft by
simultaneously activating the following:
>The acoustic alarm sounds for
30 seconds
>The hazard warning flashers are acti-
vated for approx. five minutes
>The high beams flash on and off in
rhythm with the hazard warning flash-
ers.To arm and disarm the alarm
systemWhen the vehicle is locked or unlocked
via the remote control or the driver's
door lock, the alarm system is also
simultaneously armed or disarmed.You can have different acknowl-
edgment signals set to confirm
arming and disarming.<
You can also open the luggage com-
partment lid when the system is armed
by pressing the remote control button,
refer to page 30. The lid is once again
secured when it is closed.
Extended pressure on the button sets
off the alarm – Panic mode, refer to
page 30.
Luggage compartment
Page 37 of 174

37
Indicator lamp displays>The indicator lamp below the interior
rearview mirror flashes continuously:
the system is armed
>The indicator lamp flashes immedi-
ately after the vehicle is locked: doors
or luggage compartment lid are not
completely closed. Even if you do not
close the alerted area(s), the remain-
ing areas are secured, and the indi-
cator lamp will flash continuously
after 10 seconds. However, the inte-
rior motion sensor is not activated
>The indicator lamp goes out immedi-
ately after the vehicle is unlocked: no
manipulation or attempted intrusions
have been detected in the period
since the system was armed
>The indicator lamp flashes for
10 seconds immediately after the
system is armed: an attempted entry
has been detected in the period since
the system was armed.
Following triggering of an alarm, the
indicator lamp will flash continuously.Tilt alarm sensor and interior
motion sensorTilt alarm sensor:
The tilt of the vehicle is monitored. The
alarm system reacts, for example, to
attempts to steal the wheels or tow the
vehicle
Interior motion sensor:
In order for the interior motion sensor to
function properly, the windows and the
glass sunroof must be completely
closed.Avoiding unintentional alarmsThe tilt alarm sensor and interior motion
sensor may be switched off at the same
time. You can do this to prevent a false
alarm, e.g. in the following situations:
>In garages with elevator ramps
>When the vehicle is being trans-
ported by train
>When animals are to remain in the
vehicle.
To deactivate the tilt alarm and
interior motion sensors>Press the button on the remote con-
trol twice.
The indicator lamp lights up briefly and
then flashes continuously. The tilt alarm
sensor and the interior motion sensor
are deactivated until the vehicle is
unlocked and locked again.
You can have the tilt alarm sensor
and the interior motion sensor
permanently deactivated.<
The system inadvertently deacti-
vates the tilt alarm sensor and the
interior motion sensor if the conve-
nience closing of windows and glass
sunroof is interrupted within the first
10 seconds and then restarted. The
vehicle must then be unlocked and
relocked before the sensors will resume
operation.<
Alarm system*
OverviewControlsMaintenanceRepairsDataIndex
Page 38 of 174

38
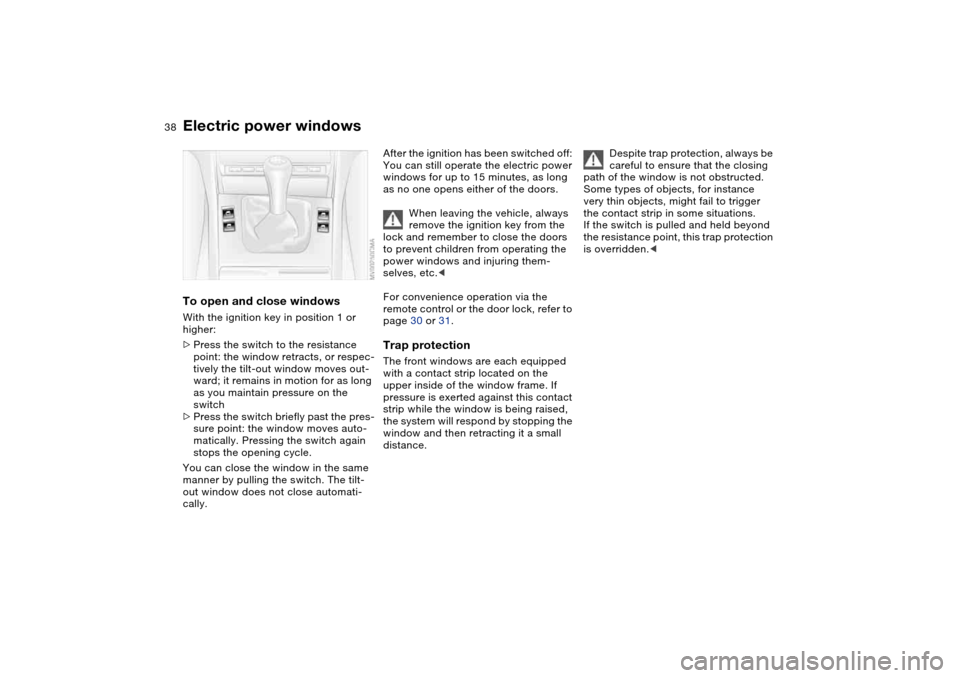
Electric power windowsTo open and close windowsWith the ignition key in position 1 or
higher:
>Press the switch to the resistance
point: the window retracts, or respec-
tively the tilt-out window moves out-
ward; it remains in motion for as long
as you maintain pressure on the
switch
>Press the switch briefly past the pres-
sure point: the window moves auto-
matically. Pressing the switch again
stops the opening cycle.
You can close the window in the same
manner by pulling the switch. The tilt-
out window does not close automati-
cally.
After the ignition has been switched off:
You can still operate the electric power
windows for up to 15 minutes, as long
as no one opens either of the doors.
When leaving the vehicle, always
remove the ignition key from the
lock and remember to close the doors
to prevent children from operating the
power windows and injuring them-
selves, etc.<
For convenience operation via the
remote control or the door lock, refer to
page 30 or 31.Trap protectionThe front windows are each equipped
with a contact strip located on the
upper inside of the window frame. If
pressure is exerted against this contact
strip while the window is being raised,
the system will respond by stopping the
window and then retracting it a small
distance.
Despite trap protection, always be
careful to ensure that the closing
path of the window is not obstructed.
Some types of objects, for instance
very thin objects, might fail to trigger
the contact strip in some situations.
If the switch is pulled and held beyond
the resistance point, this trap protection
is overridden.<
Page 39 of 174

39
Glass sunroof, electric*
To prevent injuries, exercise care
when closing the glass sunroof
and keep it in your field of vision until it
is shut.
When leaving the vehicle, always
remove the ignition key from the lock
and remember to close the doors to
prevent children from operating the
glass sunroof and injuring themselves,
etc.<
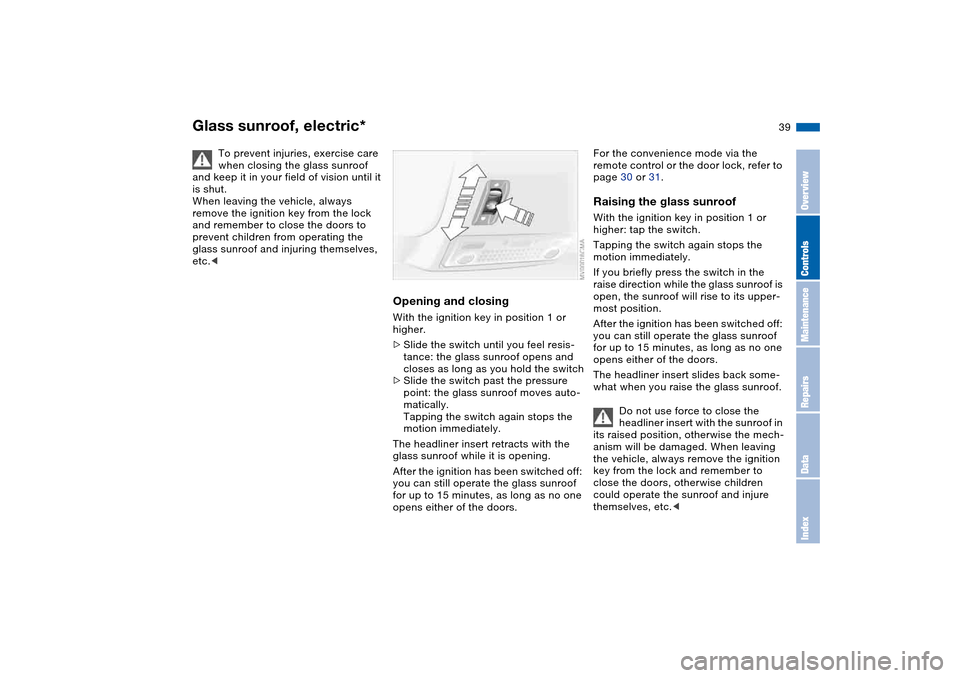
Opening and closingWith the ignition key in position 1 or
higher.
>Slide the switch until you feel resis-
tance: the glass sunroof opens and
closes as long as you hold the switch
>Slide the switch past the pressure
point: the glass sunroof moves auto-
matically.
Tapping the switch again stops the
motion immediately.
The headliner insert retracts with the
glass sunroof while it is opening.
After the ignition has been switched off:
you can still operate the glass sunroof
for up to 15 minutes, as long as no one
opens either of the doors.
For the convenience mode via the
remote control or the door lock, refer to
page 30 or 31.Raising the glass sunroofWith the ignition key in position 1 or
higher: tap the switch.
Tapping the switch again stops the
motion immediately.
If you briefly press the switch in the
raise direction while the glass sunroof is
open, the sunroof will rise to its upper-
most position.
After the ignition has been switched off:
you can still operate the glass sunroof
for up to 15 minutes, as long as no one
opens either of the doors.
The headliner insert slides back some-
what when you raise the glass sunroof.
Do not use force to close the
headliner insert with the sunroof in
its raised position, otherwise the mech-
anism will be damaged. When leaving
the vehicle, always remove the ignition
key from the lock and remember to
close the doors, otherwise children
could operate the sunroof and injure
themselves, etc.<
OverviewControlsMaintenanceRepairsDataIndex
Page 47 of 174

47
Seat and mirror memory*You can store and recall three different
driver's seat and exterior mirror posi-
tions.
Memory will not retain the adjust-
ment made to the lumbar sup-
port.
to the desired position
3. Press the M
EMORY
button: the indica-
tor lamp in the button lights up
4. Press memory button 1, 2 or 3, as
desired. Indicator lamp goes out.
To select a stored setting
Do not select a memory position
while the vehicle is moving. If you
do so, there is a risk of accident from
unexpected seat movement.<
Ignition key in position 1:
>Briefly press memory button 1, 2 or 3,
as desired.
Movement stops immediately when
one of the seat-adjustment or mem-
ory buttons is activated during the
adjustment process.
The driver's door is closed and the igni-
tion key is either removed or in position
0 or 2:
>Press and hold the desired memory
button – 1, 2 or 3 – until the adjust-
ment process is completed.
If you press the M
EMORY
button acci-
dentally: press the button again; the
indicator lamp goes out.
Your BMW center can adjust your
vehicle's systems in such a man-
ner that your personalized settings are
automatically set for the seat and exte-
rior mirror positions when you unlock
the vehicle with your personal remote
control.<
Before activating the programmed
adjustment feature, ensure that
the footwell behind the driver's seat is
empty and unobstructed. If you fail to
do so, persons, animals or objects
could be injured or damaged if the seat
should move backward.<
OverviewControlsMaintenanceRepairsDataIndex
Page 58 of 174

58
Vehicle Memory, Key MemoryHow the system functionsNo doubt you have reflected at one
time or another on how great it would
be if you could permanently configure
your vehicle's various features and
adjustments to mirror your own individ-
ual preferences. In engineering your
vehicle, BMW has provided for a num-
ber of options for personal adjustment
that can be programmed into your vehi-
cle at your BMW center.
The available configuration data fall into
two categories, according to whether
their primary orientation is the vehicle –
Vehicle Memory – or the individual –
Key Memory. Provided that each per-
son has a separate remote-control key,
you can have your BMW center enter
adjustment data for as many as four dif-
ferent individuals into the system.
The system then relies on a bilateral
data exchange to identify the individual
user and executes the selected settings
whenever the remote control unit is
used to disengage the door locks.
Distinguishing between keysColor-coded decals have been pro-
vided to help you distinguish individual
keys with different settings.What the system can doYour BMW center can provide you with
details on the capabilities of the Vehicle
Memory and Key Memory systems.
You will see this symbol through-
out the Owner's Manual. It is to
remind you at appropriate places of the
settings that are available to you.<
Examples for Vehicle Memory:
>Various signals as acknowledgment
when locking or unlocking your vehi-
cle, refer to pages 29, 31
>Activates/deactivates the 'Follow me
home' function, refer to page 85
>Activates/deactivates daytime driv-
ing lamps, refer to page 85
>Sets the units of measure for display-
ing time, outside temperature, dis-
tance traveled and fuel consumption
in the instrument cluster
>When you shift into Reverse, an
acoustic signal indicates that PDC
has been activated, refer to page 80
>Switches on rear window defroster
automatically, refer to pages 92, 97
>Activates/deactivates various alarm
system functions, refer to page 37
>After giving an ice warning, the
onboard computer display returns to
the previous setting, refer to page 78.
Examples for Key Memory:
>Unlocks driver's door first, then the
vehicle's remaining locks, refer to
page 29
>Locks the vehicle automatically after
you start off, refer to page 32
>Automatically adjusts the driver's
seat to the personal programmed
settings when the vehicle is
unlocked, refer to page 47
>Automatic tilting of the passenger-
side mirror, refer to Automatic curb
monitor, page 48.
Page 59 of 174

59 Driving
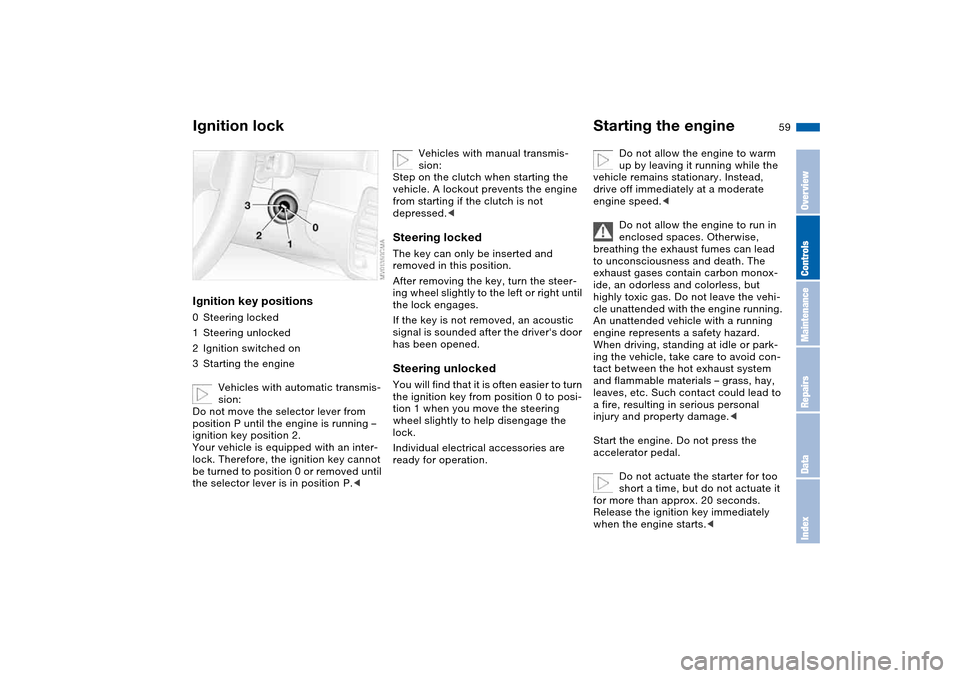
Ignition lockIgnition key positions0Steering locked
1Steering unlocked
2Ignition switched on
3Starting the engine
Vehicles with automatic transmis-
sion:
Do not move the selector lever from
position P until the engine is running –
ignition key position 2.
Your vehicle is equipped with an inter-
lock. Therefore, the ignition key cannot
be turned to position 0 or removed until
the selector lever is in position P.<
Vehicles with manual transmis-
sion:
Step on the clutch when starting the
vehicle. A lockout prevents the engine
from starting if the clutch is not
depressed.<
Steering lockedThe key can only be inserted and
removed in this position.
After removing the key, turn the steer-
ing wheel slightly to the left or right until
the lock engages.
If the key is not removed, an acoustic
signal is sounded after the driver's door
has been opened.Steering unlockedYou will find that it is often easier to turn
the ignition key from position 0 to posi-
tion 1 when you move the steering
wheel slightly to help disengage the
lock.
Individual electrical accessories are
ready for operation.
Starting the engine
Do not allow the engine to warm
up by leaving it running while the
vehicle remains stationary. Instead,
drive off immediately at a moderate
engine speed.<
Do not allow the engine to run in
enclosed spaces. Otherwise,
breathing the exhaust fumes can lead
to unconsciousness and death. The
exhaust gases contain carbon monox-
ide, an odorless and colorless, but
highly toxic gas. Do not leave the vehi-
cle unattended with the engine running.
An unattended vehicle with a running
engine represents a safety hazard.
When driving, standing at idle or park-
ing the vehicle, take care to avoid con-
tact between the hot exhaust system
and flammable materials – grass, hay,
leaves, etc. Such contact could lead to
a fire, resulting in serious personal
injury and property damage.<
Start the engine. Do not press the
accelerator pedal.
Do not actuate the starter for too
short a time, but do not actuate it
for more than approx. 20 seconds.
Release the ignition key immediately
when the engine starts.<
OverviewControlsMaintenanceRepairsDataIndex
Page 63 of 174

63
Sequential manual gearbox SMG*The conceptThe sequential manual gearbox SMG is
an automated manual gearbox with
which clutching and shifting is assumed
by an electro-hydraulic system.
The SMG is operated via the selector
lever in the center console and two shift
paddles on the steering wheel.
It offers the following functions:
>Sequential mode: manual mode
>Drive mode: automatic operation
>Ability to choose between two differ-
ent driving programs: Standard,
Sport
>Operating safety through protection
against misshifting
>Automatic upshifts and downshifts in
the drive mode
>Automatic downshifts at minimum
engine rpm
>Kickdown function in the drive mode.
>Acceleration assistant, refer to
page 66
Selector lever positionsThe current selector lever position is
indicated by a light-emitting diode in
the center console.
R: Reverse
N: Neutral
Position for forward driving with one-
touch functions:
Sequential mode
+: manual upshifts
—: manual downshifts
D: drive mode.
The SMG is ready for operation in igni-
tion key position 2.
The gearbox is automatically
placed in neutral gear if the
driver's door is opened while the engine
is running and the driver does not actu-
ate the pedals, the shift paddles or the
selector lever.
This is accompanied by an acoustic
signal and the flashing gear indicator.
The gear display N appears in the
instrument cluster.
A driving position can only be engaged
when the driver's door is closed.
When the vehicle is unlocked, a buzzer
in the area of the transmission indicates
that the system is ready for operation.<
ShiftlockWhen the car is at a standstill, a safety
function requires you to depress the
brake pedal if you want to move the
selector lever from the neutral
position N to a driving position.Driving precautions
Use enough acceleration to pull
away speedily when moving off on
an uphill gradient. Never try to prevent
the car from rolling back on an uphill
gradient by depressing the accelerator
pedal; always apply the handbrake.
Otherwise you could overheat the SMG
gearbox.<
OverviewControlsMaintenanceRepairsDataIndex