2004 BMW 330CI CONVERTIBLE transmission
[x] Cancel search: transmissionPage 79 of 186

79
Automatic transmission with Steptronic*You can drive as with a normal auto-
matic transmission. In addition, you can
also shift manually.
When you move the selector lever from
the D position to the left into the M/S
range, the performance-oriented shift
programs of the automatic transmission
are engaged. Steptronic enters the
manual selection mode and executes
the desired shift whenever you tap the
selector lever in the direction indicated
by + or –. Whenever you want to use
automatic again, just move the selector
lever toward the right to position D.
Under normal operating conditions, fuel
consumption is lowest when driving in
position D.Selector lever positionsP R N D M/S + –Starting the engineThe engine can only be started in selec-
tor lever positions P – for Park – or N –
for Neutral.
Range selectionA catch prevents inadvertent movement
of the selector lever to positions R and
P. To deactivate the catch, press the
button on the front of the selector lever
knob, see arrow.
While the vehicle is stationary and
before shifting out of Park or Neu-
tral, depress the footbrake in order to
disengage the selector lever's lock
mechanism – Shiftlock.<
Hold the footbrake down until
starting off. Otherwise the vehicle
will 'creep' when a drive position is
engaged. To prevent the vehicle from
starting off on its own, always move the
selector lever to position P and engage
the parking brake before leaving your
vehicle with the engine running.
Do not leave the vehicle unattended
with the engine running. An unattended
vehicle with a running engine repre-
sents a safety hazard.<
PParkSelect only when the vehicle is station-
ary. Transmission locks to prevent rear
wheels from turning.RReverseSelect only when the vehicle is station-
ary.NNeutralSelect only when stopping for an
extended period.DDrive – automatic shift programThis position is designed for driving
under all normal operating conditions.
All forward gears are available.
OverviewControlsMaintenanceRepairsDataIndex
Page 80 of 186

80
KickdownIn the kickdown mode, you achieve
maximum acceleration and top speed
in position D.
Depress the accelerator pedal past the
increased resistance point at the full-
throttle position.
M/S manual operation and Sport
programMove the selector lever from D to M/S
to activate the Sport program; SD
appears in the display panel. The M/S
mode is recommended for perfor-
mance-oriented driving.
Once in the M/S mode, you can tap the
selector lever to switch the automatic
transmission from the Sport program to
its manual selection mode.
This mode allows you to execute
upshifts manually by tapping the lever
toward +, while downshifts are selected
by tapping in the – direction. The dis-
plays M1 through M5 appear in the dis-
play panel to indicate your current gear
selection.
The transmission will only execute
upshifts and downshifts that will result
in an appropriate combination of vehi-
cle speed and engine rpm. For
instance, downshifts that would result
in excessive engine speed are not exe-
cuted. The desired, then the actual
gear, briefly appear in the instrument
cluster.
To accelerate quickly in the man-
ual mode for maneuvers such as
passing another vehicle, shift down
manually or employ the kickdown
mode.<
Shifting from M/S to the selector lever
positions P, R and N is possible only by
going through D.
Automatic transmission with Steptronic*
Page 81 of 186

81
Available displaysP R N D SD M1 M2 M3 M4 M5Electronic transmission control
module
If the indicator lamp comes on,
there is a malfunction in the
transmission system.
Bring the vehicle to a stop. Move the
transmission selector lever to P. Set the
parking brake and turn the engine off –
ignition key to position 0.
Wait a few seconds, then start the
engine.
If the indicator lamp goes out after a
few seconds, normal transmission per-
formance has been restored. You may
continue to drive as usual.
If the indicator lamp does not go out,
you can place the selector lever in all
positions. However, the vehicle will now
only operate in 3rd and 4th gear.
If this happens, avoid extreme engine
loads and consult the nearest autho-
rized BMW center.
Never work in the engine com-
partment when a drive gear – for-
ward or reverse – is engaged. If you do
this, the vehicle could move.<
For towing or jump-starting, refer to the
information beginning on page 159.
Automatic transmission with Steptronic*
OverviewControlsMaintenanceRepairsDataIndex
Page 85 of 186

85
The speed stored in memory is deleted.To store and maintain speed or to
acceleratePress button + briefly:
The system maintains and stores the
current vehicle speed. Every time you
tap the button, the speed increases by
approx. 0.6 mph / 1 km/h.
Press and hold button +:
The vehicle accelerates without pres-
sure on the accelerator pedal. When
you release the button, the system
maintains and stores the current speed.
If on a downhill gradient the
engine braking effect is not suffi-
cient, the controlled speed can be
exceeded. Speed can drop on uphill
grades if the engine output is insuffi-
cient.<
To deceleratePress button – briefly:
If you are already driving with activated
cruise control, the speed is decreased
by approx. 0.6 mph / 1 km/h every time
you tap the button.
Press and hold button –:
With the cruise control active, the sys-
tem automatically reduces the throttle
opening to slow the vehicle. When you
release the button, the system main-
tains and stores the current speed.To interrupt the cruise controlWhen the system is activated, press the
button. The indicator lamp stays on.
You can use the cruise control again
whenever you want by calling up the
speed that was stored last.
In addition, cruise control is interrupted
automatically:
>When the brakes are applied
>When you apply pressure to the
clutch pedal, or when you move the
automatic transmission selector lever
from D to N
>If you exceed or fall below the pro-
grammed speed for an extended
period – by depressing the accelera-
tor, for example.To recall the stored settingPress the button:
The vehicle accelerates to and main-
tains the last speed stored.
Cruise control*
OverviewControlsMaintenanceRepairsDataIndex
Page 112 of 186

112
Integrated universal remote control*The conceptThe integrated universal remote control
takes the place of up to three different
handheld transmitters belonging to var-
ious radio remote control devices, such
as door openers and home alarm sys-
tems. The integrated universal remote
control recognizes and learns the signal
sent by each original control device.
The signal of an original control device
can be programmed into one of the
three memory buttons 1. Afterwards,
the programmed memory button 1 can
be used to operate the corresponding
device. The signal transmission is indi-
cated by the indicator lamp 2.
Before selling the vehicle, clear the
memory buttons 1, refer to page 114.
While programming is in progress
and before operating any pro-
grammed system by remote control
using the integrated universal remote
control, make sure that the area of
movement of the system in question is
clear of people, animals and inanimate
obstructions, in order to avoid possible
injury or damage. Also comply with the
safety precautions issued for the origi-
nal control device.<
Checking compatibility
If this symbol is depicted on the
packaging or in the operating
instructions of the original con-
trol device, it is safe to assume that the
remote-controlled system is compatible
with the integrated universal remote
control.
If you have additional questions,
please consult your BMW center
or call 1-800-355-3515.
You can also visit these websites:
www.bmwusa.com or
www.homelink.com.
HomeLink is a registered trademark
owned by Johnson Controls, Inc.<
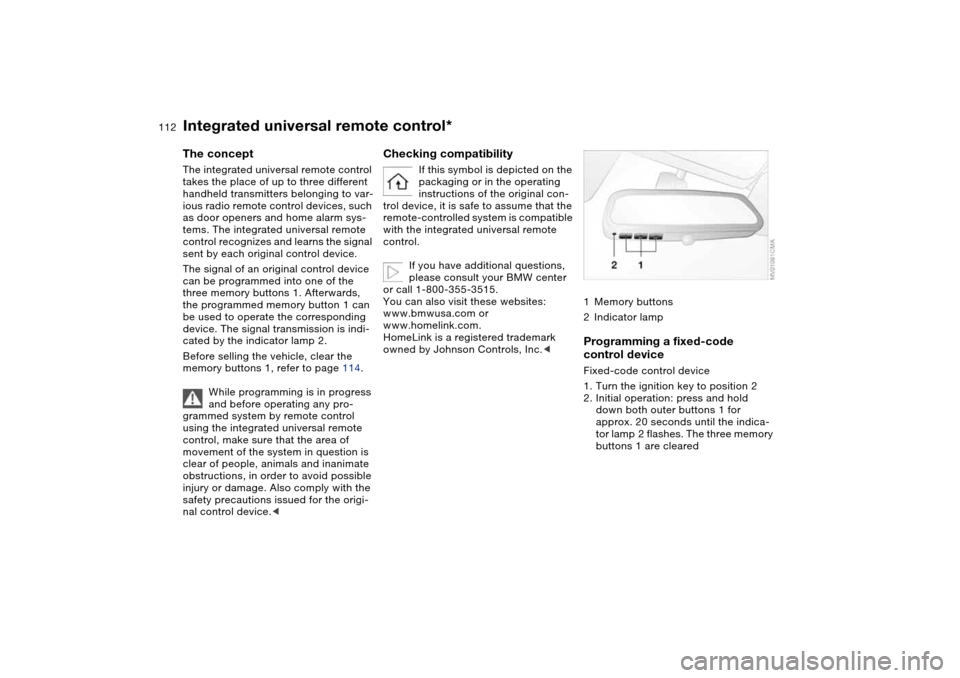
1Memory buttons
2Indicator lampProgramming a fixed-code
control deviceFixed-code control device
1. Turn the ignition key to position 2
2. Initial operation: press and hold
down both outer buttons 1 for
approx. 20 seconds until the indica-
tor lamp 2 flashes. The three memory
buttons 1 are cleared
Page 125 of 186

125
General driving notes
Brakes: do not drive with your foot
resting on the brake pedal. Even
light but consistent pedal pressure can
lead to high temperatures, brake wear
and possibly even brake failure.
Hydroplaning: when driving on wet or
slushy roads, reduce vehicle speed. If
you do not, a wedge of water may form
between the tires and the road surface.
This phenomenon can lead to partial or
complete loss of contact between the
tires and road surface, as well as loss of
vehicle control and braking ability.
Driving through water: do not drive
through water on the road if it is deeper
than 1 ft/30 cm, and then only at walk-
ing speed. Otherwise, the vehicle's
engine, the electrical systems and the
transmission may be damaged.
Clothes hooks, with hardtop: when
hanging clothing from the hooks, be
sure that they will not obstruct the
driver's vision. Do not hang heavy
objects on the hooks. If you do so, they
could cause personal injury during
braking or evasive maneuvers.<
Antilock Brake System (ABS)The conceptABS keeps the wheels from locking
during braking, thereby enhancing
active driving safety.Braking with ABSIf you are in a situation that requires full
braking, you will exploit the full benefits
of ABS system if you apply maximum
pedal pressure – panic stop.
Since the vehicle maintains steering
responsiveness, you can avoid possible
obstacles with a minimum of steering
effort, despite the full brake application.
Pulsation at the brake pedal combined
with sounds from the hydraulic circuits
indicates to the driver that ABS is in its
active mode.Dynamic Brake Control (DBC)DBC is included in the DSC, refer to
page 93. The system responds to sud-
den, high-intensity applications of force
to the brake pedal by automatically
braking the vehicle with maximum
boost to achieve the shortest possible
braking distances during panic stops.
This system also exploits the benefits of
ABS. Do not reduce the pressure exerted against the brake pedal until
the braking maneuver has been com-
pleted. DBC is deactivated when you
release the brake pedal.
Cornering Brake Control (CBC)CBC is an advanced engineering devel-
opment of ABS. When braking during
cornering with high lateral accelera-
tion, or when braking during a lane
change, vehicle stability is improved
and the steering response is enhanced.
OverviewControlsMaintenanceRepairsDataIndex
Page 139 of 186

139
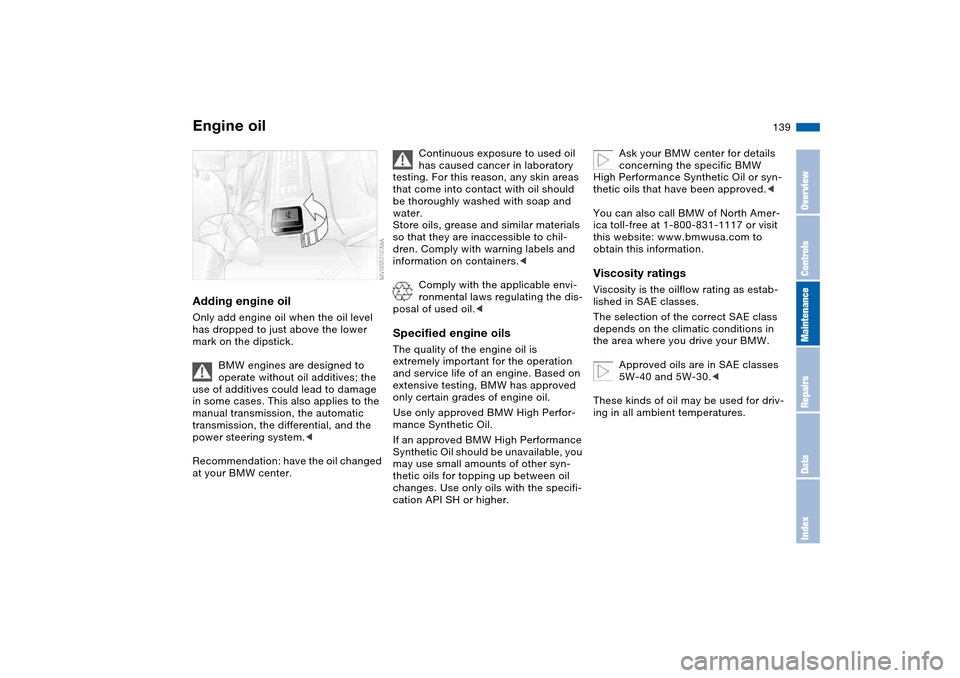
Adding engine oilOnly add engine oil when the oil level
has dropped to just above the lower
mark on the dipstick.
BMW engines are designed to
operate without oil additives; the
use of additives could lead to damage
in some cases. This also applies to the
manual transmission, the automatic
transmission, the differential, and the
power steering system.<
Recommendation: have the oil changed
at your BMW center.
Continuous exposure to used oil
has caused cancer in laboratory
testing. For this reason, any skin areas
that come into contact with oil should
be thoroughly washed with soap and
water.
Store oils, grease and similar materials
so that they are inaccessible to chil-
dren. Comply with warning labels and
information on containers.<
Comply with the applicable envi-
ronmental laws regulating the dis-
posal of used oil.<
Specified engine oilsThe quality of the engine oil is
extremely important for the operation
and service life of an engine. Based on
extensive testing, BMW has approved
only certain grades of engine oil.
Use only approved BMW High Perfor-
mance Synthetic Oil.
If an approved BMW High Performance
Synthetic Oil should be unavailable, you
may use small amounts of other syn-
thetic oils for topping up between oil
changes. Use only oils with the specifi-
cation API SH or higher.
Ask your BMW center for details
concerning the specific BMW
High Performance Synthetic Oil or syn-
thetic oils that have been approved.<
You can also call BMW of North Amer-
ica toll-free at 1-800-831-1117 or visit
this website: www.bmwusa.com to
obtain this information.
Viscosity ratingsViscosity is the oilflow rating as estab-
lished in SAE classes.
The selection of the correct SAE class
depends on the climatic conditions in
the area where you drive your BMW.
Approved oils are in SAE classes
5W-40 and 5W-30.<
These kinds of oil may be used for driv-
ing in all ambient temperatures.
Engine oil
OverviewControlsMaintenanceRepairsDataIndex
Page 161 of 186

161
Towing the vehicle with the front
axle raisedVehicles with automatic transmission:
1. Towing speed: maximum 45 mph /
70 km/h
2. Towing distance: maximum
90 miles/150 km.
Vehicles with sequential manual gear-
box SMG:
While the ignition is on, move the selec-
tor lever to position N, then turn off the
ignition.Towing eyeletThe screw-in towing eyelet is stored in
the onboard tool kit; be sure that it
remains in the vehicle at all times. It can
be attached at the front or rear of the
vehicle. It should not be used to pull a
vehicle out of deep snow, mud, sand,
etc.
Always observe all applicable towing
laws and regulations.
Access to tow socketsFront:
Press out the cover panel with a screw-
driver inserted in the recess at the top.
Rear:
Press out the cover panel with a screw-
driver inserted in the recess at the top.
Use only the towing eyelet sup-
plied with the vehicle and screw it
in firmly until it stops. Use the towing
eyelet for towing on paved roads only. If
you do not follow these instructions, the
towing eyelet could be torn out and
vehicle damage could occur.
Never attach tie-down hooks, chains,
straps, or tow hooks to tie rods, control
arms, or any other part of the vehicle
suspension, as severe damage to these
components will occur, possibly lead-
ing to accidents.<
Towing the vehicle
OverviewControlsMaintenanceRepairsDataIndex