Page 127 of 186

127
Hardtop*It is not necessary to remove the fabric
top even in the winter, when the hard-
top is generally in constant use. But you
can also remove it easily at any time.
Before the fabric top is stored in the
convertible top compartment, it must
be absolutely dry in order to avoid
water spots and mildew from forming.
The hardtop offers reading lamps and
clothes hooks that can be used just by
pressing. It is also possible to mount a
luggage rack on the roof. Please con-
sult your BMW center.
When hanging clothing from the
hooks, be sure that they will not
obstruct the driver's vision. Do not hang
heavy objects on the hooks. If you do
so, they could cause personal injury
during braking or evasive maneuvers.<
Two people are required for installation
or removal. Work with extreme caution
in order to avoid paint damage and
damage to the body or hardtop.
To facilitate hardtop installation or
removal, you can obtain a specially
designed hardtop lift* or hardtop rack*
at your BMW center.
Storage
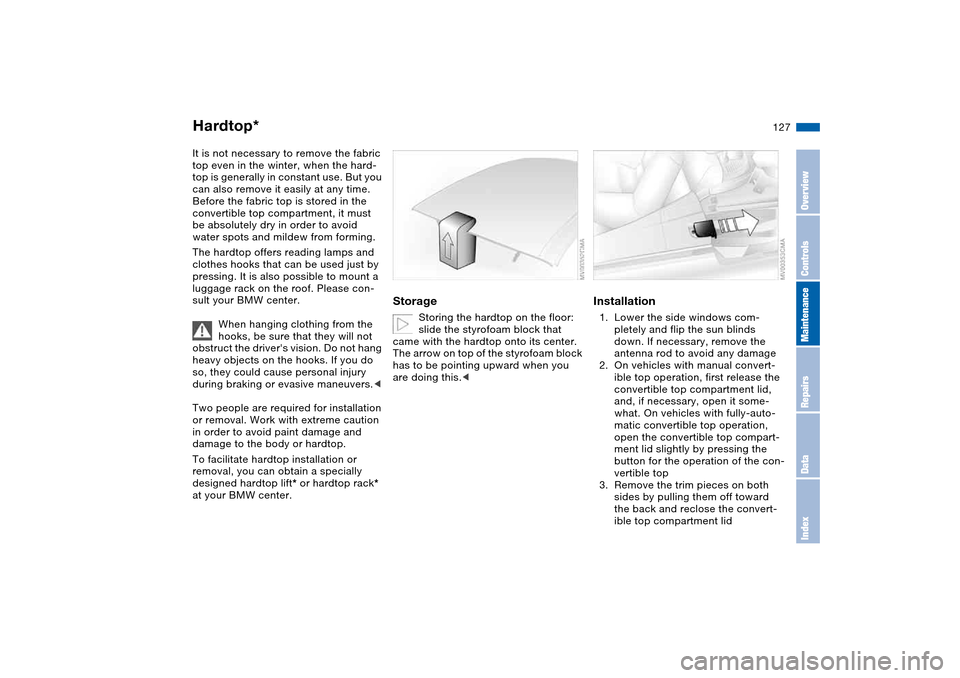
Storing the hardtop on the floor:
slide the styrofoam block that
came with the hardtop onto its center.
The arrow on top of the styrofoam block
has to be pointing upward when you
are doing this.<
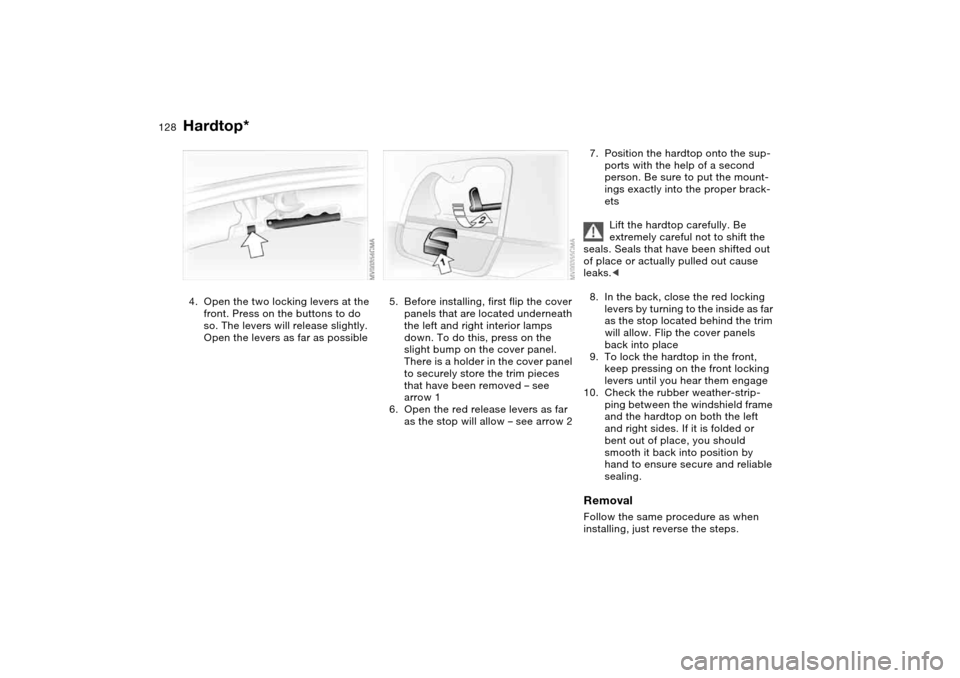
Installation1. Lower the side windows com-
pletely and flip the sun blinds
down. If necessary, remove the
antenna rod to avoid any damage
2. On vehicles with manual convert-
ible top operation, first release the
convertible top compartment lid,
and, if necessary, open it some-
what. On vehicles with fully-auto-
matic convertible top operation,
open the convertible top compart-
ment lid slightly by pressing the
button for the operation of the con-
vertible top
3. Remove the trim pieces on both
sides by pulling them off toward
the back and reclose the convert-
ible top compartment lid
OverviewControlsMaintenanceRepairsDataIndex
Page 128 of 186

128
4. Open the two locking levers at the
front. Press on the buttons to do
so. The levers will release slightly.
Open the levers as far as possible
5. Before installing, first flip the cover
panels that are located underneath
the left and right interior lamps
down. To do this, press on the
slight bump on the cover panel.
There is a holder in the cover panel
to securely store the trim pieces
that have been removed – see
arrow 1
6. Open the red release levers as far
as the stop will allow – see arrow 2
7. Position the hardtop onto the sup-
ports with the help of a second
person. Be sure to put the mount-
ings exactly into the proper brack-
ets
Lift the hardtop carefully. Be
extremely careful not to shift the
seals. Seals that have been shifted out
of place or actually pulled out cause
leaks.<
8. In the back, close the red locking
levers by turning to the inside as far
as the stop located behind the trim
will allow. Flip the cover panels
back into place
9. To lock the hardtop in the front,
keep pressing on the front locking
levers until you hear them engage
10. Check the rubber weather-strip-
ping between the windshield frame
and the hardtop on both the left
and right sides. If it is folded or
bent out of place, you should
smooth it back into position by
hand to ensure secure and reliable
sealing.RemovalFollow the same procedure as when
installing, just reverse the steps.
Hardtop*
Page 132 of 186

132
Wheel and tire combinationsThe right choice
BMW recommends using only
wheels and tires that have been
approved by BMW for your particular
vehicle model, as otherwise body con-
tact and serious accidents can result
despite the use of the same nominal
size, e.g. due to manufacturing toler-
ances. BMW cannot evaluate all tires
and wheels on the market, and is thus
unable to guarantee that the vehicle will
continue to perform safely if unap-
proved tires and/or wheels are
mounted.<
For each tire size, BMW has assessed
the safe performance of specific tire
brands and approved them for use.
Consult any BMW center for details.
Comply with any local/national regula-
tions, for example by recording the tire
type in the vehicle documents.
The correct wheel and tire combi-
nation affects various systems
that would otherwise be impaired, for
example ABS, DSC and DBC.
For this reason, use only tires of the
same manufacture and tread configura-
tion. In the event of a flat tire, for exam-
ple, remount the approved wheel and
tire combination as soon as possible.<
StorageAlways store tires in a cool, dry place.
Store them away from light whenever
possible. Protect the tires against con-
tact with oil, grease and fuel.
Do not exceed the maximum tire infla-
tion pressures specified on the tire
sidewall.
Winter tiresChoosing the right tireBMW recommends the use of winter
tires for operation under winter road
conditions. While all-season tires – with
M+S designation – provide better winter
traction than the corresponding sum-
mer tires, they generally do not achieve
the performance of winter tires.
In the interest of safe tracking and
steering response, install winter tires
made by the same manufacturer and
with the same tread configuration on all
four wheels.
Never exceed the maximum
speed for which the winter tires
are rated.
Unprofessional attempts by laymen to
service tires can lead to damage and
accidents.
Have this work performed by trained
professionals only. Any BMW center
has the required technical knowledge
and the proper equipment and will be
happy to assist you.
your BMW is eqipped with Run Flat
tires. These are indicated by a circular
symbol containing the letters RSC on
Page 140 of 186

140
Coolant
Do not add coolant to the cooling
system when the engine is hot. If
you attempt to do so, escaping coolant
can cause burns.
Antifreeze and anti-corrosion agents
are hazardous to health. You should
always store them in their closed origi-
nal containers and in a location which is
out of reach of children. Antifreeze and
anti-corrosion agents are inflammable.
For this reason, do not spill them on hot
engine parts. They could ignite and
cause serious burns. Comply with the
instructions on the containers.<
Comply with the applicable envi-
ronmental laws regulating the dis-
posal of antifreeze with corrosion inhib-
itor.<
Checking the coolant level and
adding coolantCheck the coolant level when the
engine is cold, approx. 687/+206.
1. Open the cap for the expansion tank
by turning it slightly counterclock-
wise to allow accumulated pressure
to escape, then open
2. The coolant level is correct when the
upper end of the red float rod – see
arrow – is at least even with the
upper edge of the filler neck, is at
least even with the upper edge of the
filler neck; see arrow. The end of the
float may stick out by a maximum of
3/4 in / 2 cm – that is, up to the sec-
ond mark on the float
3. If necessary, add coolant. If the cool-
ant is low, slowly add coolant until
the correct level is reached – do not
overfill.
Page 144 of 186
144
engine misfiring for even a short period
of time can seriously damage emission
control system components, especially
the catalytic converter.
SERVICE ENGINE SOON warn-
ing lamp for Canadian models.
If the gas cap is not on tight
enough, the OBD system can
detect leaking vapor and the indicator
will light up. If the gas cap is then tight-
ened, the indicator will usually go out
after a short period of time.
Page 150 of 186

150
High beamsH7 bulb, 55 watts
Engine compartment, left side:
The H7 bulb is pressurized. There-
fore, wear safety glasses and pro-
tective gloves. Failure to comply with
this precaution could lead to injury if the
bulb is damaged.<
1. Turn the cover to the left and remove
2. Pull off the plug
3. Release the retaining wire
4. Remove and replace the bulb.
Note the letters TOP when putting
the cover in place.<
When cleaning the headlamps,
please follow the instructions in
the Caring for your vehicle brochure.<
Xenon lamps*The service life of these bulbs is very
long and the probability of a failure is
very low, provided that they are not
switched on and off an unusual number
of times. If one of these bulbs should
nevertheless fail, it is possible to con-
tinue driving with great caution using
the fog lamps, provided local traffic
laws do not prohibit this.
Because of the extremely high
voltages involved, any work on the
xenon lighting system, including bulb-
changing, should be carried out by
technically qualified personnel only.
Otherwise, there is a risk of fatal
injury.<
Parking lamps5 watt bulb
Engine compartment, left side:
1. Turn the bulb holder to the left and
remove
2. Pull the bulb off and replace it.
Lamps and bulbs
Page 152 of 186
152
Bulbs in the luggage compartment lid:
1. Using a screwdriver, loosen the clip
2. Swing trim panel down – see arrow 1.
Unlock bulb holder – see arrow 2 –
and remove
3. Applying light pressure, turn the bulb
to the left. Remove and exchange the
bulb
4. Press the bulb holder into place con-
tinuing until you hear it engage
5. Reinstall the trim panel with the clip.
Center high-mount brake lampLED strip on the rear window.
Please contact your BMW center in
case of a malfunction.
Lamps and bulbs
Page 156 of 186

156
The vehicle jack is designed for
changing wheels only. Do not
attempt to raise another vehicle model
with it or to raise any other type of load.
To do so could cause accidents and
personal injury.
To ensure continued safety, have the
tightness of the torque bolts checked
with a calibrated lug wrench – torque
specification: 88.5 lb ft/120 Nm – at the
earliest opportunity.<
When storing a wheel in the spare tire
recess, take care to avoid bending the
threaded rod.
If light-alloy wheels other than original
BMW light-alloy wheels have been
mounted, it may be necessary to use
different lug bolts for those wheels.
Replace the defective tire as soon as
possible and have the new wheel/tire
balanced.
Driving with the space-saver
spare tireDrive cautiously. Do not exceed a
speed of 45 mph / 80 km/h.
Be aware that vehicle handling may be
altered. Anticipate, e.g., reduced track-
ing during braking, longer braking dis-
tances and changed steering charac-
teristics when approaching limit
conditions. These handling characteris-
tics will be even more pronounced if
winter tires are mounted.
Only one space-saver spare tire
may be mounted at one time.
Mount a wheel and tire of the original
size at the earliest possible opportu-
nity.<
Run Flat tires*Run Flat tires are labeled on the side-
wall with a circular symbol containing
the letters RSC. Run Flat tires consist of
self-supporting tires and special rims.
The tire reinforcement ensures that
driving remains possible to a restricted
degree in the event of pressure drop or
even if the tire is deflated.
When mounting or replacing sum-
mer tires with winter tires, or vice
versa, use Run Flat tires since no spare
wheel is available in the event of a flat.
In this event, BMW recommends con-
sulting your BMW center. Your BMW
center has the information needed for
working with Run Flat tires and is
equipped with the necessary special
tools.<
Changing a wheel