2004 BMW 325CI CONVERTIBLE window
[x] Cancel search: windowPage 104 of 186

104
Air supply/Blower
You can select blower speeds
from 1 to 4. The heating and
ventilation become more and
more effective as the air sup-
ply settings are increased. In position 0,
the blower and the heater are switched
off. The outside air supply is blocked in
position 0.
Temperature
In order to increase the tem-
perature of the passenger
compartment, turn to the right
toward the red zone. The tem-
perature of the incoming air is kept con-
stant.
Air distribution
You can direct air to flow onto
the windows , toward your
upper body or into the
footwell . All intermediate
settings are possible. In the setting ,
there is a low flow of air onto the win-
dows to keep them free of condensa-
tion.
Rear window defroster
When the rear window defroster
is activated, the indicator lamp
comes on. The rear window defroster
switches off automatically.
You can have your vehicle pro-
grammed in such a way that the
rear window defroster switches on
automatically. This occurs within 5 min-
utes after starting the engine when out-
side temperatures are below approx.
397/+46.<
Air conditioning
The air is cooled and dehumidi-
fied and – depending on the
temperature setting – rewarmed.
Depending on the weather, the wind-
shield may fog over briefly when the
engine is started. Air conditioning helps
prevent the windows from fogging up.
Condensation forms during opera-
tion of the air conditioning system,
which then exits under the vehicle. It is
thus not unusual for a small puddle to
form under the car while the system is
running.<
Outside air/Recirculated-air mode
You can respond to unpleasant
external odors by temporarily
blocking the supply of outside air. The
system then recirculates the air cur-
rently within the vehicle.
If the windows should fog over in
the recirculated-air mode, switch
this mode off and increase the air sup-
ply as required.<
Air conditioning
Page 105 of 186

105
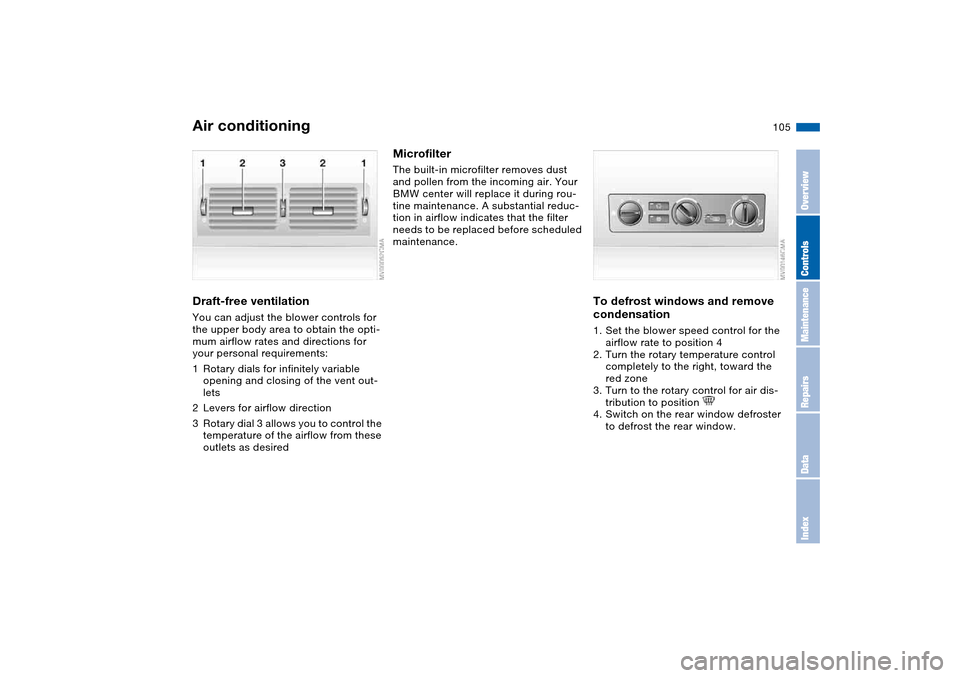
Draft-free ventilationYou can adjust the blower controls for
the upper body area to obtain the opti-
mum airflow rates and directions for
your personal requirements:
1Rotary dials for infinitely variable
opening and closing of the vent out-
lets
2Levers for airflow direction
3Rotary dial 3 allows you to control the
temperature of the airflow from these
outlets as desired
MicrofilterThe built-in microfilter removes dust
and pollen from the incoming air. Your
BMW center will replace it during rou-
tine maintenance. A substantial reduc-
tion in airflow indicates that the filter
needs to be replaced before scheduled
maintenance.
To defrost windows and remove
condensation1. Set the blower speed control for the
airflow rate to position 4
2. Turn the rotary temperature control
completely to the right, toward the
red zone
3. Turn to the rotary control for air dis-
tribution to position
4. Switch on the rear window defroster
to defrost the rear window.
Air conditioning
OverviewControlsMaintenanceRepairsDataIndex
Page 107 of 186

107
1Air onto the windshield and the side
windows
2Air for the upper body area109
3Air to the footwell
4Air inlet for interior temperature
sensor – please keep clear and
unobstructed
5Outside air/Automatic recirculated-
air control (AUC)/Recirculated
air109
6Automatic air distribution and
supply108
7Individual air distribution108
8Temperature108
9Display for temperature108
and air supply108
10 Air supply/Blower108
11 To defrost windows and remove
condensation108
12 Air conditioning108
13 Rear window defroster109Automatic climate control*
OverviewControlsMaintenanceRepairsDataIndex
Page 108 of 186

108
Tips for pleasant drivingUse the automatic mode – switch on
with AUTO button 6. Select the desired
interior temperature.
Detailed setting options are described
for you in the following section.
You can make the settings of your
vehicle in such a manner that,
when you unlock the vehicle with the
remote control of your personal key,
your own personalized setting for the
automatic climate control is initiated.
The AUTO program adjusts the
air distribution and the air sup-
ply for you and in addition adapts the
temperature to external influences –
summer, winter – to meet preferences
you can specify.
Individual air distribution
You can cancel the AUTO pro-
gram by selecting specific dis-
tribution patterns to suit your
own individual requirements.
While the AUTO program is then deacti-
vated, the automatic airflow control
remains in operation. Air flows onto
the windows , toward the upper
body , and into the footwell . You
can reactivate the automatic air distri-
bution mode by selecting the AUTO
button.Temperature
The interior temperature that
appears in the display panel is a
general figure intended for refer-
ence purposes. We recommend 727/
+226 as a comfortable setting, even if
the air conditioning is on. When you
start the vehicle, the system ensures
that the selected temperature is
achieved as quickly as possible. It then
maintains this temperature, regardless
of the season.
To select the units of measure 6/7 of
the display, refer to page 90.
Air supply/Blower
By pressing the upper or lower
button, you can vary the air sup-
ply. This deactivates the auto-
matic control of the air supply, AUTO
disappears from the display panel. Nev-
ertheless, the automatic air distribution
remains unchanged. You can reactivate
the automatic air distribution mode by
selecting the AUTO button.
When the lowest blower speed is set
and you press the lower button, all of
the displays are canceled: the blower,
heating and air conditioning are
switched off. The outside air supply is
blocked. You can reactivate the system
by pressing any button for the auto-
matic climate control.To defrost windows and remove
condensation
This program quickly removes
ice and condensation from the
windshield and the side windows.
Air conditioning
The air is cooled and dehumidi-
fied and – depending on the
temperature setting – rewarmed.
Depending on the weather, the wind-
shield may fog over briefly when the
engine is started. Air conditioning helps
prevent the windows from fogging up.
Condensation forms during opera-
tion of the air conditioning system,
which then exits under the vehicle. It is
thus not unusual for a small puddle to
form under the car while the system is
running.<
Automatic climate control*
Page 109 of 186

109
Outside air/Automatic
recirculated-air control (AUC)/
Recirculated air
You can respond to unpleasant
external odors or pollutants by
temporarily stopping the flow of outside
air. The system then recirculates the air
currently within the vehicle.
Press the button repeatedly to select
one of three different operating modes.
>Indicator lamps off: outside airflow is
on
>Left indicator lamp on – automatic
mode: the system recognizes pollut-
ants in the outside air and blocks the
flow of air when necessary. The sys-
tem then recirculates the air currently
within the vehicle. Depending on the
air quality, the automatic system then
switches back and forth between
outside air supply and recirculation of
the air within the vehicle
>Right indicator lamp on: the flow of
outside air into the vehicle is perma-
nently blocked. The system then
recirculates the air currently within
the vehicle.
If the windows should fog over in
the recirculated-air mode, switch
this mode off and increase the air sup-
ply as required.<
Rear window defroster
With the convertible top closed
or with the hardtop* mounted,
press the button. The indicator lamp
comes on. The rear window defroster
switches off automatically.
You can have your vehicle pro-
grammed in such a way that the
rear window defroster switches on
automatically. This occurs within 5 min-
utes after starting the engine when out-
side temperatures are below approx.
397/+46.<
Draft-free ventilationYou can adjust the blower controls for
the upper body area to obtain the opti-
mum airflow rates and directions for
your personal requirements:
1Rotary dials for infinitely variable
opening and closing of the vent out-
lets
2Levers for airflow direction
3Use the rotary dial to control the tem-
perature of the airflow:
>Rotate toward blue – colder
>Turn toward red – warmer
Automatic climate control*
OverviewControlsMaintenanceRepairsDataIndex
Page 127 of 186

127
Hardtop*It is not necessary to remove the fabric
top even in the winter, when the hard-
top is generally in constant use. But you
can also remove it easily at any time.
Before the fabric top is stored in the
convertible top compartment, it must
be absolutely dry in order to avoid
water spots and mildew from forming.
The hardtop offers reading lamps and
clothes hooks that can be used just by
pressing. It is also possible to mount a
luggage rack on the roof. Please con-
sult your BMW center.
When hanging clothing from the
hooks, be sure that they will not
obstruct the driver's vision. Do not hang
heavy objects on the hooks. If you do
so, they could cause personal injury
during braking or evasive maneuvers.<
Two people are required for installation
or removal. Work with extreme caution
in order to avoid paint damage and
damage to the body or hardtop.
To facilitate hardtop installation or
removal, you can obtain a specially
designed hardtop lift* or hardtop rack*
at your BMW center.
Storage
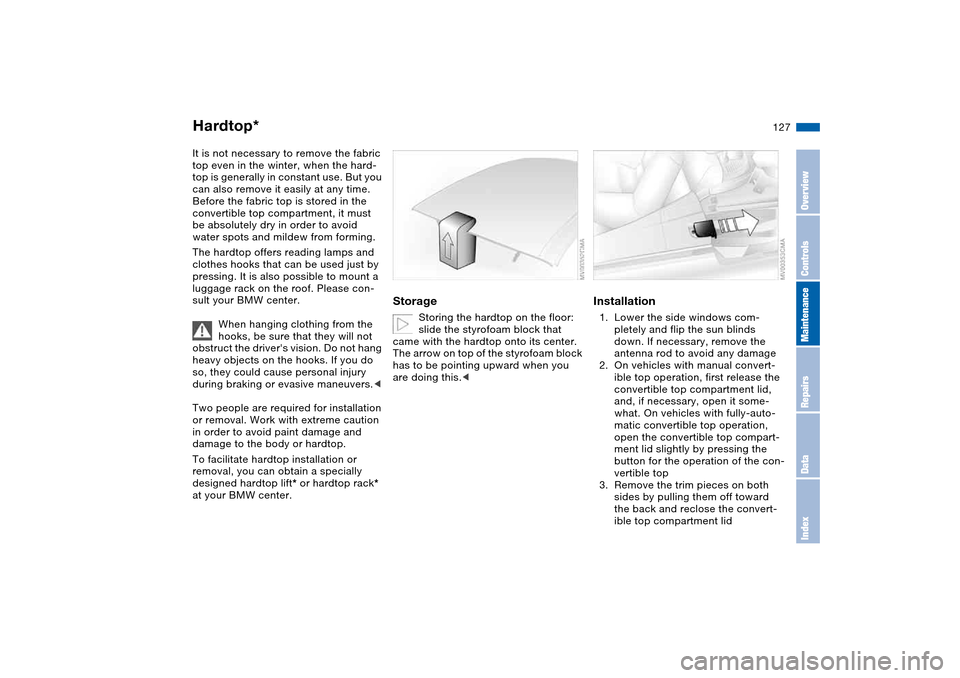
Storing the hardtop on the floor:
slide the styrofoam block that
came with the hardtop onto its center.
The arrow on top of the styrofoam block
has to be pointing upward when you
are doing this.<
Installation1. Lower the side windows com-
pletely and flip the sun blinds
down. If necessary, remove the
antenna rod to avoid any damage
2. On vehicles with manual convert-
ible top operation, first release the
convertible top compartment lid,
and, if necessary, open it some-
what. On vehicles with fully-auto-
matic convertible top operation,
open the convertible top compart-
ment lid slightly by pressing the
button for the operation of the con-
vertible top
3. Remove the trim pieces on both
sides by pulling them off toward
the back and reclose the convert-
ible top compartment lid
OverviewControlsMaintenanceRepairsDataIndex
Page 152 of 186

152
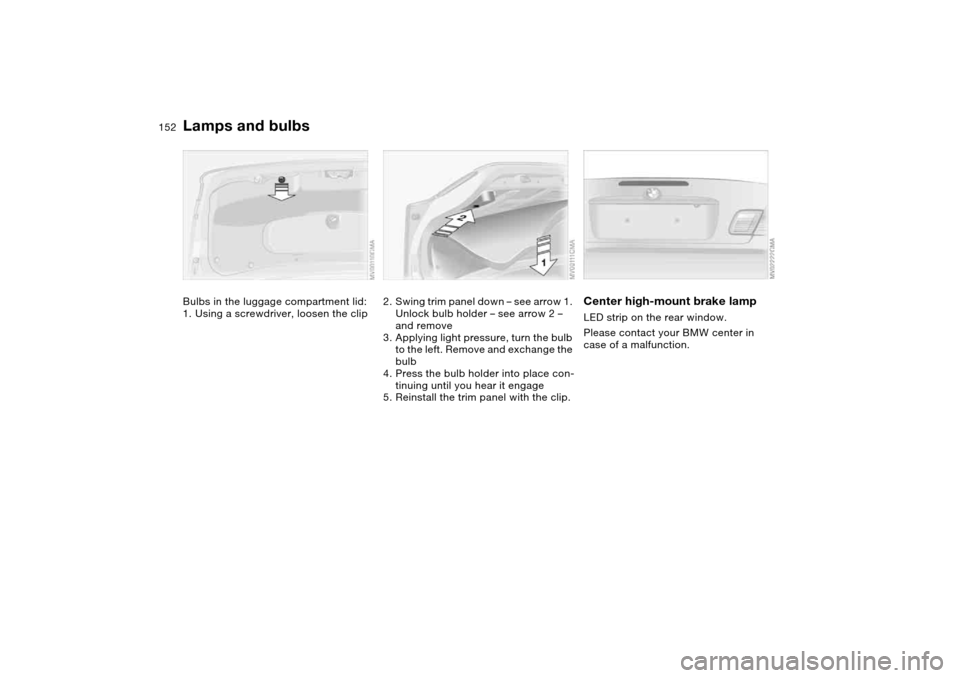
Bulbs in the luggage compartment lid:
1. Using a screwdriver, loosen the clip
2. Swing trim panel down – see arrow 1.
Unlock bulb holder – see arrow 2 –
and remove
3. Applying light pressure, turn the bulb
to the left. Remove and exchange the
bulb
4. Press the bulb holder into place con-
tinuing until you hear it engage
5. Reinstall the trim panel with the clip.
Center high-mount brake lampLED strip on the rear window.
Please contact your BMW center in
case of a malfunction.
Lamps and bulbs
Page 174 of 186

Everything from A to ZClock 89
12-/24-hour mode 89
setting, refer also to the
Owner's Manual for
Radio/Onboard Computer
Closing
from inside 34
from outside 31
Clothes hooks 125
Clutch
breaking in 124
Cockpit 14
Code, refer to the Owner's
Manual for Radio/Onboard
Computer
Coin box 115
Cold start, refer to Starting
the engine 71
Compact disc operation,
refer to the Owner's Man-
ual for Radio/Onboard
Computer
Compartments 114
Compression ratio, refer to
Engine data 166
Computer 90
Condensation, refer to Air
conditioning mode
104, 108
Configuring settings, refer to
Vehicle Memory, Key
Memory 70Connecting a vacuum
cleaner, refer to Cigarette
lighter 116
Consumption
display 86
Consumption, refer to Aver-
age fuel consumption 91
Control elements, refer to
Cockpit 14
Convenience operation
from outside 33
windows 32
Convertible top
cleaning position 45, 50
closing in an
emergency 48
electrical fault 48
indicator lamps 47
remote control 31
Convertible top activation
fully automatic top 46
manual top 41
Convertible top compart-
ment panel 37
Coolant 140
indicator lamp 19, 87
level 140
temperature gauge 87
Coolant water, refer to Cool-
ant 140
Cooling, refer to Tempera-
ture 104, 108Copyright 4
Cornering Brake Control
(CBC) 125
warning lamp 19
Correct tires 132
Cruise control 84
indicator lamp 20
Cup holders, see Beverage
holders 115
Curb weight, refer to
Weights 168
Current consumption, refer
to Energy control 86
Curve lighting, refer to
Adaptive headlights 98
Cylinders, refer to Engine
data 166
D
Dashboard, refer to
Cockpit 14
Data
capacities 169
dimensions 167
engine 166
technical 166
weights 168
Daytime driving lamps 97
DBC Dynamic Brake Control
19, 125
Deep water, refer to Water
on roadways 125Defrost position, refer
to Defrosting windows
105, 108
Defrosting and demisting
windows
air conditioning 105
automatic climate
control 108
Defrosting windows
105, 108
Defrosting windshield, refer
to Defrosting windows
105, 108
Demisting windows
air conditioning 105
automatic climate
control 108
Determining the maximum
load 118
Differential
breaking in 124
Digital clock 89
Dimensions 167
Dipstick, engine oil 138
Disc brakes 126
Displacement, refer to
Engine data 166
Display lighting, refer to
Instrument lighting 98
Displays, refer to Instrument
cluster 16