Page 56 of 284
These labels are in the locations
shown. They warn you of potential
hazards that could cause serious
injury. Read these labels caref ully.
If a label comes of f or becomes hard
to read (except for the U.S.
dashboard label which is removed by
the owner), contact your Acura
dealer f or a replacement.U.S. models only
Saf ety L abels
Driver and Passenger Saf ety52
RADIATOR CAP
HOOD DASHBOARD
BATTERY LABEL
Page 77 of 284

�µThe Automatic Lighting
f eature turns on the headlights, all
other exterior lights, and the
instrument panel lights when it
senses low ambient light.
To turn on automatic lighting, turn
the light switch to AUTO at any time.
The lights will come on automatically
when the outside light level becomes
low (at dusk, f or example). The
Lights On indicator comes on as a
reminder. The lights and indicator
will turn of f automatically when the
system senses high ambient light. The lights will remain on when you
turn of f the ignition switch. They will
turn of f automatically when you open
the driver’s door. To turn them on
again, either turn the ignition switch
to ON (II) or turn the light switch to
.
Even with the automatic lighting
f eature turned on, we recommend
thatyouturnonthelightsmanually
when driving at night or in a dense
f og, or when you enter dark areas,
such as long tunnels or parking
structures.
Do not leave the light switch in
AUTO if you will not be driving the
vehicle f or an extended period (a
weekormore).Youshouldalsoturn
of f the lights if you plan to leave the
engine idling or the engine of f f or a
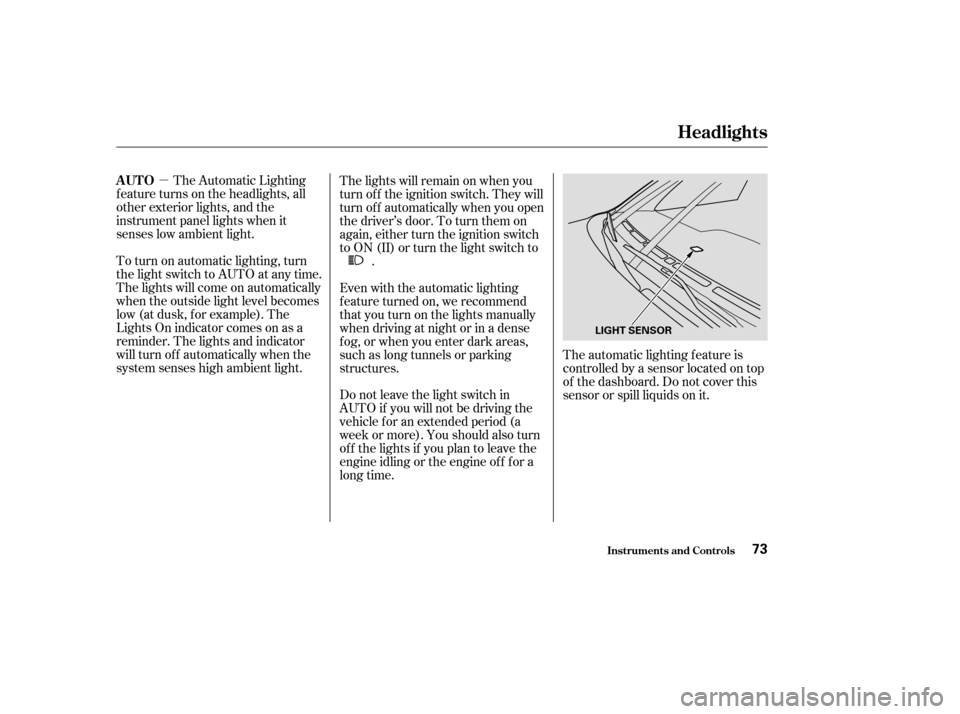
long time. The automatic lighting f eature is
controlledbyasensorlocatedontop
of the dashboard. Do not cover this
sensor or spill liquids on it.
Headlights
Inst rument s and Cont rols
AUTO
73
LIGHT SENSOR
Page 109 of 284

�Ú�Ü
�Û
�Ý
Push the button to increase the
temperature of air f low. Push the
button to decrease it. When you set
the temperature to its lower limit or
its upper limit, the system runs at f ull
cooling or heating only. It does not
regulate the interior temperature.
This button or icon turns the air
conditioningonandoff.Youwillsee
A/C ON or A/C OFF in the display. The outside air intakes f or the
heating and cooling system are at
the base of the windshield. Keep this
area clear of leaves and other debris.
ThesystemshouldbeleftinFresh
Air mode under almost all conditions.
Keeping the system in Recirculation
mode, particularly with the A/C of f ,
can cause the windows to fog up.
Switch to Recirculation mode when
driving through dusty or smoky
conditions, then return to Fresh Air
mode.
This button turns the rear window
def ogger on and of f (see page ). When the indicator in the button is
on, air f rom the vehicle’s interior is
recirculated throughout the system.
When the indicator is off, air is
brought in f rom the outside of the
vehicle (Fresh Air mode).
Push the button or icon to
increase the f an speed and air f low.
Push the button or icon to
decrease it.
Use the mode control button or icon
to select the vents the air flows from.
Air flows from the center
and corner vents in the dashboard.
Airf low is divided between
the vents in the dashboard and the
f loor vents.
Air f lows f rom the f loor
vents.
Airf low is divided between
the f loor vents and the def roster
vents at the base of the windshield.
Air f lows f rom the def roster
vents at the base of the windshield.
When you select , the system
automatically switches to Fresh Air
mode and turns on the A/C.
75
Comf ort and Convenience Feat ures
Fan Control Button/Icon
Temperature Control Buttons
Air Conditioning (A/C) Button/
Icon Recirculation Button
Rear Window Def ogger Button Mode Control Button/Icon
Airf low Buttons
105
Page 112 of 284

The Automatic Climate Control
system can adjust the f an speed and
airflow levels to maintain the interior
temperature you select.Press the AUTO button.
Set the desired temperature with
the temperature control buttons.
You will see FULL AUTO in the
system’s display.
The system automatically selects the
proper mix of conditioned and/or
heated air that will, as quickly as
possible, raise or lower the interior
temperature f rom its current level to
the set temperature. In FULL AUTO
the rear A/C control panel cannot be
used. In cold weather, the f an will not
come on automatically until the
heater starts to develop warm air.
You can manually select various
f unctions of the Climate Control
system when it is in FULL AUTO.
All other f eatures remain
automatically controlled.
Manually selecting a f unction causes
thewordFULLinthedisplaytogo
out.
Press the OFF button. However, a
lack of air f low can cause the
windows to fog up. It is
recommended that you keep the f an
on at all times so stale air and
moisture do not build up in the
interior and cause fogging.
If you set the temperature to its
lower or its upper limit, the system
runs at f ull cooling or heating only. It
does not regulate the interior
temperature.
Select . The system
automatically switches to Fresh
Air mode and turns on the A/C.
The A/C indicator will not come
on in U.S. vehicles.
Select .
Set the f an and temperature
controls to maximum level.
To clear the windows f aster, you can
close the dashboard corner vents by
rotating the wheel below each vent.
This sends more warm air to the
windshield def roster vents. Once the
windshield is clear, select Fresh Air
mode to avoid f ogging the windows.
For your saf ety, make sure you have
a clear view through all the windows
bef ore driving. 1.
2.
1.
2.
3.
Comf ort and Convenience Feat ures
Vents, Heating, and A/C
T o Remove Exterior Frost or Ice
From the Windows
Manual Operation
To Turn Everything Of f
Using A utomatic Climate Control
108
Page 113 of 284
Theclimatecontrolsystemhastwo
sensors. A sunlight sensor is in the
top of the dashboard, and a
temperature sensor is next to the
steering column. Do not cover the
sensors or spill any liquid on them.
Press the RR A/C MANUAL button
to enable the rear A/C control panel.
The light in the button will come on.
A passenger in the second row can
then use the temperature control dial,
f an speed dial, and mode buttons to
adjust the temperature and airflow to
their pref erence. This is limited by
the system’s minimum and
maximum temperature.
Comf ort and Convenience Feat ures
Rear Climate Control, Climate Control Sensors
Sunlight and T emperature
Sensors
Using the Rear A /C Unit
109
SUNLIGHT SENSOR TEMPERATURE SENSOR
TEMPERATURE CONTROL DIAL
MODE BUTTONS
FAN SPEED CONTROL DIAL
Page 147 of 284

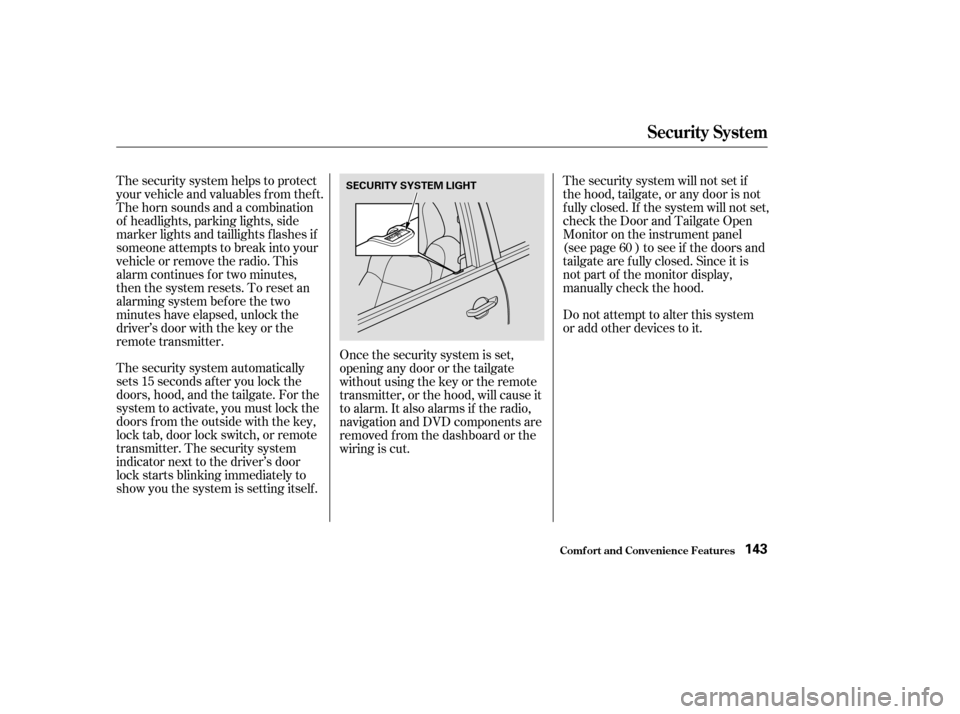
The security system automatically
sets 15 seconds after you lock the
doors, hood, and the tailgate. For the
system to activate, you must lock the
doors f rom the outside with the key,
lock tab, door lock switch, or remote
transmitter. The security system
indicator next to the driver’s door
lock starts blinking immediately to
show you the system is setting itself .The security system will not set if
the hood, tailgate, or any door is not
f ully closed. If the system will not set,
check the Door and Tailgate Open
Monitor on the instrument panel
(see page ) to see if the doors and
tailgate are f ully closed. Since it is
notpartofthemonitordisplay,
manually check the hood.
Do not attempt to alter this system
or add other devices to it.
The security system helps to protect
your vehicle and valuables f rom thef t.
The horn sounds and a combination
of headlights, parking lights, side
marker lights and taillights f lashes if
someone attempts to break into your
vehicleorremovetheradio.This
alarm continues f or two minutes,
then the system resets. To reset an
alarming system before the two
minutes have elapsed, unlock the
driver’s door with the key or the
remote transmitter.
Once the security system is set,
opening any door or the tailgate
without using the key or the remote
transmitter, or the hood, will cause it
to alarm. It also alarms if the radio,
navigation and DVD components are
removed f rom the dashboard or the
wiring is cut. 60
Security System
Comf ort and Convenience Feat ures143
SECURITY SYSTEM LIGHT
Page 164 of 284
Screw the fuel fill cap back on
until it clicks at least three times.
If you do not properly tighten the
cap, the Malf unction Indicator
Lampmaycomeon(seepage).
Push the f uel f ill door closed until
it latches.
Park the vehicle, and set the
parking brake. Pull the hood
release handle located under the
lower lef t corner of the dashboard.
The hood will pop up slightly.Put your f ingers under the f ront
edge of the hood to the left of
center. Slide your hand to the lef t
until you f eel the hood latch
handle. Push this handle up until it
releases the hood. Lif t the hood.
If the hood latch handle moves stif f ly,
or if you can open the hood without
lifting the handle, the mechanism
should be cleaned and lubricated
(see page ).
1.
5.
6.
2.
243
214
Service Station Procedure
Bef ore Driving
Opening the Hood
160
HOOD RELEASE HANDLELATCH
Page 168 of 284

Removing parts f rom your vehicle,
or replacing components with non-
Acura (aftermarket) components
could seriously af f ect your vehicle’s
handling, stability, and reliability.
Some examples are:Lowering your vehicle with an
aftermarket suspension kit that
signif icantly reduces ground
clearance can allow the
undercarriage to hit speed bumps
or other raised objects, which
could cause the airbags to deploy.
Raising your vehicle with an
af termarket suspension kit can
af f ect handling and stability.
Af termarket wheels, because they
are a universal design, can cause
excessive stress on suspension
components. Larger or smaller wheels and tires
can interf ere with the operation of
your vehicle’s anti-lock brakes and
other systems.
Do not modif y your steering wheel
or any other part of your
Supplemental Restraint System.
Modif ications could make the
system inef f ective. See the saf ety
precautions on page .
If you plan to modif y your vehicle,
consult your Acura dealer. Any object
attached to or placed on the covers
marked ‘‘SRS AIRBAG’’ in the
center of the steering wheel and
on top of the dashboard, could
interf ere with the proper operation
of the airbags. Or, if the airbags
inf late, the objects could be
propelled inside the vehicle and
hurt someone.
This could prevent the
airbag from inflating properly. If a side airbag
inflates,acupholderorotherhard
object attached on or near the
door could be propelled inside the
vehicle and hurt someone.
32
A ccessories and Modif ications
Bef ore Driving
Modif ying Your Vehicle
Additional Saf ety Precautions
Do not at t ach or place object s on
the f ront airbag covers.
Do not place any object s over orreplacetheoutsideedgeof afrontseat -back.
Do not at t ach hard object s on or
near a f ront door.
164