Page 442 of 510
5 - 39
CHASFRONT FORK
9. Compress the front fork fully.
10. Fill:
�Front fork oil 1
CAUTION:
�Be sure to use recommended fork oil. If
other oils are used, they may have an
excessively adverse effect on the front
fork performance.
�Never allow foreign materials to enter the
front fork.
Recommended oil:
Fork oil 10W or equivalent
Quantity (each front fork leg):
TT-R125: 159 cm
3
(5.60 Imp oz, 5.38 US oz)
TT-R125LW: 156 cm
3
(5.49 lmp oz, 5.27 US oz)
11. After filling, pump the inner tube slowly
up and down more than 10 times to dis-
tribute the fork oil.
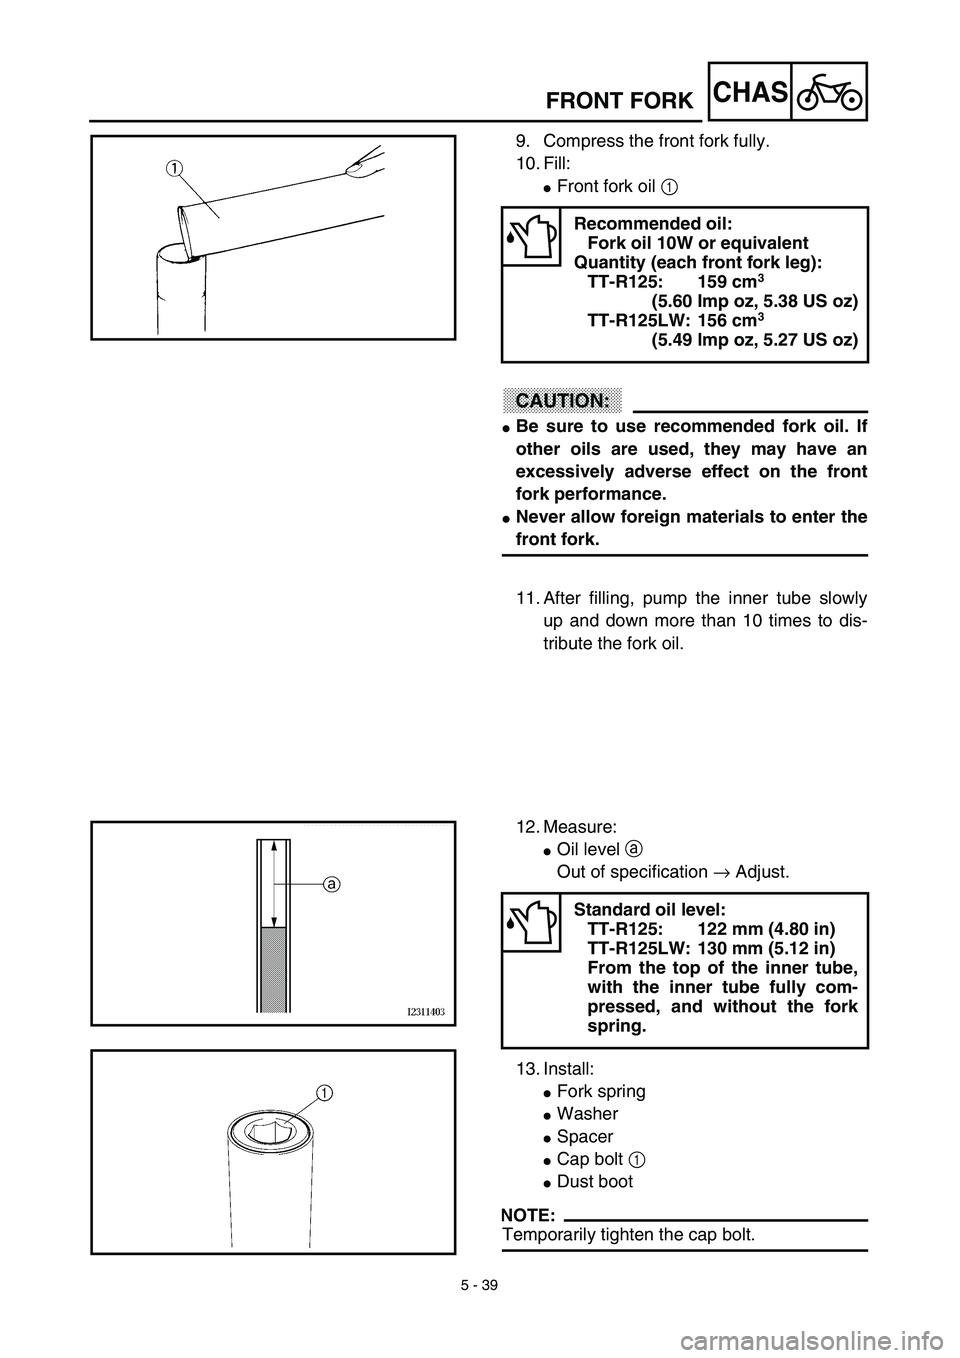
12. Measure:
�Oil level a
Out of specification → Adjust.
13. Install:
�Fork spring
�Washer
�Spacer
�Cap bolt 1
�Dust boot
NOTE:
Temporarily tighten the cap bolt.
Standard oil level:
TT-R125: 122 mm (4.80 in)
TT-R125LW: 130 mm (5.12 in)
From the top of the inner tube,
with the inner tube fully com-
pressed, and without the fork
spring.
Page 444 of 510
5 - 40
CHASFRONT FORK
Installation
1. Install:
�Front fork
NOTE:
�Temporarily tighten the pinch bolt (lower
bracket).
�Do not tighten the pinch bolt (upper bracket)
yet.
2. Tighten:
�Cap bolt 1
3. Adjust:
�Front fork top end a
Front fork top end (standard) a:
Zero mm (Zero in)
T R..23 Nm (2.3 m · kg, 17 ft · lb)
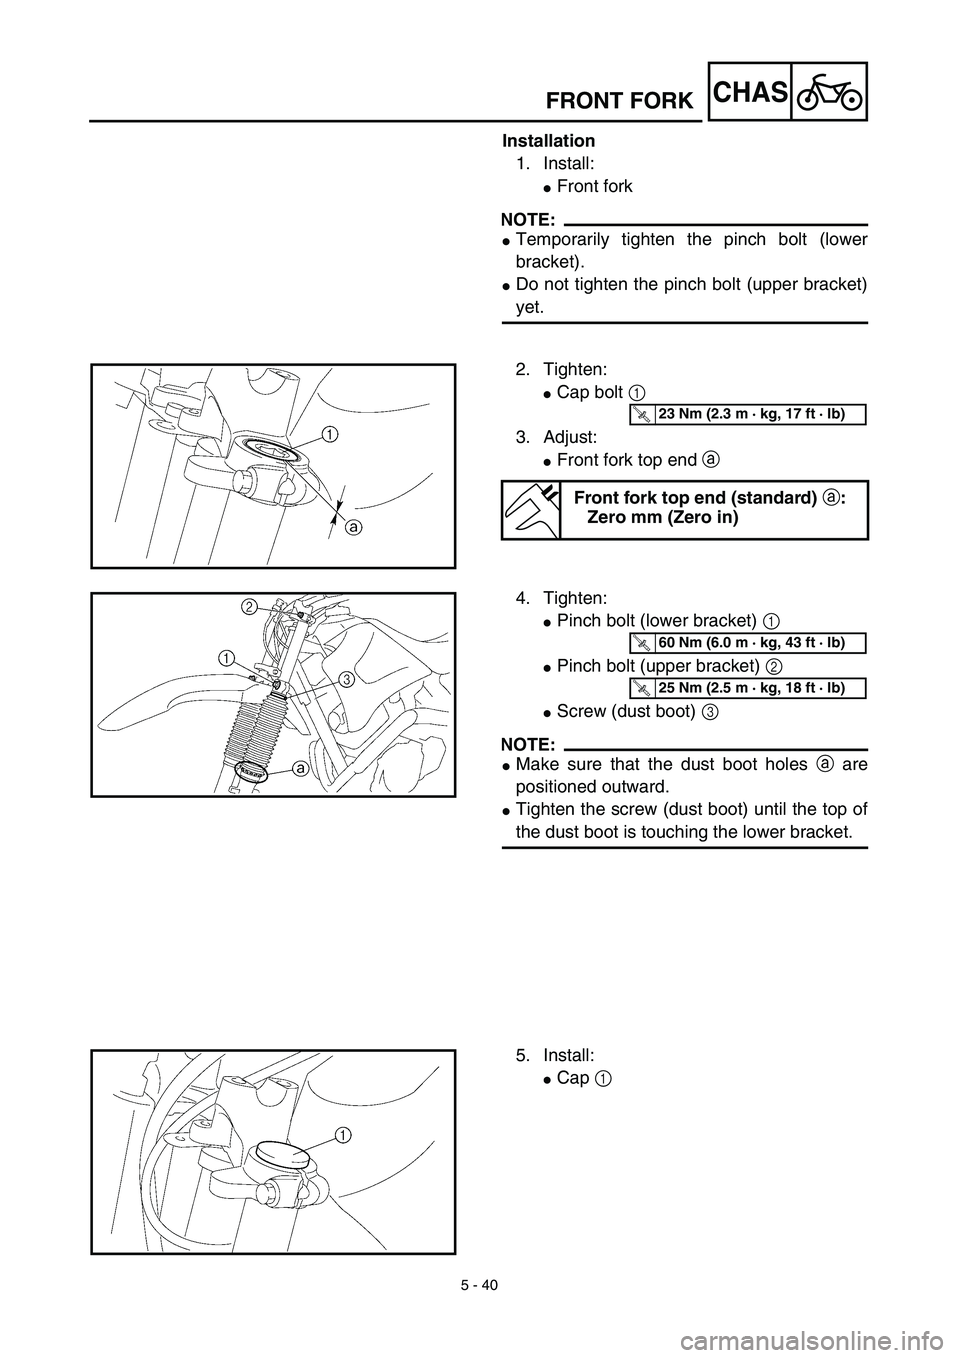
4. Tighten:
�Pinch bolt (lower bracket) 1
�Pinch bolt (upper bracket) 2
�Screw (dust boot) 3
NOTE:
�Make sure that the dust boot holes a are
positioned outward.
�Tighten the screw (dust boot) until the top of
the dust boot is touching the lower bracket.
T R..60 Nm (6.0 m · kg, 43 ft · lb)
T R..25 Nm (2.5 m · kg, 18 ft · lb)
5. Install:
�Cap 1
Page 482 of 510
5 - 59
CHAS
2. Install:
�Oil seals 1
�Collars 2
�Bushing 3
�Dust covers 4
�Dust covers 5
�Rubber boot 6
On relay arm.
NOTE:
Apply the molybdenum disulfide grease on the
bushing, collar, oil seal lip and dust cover lip.
3. Install:
�Collar 1
�Dust covers 2
On connecting arm.
NOTE:
Apply the molybdenum disulfide grease on the
collar and dust cover lip.
4. Install:
�Relay arm 1
�Bolt (relay arm)
�Plain washer
�Nut (relay arm)
On swingarm.
NOTE:
Apply the molybdenum disulfide grease on the
bolt (relay arm).
5. Install:
�Connecting arm 1
�Bolt (connecting arm)
�Plain washer
�Nut (connecting arm)
On relay arm.
NOTE:
Apply the molybdenum disulfide grease on the
bolt (connecting arm).
T R..53 Nm (5.3 m · kg, 38 ft · lb)
T R..35 Nm (3.5 m · kg, 25 ft · lb)
SWINGARM