2003 YAMAHA MAJESTY 250 ignition
[x] Cancel search: ignitionPage 17 of 116

INSTRUMENT AND CONTROL FUNCTIONS
Main switch/steering lock ...................................................................3-1
Indicator and warning lights ...............................................................3-2
Speedometer .....................................................................................3-4
Tachometer .......................................................................................3-4
Fuel gauge .........................................................................................3-5
Coolant temperature gauge ...............................................................3-5
Multi-function display .........................................................................3-5
Anti-theft alarm (optional) ................................................................3-10
Handlebar switches .........................................................................3-10
Front brake lever .............................................................................3-11
Rear brake lever ..............................................................................3-12
ABS .................................................................................................3-13
Fuel tank cap ...................................................................................3-15
Fuel ..................................................................................................3-16
Catalytic converter ...........................................................................3-17
Rider seat ........................................................................................3-18
Adjusting the rider seat ....................................................................3-18
Storage compartments ....................................................................3-19
Adjusting the shock absorber assemblies .......................................3-21
Sidestand .........................................................................................3-22
Ignition circuit cut-off system ...........................................................3-22
3
5SJ-28199-E1 7/11/02 11:03 AM Page 15
Page 18 of 116

3-1
EAU00029
Main switch/steering lockMain switch/steering lockThe main switch/steering lock con-
trols the ignition and lighting systems,
and is used to lock the steering. The
various positions are described
below.
EAU04580
ON
All electrical circuits are supplied with
power; the meter lighting, taillight,
license plate light and auxiliary light
come on, and the engine can be
started. The key cannot be removed.
EAU00027
INSTRUMENT AND CONTROL FUNCTIONS
3IGNITIONP
LOCK
ON
OFF
OPEN
PUSH
PUSH
NOTE:
The headlight comes on automatical-
ly when the engine is started and
stays on until the key is turned to
“OFF” or the sidestand is moved
down.
EAU00038
OFF
All electrical systems are off. The key
can be removed.
EAU00040
LOCK
The steering is locked, and all electri-
cal systems are off. The key can be
removed.To lock the steering
1. Turn the handlebars all the way
to the left.
2. Push the key in from the “OFF”
position, and then turn it to
“LOCK” while still pushing it.
3. Remove the key.
To unlock the steering
Push the key in, and then turn it to
“OFF” while still pushing it.
EW000016
w
Never turn the key to “OFF” or
“LOCK” while the scooter is mov-
ing, otherwise the electrical sys-
tems will be switched off, which
may result in loss of control or an
accident. Make sure that the scoot-
er is stopped before turning the
key to “OFF” or “LOCK”.
5SJ-28199-E1 7/11/02 11:03 AM Page 16
Page 35 of 116

3-18
INSTRUMENT AND CONTROL FUNCTIONS
3
EAU03091
Rider seat
Rider seatTo open the rider seat
1. Place the scooter on the center-
stand.
2. Insert the key into the main
switch, and then turn it counter-
clockwise.
NOTE:
Do not push inward when turning the
key.
IGNITIONP
LOCK
ON
OFF
OPEN
PUSH
PUSH
a
a. Open.
EAU03096*
Adjusting the rider seatRider seat, adjustingThe rider seat can be adjusted as fol-
lows to change the riding position.
1. Open the rider seat.
1
1. Rider seat
3. Fold the rider seat up.
To close the rider seat
1. Fold the rider seat down, and
then push it down to lock it in
place.
2. Remove the key from the main
switch if the scooter will be left
unattended.
NOTE:
Make sure that the seat is properly
secured before riding.
1
1. Rider seat
5SJ-28199-E1 7/11/02 11:03 AM Page 33
Page 39 of 116

3-22
INSTRUMENT AND CONTROL FUNCTIONS
3
EAU00330
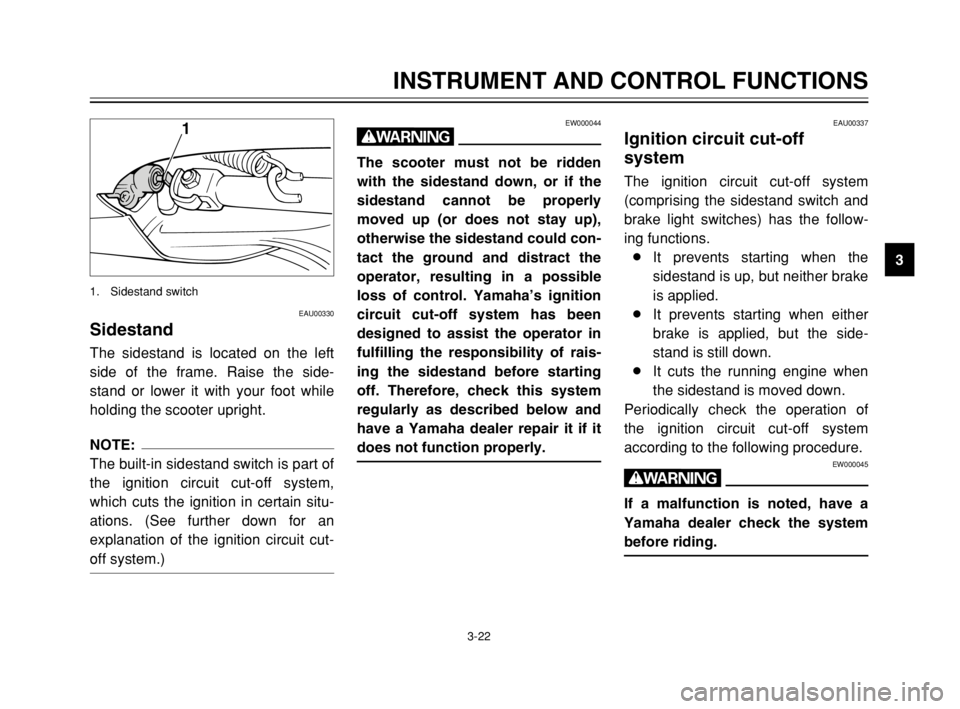
SidestandSidestandThe sidestand is located on the left
side of the frame. Raise the side-
stand or lower it with your foot while
holding the scooter upright.
NOTE:
The built-in sidestand switch is part of
the ignition circuit cut-off system,
which cuts the ignition in certain situ-
ations. (See further down for an
explanation of the ignition circuit cut-
off system.)
1
1. Sidestand switch
EAU00337
Ignition circuit cut-off
system
Ignition circuit cut-off systemThe ignition circuit cut-off system
(comprising the sidestand switch and
brake light switches) has the follow-
ing functions.
8It prevents starting when the
sidestand is up, but neither brake
is applied.
8It prevents starting when either
brake is applied, but the side-
stand is still down.
8It cuts the running engine when
the sidestand is moved down.
Periodically check the operation of
the ignition circuit cut-off system
according to the following procedure.
EW000045
w
If a malfunction is noted, have a
Yamaha dealer check the system
before riding.
EW000044
w
The scooter must not be ridden
with the sidestand down, or if the
sidestand cannot be properly
moved up (or does not stay up),
otherwise the sidestand could con-
tact the ground and distract the
operator, resulting in a possible
loss of control. Yamaha’s ignition
circuit cut-off system has been
designed to assist the operator in
fulfilling the responsibility of rais-
ing the sidestand before starting
off. Therefore, check this system
regularly as described below and
have a Yamaha dealer repair it if it
does not function properly.
5SJ-28199-E1 7/11/02 11:03 AM Page 37
Page 43 of 116

4-2
PRE-OPERATION CHECKS
4
Rear brake•Check operation.
•If soft or spongy, have Yamaha dealer bleed hydraulic system.
•Check fluid level in reservoir.
•If necessary, add recommended brake fluid to specified level.
•Check hydraulic system for leakage.3-12, 6-27–6-30
Throttle grip•Make sure that operation is smooth.
•Check cable free play.
•If necessary, have Yamaha dealer adjust cable free play and lubricate cable and
grip housing.6-23, 6-31
Wheels and tires•Check for damage.
•Check tire condition and tread depth.
•Check air pressure.
•Correct if necessary.6-24–6-27
Brake levers•Make sure that operation is smooth.
•Lubricate lever pivoting points if necessary.3-11–3-12, 6-27, 6-31
Centerstand, sidestand•Make sure that operation is smooth.
•Lubricate pivots if necessary.6-31–6-32
Chassis fasteners•Make sure that all nuts, bolts and screws are properly tightened.
•Tighten if necessary.—
Instruments, lights, signals
and switches•Check operation.
•Correct if necessary.3-2–3-11, 6-37–6-42
Sidestand switch•Check operation of ignition circuit cut-off system.
•If system is defective, have Yamaha dealer check vehicle.3-22–3-23 ITEM CHECKS PAGE
5SJ-28199-E1 7/11/02 11:03 AM Page 41
Page 46 of 116

3
2
1
1. Start switch
2. Front brake lever
3. Rear brake lever
5-1
EAU00372
OPERATION AND IMPORTANT RIDING POINTS
5
EAU01118
w
8 8
Become thoroughly familiar
with all operating controls and
their functions before riding.
Consult a Yamaha dealer
regarding any control or func-
tion that you do not thorough-
ly understand.
8 8
Never start the engine or oper-
ate it in a closed area for any
length of time. Exhaust fumes
are poisonous, and inhaling
them can cause loss of con-
sciousness and death within a
short time. Always make sure
that there is adequate ventila-
tion.
8 8
For safety, always start the
engine with the centerstand
down.
EAU03616*
Starting the engineStarting the engineEC000046
cC
See page 5-4 for engine break-in
instructions prior to operating the
vehicle for the first time.
In order for the ignition circuit cut-off
system to enable starting, the side-
stand must be up.
EW000054
w
8 8
Before starting the engine,
check the function of the igni-
tion circuit cut-off system
according to the procedure
described on page 3-23.
8 8
Never ride with the sidestand
down.
1. Turn the key to “ON” and make
sure that the engine stop switch
is set to “#”.
ECA00068
cC
When the key is turned to “ON”,
the ABS warning light should
come on for a few seconds, and
then go off. If the ABS warning
light does not come on or remains
on, have a Yamaha dealer inspect
the electrical circuit.
5SJ-28199-E1 7/11/02 11:03 AM Page 44
Page 87 of 116

6-36
PERIODIC MAINTENANCE AND MINOR REPAIR
6
EC000102
cC
8
8
Always keep the battery
charged. Storing a discharged
battery can cause permanent
battery damage.
8 8
To charge a sealed-type (MF)
battery, a special (constant-
voltage) battery charger is
required. Using a conventional
battery charger will damage
the battery. If you do not have
access to a sealed-type (MF)
battery charger, have a
Yamaha dealer charge your
battery.
1. Turn the key to “OFF” and turn
off all electrical circuits.
2. Remove the blown fuse, and
then install a new fuse of the
specified amperage.
EC000103
cC
Do not use a fuse of a higher
amperage rating than recommend-
ed to avoid causing extensive
damage to the electrical system
and possibly a fire.
EAU04110*
Replacing the fusesFuses, replacingThe fuse boxes are located under the
battery cover. (See page 6-34 for bat-
tery cover removal and installation
procedures.)
If a fuse is blown, replace it as fol-
lows.
4
5
79
6
18
3
2
910
1. Main fuse
2. Backup fuse (clock)
3. ABS control unit fuse
4. Radiator fan fuse
5. Ignition fuse
6. Headlight fuse
7. Signaling system fuse
8. ABS motor fuse
9. Spare fuse (×5)
10. Spare main fuse
Specified fuses:
Main fuse: 30 A
Backup fuse (clock): 10 A
ABS control unit fuse: 10 A
Radiator fan fuse: 4 A
Ignition fuse: 7.5 A
Headlight fuse: 15 A
Signaling system fuse: 15 A
ABS motor fuse: 30 A
5SJ-28199-E1 7/11/02 11:03 AM Page 85
Page 93 of 116

6-42
PERIODIC MAINTENANCE AND MINOR REPAIR
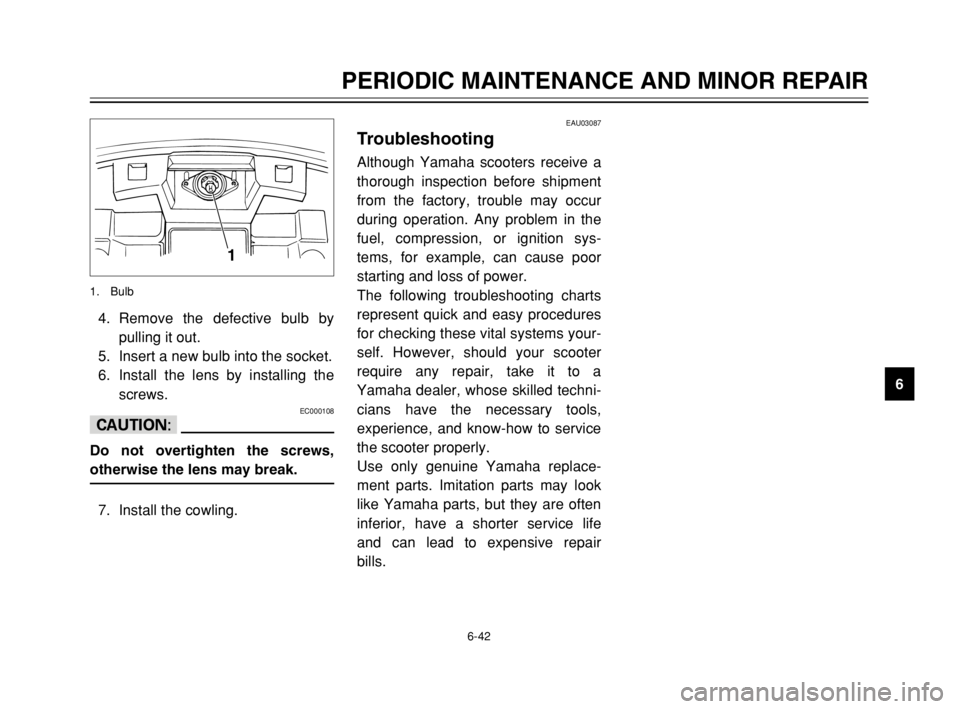
6 4. Remove the defective bulb by
pulling it out.
5. Insert a new bulb into the socket.
6. Install the lens by installing the
screws.
EC000108
cC
Do not overtighten the screws,
otherwise the lens may break.
7. Install the cowling.
1
1. Bulb
EAU03087
TroubleshootingTroubleshootingAlthough Yamaha scooters receive a
thorough inspection before shipment
from the factory, trouble may occur
during operation. Any problem in the
fuel, compression, or ignition sys-
tems, for example, can cause poor
starting and loss of power.
The following troubleshooting charts
represent quick and easy procedures
for checking these vital systems your-
self. However, should your scooter
require any repair, take it to a
Yamaha dealer, whose skilled techni-
cians have the necessary tools,
experience, and know-how to service
the scooter properly.
Use only genuine Yamaha replace-
ment parts. Imitation parts may look
like Yamaha parts, but they are often
inferior, have a shorter service life
and can lead to expensive repair
bills.
5SJ-28199-E1 7/11/02 11:03 AM Page 91