Page 82 of 242
2003 VOLVO XC90
Vanity mirror
The light comes on when you open the cover.
Floor Mats
Volvo offers floor mats specially manufactured for your vehicle. They mu\
st be properly placed and
secured in the mat clips.
WARNING!
An extra mat on the driver's floor can cause the accelerator pedal to ca\
tch. Check that the movement
of the accelerator pedal is not impeded. No more than one protective flo\
or covering may be used at
one time.
Contents | Top of Page
file:///K|/ownersdocs/2003/2003_XC90/03xc90_04a.htm (11 of 11)12/30/20\
06 4:18:55 PM
Page 87 of 242

2003 VOLVO XC90
pg. 67 Interior
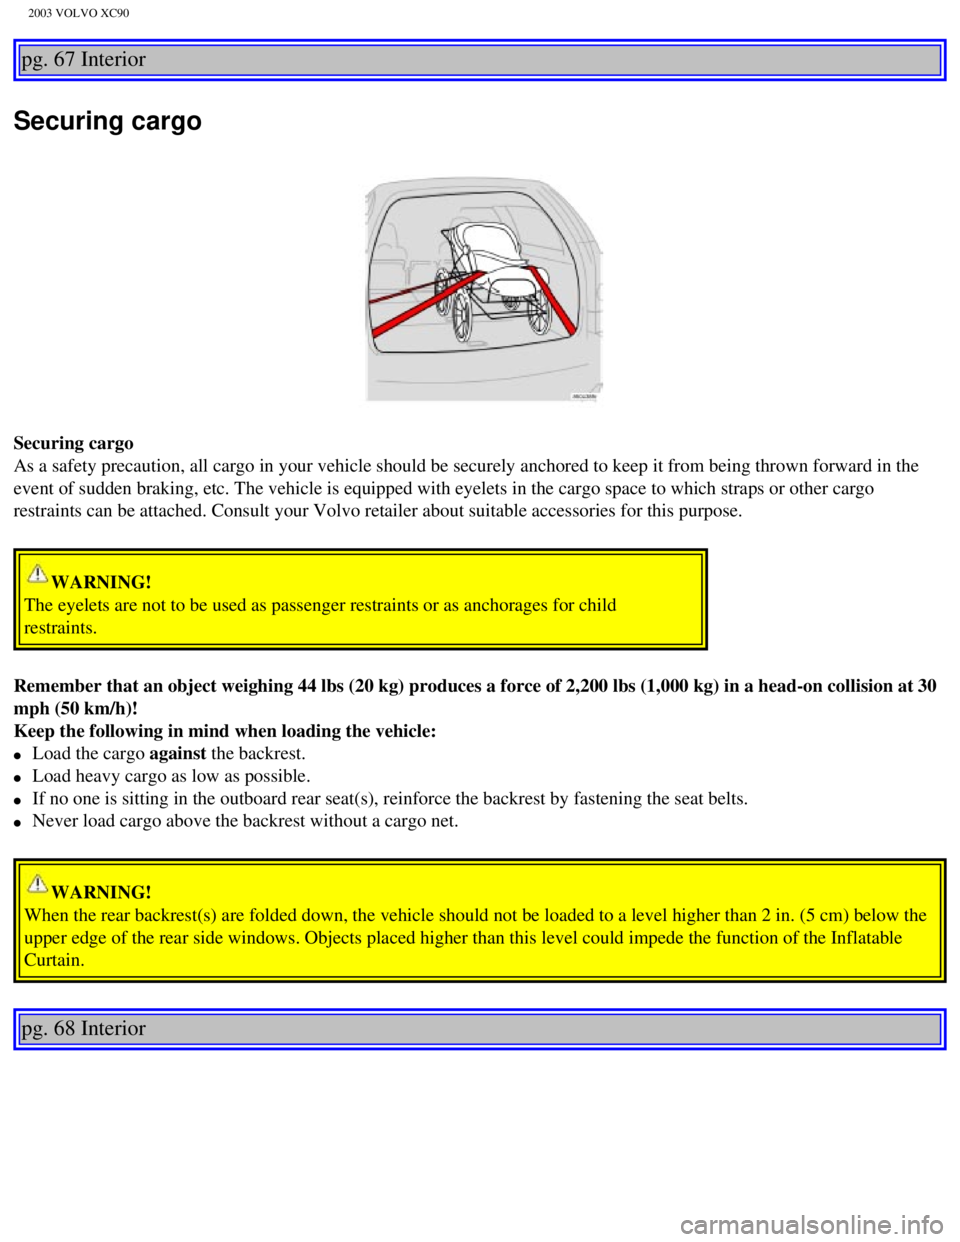
Securing cargo
Securing cargo
As a safety precaution, all cargo in your vehicle should be securely anc\
hored to keep it from being thrown forward in the
event of sudden braking, etc. The vehicle is equipped with eyelets in th\
e cargo space to which straps or other cargo
restraints can be attached. Consult your Volvo retailer about suitable a\
ccessories for this purpose.
WARNING!
The eyelets are not to be used as passenger restraints or as anchorages \
for child
restraints.
Remember that an object weighing 44 lbs (20 kg) produces a force of 2,\
200 lbs (1,000 kg) in a head-on collision at 30
mph (50 km/h)!
Keep the following in mind when loading the vehicle:
l Load the cargo against the backrest.
l Load heavy cargo as low as possible.
l If no one is sitting in the outboard rear seat(s), reinforce the backr\
est by fastening the seat belts.
l Never load cargo above the backrest without a cargo net.
WARNING!
When the rear backrest(s) are folded down, the vehicle should not be l\
oaded to a level higher than 2 in. (5 cm) below the
upper edge of the rear side windows. Objects placed higher than this lev\
el could impede the function of the Inflatable
Curtain.
pg. 68 Interior
file:///K|/ownersdocs/2003/2003_XC90/03xc90_04b.htm (5 of 10)12/30/200\
6 4:18:55 PM
Page 90 of 242

2003 VOLVO XC90
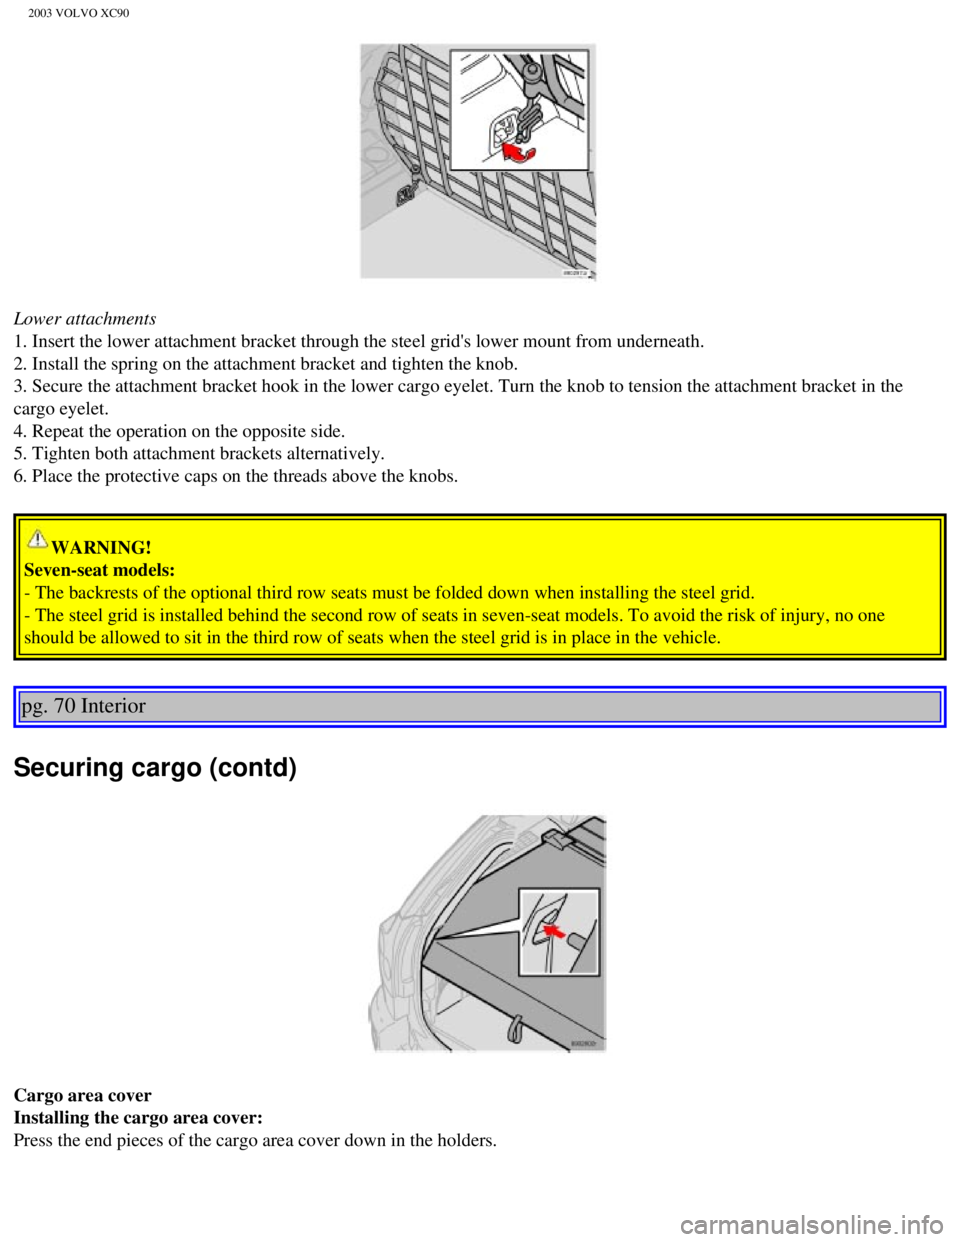
Lower attachments
1. Insert the lower attachment bracket through the steel grid's lower mo\
unt from underneath.
2. Install the spring on the attachment bracket and tighten the knob.
3. Secure the attachment bracket hook in the lower cargo eyelet. Turn th\
e knob to tension the attachment bracket in the
cargo eyelet.
4. Repeat the operation on the opposite side.
5. Tighten both attachment brackets alternatively.
6. Place the protective caps on the threads above the knobs.
WARNING!
Seven-seat models:
- The backrests of the optional third row seats must be folded down when\
installing the steel grid.
- The steel grid is installed behind the second row of seats in seven-se\
at models. To avoid the risk of injury, no one
should be allowed to sit in the third row of seats when the steel grid i\
s in place in the vehicle.
pg. 70 Interior
Securing cargo (contd)
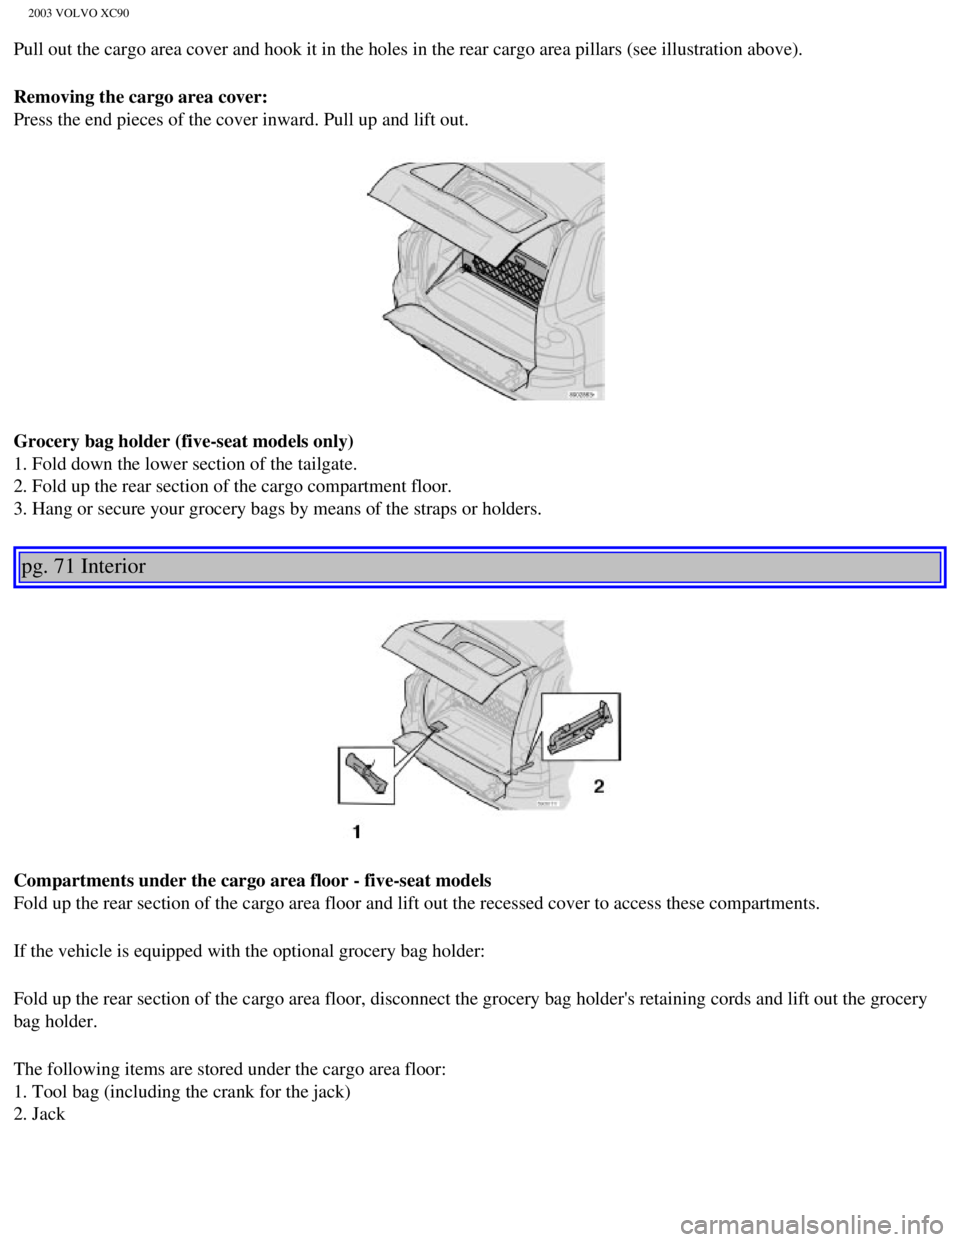
Cargo area cover
Installing the cargo area cover:
Press the end pieces of the cargo area cover down in the holders.
file:///K|/ownersdocs/2003/2003_XC90/03xc90_04b.htm (8 of 10)12/30/200\
6 4:18:55 PM
Page 91 of 242

2003 VOLVO XC90
Pull out the cargo area cover and hook it in the holes in the rear cargo\
area pillars (see illustration above).
Removing the cargo area cover:
Press the end pieces of the cover inward. Pull up and lift out.
Grocery bag holder (five-seat models only)
1. Fold down the lower section of the tailgate.
2. Fold up the rear section of the cargo compartment floor.
3. Hang or secure your grocery bags by means of the straps or holders.
pg. 71 Interior
Compartments under the cargo area floor - five-seat models
Fold up the rear section of the cargo area floor and lift out the recess\
ed cover to access these compartments.
If the vehicle is equipped with the optional grocery bag holder:
Fold up the rear section of the cargo area floor, disconnect the grocery\
bag holder's retaining cords and lift out the grocery
bag holder.
The following items are stored under the cargo area floor:
1. Tool bag (including the crank for the jack)
2. Jack
file:///K|/ownersdocs/2003/2003_XC90/03xc90_04b.htm (9 of 10)12/30/200\
6 4:18:55 PM
Page 96 of 242

2003 VOLVO XC90
Remote controls
Your vehicle is equipped with a remote control transmitter. This transmi\
tter uses a radio signal to allow
"keyless" entry into the passenger compartment or the tailgate. You will\
be supplied with two coded key
ring transmitters, which will enable you to lock/unlock all doors and th\
e tailgate from a distance of 10-
15 feet (3- 5 meters).
On vehicles equipped with an alarm, the alarm will also be activated/dea\
ctivated by this system.
The vehicle can also be locked/unlocked with the key.
Buttons in remote control:
1-Lock, 2-Unlock, 3-Unlock tailgate,
4-"Panic" function,*, 5-Approach lighting
As an extra security precaution in certain situations (valet parking, e\
tc.), Volvo recommends that the
transmitter not be included when the keys are given to anyone. The servi\
ce key can be used instead. If
one of the transmitters is misplaced, contact the nearest authorized Vol\
vo retailer for assistance.
Using the remote control
l Press the LOCK button once to lock all doors and tailgate.
l Press the UNLOCK button once to unlock the driver's door and fuel filler\
door. Wait for at least 1
second and press this button again (within 10 seconds) to unlock all d\
oors and the tailgate.
l To unlock the tailgate (without unlocking the doors), press the Unlock\
tailgate button twice within 3
seconds.
NOTE:
l Airbag deployment will automatically unlock the doors.
l The keys may also be used to lock and unlock the doors, and to activate \
and deactivate the alarm
system.
l To avoid leaving your keys in the vehicle, make a habit of always lockin\
g the vehicle with the remote
control.
file:///K|/ownersdocs/2003/2003_XC90/03xc90_05.htm (4 of 11)12/30/2006\
4:18:56 PM
Page 125 of 242

2003 VOLVO XC90
To temporarily off the system
l Press the button in the center control panel (see illustration above).\
The LED in the button will go out
to indicate that the system is not in active mode.
l Press the button again to reactivate the system.
Faults in the system
If a fault should occur in the system, the LED in the button will be swi\
tched off and a message will be
displayed in the text window.
Cleaning the sensors
For the system to function properly, the sensors should be kept clean. T\
hey can be cleaned with car
washing detergent and a sponge.
WARNING!
This system is designed to be a supplementary aid when the vehicle is ba\
cking up. It is not, however,
intended to replace the driver's attention and judgement.
pg. 100 Starting and driving
Towing
Positions for attaching towing eyelets
Emergency towing
The towing eyelet is located in the tool bag, under the floor of the car\
go area. This eyelet must be
screwed into the positions provided on the right sides of either the fro\
nt or rear bumper (see illustrations).
To attach the towing eyelet:
A Use a coin to pry open the lower edge of the cover (A).
B Screw the towing eyelet (C) in place (B), first by hand and then us\
ing the tire iron until it is securely
file:///K|/ownersdocs/2003/2003_XC90/03xc90_06b.htm (7 of 17)12/30/200\
6 4:18:59 PM
Page 126 of 242

2003 VOLVO XC90
in place.
After the vehicle has been towed, the eyelet should be removed and retur\
ned to the tool bag. Press the
cover back into position.
Precautions when the vehicle is in tow
l The steering wheel must be unlocked. Turn the ignition key to position I\
or II.
l The gear selector must be in position N.
l Maximum speed: 50 mph (80 km/h). Do not exceed the maximum allowable t\
owing speed.
l Maximum distance with front wheels on ground: 50 miles (80 km).
l While the vehicle is being towed, try to keep the tow rope taut at all t\
imes.
l The vehicle should only be towed in forward direction.
CAUTION
- Please check with state and local authorities before attempting this t\
ype of towing, as vehicles being
towed are subject to regulations regarding maximum towing speed, length \
and type of towing device,
lighting, etc.
- If the vehicle's battery is dead, do not attempt to start the vehicle \
by pushing or pulling it as this will
damage the three-way catalytic converter(s). The engine must be jump s\
tarted using an auxiliary
battery (see
page 102).
- If the vehicle is being towed on a flat bed truck, the towing eyelets \
must not be used to secure the
vehicle on the flat bed. Consult the tow truck operator.
WARNING!
- Remember that the power brakes and power steering will not function wh\
en engine is not running.
The braking and steering systems will function but the brake pedal press\
ure required is 3 - 4 times
above normal and greater steering effort must be exerted.
- The towing eyelets must not be used for pulling the vehicle out of a d\
itch or for any similar purpose
involving severe strain. Do not use the towing eyelets to pull the vehic\
le up onto a flat bed tow truck.
pg. 101 Starting and driving
file:///K|/ownersdocs/2003/2003_XC90/03xc90_06b.htm (8 of 17)12/30/200\
6 4:18:59 PM
Page 127 of 242

2003 VOLVO XC90
Towing vehicles with front wheel drive/All Wheel Drive
Volvo recommends the use of flat bed equipment.
If wheel lift equipment must be used, please use extreme caution to help\
avoid damage to the vehicle. In
this case, the vehicle should be towed with the rear wheels on the groun\
d if at all possible.
If it is absolutely necessary to tow the vehicle with the front wheels o\
n the ground, please refer to the
towing information on the previous page. CAUTION
Sling-type equipment applied at the front will damage radiator and air c\
onditioning lines.
It is equally important not to use sling-type equipment at the rear or a\
pply lifting equipment inside the
rear wheels; serious damage to the rear axle may result.
If the vehicle is being towed on a flat bed truck, the towing eyelets mu\
st not be used to secure the
vehicle on the flat bed. Consult the tow truck operator.
WARNING!
Do not use the towing eyelets to pull the vehicle up onto a flat bed tow\
truck.
pg. 102 Starting and driving
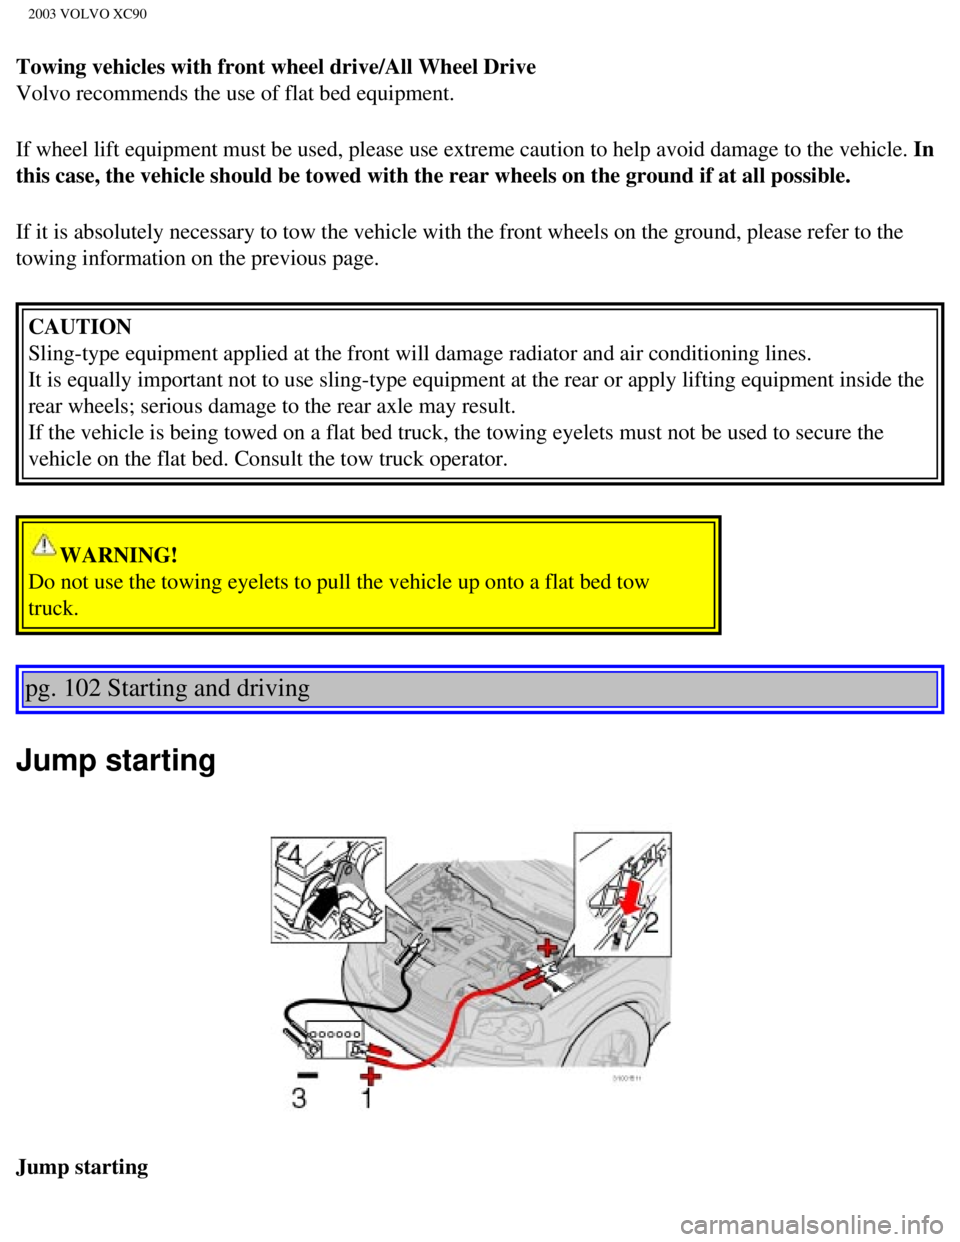
Jump starting
Jump starting
file:///K|/ownersdocs/2003/2003_XC90/03xc90_06b.htm (9 of 17)12/30/200\
6 4:18:59 PM