2003 VOLVO S80 warning
[x] Cancel search: warningPage 63 of 109
cornering (turning) traction.
TEMPERATURE
The temperature grades are AA (the highest), A, B, and C, representing the tire's resistance to the generation of heat
and its ability to dissipate heat when tested under controlled conditions on a specified indoor laboratory test wheel.
Sustained high temperature can cause the material of the tire to degenerate and reduce tire life, and excessive
temperature can lead to sudden tire failure. The grade C corresponds to a minimum level of performance that all
passenger car tires must meet under the Federal Motor Safety Standard No. 109. Grades B and A represent higher
levels of performance on the laboratory test wheel than the minimum required by law.
WARNING!
The temperature grade for this tire is established for a tire that is properly inflated and not overloaded. Excessive
speed, under-inflation, or excessive loading, either separately or in combination, can cause heat buildup and possible
tire failure.
pg. 96 Changing wheels
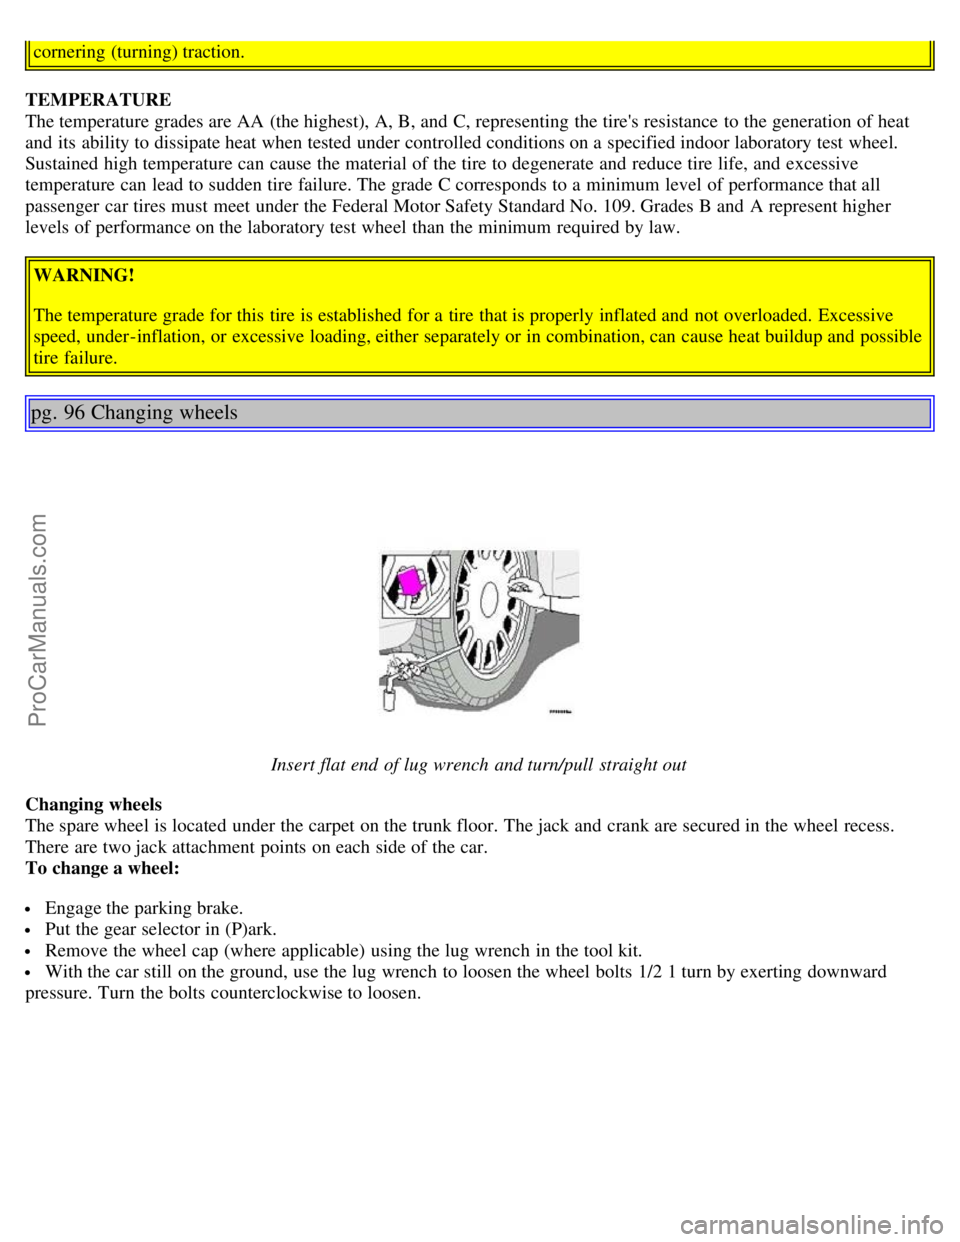
Insert flat end of lug wrench and turn/pull straight out
Changing wheels
The spare wheel is located under the carpet on the trunk floor. The jack and crank are secured in the wheel recess.
There are two jack attachment points on each side of the car.
To change a wheel:
Engage the parking brake.
Put the gear selector in (P)ark.
Remove the wheel cap (where applicable) using the lug wrench in the tool kit.
With the car still on the ground, use the lug wrench to loosen the wheel bolts 1/2 1 turn by exerting downward
pressure. Turn the bolts counterclockwise to loosen.
ProCarManuals.com
Page 65 of 109
Install the wheel bolts and tighten handtight. use the lug wrench, tighten crosswise(see illustration above) until all
bolts are snug.
Lower the vehicle to the ground and alternately tighten the bolts crosswise to 100 ft. lbs. (136 Nm).
Install the wheel cap (where applicable).
WARNING!
The jack must correctly engage the bar in the jack attachment (A). The car's weight must not rest on the jack
attachment (B). See illustration on page 96
.
Be sure the jack is on a firm, level, non-slippery surface.
Never allow any part of your body to be extended under a car supported by a jack.
Use the jack intended for the car when replacing a wheel. For any other job, use stands to support the side of the
car being worked on.
Apply the parking brake and put the gear selector in the (P)ark position.
Block the wheels standing on the ground, use rigid wooden blocks or large stones.
The jack should be kept well-greased.
CAUTION:
The car must not be driven with wheels of different dimensions or with a spare tire other than the one that came
with the car. The use of different size wheels can seriously damage your car's transmission.
Correct tightening torque on wheel bolts must be observed. The wheel bolts should never be greased or lubricated.
The extended, chromed wheel bolts must not be used with steel rims, as they make it impossible to fit the hub caps.
pg. 94
This page intentionally left blank.
Contents | Top of Page
ProCarManuals.com
Page 67 of 109
Replacing fuses
If an electrical component fails to function, it is likely that a fuse has blown due to a temporary circuit overload.
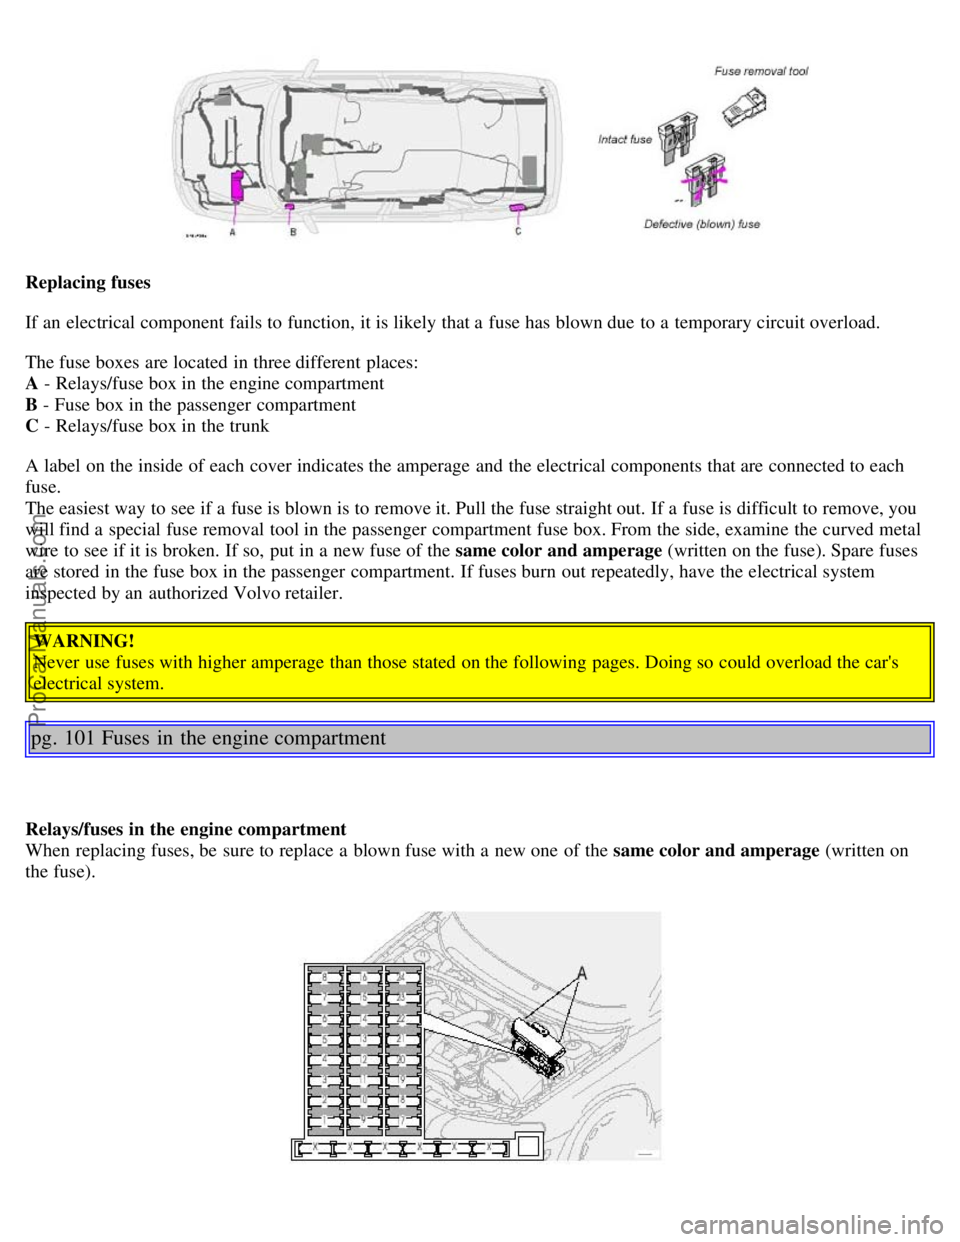
The fuse boxes are located in three different places:
A - Relays/fuse box in the engine compartment
B - Fuse box in the passenger compartment
C - Relays/fuse box in the trunk
A label on the inside of each cover indicates the amperage and the electrical components that are connected to each
fuse.
The easiest way to see if a fuse is blown is to remove it. Pull the fuse straight out. If a fuse is difficult to remove, you
will find a special fuse removal tool in the passenger compartment fuse box. From the side, examine the curved metal
wire to see if it is broken. If so, put in a new fuse of the same color and amperage (written on the fuse). Spare fuses
are stored in the fuse box in the passenger compartment. If fuses burn out repeatedly, have the electrical system
inspected by an authorized Volvo retailer.
WARNING!
Never use fuses with higher amperage than those stated on the following pages. Doing so could overload the car's
electrical system.
pg. 101 Fuses in the engine compartment
Relays/fuses in the engine compartment
When replacing fuses, be sure to replace a blown fuse with a new one of the same color and amperage (written on
the fuse).
ProCarManuals.com
Page 80 of 109
6 cyl. turbo3600-3635 Ibs1640-1655 kg
Permissible axle weight, front
6 cyl. 2491 Ibs1130 kg
Permissible axle weight, rear
6 cyl. 2293 lbs1040 kg
Max roof load 220 lbs100 kg
Max trailer weight
(w/o brakes) 1650 lbs750 kg
Max trailer weight
(with brakes)
2" ball 3300 lbs **1500 kg
1 7/8" ball 2000 lbs900 kg
Max tongue weight **165 lbs 75 kg
WARNING!
When adding accessories, equipment, luggage and other cargo to your vehicle, the total loaded weight capacity of
the vehicle must not be exceeded.
* The max permissible axle loads or the gross vehicle weight must not be exceeded.
** When driving for prolonged periods at temperatures above 86° F (30° C), the maximum recommended weight is
2000 lbs (900 kg).
*** See also section "Trailer towing"
All specifications are subject to change without prior notice.
pg. 130 Engine/transmission specifications
Engine specifications Designation: Volvo B 6294 T
Output 268 hp at 5200 rpm (200 KW/87 rps)
Max torque 280 ft. lbs. at 1800-5000 rpm (380 Nm at 30-83 rps)
Number of cylinders 6
Bore 3.27" (83 mm)
Stroke 3.54" (90 mm)
Displacement 2.92 liters (115 cu. in.)
Compression ratio 8.5:1
Number of valves 24
Charge air cooler (Intercooler)
Turbocharged engines employ a turbo-compressor to force air into the engine inlet manifold and a charge air cooler to
cool the compressed inlet air. The resulting increase in air flow raises pressure in the intake manifold and increases
engine power over that developed by the normally-aspirated engine. The charge air cooler (which resembles a radiator)
is located between the turbo-compressor and inlet manifold. Designation: Volvo B 6294 S
ProCarManuals.com
Page 82 of 109

DOT 4+ boiling point > 536°F (280° C) P/N 9437433
Volume: 0.6 US qt (0.6 liter)
Climate control system - refrigerant (R 134a)
Oil: PAG
Volume: 2.2 lbs (1000 g) R134a.
Fuel
Minimum octane requirement - AKI 87 (RON 91)
Volume (fuel tank): 21.1 US gals (80 liters)
Washer fluid reservoir
Volume: 6 cyl: 4.7 US qts. (4.5 liters)
All specifications are subject to change without prior notice.
pg. 132 Fuel system, Distributor ignition system, Suspension
Fuel system
The engine is equipped with a multiport fuel injection system.
Distributor ignition system
Firing order: 1-5-3-6-2-4
Distributor ignition setting: Not adjustable
Spark plugs: B 6294 T: P/N 271367-4 (or equivalent)
B 6294 S: P/N 272371-8 (or equivalent)
Spark plug gap: 0.028-0.032" (0.7-0.8 mm)
Tightening torque: 18.4 ft. lbs. (25 Nm)
WARNING!
The distributor ignition system operates at very high voltages. Special safety precautions must be followed to
prevent injury. Always turn the ignition off when:
Replacing distributor ignition components e.g. plugs, coil, etc.
Do not touch any part of the distributor ignition system while the engine is running. This may result in unintended
movements and body injury.
Front suspension
Spring strut suspension with integrated shock absorbers and control arms linked to the support frame. Power-assisted
rack and pinion steering. Safety type steering column.
The alignment specifications apply to an unladen car but include fuel, coolant and spare wheel.
Toe-in measured on the wheel rims: 2.3 mm +/ 0.8 mm
Toe-in measured on tire sides: 2.8 +/ 0.9 mm
Rear suspension
Individual rear wheel suspension with longitudinal support arms, double link arms and track rods.
ProCarManuals.com
Page 83 of 109

Toe-in measured on the tire sides: 1.9 mm +/ 1.9 mm
Vehicle loading
The tires on your Volvo should perform to specifications at all normal loads when inflated as recommended on the tire
information label. The label is located on the inside of the fuel filler door and lists vehicle design limits. Do not load
your car beyond the load limits indicatedWARNING!
Improperly inflated tires will reduce tire life, adversely affect vehicle handling and can possibly lead to failure
resulting in loss of vehicle control without prior warning.
All specifications are subject to change without prior notice.
pg. 133 Electrical system
Electrical system
12 Volt, negative ground.
Voltage-controlled generator. Single-wire system with chassis and engine used as conductors. Grounded on chassis.
Battery
Voltage: 12 Volt, capacity: 600 A/115 min. reverse capacity
The battery contains corrosive and poisonous acids. It is of the utmost importance that old batteries are disposed of
correctly. Your Volvo retailer can assist you in this matter.
Generator
Rated output: max. current: 140 A
Starter motor:
Output: 1.7 kW
Bulbs
Bulb US no.Power Socket
Headlights
High beam H755W -
Low beam H755W -
Front parking lights 5WW 2.1x9.5d
Front direction indicators -21 W BAU 15d
Front fog lights H155 W -
Side marker lights -3 W W2.1x9.5d
Rear direction indicators -21W BAU 15 s
Tail lights 675W/4cp BA 15 s
Brake lights 115621W/32cp BA 15 s
Backup lights 115621W/32cp BA 15 s
Rear fog light 115621W/32cp BA 15 s
License plate light -5 W W 2.1x9.5d
ProCarManuals.com
Page 96 of 109

Repeat steps 3 and 4 to program the other two transceiver buttons.
If, after several attempts, you are unable to successfully train the HomeLink® Universal Transceiver to learn your
hand -held transmitter's signal, contact HomeLink® toll-free 1-800-355-3515 (Internet: www.HomeLink.com
).
pg. 152 HomeLink® Universal Transceiver (option)
WARNING!
If you use HomeLink® to open a garage door or gate, be sure no one is near the gate or door while it is in motion.
Do not use the HomeLink® Universal Transceiver with any garage door opener that lacks safety "stop" and
"reverse" features as required by federal safety standards. (This includes any garage door opener model
manufactured before April 1, 1982) A garage door opener that cannot "detect" an object, signalling the door to
"stop" and "reverse" does not meet current federal safety standards. Using a garage door opener without these
features increases the risk of serious injury or death. For more information on this matter, call toll-free 1-800-355-
3515 (Internet: www.HomeLink.com
).
NOTE - Canadian residents:
During programming, your hand -held transmitter may automatically stop transmitting. To successfully train
HomeLink®, continue to hold the HomeLink® button. At the same time, repeatedly press and hold your hand -held
transmitter's button at two-second intervals until HomeLink® has learned your transmitter's code. The HomeLink®
indicator light will flash first slowly, and then rapidly to indicate that the button has been successfully programmed.
Determining if your garage door uses a rolling code
Determine, in one of the following ways, if your garage door uses a rolling code system and is manufactured after
1996:
Refer to the garage door opener owner's manual for verification.
If your hand -held transmitter appears to program the HomeLink® Universal Transceiver but the programmed button
does not activate the garage door, your garage door opener may have a rolling code.
Press the programmed HomeLink® button. If the garage door opener has the rolling code feature, the HomeLink®
indicator light flashes rapidly and then glows steadily after approximately 2 seconds.
To train a rolling code garage door opener , follow these instructions after programming the desired transceiver
button according to "Programming the transceiver." The help of a second person may make training easier.
1. Locate the training button on the garage door opener motor head unit . The location and color of the training button
may vary. If you encounter difficulty, refer to the garage door opener owner's manual or call toll-free 1-800-355-3515
(Internet: www.HomeLink.com
).
2. Press the "training" button on the garage door opener motor head unit until the "training" light comes on.
3. Press and release the programmed HomeLink® button. Press and release the programmed HomeLink® button a
second time to complete the training process.
Some garage door openers may require you to do this procedure a third time to complete the training.
The programmed button on your HomeLink® Universal Transceiver should now operate your garage door opener. The
original hand -held transmitter can also be used, as desired, to operate the garage door.
The remaining two HomeLink® buttons can be programmed in the same way. In the event of any problems in
ProCarManuals.com
Page 98 of 109
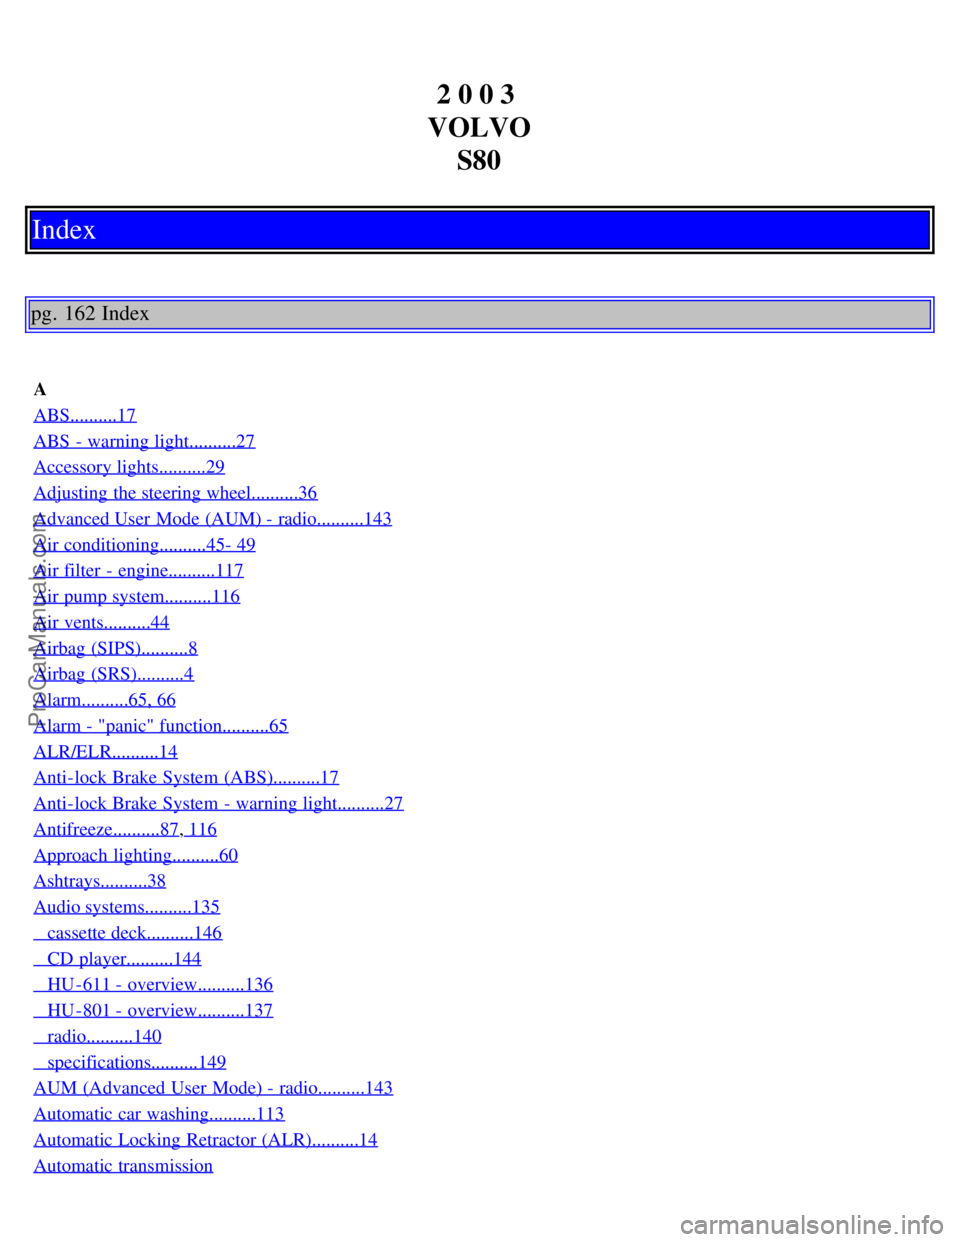
2 0 0 3
VOLVO S80
Index
pg. 162 Index
A
ABS..........17
ABS - warning light..........27
Accessory lights..........29
Adjusting the steering wheel..........36
Advanced User Mode (AUM) - radio..........143
Air conditioning..........45- 49
Air filter - engine..........117
Air pump system..........116
Air vents..........44
Airbag (SIPS)..........8
Airbag (SRS)..........4
Alarm..........65, 66
Alarm - "panic" function..........65
ALR/ELR..........14
Anti-lock Brake System (ABS)..........17
Anti-lock Brake System - warning light..........27
Antifreeze..........87, 116
Approach lighting..........60
Ashtrays..........38
Audio systems..........135
cassette deck..........146
CD player..........144
HU -611 - overview..........136
HU -801 - overview..........137
radio..........140
specifications..........149
AUM (Advanced User Mode) - radio..........143
Automatic car washing..........113
Automatic Locking Retractor (ALR)..........14
Automatic transmission
ProCarManuals.com