2003 VOLVO S80 clock
[x] Cancel search: clockPage 3 of 109

12 mph (20 km/h). The brake pedal will pulsate several times and a sound may be audible from the ABS control
module. This is normal.
Fuel filler door
The fuel filler door, located on the right rear fender, is connected to your car's central locking system.
Press the button on the light switch panel (see page 32
) when the car is at a standstill to unlock the fuel filler door.
Please note that the fuel filler door will remain unlocked until the car begins to move forward.
An audible click will be heard when the fuel filler door relocks.
Fuel filler cap
After refueling, close the fuel filler cap by turning it clockwise until it clicks into place If this cap is not closed tightly
or if the engine is running when the car is refueled, the Malfunction Indicator Lamp ("Check Engine" light) may
indicate a fault.
Important
Before you operate your car for the first time, please familiarize yourself with the new-engine oil consumption
information on page 120
. You should also be familiar with the information in the chapters one, two and four of
this manual.
Information contained in the balance of the manual is extremely useful and should be read after operating the
vehicle for the first time.
The manual is structured so that it can be used for reference. For this reason, it should be kept in the car for
ready access.
Do not export your Volvo to another country before investigating that country's applicable safety and exhaust
emission requirements. In some cases it may be difficult or impossible to comply with these requirements.
Modifications to the emission control system(s) may render your Volvo not certifiable for legal operation in the
U.S., Canada and other countries.
All information, illustrations and specifications contained in this manual are based on the latest product
information available at the time of publication. Please note that some vehicles may be equipped differently,
depending on special legal requirements and that optional equipment described in this manual may not be
available in all markets.
Volvo reserves the right to make model changes at any time, or to change specifications or design, without
notice and without incurring obligation.
CALIFORNIA Proposition 65 Warning
WARNING! Engine exhaust, some of its constituents, and certain vehicle components contain or emit chemicals
known to the state of California to cause cancer, and birth defects or other reproductive harm. In addition, certain
fluids contained in vehicles and certain products of component wear contain or emit chemicals known to the State
of California to cause cancer, and birth defects or other reproductive harm.
Volvo and the environment
Volvo is committed to the well being of our customers. As a natural part of this commitment, we care about the
environment in which we all live. Caring for the environment means an everyday involvement in reducing our
environmental impact.
Volvo's environmental activities are based on a holistic view, which means we consider the overall environmental
ProCarManuals.com
Page 19 of 109

A
Temperature gauge25
Speedometer25
Odometer25
Trip odometer25
Warning lights25
Text window28
Tachometer25
Clock25
Ambient temperature sensor25
Fuel gauge25
B
Hazard warning flashers37
C
Audio system135
D
Electronic climate control45
Heated seats (option)37
Heated rear window/rearview mirrors37
E
Steering wheel adjustment36
Airbag4
Cruise control31
Windshield wipers/washer35
Turn signal lever34
Trip computer30
Audio system controls139
F
High/low beam headlights32
Parking lights32
Fog lights32
ProCarManuals.com
Page 20 of 109

Instrument panel lighting32
Button to unlock fuel filler door32
pg. 25 Instrument panel
1 Turn signals
2 Text window
3 Temperature gauge
The pointer should be approximately midway on the gauge when driving.
Do not drive the car if the warning light is on. The text window will provide you with additional information.
If the engine temperature remains high, check coolant level - see page 116
.
4 Trip odometer/reset button
The trip odometer is used for measuring shorter distances. The last digit indicates 1/10 mile/kilometer. Press the button
quickly to toggle between trip odometers 1 and 2. Hold in the button for more than 2 seconds to reset.
5 Odometer
6 Speedometer
7 General warning light (see page 26
).
8 High beam indicator light
9 Tachometer
Indicates engine speed in thousands of rpm. Do not drive for long with the needle in the red section. The engine has an
built-in function preventing too high an engine speed. When this function operates, you may discern some pulsation,
which is normal.
10 Gear and driving mode indicator
The currently selected driving mode is displayed here. If you use the Geartronic function on the automatic
transmission, the currently selected gear will be displayed.
11 Ambient temperature indicator
This sensor indicates the air temperature outside your car. A "snowflake" symbol in the text window is displayed when
the temperature is in the range of 23 - 36° F (-5 - +2° C).
Please note that this symbol does not indicate a fault with your car.
At low speeds or when the car is not moving, the temperature readings may be slightly higher than the actual ambient
temperature.
12 Clock/reset button
Turn the button to adjust the clock.
ProCarManuals.com
Page 28 of 109

Press the switch to turn the air conditioning on or off. The "ON" or "OFF" LED will light up to indicate if the system
is switched on or off. Other functions will still be regulated automatically (if the AUTO switch is on).
The air conditioning functions only at temperatures above 32° F
(0° C).
While the Defroster function is selected, the air conditioning is temporarily activated to dehumidify the air, even if
you have manually switched the air conditioning off. This will only function if the blower is not switched off.
Blower control
Turn the control clockwise to increase or counterclockwise to decrease the blower speed. Pressing the AUTO switch
will automatically regulate blower speed and override manual adjustment.
NOTE: Turning the blower control counterclockwise as far as possible (an LED next to the control will light up) will
turn both the blower and the air conditioning off.
pg. 48 Climate control system - general information
Condensation on the inside of the windows
Keeping the insides of the windows clean will help reduce the amount of condensation that forms on the windows. Use
a commercial window cleaning agent to clean the windows.
Ice and snow
Always keep the air intake grille at the base of the windshield free of snow.
Air cabin filter
Replace the air cabin filter with a new one at the recommended intervals. The filter should be replaced more often
when driving under dirty and dusty conditions. The filter cannot be cleaned and therefore should always be replaced
with a new one.
Sensors
The sunlight sensor on the dashboard and passenger compartment temperature sensor in the ECC control panel should
not be covered in any way as this could cause incorrect information to be sent to the ECC system.
Parking the car in warm weather
If your car has been parked in the sun in warm weather, opening the windows and sun roof (option) for several
minutes before driving will help release the warm air from the passenger compartment. When the engine is running,
close the windows and sun roof and use the recirculation function for several minutes to enable the air conditioning to
cool the compartment as quickly as possible.
Windows and optional sun roof
The ECC system will function best if the windows and optional sun roof are closed. If you drive with the sun roof
open, we recommend that you manually adjust the temperature and blower control (the LED in the AUTO switch
should be off).
Acceleration
The air conditioning is momentarily disengaged during full-throttle acceleration.
ECC maintenance
ProCarManuals.com
Page 46 of 109

Insert your master key into the glove compartment. Turn it 90 degrees clockwise and remove the key. The glove
compartment cannot be unlocked with the service key.
Insert your master key into the ignition and turn it to position II.
Press the trunk lock button in the center console. An LED and a message in the text window will show that the trunk
lock has be activated.
Turn off the car and remove the master key.
With the trunk lock activated, neither the service key nor the remote control will open the trunk.
* The position of this button may vary, depending on the specifications of your car.
pg. 65 Alarm
Alarm
The alarm is automatically set (armed) whenever you lock your car.
When armed, the alarm continuously monitors a number of points on the car. The following conditions will set off the
alarm:
The hood is forced opened.
The trunk is forced opened.
A door is forced opened.
The ignition switch is tampered with.
If there is movement in the passenger compartment (if the car is equipped with the optional movement sensor).
The car is lifted or towed (if the car is equipped with the optional inclination sensor).
The battery is disconnected (while the alarm is set).
Arming the alarm
Press the LOCK button on the remote control, lock the car using the key in the driver's door or press the central lock
button on one of the front doors with the door open. One long flash of the turn signals will confirm that the alarm is
set.
Disarming the alarm
Press the UNLOCK button on the remote control or unlock the doors with the key.
Turning off (stopping) the alarm
If the alarm is sounding, it can be stopped by pressing the UNLOCK button on the remote control or by unlocking the
driver's door with the key.
Visual alarm signal
The visual alarm signal is given by flashing all turn signals and turning on the interior lighting for approximately 5
minutes.
Audible alarm signal
An audible alarm signal is given by a battery powered siren. One alarm cycle lasts for 25 seconds.
"Panic" function
In an emergency situation, this feature can be used to attract attention.
Activate the "panic" function by pressing the red button on the remote control (see illustration on page 61
) for at least
3 seconds or by pressing this button twice within 3 seconds. The turn signals will flash, the interior lights will go on
and the car's horn will sound.
The function can be turned off by pressing any of the buttons on the remote control or will stop automatically
after 25 seconds. When a button is pressed, there is a 5 second delay before the panic alarm is deactivated.
ProCarManuals.com
Page 51 of 109

standing upwind away from the filler nozzle while refueling
refueling only at gas stations with vapor recovery systems that fully seal the mouth of the filler neck during refueling
wear neoprene gloves while handling a fuel filler nozzle.
Use of Additives
With the exception of gas line antifreeze during winter months, do not add solvents, thickeners, or other store -bought
additives to your car's fuel, cooling, or lubricating systems. Overuse may damage your engine, and some of these
additives contain organically volatile chemicals. Do not needlessly expose yourself to these chemicals.
pg. 72 Refueling
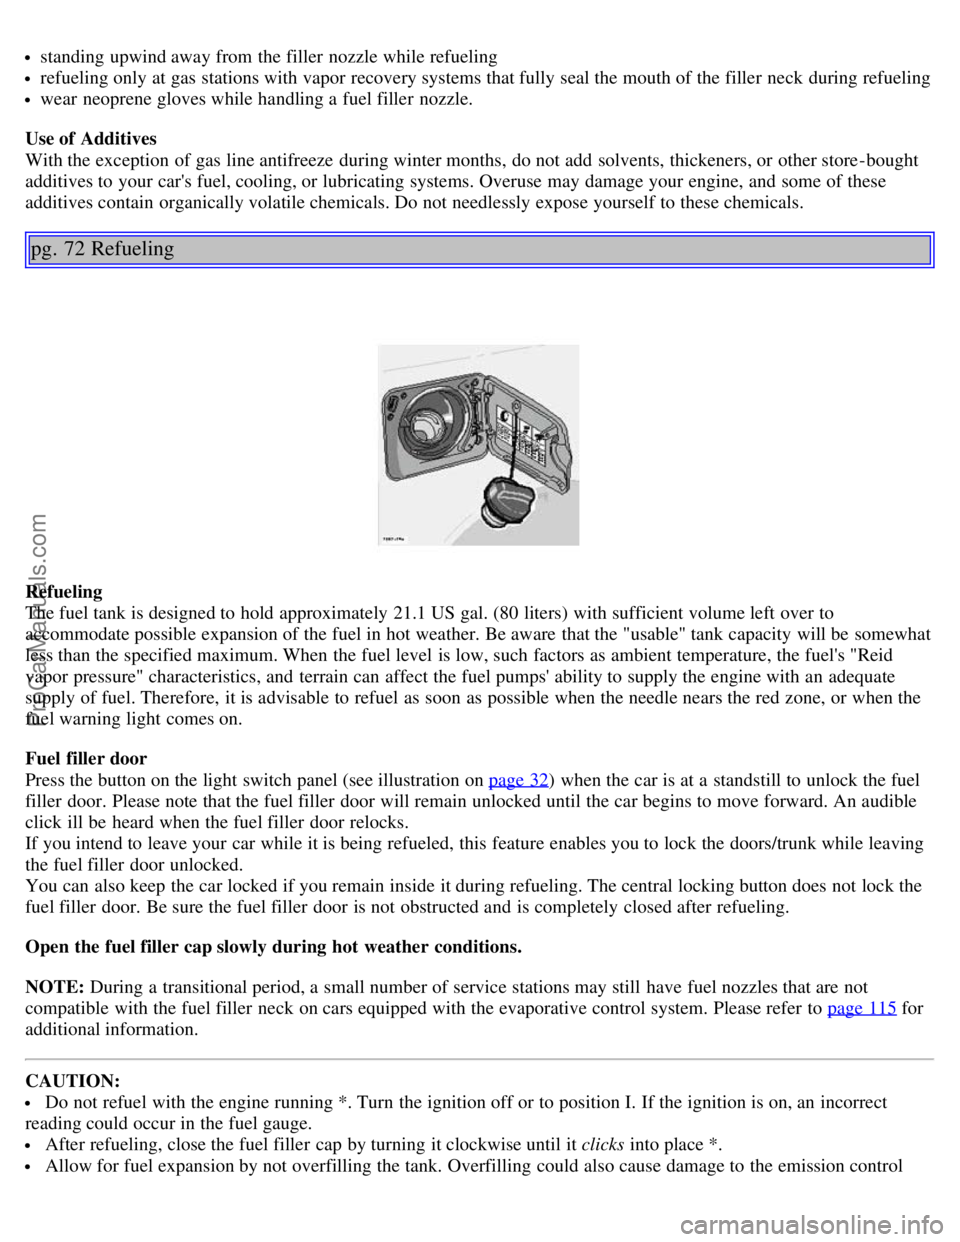
Refueling
The fuel tank is designed to hold approximately 21.1 US gal. (80 liters) with sufficient volume left over to
accommodate possible expansion of the fuel in hot weather. Be aware that the "usable" tank capacity will be somewhat
less than the specified maximum. When the fuel level is low, such factors as ambient temperature, the fuel's "Reid
vapor pressure" characteristics, and terrain can affect the fuel pumps' ability to supply the engine with an adequate
supply of fuel. Therefore, it is advisable to refuel as soon as possible when the needle nears the red zone, or when the
fuel warning light comes on.
Fuel filler door
Press the button on the light switch panel (see illustration on page 32
) when the car is at a standstill to unlock the fuel
filler door. Please note that the fuel filler door will remain unlocked until the car begins to move forward. An audible
click ill be heard when the fuel filler door relocks.
If you intend to leave your car while it is being refueled, this feature enables you to lock the doors/trunk while leaving
the fuel filler door unlocked.
You can also keep the car locked if you remain inside it during refueling. The central locking button does not lock the
fuel filler door. Be sure the fuel filler door is not obstructed and is completely closed after refueling.
Open the fuel filler cap slowly during hot weather conditions.
NOTE: During a transitional period, a small number of service stations may still have fuel nozzles that are not
compatible with the fuel filler neck on cars equipped with the evaporative control system. Please refer to page 115
for
additional information.
CAUTION:
Do not refuel with the engine running *. Turn the ignition off or to position I. If the ignition is on, an incorrect
reading could occur in the fuel gauge.
After refueling, close the fuel filler cap by turning it clockwise until it clicks into place *.
Allow for fuel expansion by not overfilling the tank. Overfilling could also cause damage to the emission control
ProCarManuals.com
Page 63 of 109

cornering (turning) traction.
TEMPERATURE
The temperature grades are AA (the highest), A, B, and C, representing the tire's resistance to the generation of heat
and its ability to dissipate heat when tested under controlled conditions on a specified indoor laboratory test wheel.
Sustained high temperature can cause the material of the tire to degenerate and reduce tire life, and excessive
temperature can lead to sudden tire failure. The grade C corresponds to a minimum level of performance that all
passenger car tires must meet under the Federal Motor Safety Standard No. 109. Grades B and A represent higher
levels of performance on the laboratory test wheel than the minimum required by law.
WARNING!
The temperature grade for this tire is established for a tire that is properly inflated and not overloaded. Excessive
speed, under-inflation, or excessive loading, either separately or in combination, can cause heat buildup and possible
tire failure.
pg. 96 Changing wheels
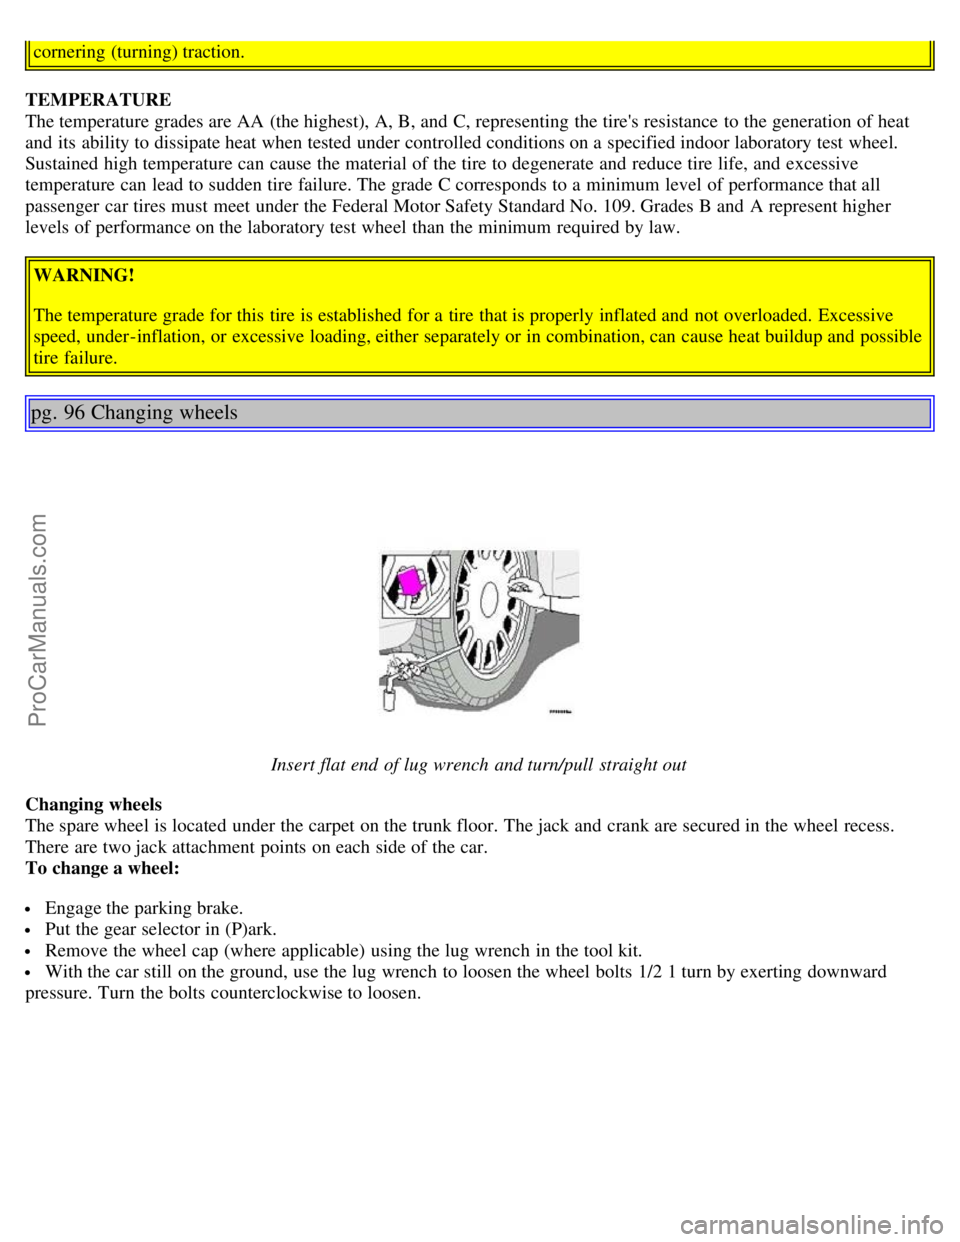
Insert flat end of lug wrench and turn/pull straight out
Changing wheels
The spare wheel is located under the carpet on the trunk floor. The jack and crank are secured in the wheel recess.
There are two jack attachment points on each side of the car.
To change a wheel:
Engage the parking brake.
Put the gear selector in (P)ark.
Remove the wheel cap (where applicable) using the lug wrench in the tool kit.
With the car still on the ground, use the lug wrench to loosen the wheel bolts 1/2 1 turn by exerting downward
pressure. Turn the bolts counterclockwise to loosen.
ProCarManuals.com
Page 72 of 109

To remove a defective bulb:
Switch off the ignition.
Open the hood.
Remove the plastic cover over the bulb (1) by turning it counterclockwise.
Remove the connector (2).
Loosen the retaining spring (3) by first moving it to the right and then moving it down, out of the way.
Pull out the defective bulb. Note the position of the guide lug on the base of the bulb (4).
Installing a new bulb
To install a new bulb:
Insert the new bulb, without touching the glass, with the guide lug upward (1). The bulb will only seat properly in
this position.
Move the retaining spring up and push it slightly to the left until it seats properly (2).
Press the connector into place on the bulb (3).
Reinstall the plastic cover and turn it clockwise until it is correctly in place (4). "TOP" must be upward.
NOTE: If the vertical aim of your headlights needs to be adjusted for any reason (e.g., towing a trailer for extended
periods), this should be done by an authorized Volvo retailer.
pg. 105 Replacing bulbs
Front parking light
Front parking lights
Switch off the ignition.
Remove the plastic cover over it the high beam bulb by turning it counterclockwise.
ProCarManuals.com