Page 212 of 340

03 SIENNA_U (L/O 0207)
2082003 MY SIENNA (OM45410U)
The power outlets are designed for
power supply for car accessories.
The key must be in the “ACC” or “ON”
position for the power outlets to be used.
NOTICE
�To prevent the fuse from being
blown, do not use the electricity
over the total vehicle capacity of
12V/120W (front and rear outlets to-
gether).
� To prevent the battery from being
discharged, do not use the power
outlets longer than necessary when
the engine is not running.
� Close the power outlet lids when
the power outlets are not in use.
Inserting a foreign object other than
the appropriate plug that fits the
outlet, or allowing any liquid into
the outlet may cause electrical fail-
ure or short circuits.
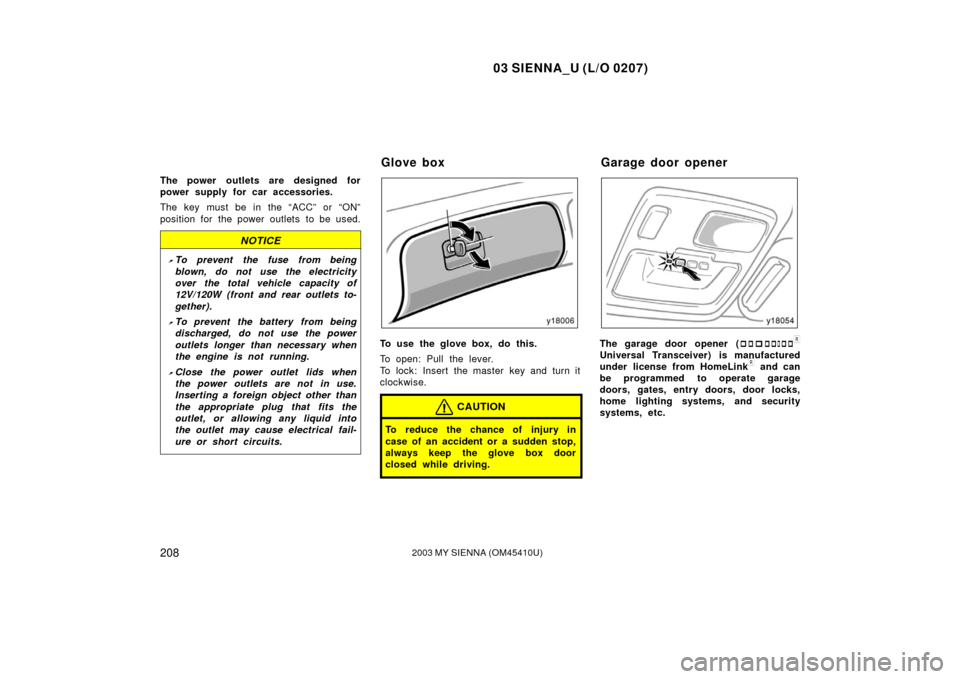
To use the glove box, do this.
To open: Pull the lever.
To lock: Insert the master key and turn it
clockwise.
CAUTION
To reduce the chance of injury in
case of an accident or a sudden stop,
always keep the glove box door
closed while driving.
The garage door opener ( HomeLink�
Universal Transceiver) is manufactured
under license from HomeLink� and can
be programmed to operate garage
doors, gates, entry doors, door locks,
home lighting systems, and security
systems, etc.
Glove box Garage door opener
Page 240 of 340

03 SIENNA_U (L/O 0207)
2362003 MY SIENNA (OM45410U)
�Do not drive with objects left on
top of the instrument panel. They
may interfere with the driver’s field
of view. Or they may move during
sharp vehicle acceleration or turn-
ing, and impair the driver’s control
of the vehicle. In an accident they
may injure the vehicle occupants.
NOTICE
Do not load the vehicle beyond the
vehicle capacity weight specified in
Section 8.
The roof luggage carrier consists of
roof rails (1) attached to the roof and
sliding cross rails (2).
To adjust the positions of cross rails, do
this.1. Turn the knobs counterclockwise to loosen the cross rails.
2. Slide the cross rails to the desired position for loading the luggages of
various sizes.
3. After adjusting, be sure to tighten the cross rails by turning knobs clockwise.
Follow the manufacture’s instructions and
precautions when installing the attach-
ments or their equivalent.
CAUTION
When you load cargo on the roof lug-
gage carrier, observe the following:
�Place the cargo so that its weight
is distributed evenly between the
front and rear axles.
�If loading long or wide cargo, never
exceed the vehicle overall length or
width. (See “Dimensions and
weight” in Section 8 for information
on your vehicle overall length and
width.)
�Before driving, make sure the cargo
is securely fastened on the roof
luggage carrier.
�Avoid sudden starts, sharp turns or
sudden braking.
�If driving for a long distance, on
rough roads, or at high speeds,
stop the vehicle now and then dur-
ing the trip to make sure the cargo
remains in its place.
�Do not exceed 50 kg (110 lb.) cargo
weight on the roof rails. However,
if the allowable cargo weight of the
cross rails is under 50 kg (110 lb.)
observe the load limit.
Roof luggage carrier
Page 265 of 340

03 SIENNA_U (L/O 0207)
2612003 MY SIENNA (OM45410U)
1. Get the required tools and sparetire.
1. Jack
2. Jack handle
3. Wheel nut wrench
4. Spare tire
To prepare yourself for an emergency, you
should fam iliarize yourself with the use of
the jack, each of the tools and their stor-
age locations.
Turn the jack joint by hand.
To remove: Turn the joint in direction 1
until the jack is free.
To store: Turn the joint in direction 2 until
the jack is firmly secured to prevent it
flying forward during a collision or s udden
braking.To remove the spare tire;
Open the back door and you will find the
spare tire clamp bolt near the back door
latch.
1. Loosen the spare tire clamp bolt by turning it counterclockwise with the
wheel nut wrench.
2. After the tire is lowered completely to the ground, remove the holding brack-
et.
Compact spare tire—
When storing the spare tire, put it in place
with the inner side of the wheel facing up.
Except compact spare tire—
When storing the spare tire, put it in place
with the outer side of the wheel facing up.
Page 267 of 340
03 SIENNA_U (L/O 0207)
2632003 MY SIENNA (OM45410U)
3. Remove the wheel ornament.
Pry off the wheel ornament, using the
beveled end of the wheel nut wrench as
shown.
CAUTION
Do not try to pull off the ornament by
hand. Take due care in handling the
ornament to avoid unexpected person-
al injury.
4. Loosen all the wheel nuts.
Always loosen the wheel nuts before rais-
ing the vehicle.
Turn the wheel nuts counterclockwise to
loosen. To get maximum leverage, fit the
wrench to the nut so that the handle is
on the right side, as shown above. Grab
the wrench near the end of the handle
and pull up on the handle. Be careful that
the wrench does not slip off the nut.
Do not remove the nuts yet—just unscrew
them about one�half turn.
CAUTION
Never use oil or grease on the bolts
or nuts. The nuts may loose and the
wheels may fall off, which could cau-
se a serious accident.
—Loosening wheel nuts
Page 268 of 340
03 SIENNA_U (L/O 0207)
2642003 MY SIENNA (OM45410U)
5. Position the jack at the correct jackpoint as shown.
Make sure the jack is positioned on a
level and solid place.
CAUTION
When jacking up the vehicle, turn off
the power sliding door system and
close the sliding door completely.
6. After making sure that no one is in the vehicle, raise it high enough so
that the spare tire can be installed.
Remember you will need more ground
clearance when putting on the spare tire
than when removing the flat tire.
To raise the vehicle, insert the jack handle
into the jack (it is a loose fit) and turn it
clockwise. As the jack touches the vehicle
and begins to lift, double�check that it is
properly positioned.
CAUTION
Never get under the vehicle when the
vehicle is supported by the jack
alone.
—Positioning the jack —Raising your vehicle
Page 270 of 340

03 SIENNA_U (L/O 0207)
2662003 MY SIENNA (OM45410U)
CAUTION
Never use oil or grease on the bolts
or nuts. Doing so may lead to over-
tightening the nuts and damaging the
bolts. The nuts may loose and the
wheels may fall off, which could cau-
se a serious accident. If there is oil
or grease on any bolt or nut, clean
it.
9. Lower the vehicle completely andtighten the wheel nuts.
Turn the jack handle counterclockwise to
lower the vehicle.
Use only the wheel nut wrench to tighten
the nuts. Do not use other tools or any
additional leverage other than your hands,
such as a hammer, pipe or your foot.
Make sure the wrench is securely en-
gaged over the nut.
Tighten each nut a little at a time in the
order shown. Repeat the process until all
the nuts are tight.
CAUTION
�When lowering the vehicle, make
sure all portions of your body and
all other persons around will not be
injured as the vehicle is lowered to
the ground.
�Have the wheel nuts tightened by
torque wrench at 104 N·m (10.5
kgf·m, 77 ft·lbf), as soon as pos-
sible after changing wheels. Other-
wise, the nuts may loosen and the
wheels may fall off, which could
cause a serious accident.
—Lowering your vehicle
Page 305 of 340

03 SIENNA_U (L/O 0207)
3012003 MY SIENNA (OM45410U)
If hot
O.K.If cold
O.K.
Close
If hot
add If cold
add
Open
Check the fluid level through the reser-
voir. If necessary, add automatic trans-
mission fluid DEXRON
�II or III.
If the vehicle has been driven around 80
km/h (50 mph) for 20 minutes (a little
more in frigid temperatures), the fluid is
hot (60 �C—80 �C or 140 �F—175 �F). You
may also check the level when the fluid
is cold (about room temperature,
10 �C—30 �C or 50 �F—85 �F) if the engine
has not been run for about five hours. Clean all dirt from outside of the reservoir
tank and look at the fluid level. If the fluid
is cold, the level should be in the “COLD”
range. Similarly, if it is hot, the fluid level
should be in the “HOT” range. If the level
is at the low side of either range, add
automatic transmission fluid DEXRON
�II
or III to bring the level within the range.
To remove the reservoir cap, turn it coun-
terclockwise and lift up. To reinstall it,
turn it clockwise. After replacing the reser-
voir cap, visually check the steering box
case, vane pump and hose connections
for leaks or damage.
CAUTION
The reservoir tank may be hot so be
careful not to burn yourself.
NOTICE
Avoid overfilling, or the power steer-
ing could be damaged.
Keep your tire pressures at the proper
level.
The recommended cold tire pressures, tire
size and the vehicle capacity weight are
given in Section 8. They are also on the
tire pressure label as shown.
You should check the tire pressures every
two weeks, or at least once a month. And
don’t forget the spare!
Incorrect tire pressure may waste fuel,
reduce the comfort of driving, reduce tire
life and make your vehicle less safe to
drive.
Checking power steering fluid Checking tire pressure
Page 331 of 340

03 SIENNA_U (L/O 0207)
3272003 MY SIENNA (OM45410U)
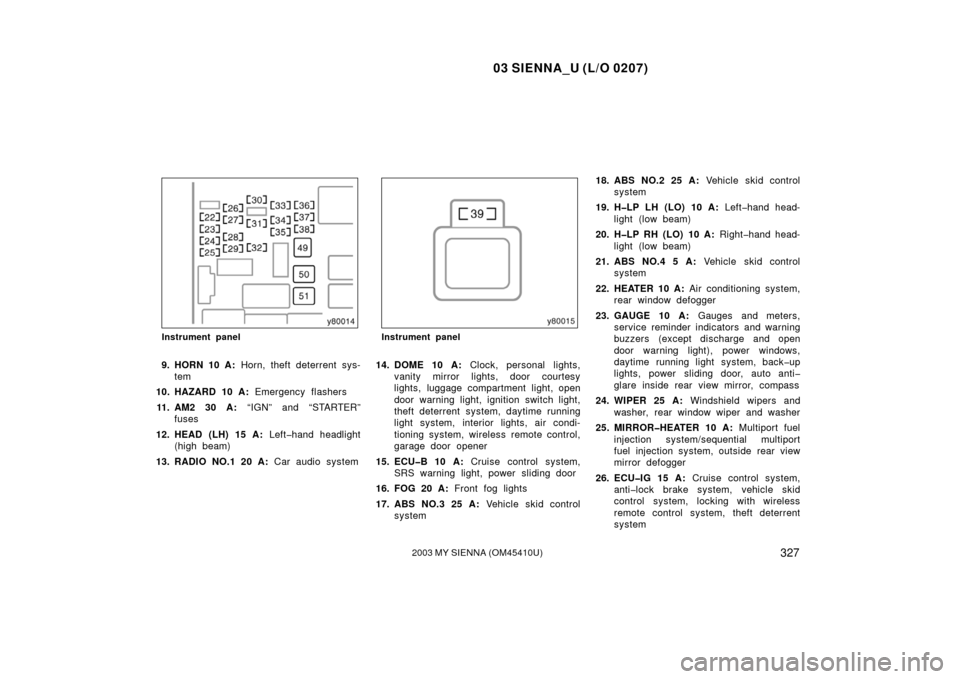
Instrument panel
9. HORN 10 A: Horn, theft deterrent sys-
tem
10. HAZARD 10 A: Emergency flashers
11. AM2 30 A: “IGN” and “STARTER”
fuses
12. HEAD (LH) 15 A: Left�hand headlight
(high beam)
13. RADIO NO.1 20 A: Car audio system
Instrument panel
14. DOME 10 A: Clock, personal lights,
vanity mirror lights, door courtesy
lights, luggage compartment light, open
door warning light, ignition switch light,
theft deterrent system, daytime running
light system, interior lights, air condi-
tioning system, wireless remote control,
garage door opener
15. ECU�B 10 A: Cruise control system,
SRS warning light, power sliding door
16. FOG 20 A: Front fog lights
17. ABS NO.3 25 A: Vehicle skid control
system 18. ABS NO.2 25 A:
Vehicle skid control
system
19. H�LP LH (LO) 10 A: Left�hand head-
light (low beam)
20. H�LP RH (LO) 10 A: Right�hand head-
light (low beam)
21. ABS NO.4 5 A: Vehicle skid control
system
22. HEATER 10 A: Air conditioning system,
rear window defogger
23. GAUGE 10 A: Gauges and meters,
service reminder indicators and warning
buzzers (except discharge and open
door warning light), power windows,
daytime running light system, back�up
lights, power sliding door, auto anti�
glare inside rear view mirror, compass
24. WIPER 25 A: Windshield wipers and
washer, rear window wiper and washer
25. MIRROR�HEATER 10 A: Multiport fuel
injection system/sequential multiport
fuel injection system, outside rear view
mirror defogger
26. ECU�IG 15 A: Cruise control system,
anti�lock brake system, vehicle skid
control system, locking with wireless
remote control system, theft deterrent
system