Page 277 of 373
’03 4Runner_U (L/O 0305)
271
2003 4RUNNER from Apr. ’03 Prod. (OM 35820U)
CAUTION
�If the total trailer weight exceeds
453 kg (1000 lb.), trailer brakes are
required.
�Never tap into your vehicle’s hy-
draulic system as it would lower its
braking effectiveness .
�Never tow a trailer without using a
safety chain securely attached to
both the trailer and the vehicle. If
damage occurs to the coupling unit
or hitch ball, there is danger of the
trailer wandering over into another
lane.
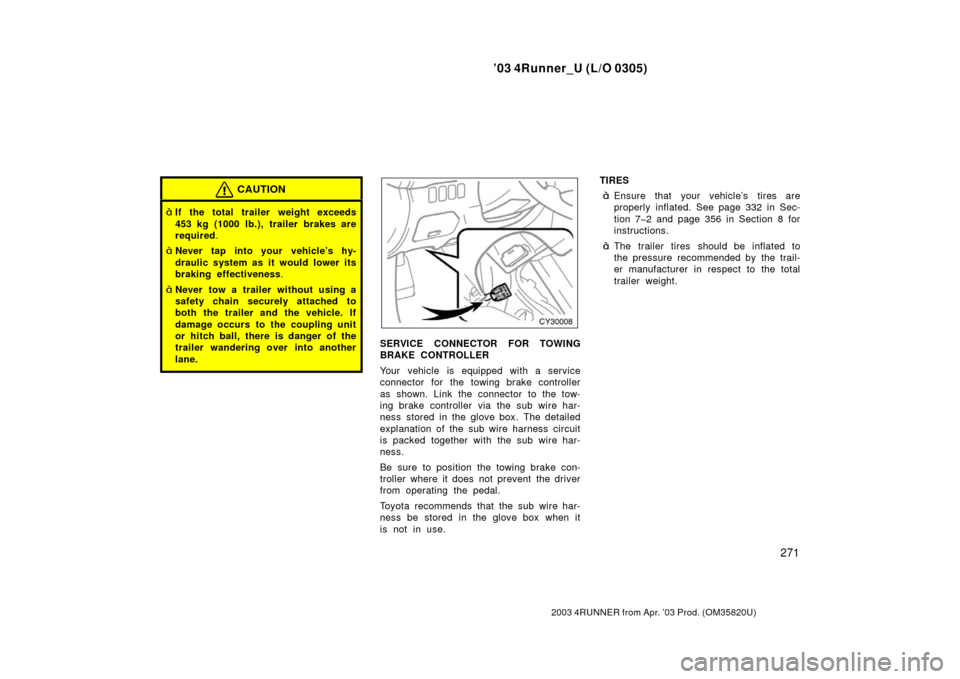
SERVICE CONNECTOR FOR TOWING
BRAKE CONTROLLER
Your vehicle is equipped with a service
connector for the towing brake controller
as shown. Link the connector to the tow-
ing brake controller via the sub wire har-
ness stored in the glove box. The detailed
explanation of the sub wire harness circuit
is packed together with the sub wire har-
ness.
Be sure to position the towing brake con-
troller where it does not prevent the driver
from operating the pedal.
Toyota recommends that the sub wire har-
ness be stored in the glove box when it
is not in use. TIRES
�Ensure that your vehicle’s tires are
properly inflated. See page 332 in Sec-
tion 7�2 and page 356 in Section 8 for
instructions.
�The trailer tires should be inflated to
the pressure recommended by the trail-
er manufacturer in respect to the total
trailer weight.
Page 279 of 373

’03 4Runner_U (L/O 0305)
273
2003 4RUNNER from Apr. ’03 Prod. (OM 35820U)
DISCONNECTING A TRAILER (models
with rear height control air suspension)
Stop your vehicle and a trailer in line and
perform the following:
1. Put the rear height control air suspen- sion in the “LO” (low) mode. (Make
sure the vehicle height is in the “LO”
(low) mode by pushing the height se-
lect switch on the “ �” side.)
2. Turn the ignition switch off or push the “HEIGHT CONTROL OFF” switch to
turn off the rear height control air sus-
pension.
3. Set the supporting leg of a trailer on the ground and raise the hitch by 100
mm (4 in.).
4. Turn the ignition switch on or push the “HEIGHT CONTROL OFF” switch to
turn on the rear height control air sus-
pension.
5. Wait for about 20 seconds until the rear vehicle height is lowered by the
automatic leveling function.
6. Make sure the hitch is disconnected. If not, raise the hitch higher and repeat
steps 2 through 5. 7. Move the vehicle forward in the “LO”
(low) mode where the hitch does not
touch anything in the “N” (normal)
mode.
8. Put the rear height control air suspen- sion in the “N” (normal) mode.
PRE�TOWING SAFETY CHECK
�Check that your vehicle remains level
when a loaded or unloaded trailer is
hitched. Do not drive if the vehicle has
an abnormal nose�up or nose�down
condition, and check for improper
tongue load, overload, worn suspension
or other possible causes.
�Make sure the trailer cargo is securely
loaded so that it cannot shift.
�Check that your rear view mirrors con-
form to any applicable federal, state/
provincial or local regulations. If not,
install the rear view mirrors required
for towing purpose. TRAILER TOWING TIPS
When towing a trailer, your vehicle will
handle differently than when not tow-
ing. The three main causes of vehicle�
trailer accidents are driver error, exces-
sive speed and improper trailer loading.
Keep these in mind when towing:
�Before starting out, check operation of
the lights and all vehicle�trailer connec-
tions. After driving a short distance,
stop and recheck the lights and con-
nections. Before actually towing a trail-
er, practice turning, stopping and back-
ing with a trailer in an area away from
traffic until you learn the feel.
�Backing with a trailer is difficult and
requires practice. Grip the bottom of
the steering wheel and move your hand
to the left to move the trailer to the
left. Move your hand to the right to
move the trailer to the right. (This pro-
cedure is generally opposite to that
when backing without a trailer.) Also,
just turn the steering wheel a little at
a time, avoiding sharp or prolonged
turning. Have someone guide you when
backing to reduce the risk of an acci-
dent.
Page 290 of 373
’03 4Runner_U (L/O 0305)
284
2003 4RUNNER from Apr. ’03 Prod. (OM 35820U)
1. Get the required tools and spare
tire.
1. Tool bag
2. Jack
To prepare yourself for an emergency, you
should fam iliarize yourself with the use of
the jack, each of the tools and their stor-
age locations.
When storing the tool bag, make sure it
is securely held by the tightening strap.Turn the jack joint by hand.
To remove: Turn the joint in direction 1
until the jack is free.
To store: Turn the joint in direction 2 until
the jack is firmly secured to prevent it
flying forward during a collision or s udden
braking.To remove the spare tire under the lug-
gage compartment:
1. Put a jack handle and jack handle ex- tensions together as shown in the il-
lustration.
1. Jack handle extensions
2. Jack handle
—Required tools and spare
tire
Page 291 of 373
’03 4Runner_U (L/O 0305)
285
2003 4RUNNER from Apr. ’03 Prod. (OM 35820U)
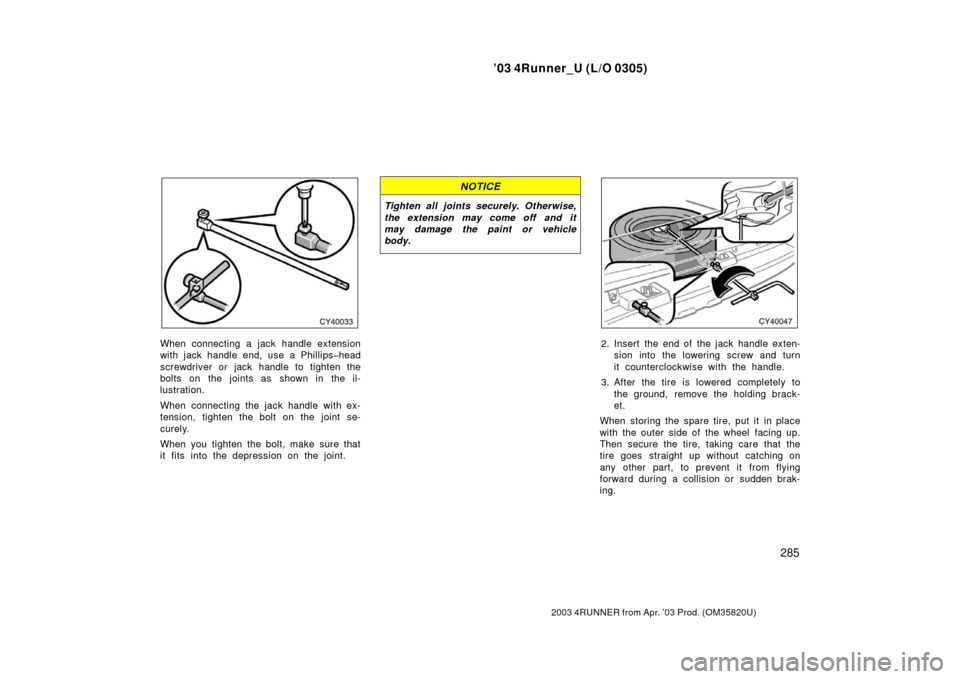
When connecting a jack handle extension
with jack handle end, use a Ph illips�head
screwdriver or jack handle to tighten the
bolts on the joints as shown in the il-
lustration.
When connecting the jack handle with ex-
tension, tighten the bolt on the joint se-
curely.
When you tighten the bolt, make sure that
it fits into the depression on the joint.
NOTICE
Tighten all joints securely. Otherwise,
the extension may come off and it
may damage the paint or vehicle
body.
2. Insert the end of the jack handle exten- sion into the lowering screw and turn
it counterclockwise with the handle.
3. After the tire is lowered completely to the ground, remove the holding brack-
et.
When storing the spare tire, put it in place
with the outer side of the wheel facing up.
Then secure the tire, taking care that the
tire goes straight up without catching on
any other part, to prevent it from flying
forward during a collision or s udden brak-
ing.
Page 294 of 373
’03 4Runner_U (L/O 0305)
288
2003 4RUNNER from Apr. ’03 Prod. (OM 35820U)
When connecting a jack handle extension
with jack handle end, use a Ph illips�head
screwdriver or jack handle to tighten the
bolts on the joints as shown in the il-
lustration.
When connecting the jack handle with ex-
tension, tighten the bolt on the joint se-
curely.
When you tighten the bolt, make sure that
it fits into the depression on the joint.
NOTICE
Tighten all joints securely. Otherwise,
the extension may come off and it
may damage the paint or vehicle
body.
Front of vehicle
6. After making sure that no one is in the vehicle, as the jack touches the
vehicle and begins to fit, double�
check that it is properly positioned.
Rear side only—
When positioning the jack under the rear
axle housing, make sure the groove on
the top of the jack fits with the rear axle
housing.
—Raising your vehicle
Page 296 of 373
’03 4Runner_U (L/O 0305)
290
2003 4RUNNER from Apr. ’03 Prod. (OM 35820U)
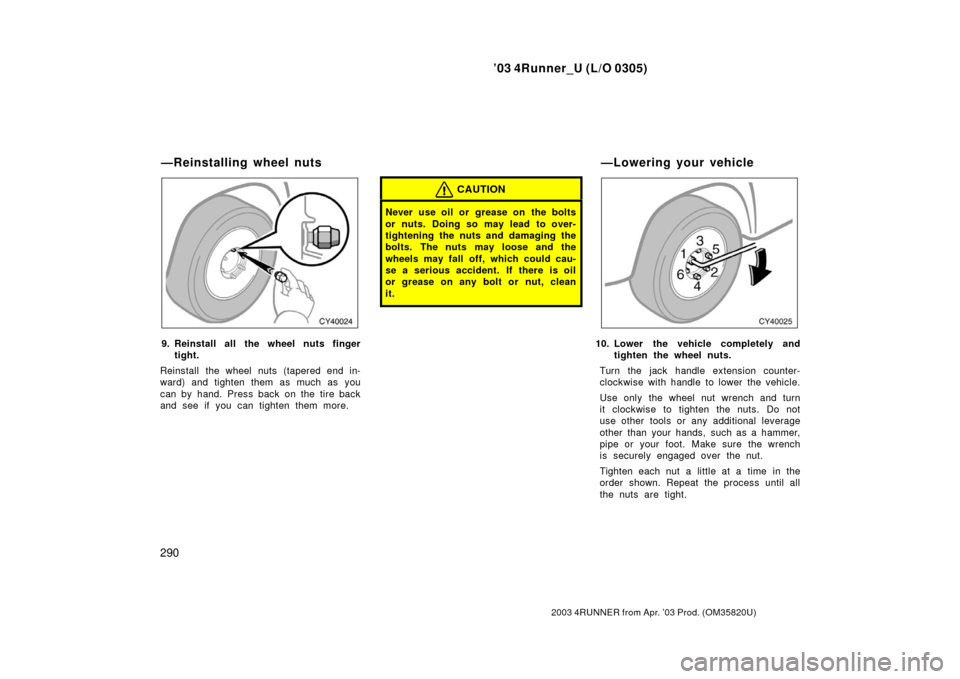
9. Reinstall all the wheel nuts finger
tight.
Reinstall the wheel nuts (tapered end in-
ward) and tighten them as much as you
can by hand. Press back on the tire back
and see if you can tighten them more.
CAUTION
Never use oil or grease on the bolts
or nuts. Doing so may lead to over-
tightening the nuts and damaging the
bolts. The nuts may loose and the
wheels may fall off, which could cau-
se a serious accident. If there is oil
or grease on any bolt or nut, clean
it.
10. Lower the vehicle completely and tighten the wheel nuts.
Turn the jack handle extension counter-
clockwise with handle to lower the vehicle.
Use only the wheel nut wrench and turn
it clockwise to tighten the nuts. Do not
use other tools or any additional leverage
other than your hands, such as a hammer,
pipe or your foot. Make sure the wrench
is securely engaged over the nut.
Tighten each nut a little at a time in the
order shown. Repeat the process until all
the nuts are tight.
—Reinstalling wheel nuts —Lowering your vehicle
Page 297 of 373
’03 4Runner_U (L/O 0305)
291
2003 4RUNNER from Apr. ’03 Prod. (OM 35820U)
CAUTION
�When lowering the vehicle, make
sure all portions of your body and
all other persons around will not be
injured as the vehicle is lowered to
the ground.
�Have the wheel nuts tightened with
torque wrench to 110 N·m (11.5
kgf·m, 83 ft·lbf), as soon as pos-
sible after changing wheels. Other-
wise, the nuts may loosen and the
wheels may fall off, which could
cause a serious accident.
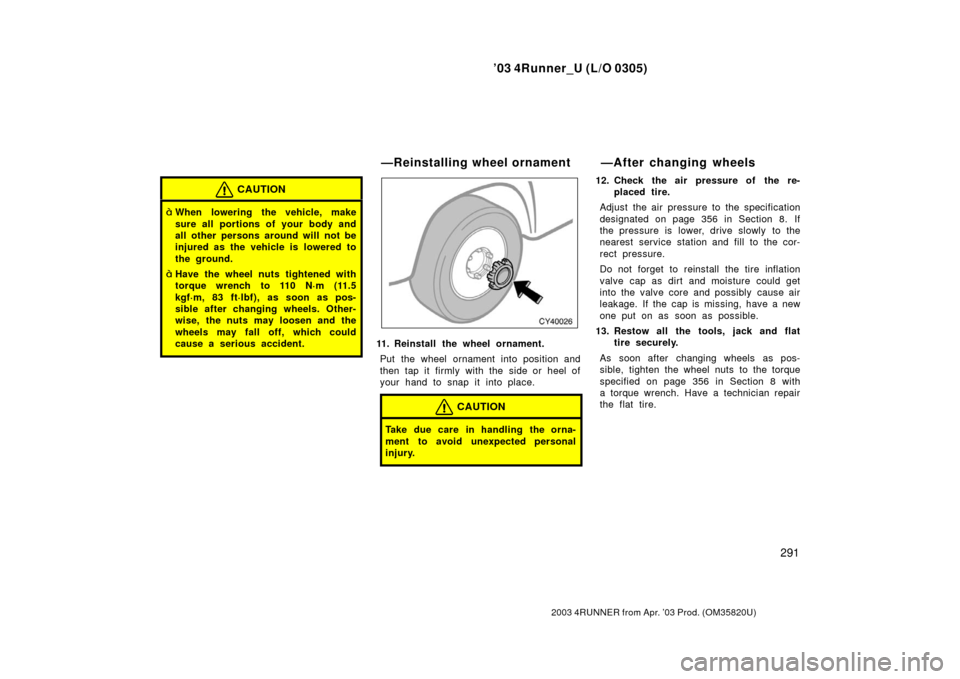
11. Reinstall the wheel ornament.
Put the wheel ornament into position and
then tap it firmly with the side or heel of
your hand to snap it into place.
CAUTION
Take due care in handling the orna-
ment to avoid unexpected personal
injury.
12. Check the air pressure of the re- placed tire.
Adjust the air pressure to the specification
designated on page 356 in Section 8. If
the pressure is lower, drive slowly to the
nearest service station and fill to the cor-
rect pressure.
Do not forget to reinstall the tire inflation
valve cap as dirt and moisture could get
into the valve core and possibly cause air
leakage. If the cap is missing, have a new
one put on as soon as possible.
13. Restow all the tools, jack and flat tire securely.
As soon after changing wheels as pos-
sible, tighten the wheel nuts to the torque
specified on page 356 in Section 8 with
a torque wrench. Have a technician repair
the flat tire.
—Reinstalling wheel ornament —After changing wheels
Page 298 of 373
’03 4Runner_U (L/O 0305)
292
2003 4RUNNER from Apr. ’03 Prod. (OM 35820U)
CAUTION
Before driving, make sure all the
tools, jack and flat tire are securely
in place in their storage location to
reduce the possibility of personal in-
jury during a collision or s udden
braking.
If your vehicle becomes stuck in snow,
mud, sand, etc., then you may attempt
to rock the vehicle free by moving it
forward and backward.
Turn off the traction control system to
become unstuck to allow the tires to
spin enough to remove the vehicle from
the obstruction. (For details, see “Trac-
tion control system” on page 145 in
Section 1�6.)
CAUTION
Do not attempt to rock the vehicle
free by moving it forward and back-
ward if people or objects are any-
where near the vehicle. During the
rocking operation the vehicle may
suddenly move forward or backward
as it becomes unstuck, causing injury
or damage to nearby people or ob-
jects.
NOTICE
If you rock your vehicle, observe the
following precautions to prevent dam-
age to the transmission and other
parts.
� Do not depress the accelerator ped-
al while shifting the selector lever
or before the transmission is com-
pletely shifted to forward or reverse
gear.
� Do not race the engine and avoid
spinning the wheels.
� If your vehicle remains stuck after
rocking the vehicle several times,
consider other ways such as tow-
ing.
If your vehicle becomes stuck