2003 SUBARU IMPREZA WRX check engine light
[x] Cancel search: check engine lightPage 226 of 425

Starting and operating
7-5
– CONTINUED –
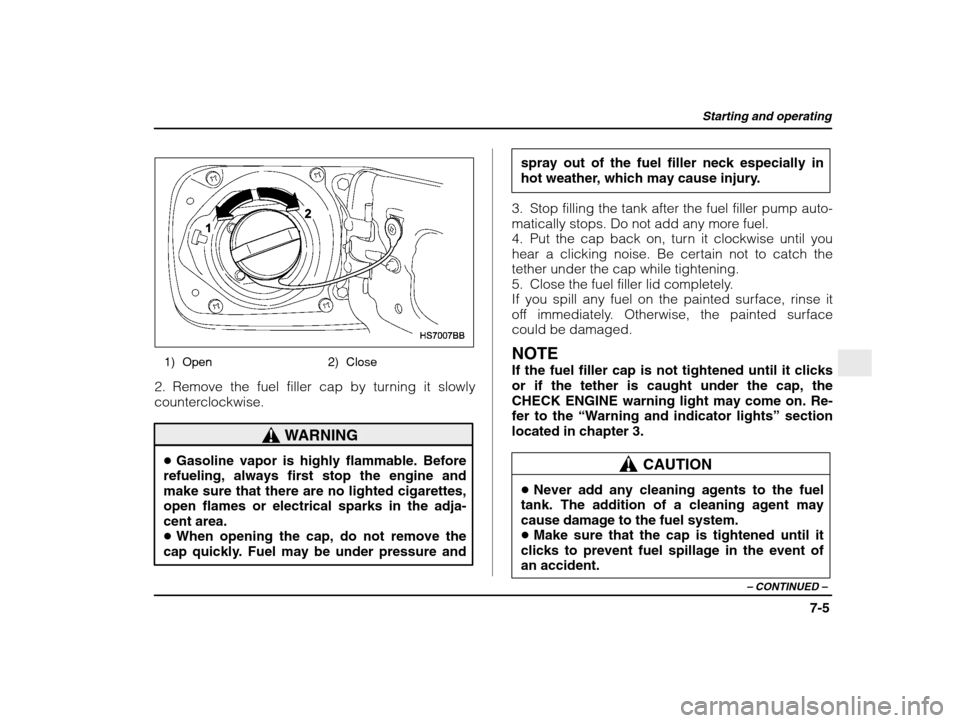
1) Open 2) Close
2. Remove the fuel filler cap by turning it slowly
counterclockwise.
WARNING
� Gasoline vapor is highly flammable. Before
refueling, always first stop the engine and
make sure that there are no lighted cigarettes,open flames or electrical sparks in the adja-cent area. � When opening the cap, do not remove the
cap quickly. Fuel may be under pressure and spray out of the fuel filler neck especially in
hot weather, which may cause injury.
3. Stop filling the tank after the fuel filler pump auto-
matically stops. Do not add any more fuel.
4. Put the cap back on, turn it clockwise until you
hear a clicking noise. Be certain not to catch the
tether under the cap while tightening.
5. Close the fuel filler lid completely.
If you spill any fuel on the painted surface, rinse it
off immediately. Otherwise, the painted surface
could be damaged. NOTE If the fuel filler cap is not tightened until it clicks or if the tether is caught under the cap, the
CHECK ENGINE warning light may come on. Re-fer to the “Warning and indicator lights ” section
located in chapter 3.CAUTION
� Never add any cleaning agents to the fuel
tank. The addition of a cleaning agent may
cause damage to the fuel system.� Make sure that the cap is tightened until it
clicks to prevent fuel spillage in the event of an accident.
Page 228 of 425

Starting and operating
7-7
– CONTINUED –
and states using two-wheel dynamometers in their
emission testing programs have EXEMPTED
Subaru AWD vehicles from the portion of the testing
program that involves a two-wheel dynamometer.
There are some states that use four-wheel
dynamometers in their testing programs. When
properly used, that equipment will not damage an
AWD Subaru vehicle.
Under no circumstances should the rear wheels be
jacked off the ground, nor should the driveshaft be
disconnected for state emission testing.
WARNING
Testing of an All-Wheel Drive vehicle must
NEVER be performed on a single two-wheel
dynamometer. Attempting to do so will result in uncontrolled vehicle movement and may
cause an accident or injuries to persons
nearby.
CAUTION
Resultant vehicle damage due to improper testing is not covered under the SUBARU Lim-
ited Warranty and is the responsibility of the state inspection program or its contractors orlicensees.
The EPA has issued regulations for inspecting the
On-Board Diagnostic (OBD) system as part of the state emissions inspection. The OBD system is de-
signed to detect engine and transmission problemsthat might cause vehicle emissions to exceed allow-able limits. These inspections apply to all 1996 mod-el year and newer passenger cars and light trucks.
Several states plus the District of Columbia have
opted to start the OBD system inspection prior to
the required EPA regulation effective date of January1, 2002. Other states will add OBD system inspec-
tion in 2002. � The inspection of the OBD system consists of a
visual operational check of the “CHECK ENGINE ”
warning light/malfunction indicator lamp (MIL) and
an examination of the OBD system with an electron-ic scan tool while the engine is running. � A vehicle passes
the OBD system inspection if
proper the “CHECK ENGINE ” warning light/MIL illu-
Page 229 of 425

Starting and operating
7-8
mination is observed, there is no stored diagnostic
trouble codes, and the OBD system readiness moni-
tors are complete.� A vehicle fails
the OBD inspection if the “CHECK
ENGINE ” warning light/MIL is not properly operating
or there is one or more diagnostic trouble codes
stored in vehicle ’s computer with the “CHECK
ENGINE ” warning light/MIL illuminated.
� A state emission inspection may reject (not pass
or fail) a vehicle if the number of OBD system readi- ness monitors “Not Ready ” is greater than three.
Under this condition, the vehicle operator should be instructed to drive his/her vehicle for a few days to
set the monitors and return for an emission re-in-spection.� Owners of rejected or failing vehicles should con-
tact their Subaru Dealer for service. Preparing to drive
You should perform the following checks and adjust-
ments every day before you start driving.
1. Check that all windows, mirrors, and lights are
clean and unobstructed.
2. Check the appearance and condition of the tires.
Also check tires for proper inflation.
3. Look under the vehicle for any sign of leaks.
4. Check that the hood, trunk and rear gate are fullyclosed.
5. Check the adjustment of the seat.
6. Check the adjustment of the inside and outside
mirrors.
7. Fasten your seatbelt. Check that your passen-gers have fastened their seatbelts.
8. Check the operation of the warning and indicator
lights when the ignition switch is turned to the
“ON”
position.
9. Check the gauges, indicator and warning lights
after starting the engine. NOTE Engine oil, engine coolant, brake fluid, washer
fluid and other fluid levels should be checked
daily, weekly or at fuel stops.
Page 230 of 425

Starting and operating
7-9
– CONTINUED –
Starting the engine
CAUTION
Do not operate the starter motor continuously
for more than ten seconds. If the engine fails to start after operating the starter for five to ten seconds, wait for ten seconds or more be-fore trying again.
� Manual transmission vehicle
1. Apply the parking brake.
2. Turn off unnecessary lights and accessories.
3. Press the clutch pedal to the floor and shift the
shift lever into neutral. Hold the clutch pedal to the
floor while starting the engine.
The starter motor will only operate when the clutch
pedal is pressed fully to the floor.
4. Turn the ignition switch to the “ON” position and
check the operation of the warning and indicatorlights. Refer to the “Warning and indicator light ” sec-
tion (chapter 3).
5. Turn the ignition switch to the “START” position
without depressing the accelerator pedal. Release
the key immediately after the engine has started. If the engine does not start within ten seconds, wait
a while and then turn the ignition switch to the
“START”
position again while depressing the accel-
erator pedal half way down.
6. Confirm that all warning and indicator lights have
gone off after the engine has started. The fuel injec-
tion system automatically lowers the idle speed as
the engine warms up. � Automatic transmission vehicle
1. Apply the parking brake.
2. Turn off unnecessary lights and accessories.
3. Shift the selector lever to the “P” or “N” position
(preferably “P” position).
The starter motor will only operate when the selectlever is at the “P” or “N” position.
4. Turn the ignition switch to the “ON” position and
check the operation of the warning and indicatorlights. Refer to the “Warning and indicator lights ”
section (chapter 3).
5. Turn the ignition switch to the “START” position
without depressing the accelerator pedal. Release
the key immediately after the engine has started.
If the engine does not start within ten seconds, wait
a while and then turn the ignition switch to the
“START” position again while depressing the accel-
Page 245 of 425

Starting and operating
7-24
CAUTION
�The ABS system does not always decrease
stopping distance. You should always main- tain a safe following distance from other ve- hicles.� When driving on badly surfaced roads, grav-
el roads, icy roads, or over deep newly fallen
snow, stopping distances may be longer for a
vehicle with the ABS system than one without. When driving under these conditions, there-
fore, reduce your speed and leave ample dis-tance from other vehicles.� When you feel the ABS system operating,
you should maintain constant brake pedal
pressure. Do not pump the brake pedal since doing so may defeat the operation of the ABS system.
� ABS system self-check
You may feel a slight shock in the brake pedal and
hear the operating sound of ABS from the engine
compartment just after the vehicle is started. This iscaused by an automatic functional test of the ABS
system being carried out and does not indicate any
abnormal condition. �
ABS warning light
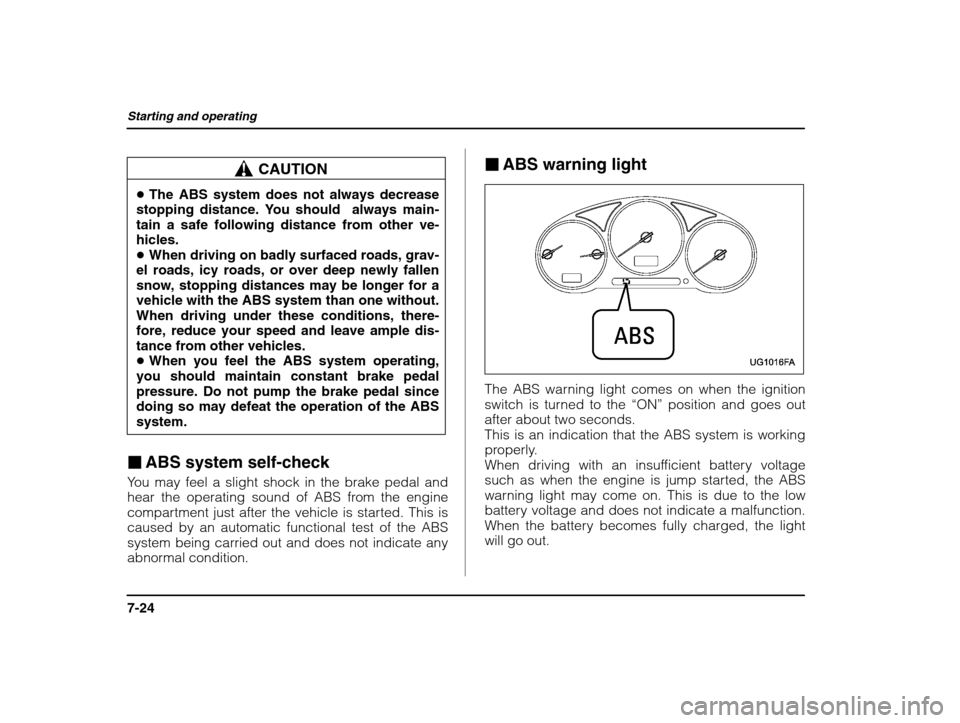
The ABS warning light comes on when the ignition
switch is turned to the “ON” position and goes out
after about two seconds.This is an indication that the ABS system is working
properly.
When driving with an insufficient battery voltage
such as when the engine is jump started, the ABS
warning light may come on. This is due to the low
battery voltage and does not indicate a malfunction.
When the battery becomes fully charged, the lightwill go out.
Page 263 of 425

Driving tips
8-10
it more prone to tip over. �If you must rock the vehicle to free it from sand or
mud, depress the accelerator pedal slightly and
move the selector lever back and forth between “D”
and “R” repeatedly. Do not race the engine. For the
best possible traction, avoid spinning the wheels
when trying to free the vehicle.
When the road surface is extremely slippery, you
can obtain better traction by starting the vehicle withthe transmission in 2nd than 1st (both for MT and
AT).� Never equip your vehicle with tires larger than
those specified in this manual.� Frequent driving of an AWD vehicle under hard-
driving conditions such as rough roads or off roads
will necessitate more frequent replacement of engine
oil, brake fluid and transmission oil than that specified
in the maintenance schedule described in the “War -
ranty and Maintenance Booklet ”.
Remember that damage done to your Subaru while
operating it off-road and not using common sense
precautions such as those listed above is not eligi-ble for warranty coverage. Winter driving
�
Operation during cold weather
Carry some emergency equipment, such as tire
chains, a window scraper, a bag of sand, flares, a small shovel, and jumper cables.
Check the battery and cables. Cold temperatures
reduce battery capacity. The battery must be in
good condition to provide enough power for cold
winter starts.
Use an engine oil of proper grade and viscosity for
Page 289 of 425

Driving tips
8-36
safety’s sake, you should employ extra cau-
tion when towing a trailer and you should
never speed. You should also keep the follow-ing tips in mind:
� Before starting out on a trip
� Check that the vehicle and vehicle-to-hitch mount-
ing are in good condition. If any problems are
apparent, do not tow the trailer.� Check that the vehicle sits horizontally with the
trailer attached. If the vehicle is tipped sharply up at
the front and down at the rear, check the total trailer
weight, GVW, GAWs and tongue load again, then
confirm that the load and its distribution are accept-able.� Check that the tire pressures are correct.
� Check that the vehicle and trailer are connected
properly. Confirm that
–the trailer tongue is connected properly to the
hitch ball.– the trailer lights connector is connected prop-
erly and trailer ’s brake lights illuminate when the
vehicle’ s brake pedal is pressed, and that the trail-
er’ s turn signal lights flash when the vehicle ’s turn
signal lever is operated.– the safety chains are connected properly. –
all cargo in the trailer is secured safety in posi-
tion.– the side mirrors provide a good rearward field of
view without a significant blind spot.
� Sufficient time should be taken to learn the “feel”
of the vehicle/trailer combination before starting out
on a trip. In an area free of traffic, practice turning, stopping and backing up.
� Driving with a trailer
� You should allow for considerably more stopping
distance when towing a trailer. Avoid sudden brak-
ing because it may result in skidding or jackknifing
and loss of control. � Avoid abrupt starts and sudden accelerations. If
your vehicle has a manual transmission, always start
out in first gear and release the clutch at moderate
engine revolution.� Avoid uneven steering, sharp turns and rapid lane
changes.� Slow down before turning. Make a longer than
normal turning radius because the trailer wheels will
be closer than the vehicle wheels to the inside of the
turn. In a tight turn, the trailer could hit your vehicle.� Crosswinds will adversely affect the handling of
your vehicle and trailer, causing sway. Crosswindscan be due to weather conditions or the passing of
Page 335 of 425

Maintenance and service
11-12
ing washer after the oil has completely drained out.
1) Oil filter
6. Remove the oil filter with an oil filter wrench.
7. Before installing a new oil filter, apply a thin coatof engine oil to the seal.
8. Clean the rubber seal seating area of the lower
crank case and install the oil filter by hand turning.
Be careful not to twist or damage the seal.
9. Tighten it approximately two-thirds of a turn after the seal makes contact with the lower crank case.
CAUTION
Never over tighten the oil filter because that can result in an oil leak.
10. Pour engine oil through the filler neck.
Oil capacity (guideline): Non-turbo models: 4.2 US qt (4.0 liters, 3.5 Imp qt)
Turbo models: 4.8 US qt (4.5 liters, 4.0 Imp qt)
The oil quantity indicated above is only guideline.
The necessary quantity of oil depends on the quan- tity of oil that has been drained. The quantity of
drained oil differs slightly depending on the temper-
ature of the oil and the time the oil is left flowing out.
After refilling the engine with oil, therefore, you must
the dipstick to confirm that the level is correct.
11. Start the engine and make sure that no oil leaks
appear around the filter ’s rubber seal and drain
plug.
12. Run the engine until it reaches the normal oper-
ating temperature. Then stop the engine and wait a
few minutes to allow the oil drain back. Check the oil
level again and if necessary, add more engine oil.