2003 SKODA FABIA remove seats
[x] Cancel search: remove seatsPage 70 of 233

Seats and Stowage69
Using the systemSafetyDriving TipsGeneral MaintenanceBreakdown assist-
anceTechnical DataFabia Praktik
– The rear head restraints can be inserted into the relevant
holes of the folded forwards rear seats.
Remove the rear seats
The luggage compar tment can be increased in size by removing
the rear seats
Removing
– Fold the rear seats forwards completely
– Press the wire clamp in the direction of the arrow ⇒fig. 51
and remove the rear seats from its holder.
Installing
– Press the wire clamp in the direction of the arrow and place the seat upholstery in its holder. – Fold the rear seats back into its original position.
Pedals
You should use only footmats which do not obstruct the movement of the
pedals and have an anti-slip protection.
Operation of the pedals must not be hindered!
Luggage compartment
Loading the luggage compartment
Please observe the following in the interest of having good
handling c
haracteristics of your vehicle:
Fig. 51 Remove the
rear seats
WARNING
•Greater pedal distances may be needed when there is a fault in
the brake system.
•Do not place any footmats or other additional floor coverings in
the area of the pedals in order to ensure that all the pedals can be
fully depressed and are able to return unobstructed to their initial
position - risk of accident!
•There must be no objects on the floor which could roll under the
pedals. You would then no longer be able to apply the brakes,
operate the clutch or accelerator - risk of accident!
Page 73 of 233

Seats and Stowage
72
The luggage compartment cover*
You can use the luggage compartment cover behind the
rear head restraints for storing light and soft items.
The luggage compartment cover can be removed as required if
one must transport bulky goods.
– Unhook the support straps on the tailgate.
– Place the cover on the side supports.
– Pull the cover to the rear out of the front holders ⇒fig. 55 .
– Install again by pushing it forwards into the holders and hanging the support straps on the tailgate. Caution
Please ensure that the heating elements of the rear window heater are not
damaged as a result of objects placed in this area.
Note
Opening the tailgate also lifts up the luggage compartment cover.
Luggage compartment cover (estate car)
Fig. 55 Removing the
luggage compartment
cover
WARNING
No objects should be placed on the luggage compartment cover,
the vehicle occupants could be endangered if there is sudden
braking or the vehicle collides with something.
Fig. 56 Luggage
compartment: The
luggage compartment
cover
Page 74 of 233

Seats and Stowage73
Using the systemSafetyDriving TipsGeneral MaintenanceBreakdown assist-
anceTechnical DataFabia Praktik
– Pull the luggage compartment cover in direction of arrow
⇒page 72, fig. 56 .
– Hang the luggage compartment cover in the recesses on the side of the luggage compartment.
– Have the luggage compartment cover removed to transport bulky goods. Press the slider from the side in the direction of
arrow and remove the luggage compartment cover in the
direction of arrow .
Caution
Please ensure that the heating elements of the rear window heater and
luggage compartment cover are not damaged as a result of objects placed
in this area.
Net partition (Estate)*
Use behind the rear seats
WARNING
No objects should be placed on the luggage compartment cover,
the vehicle occupants could be endangered if there is sudden
braking or the vehicle collides with something.
A1
A2
Fig. 57 Unrolling net
partition
Fig. 58 Rolling up net
partition
Page 75 of 233

Seats and Stowage
74
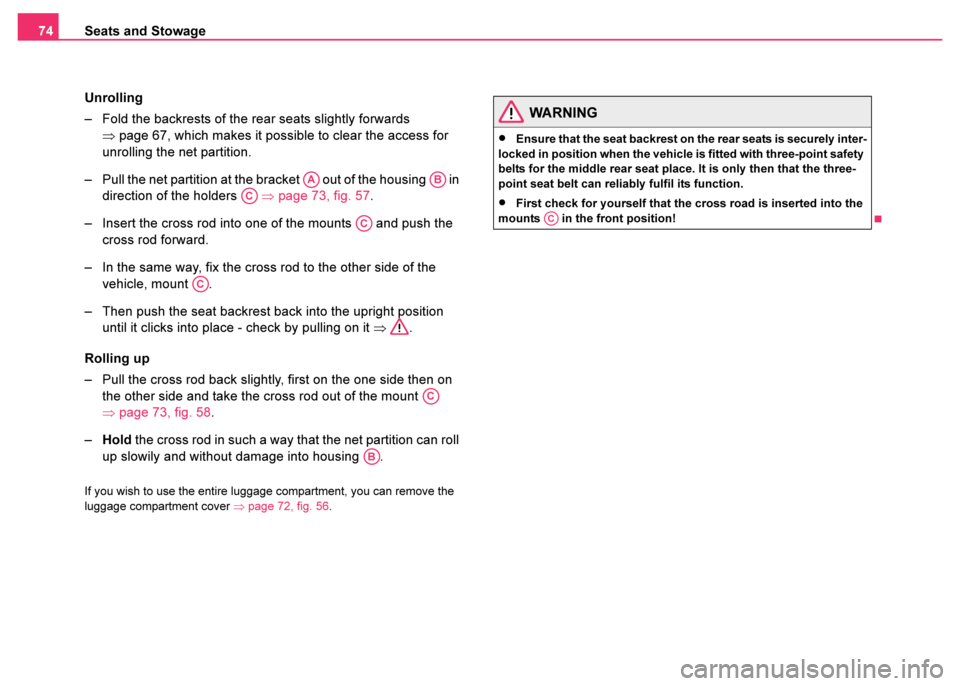
Unrolling
– Fold the backrests of the rear seats slightly forwards ⇒page 67, which makes it possible to clear the access for
unrolling the net partition.
– Pull the net partition at the bracket out of the housing in direction of the holders ⇒page 73, fig. 57 .
– Insert the cross rod into one of the mounts and push the cross rod forward.
– In the same way, fix the cross rod to the other side of the vehicle, mount .
– Then push the seat backrest back into the upright position until it clicks into place - check by pulling on it ⇒.
Rolling up
– Pull the cross rod back slightly, first on the one side then on the other side and take the cross rod out of the mount
⇒page 73, fig. 58 .
– Hold the cross rod in such a way that the net partition can roll
up slowily and without damage into housing .
If you wish to use the entire luggage compartment, you can remove the
luggage compartment cover ⇒page 72, fig. 56 .
AAAB
AC
AC
AC
AC
AB
WARNING
•Ensure that the seat backrest on the rear seats is securely inter-
locked in position when the vehicle is fitted with three-point safety
belts for the middle rear seat place. It is only then that the three-
point seat belt can reliably fulfil its function.
•First check for yourself that the cross road is inserted into the
mounts in the front position!AC
Page 78 of 233

Seats and Stowage77
Using the systemSafetyDriving TipsGeneral MaintenanceBreakdown assist-
anceTechnical DataFabia Praktik
Note
A roof rail is obtainable from a Škoda dealer if hasn't been fitted onto an
estate car at the works.
Attachment points
Fitting
– Remove the plastic caps ⇒fig. 62 carefully using a plastic
auxiliary tool to avoid paint damage.
– The feet are inserted into the openings of the roof bars. Assembly is described by the manufacturer of the roof
luggage rack system. Note
•The figure is not valid for an estate car.
•If you have any questions, please contact a Škoda dealer.
Roof load
Distribute weight evenly over the roof luggage rack system. The maximum
permissible roof load (including roof rack system) of
75 kg and the
maximum permissible total weight of the vehicle should not be exceeded.
You cannot make full use of the permissible roof load if you use a roof
luggage rack system with a lower load carrying capacity. The load trans-
ported on the roof luggage rack system must not exceed the weight limit
which is stated in the fitting instructions.
Fig. 62 Attachment
points for roof bars
WARNING
•The items which you transport on the roof bar system must be
reliably attached - risk of accident!
•You must on no account exceed the permissible roof load, the
permissible axle loads and the permissible gross weight of your
vehicle - risk of accident!
•Please note that the handling properties of your vehicle change
when you transport heavy or bulky items on the roof bar system as
a result of the displacement of the centre of gravity and the
increased wind attack area - risk of accident! You must absolutely
adapt your style of driving and the speed of the vehicle to the
specific circumstances.
Page 79 of 233

Seats and Stowage
78
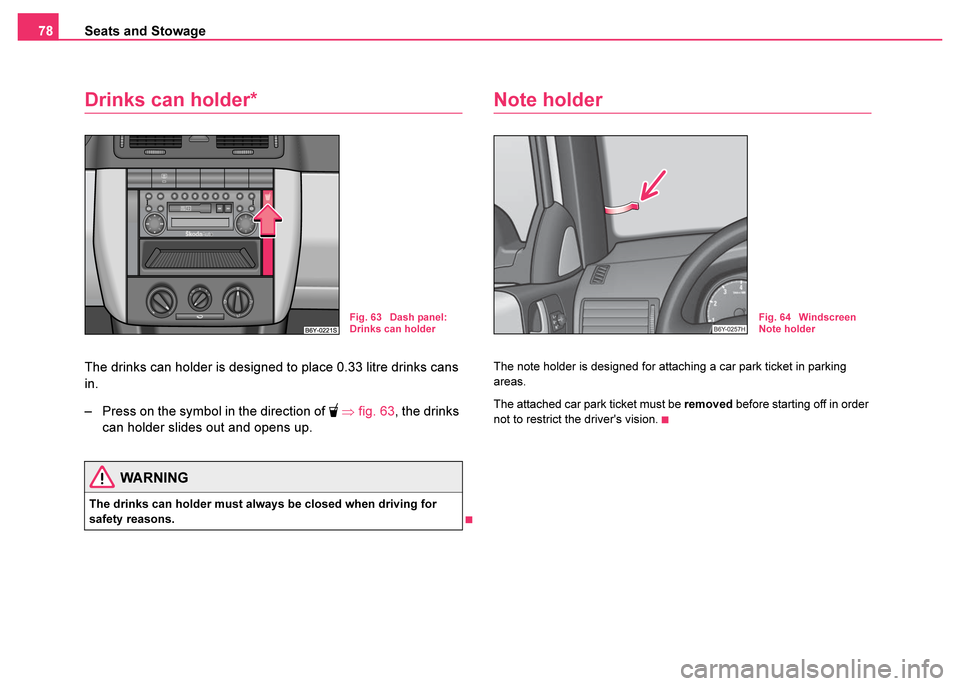
Drinks can holder*
The drinks can holder is designed to place 0.33 litre drinks cans
in.
– Press on the symbol in the direction of
⇒ fig. 63 , the drinks
can holder slides out and opens up.
Note holder
The note holder is designed for attaching a car park ticket in parking
areas.
The attached car park ticket must be removed before starting off in order
not to restrict the driver's vision.
WARNING
The drinks can holder must always be closed when driving for
safety reasons.
Fig. 63 Dash panel:
Drinks can holderFig. 64 Windscreen
Note holder
Page 81 of 233

Seats and Stowage
80
Cigarette lighter* and power socket*
Cigarette lighter
You can also use the socket on the cigarette lighter for
other electrical appliances.
Using the cigarette lighter
– Press in the button of the cigarette lighter ⇒fig. 67 .
– Wait until the button jumps forward.
– Remove the cigarette lighter immediately and use it.
– Insert the cigarette lighter again into the socket.
Using the power socket
– Take out the cigarette lighter. – Insert the plug of the electrical appliance into the socket of the
cigarette lighter.
The 12 volt power socket or the lighter holder can also be used for further
electrical appliance with a power uptake of up to 180 watts.
Caution
Only use matching plugs, which fulfils the DIN - ISO Standard 4165, to
avoid damaging the power sockets.
Note
Connecting electrical components when the engine is not running
will drain the battery of the vehicle - risk of battery draining!
Fig. 67 Centre
console: Cigarette
lighter
WARNING
•Take care when using the cigarette lighter! Not paying proper
attention or incorrect use the cigarette lighter in an uncontrolled
manner may result in burns.
•The cigarette lighter and the power socket also operates when
the ignition is switched off or the ignition key withdrawn. This is
why you should never leave children unattended in the vehicle.
Page 165 of 233

Care and cleaning
164
Protection of hollow spaces
All the cavities of your vehicle which are at risk from corrosion are
protected for life by a layer of protective wax applied in the factory.
This wax protection does not require to be inspected or re-treated. Please
remove any small amount of wax which flows out of the cavities at high
temperatures with a plastic scraper and clean the spot using petroleum
cleaner.
Care of the interior of vehicle
Plastic parts, artificial leather and cloths
You can clean plastic parts and artificial leather with a moist cloth. You
should only treat such parts with special solvent-free plastic cleaning
and care products it does prove to be adequate.
Upholstery cloth and cloth trim on the doors, boot lid, headliner etc. are
best treated with special cleaning products, including, where, necessary
dry foam and a soft sponge or brush.
Fabric covers of electrically heated seats*
Do not clean the seat covers moist as this may result in damage to the
seat heating system.
Clean such covers using special agents, for example dry foam.
Natural leather
Natural leather requires quite particular care and attention.
Leather should be treated from time to time according the
following guidelines depending on how much it is used.
Normal cleaning
– Clean soiled areas of the leather with slightly moistened cotton or woollen cloth.
Severe soiling
– Clean severely soiled areas with a cloth dipped in a mild soapy solution (2 spoonfuls of natural soap to 1 litre of water).
– Ensure that the leather is not soaked through at any point and that no water gets into the stitching of the seams.
– Dry off the leather with a soft, dry cloth.
Removing stains
– Remove fresh stains which are water-based (e.g. coffee, tea,
juices, blood etc.) with an absorbent cloth or household paper
or use the cleaner from the care set for a stain which has
already dried in.
WARNING
Safety and environmental protection regulations should observed
when using petroleum cleaner to remove wax - a risk of fire!