Page 207 of 381
4-39 Hitches
It's important to have the correct hitch equipment.
Crosswinds, large trucks going by and rough roads are a
few reasons why you'll need the right hitch. Here are
some rules to follow:
�Don't let the steel in a hitch contact the aluminum on
your bumper. If you do, the two will corrode. You
can use something like paint or plastic tape to
separate the steel and aluminum. The same steel to
aluminum problem can happen with fasteners, too.
�Will you have to make any holes in the body of your
vehicle when you install a trailer hitch? If you do,
then be sure to seal the holes later when you remove
the hitch. If you don't seal them, deadly carbon
monoxide (CO) from your exhaust can get into
your vehicle. See ªCarbon Monoxideº in the Index.
Dirt and water can, too.
Safety Chains
You should always attach chains between your vehicle
and your trailer. Cross the safety chains under the tongue
of the trailer so that the tongue will not drop to the road
if it becomes separated from the hitch. Instructions
about safety chains may be provided by the hitch
manufacturer or by the trailer manufacturer. Follow the
manufacturer's recommendation for attaching safety
chains and do not attach them to the bumper. Always
leave just enough slack so you can turn with your rig.
And, never allow safety chains to drag on the ground.
Trailer Brakes
Does your trailer have its own brakes?
Be sure to read and follow the instructions for the trailer
brakes so you'll be able to install, adjust and maintain
them properly. And, if you have anti
-lock brakes, do not
try to tap into your vehicle's brake system. If you do,
both systems won't work well, or at all.
Page 208 of 381
4-40 Driving with a Trailer
Towing a trailer requires a certain amount of experience.
Before setting out for the open road, you'll want to get
to know your rig. Acquaint yourself with the feel of
handling and braking with the added weight of the
trailer. And always keep in mind that the vehicle you are
driving is now a good deal longer and not nearly as
responsive as your vehicle is by itself.
Before you start, check the trailer hitch and platform
(and attachments), safety chains, electrical connector,
lamps, tires and mirror adjustment. If the trailer has
electric brakes, start your vehicle and trailer moving and
then apply the trailer brake controller by hand to be sure
the brakes are working. This lets you check your
electrical connection at the same time.
During your trip, check occasionally to be sure that the
load is secure, and that the lamps and any trailer brakes
are still working.
Following Distance
Stay at least twice as far behind the vehicle ahead as you
would when driving your vehicle without a trailer. This
can help you avoid situations that require heavy braking
and sudden turns.
Passing
You'll need more passing distance up ahead when
you're towing a trailer. And, because you're a good deal
longer, you'll need to go much farther beyond the
passed vehicle before you can return to your lane.
Backing Up
Hold the bottom of the steering wheel with one hand.
Then, to move the trailer to the left, just move that hand
to the left. To move the trailer to the right, move your
hand to the right. Always back up slowly and, if
possible, have someone guide you.
Page 210 of 381

4-42 Driving On Grades
Reduce speed and shift to a lower gear before you start
down a long or steep downgrade. If you don't shift
down, you might have to use your brakes so much that
they would get hot and no longer work well.
On a long uphill grade, shift down and reduce your
speed to around 45 mph (70 km/h) to reduce the
possibility of the engine and the transaxle overheating.
Parking on Hills
CAUTION:
You really should not park your vehicle, with a
trailer attached, on a hill. If something goes
wrong, your rig could start to move. People can
be injured, and both your vehicle and the trailer
can be damaged.
But if you ever have to park your rig on a hill, here's
how to do it:
1. Apply your regular brakes, but don't shift into
PARK (P) for an automatic transaxle or into gear for
a manual transaxle, yet. When parking uphill, turn
your wheels away from the curb. When parking
downhill, turn your wheels into the curb.
2. Have someone place chocks under the trailer wheels.
3. When the chocks are in place, release the regular
brakes until the chocks absorb the load.
4. Reapply the regular brakes. Then apply your parking
brake and shift into PARK (P) for an automatic
transaxle or REVERSE (R) for a manual transaxle.
5. Release the regular brakes.
Page 211 of 381

4-43 When You Are Ready to Leave After
Parking on a Hill
1. Apply your regular brakes and hold the pedal down
while you:
�start your engine,
�shift into a gear, and
�release the parking brake.
2. Let up on the brake pedal.
3. Drive slowly until the trailer is clear of the chocks.
4. Stop and have someone pick up and store the chocks.
Maintenance When Trailer Towing
Your vehicle will need service more often when you're
pulling a trailer. See the Maintenance Schedule for more
on this. Things that are especially important in trailer
operation are automatic transaxle fluid (don't overfill),
engine oil, drive belt, cooling system and brake system.
Each of these is covered in this manual, and the Index
will help you find them quickly. If you're trailering, it's
a good idea to review this information before you start
your trip.
Check periodically to see that all hitch nuts and bolts
are tight.
Engine Cooling When Trailer Towing
Your cooling system may temporarily overheat during
severe operating conditions. See ªEngine Overheatingº
in the Index.
Page 246 of 381

6-
6-1
Section 6 Service and Appearance Care
Here you will find information about the care of your vehicle. This section begins with service and fuel information,
and then it shows how to check important fluid and lubricant levels. There is also technical information about your
vehicle, and a part devoted to its appearance care.
6
-2 Service
6
-3 Fuel
6
-6 Fuels in Foreign Countries
6
-6 Filling Your Tank
6
-9 Filling a Portable Fuel Container
6
-10 Checking Things Under the Hood
6
-14 Engine Oil
6
-20 Engine Air Cleaner/Filter
6
-22 Passenger Compartment Air Filter
6
-24 Automatic Transaxle Fluid
6
-28 Manual Transaxle Fluid
6
-29 Hydraulic Clutch
6
-30 All-Wheel Drive (Option)
6
-31 Engine Coolant
6
-34 Radiator Pressure Cap
6
-34 Power Steering Fluid6
-36 Windshield Washer Fluid
6
-37 Brakes
6
-41 Battery
6
-42 Bulb Replacement
6
-49 Windshield Wiper Blade Replacement
6
-50 Tires
6
-61 Appearance Care
6
-61 Cleaning the Inside of Your Vehicle
6
-64 Care of Safety Belts
6
-65 Cleaning the Outside of Your Vehicle
6
-70 Vehicle Identification Number (VIN)
6
-71 Electrical System
6
-76 Replacement Bulbs
6
-76 Capacities and Specifications
6
-78 Normal Maintenance Replacement Parts
Page 282 of 381
6-37
NOTICE:
�When using concentrated washer fluid,
follow the manufacturer's instructions for
adding water.
�Don't mix water with ready
-to-use washer
fluid. Water can cause the solution to freeze
and damage your washer fluid tank and
other parts of the washer system. Also,
water doesn't clean as well as washer fluid.
�Fill your washer fluid tank only
three
-quarters full when it's very cold. This
allows for expansion if freezing occurs,
which could damage the tank if it is
completely full.
�Don't use engine coolant (antifreeze) in
your windshield washer. It can damage
your washer system and paint.
Brakes
Brake Fluid
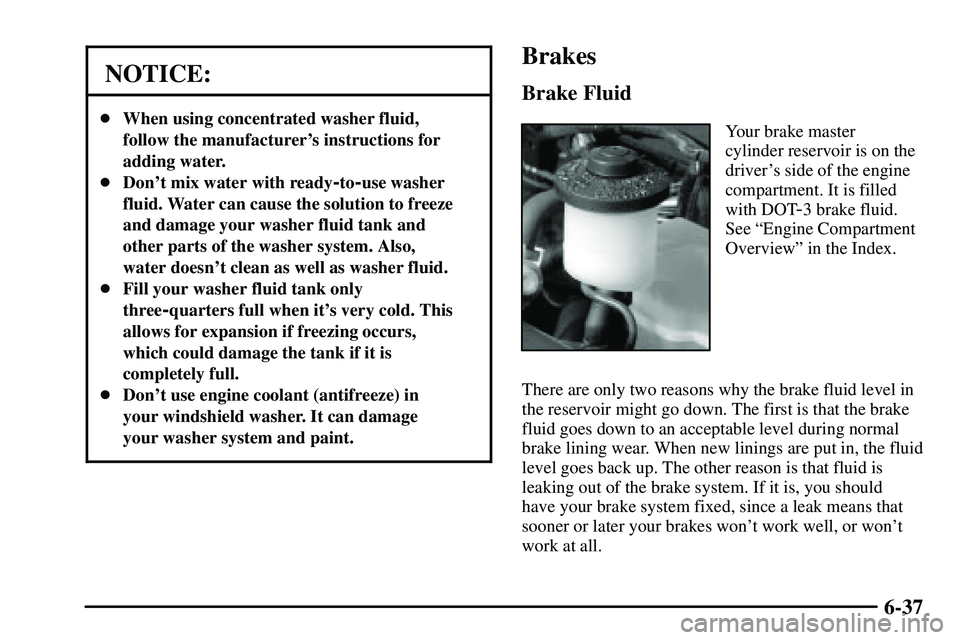
Your brake master
cylinder reservoir is on the
driver's side of the engine
compartment. It is filled
with DOT
-3 brake fluid.
See ªEngine Compartment
Overviewº in the Index.
There are only two reasons why the brake fluid level in
the reservoir might go down. The first is that the brake
fluid goes down to an acceptable level during normal
brake lining wear. When new linings are put in, the fluid
level goes back up. The other reason is that fluid is
leaking out of the brake system. If it is, you should
have your brake system fixed, since a leak means that
sooner or later your brakes won't work well, or won't
work at all.
Page 284 of 381

6-39
What to Add
When you do need brake fluid, use only DOT
-3 brake
fluid. Use new brake fluid from a sealed container only.
See ªRecommended Fluids and Lubricantsº in
the Index.
Always clean the brake fluid reservoir cap and the area
around the cap before removing it. This will help keep
dirt from entering the reservoir.
CAUTION:
With the wrong kind of fluid in your brake
system, your brakes may not work well, or they
may not even work at all. This could cause a
crash. Always use the proper brake fluid.
NOTICE:
�Using the wrong fluid can badly damage
brake system parts. For example, just a few
drops of mineral
-based oil, such as engine
oil, in your brake system can damage brake
system parts so badly that they'll have to be
replaced. Don't let someone put in the
wrong kind of fluid.
�If you spill brake fluid on your vehicle's
painted surfaces, the paint finish can be
damaged. Be careful not to spill brake fluid
on your vehicle. If you do, wash it off
immediately. See ªAppearance Careº in
the Index.
Page 285 of 381

6-40 Brake Wear
The GT Series has four-wheel disc brakes. All other
models have front disc brakes and rear drum brakes.
Disc brake pads have built
-in wear indicators that
make a high
-pitched warning sound when the brake
pads are worn and new pads are needed. The sound
may come and go or be heard all the time your vehicle
is moving (except when you are pushing on the brake
pedal firmly).
CAUTION:
The brake wear warning sound means that soon
your brakes won't work well. That could lead to
an accident. When you hear the brake wear
warning sound, have your vehicle serviced.
NOTICE:
Continuing to drive with worn-out brake pads
could result in costly brake repair.
Some driving conditions or climates may cause a brake
squeal when the brakes are first applied or lightly
applied. This does not mean something is wrong with
your brakes.
Properly torqued wheel nuts are necessary to help
prevent brake pulsation. When tires are rotated, inspect
brake pads for wear and evenly tighten wheel nuts in the
proper sequence to GM torque specifications.
If you have rear drum brakes, they don't have wear
indicators, but if you ever hear a rear brake rubbing
noise, have the rear brake linings inspected immediately.
Also, the rear brake drums should be removed and
inspected each time the tires are removed for rotation or
changing. When you have the front brake pads replaced,
have the rear brakes inspected, too.
Brake linings should always be replaced as complete
axle sets.
See ªBrake System Inspectionº in Section 7 of
this manual under Part C ªPeriodic Maintenance
Inspections.º