2003 Peugeot Boxer bonnet
[x] Cancel search: bonnetPage 3 of 180
05-05-2003
3YOUR BOXER AT A GLANCE
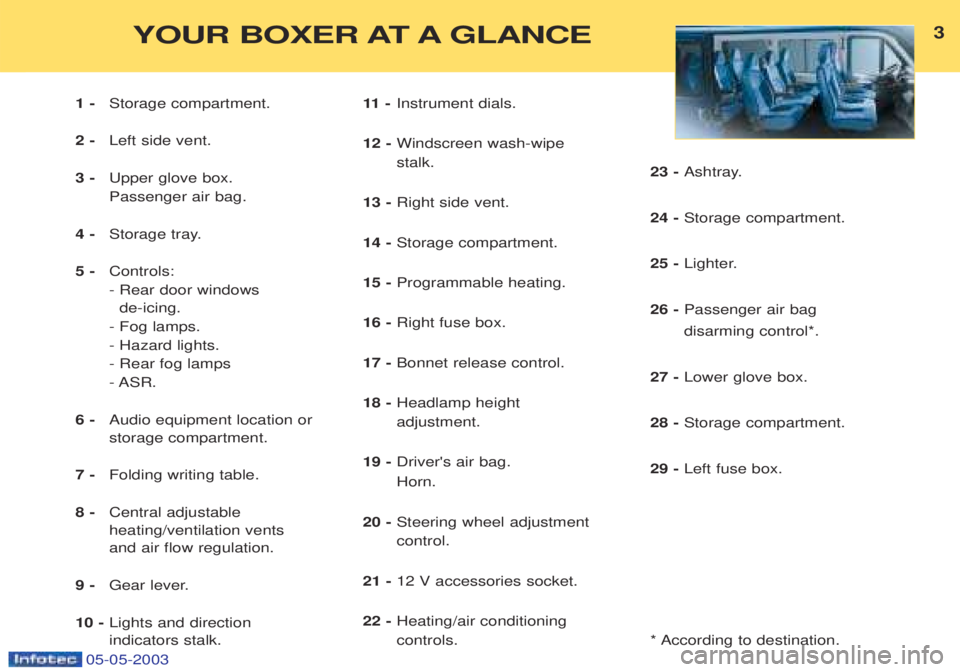
1 -Storage compartment.
2 - Left side vent.
3 - Upper glove box. Passenger air bag.
4 - Storage tray.
5 - Controls:
- Rear door windows
de-icing.
- Fog lamps.- Hazard lights.- Rear fog lamps- ASR.
6 - Audio equipment location or storage compartment.
7 - Folding writing table.
8 - Central adjustableheating/ventilation vents and air flow regulation.
9 - Gear lever.
10 - Lights and direction indicators stalk. 11 -
Instrument dials.
12 - Windscreen wash-wipe stalk.
13 - Right side vent.
14 - Storage compartment.
15 - Programmable heating.
16 - Right fuse box.
17 - Bonnet release control.
18 - Headlamp height adjustment.
19 - Driver's air bag. Horn.
20 - Steering wheel adjustment control.
21 - 12 V accessories socket.
22 - Heating/air conditioningcontrols. 23 -
Ashtray.
24 - Storage compartment.
25 - Lighter.
26 - Passenger air bag disarming control*.
27 - Lower glove box.
28 - Storage compartment.
29 - Left fuse box.
* According to destination.
Page 10 of 180
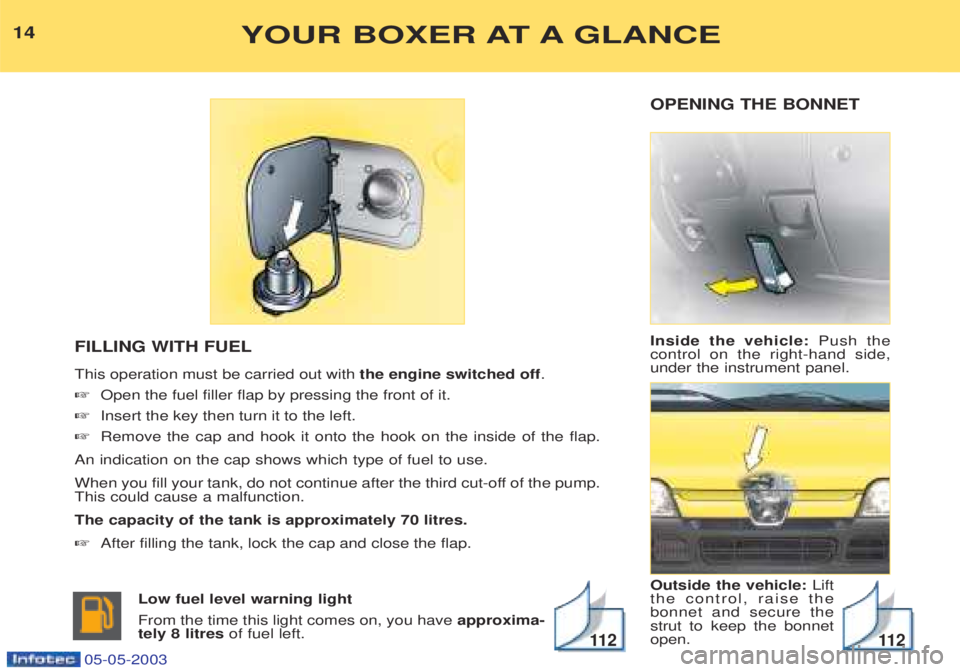
OPENING THE BONNET Inside the vehicle:Push the
control on the right-hand side, under the instrument panel. Outside the vehicle: Lift
the control, raise the bonnet and secure thestrut to keep the bonnetopen.
FILLING WITH FUEL This operation must be carried out with
the engine switched off.
☞ Open the fuel filler flap by pressing the front of it.
☞ Insert the key then turn it to the left.
☞ Remove the cap and hook it onto the hook on the inside of the flap.
An indication on the cap shows which type of fuel to use.
When you fill your tank, do not continue after the third cut-off of the pump. This could cause a malfunction. The capacity of the tank is approximately 70 litres.☞ After filling the tank, lock the cap and close the flap.
Low fuel level warning light From the time this light comes on, you have approxima-
tely 8 litres of fuel left.
YOUR BOXER AT A GLANCE14
11 211 2
05-05-2003
Page 110 of 180
05-05-2003
YOUR BOXER IN DETAIL109
THE ALARM This provides two types of protection: -
exterior protection: it sounds if a
door, the tailgate or the bonnet isopened.
- interior protection: it sounds if thevolume inside the passenger com-partment changes (breaking of awindow or a movement inside thevehicle).
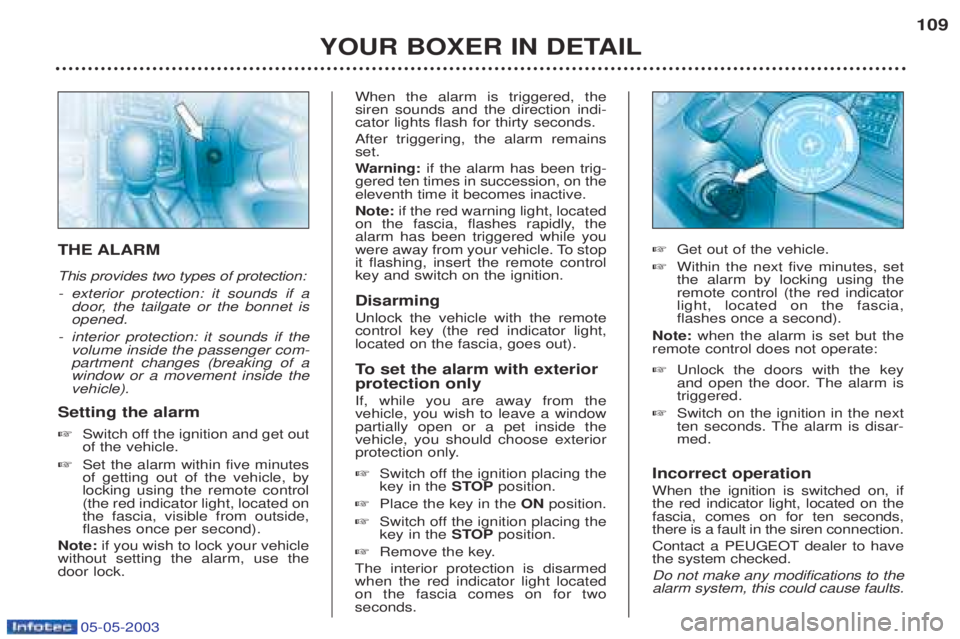
Setting the alarm ☞ Switch off the ignition and get out of the vehicle.
☞ Set the alarm within five minutesof getting out of the vehicle, bylocking using the remote control(the red indicator light, located onthe fascia, visible from outside,flashes once per second).
Note: if you wish to lock your vehicle
without setting the alarm, use thedoor lock. When the alarm is triggered, thesiren sounds and the direction indi-cator lights flash for thirty seconds. After triggering, the alarm remains set. W
arning: if the alarm has been trig-
gered ten times in succession, on the eleventh time it becomes inactive. Note: if the red warning light, located
on the fascia, flashes rapidly, the alarm has been triggered while you
were away from your vehicle. To stopit flashing, insert the remote controlkey and switch on the ignition. Disarming Unlock the vehicle with the remote control key (the red indicator light,located on the fascia, goes out).
To set the alarm with exterior
protection only If, while you are away from the vehicle, you wish to leave a windowpartially open or a pet inside thevehicle, you should choose exterior
protection only. ☞ Switch off the ignition placing the key in the STOPposition.
☞ Place the key in the ONposition.
☞ Switch off the ignition placing thekey in the STOPposition.
☞ Remove the key.
The interior protection is disarmedwhen the red indicator light locatedon the fascia comes on for twoseconds. ☞
Get out of the vehicle.
☞ Within the next five minutes, setthe alarm by locking using theremote control (the red indicatorlight, located on the fascia,flashes once a second).
Note: when the alarm is set but the
remote control does not operate: ☞ Unlock the doors with the key
and open the door. The alarm istriggered.
☞ Switch on the ignition in the next
ten seconds. The alarm is disar-med.
Incorrect operation When the ignition is switched on, if the red indicator light, located on thefascia, comes on for ten seconds,there is a fault in the siren connection.
Contact a PEUGEOT dealer to have the system checked. Do not make any modifications to the alarm system, this could cause faults.
Page 114 of 180
05-05-2003
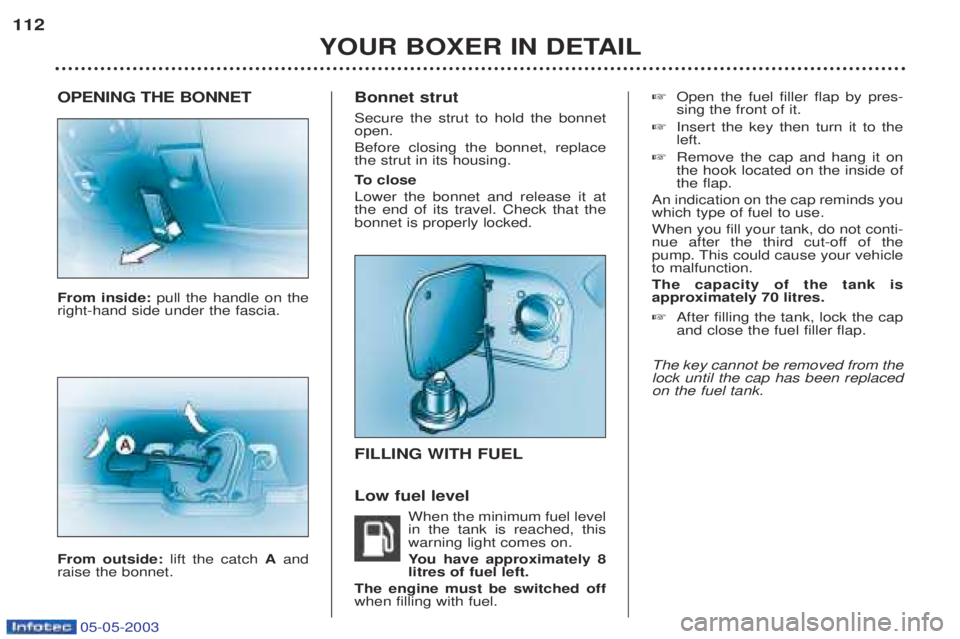
OPENING THE BONNET From inside: pull the handle on the
right-hand side under the fascia. From outside: lift the catch Aand
raise the bonnet. Bonnet strut Secure the strut to hold the bonnet open. Before closing the bonnet, replace the strut in its housing.
To
close
Lower the bonnet and release it at the end of its travel. Check that thebonnet is properly locked. FILLING WITH FUEL Low fuel level
When the minimum fuel level in the tank is reached, thiswarning light comes on. You have approximately 8
litres of fuel left.
The engine must be switched off when filling with fuel. ☞
Open the fuel filler flap by pres-sing the front of it.
☞ Insert the key then turn it to theleft.
☞ Remove the cap and hang it onthe hook located on the inside ofthe flap.
An indication on the cap reminds youwhich type of fuel to use. When you fill your tank, do not conti-
nue after the third cut-off of the
pump. This could cause your vehicleto malfunction. The capacity of the tank is approximately 70 litres. ☞ After filling the tank, lock the cap and close the fuel filler flap.
The key cannot be removed from thelock until the cap has been replacedon the fuel tank.
YOUR BOXER IN DETAIL
112
Page 143 of 180
05-05-2003
Only use products recom-
mended by PEUGEOT.
To ensure best perfor-
mance from components as important as the power
steering and the braking system,PEUGEOT selects and offers quitespecific products.
CHECKS Battery
At the start of winter, have your bat-
tery checked by a PEUGEOT dealer. Air filter and passenger compartment filter Have the filter elements replaced
regularly. If you drive in dusty
conditions, change them twice asoften. Brake pads Brake pad wear depends on the style of driving, in particular forvehicles which are used in town,over short distances. It may be necessary to check the thickness of the pads, even betweenservices. Handbrake Where the handbrake travel is too great or there is a reduction in theperformance of the system, thehandbrake should be adjusted, evenbetween services. Have the system checked by a
PEUGEOT dealer. Manual gearbox This does not need an oil change. Check the level, according to themanufacturer's servicing schedule. Automatic gearbox This does not need an oil change. Have the level checked by a
PEUGEOT dealer, according to themanufacturer's servicing schedule. Oil filter
Change the filter regularly, in accor- dance with the servicing schedule.
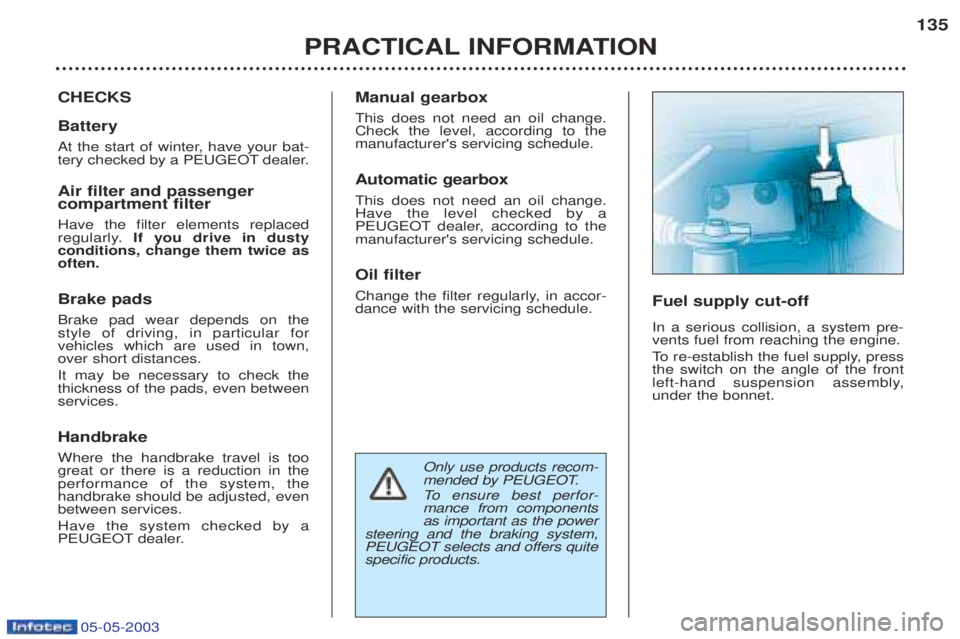
Fuel supply cut-off In a serious collision, a system pre- vents fuel from reaching the engine.
To
re-establish the fuel supply, press
the switch on the angle of the front
left-hand suspension assembly,under the bonnet.
PRACTICAL INFORMATION 135
Page 146 of 180
05-05-2003
PRACTICAL INFORMATION
138
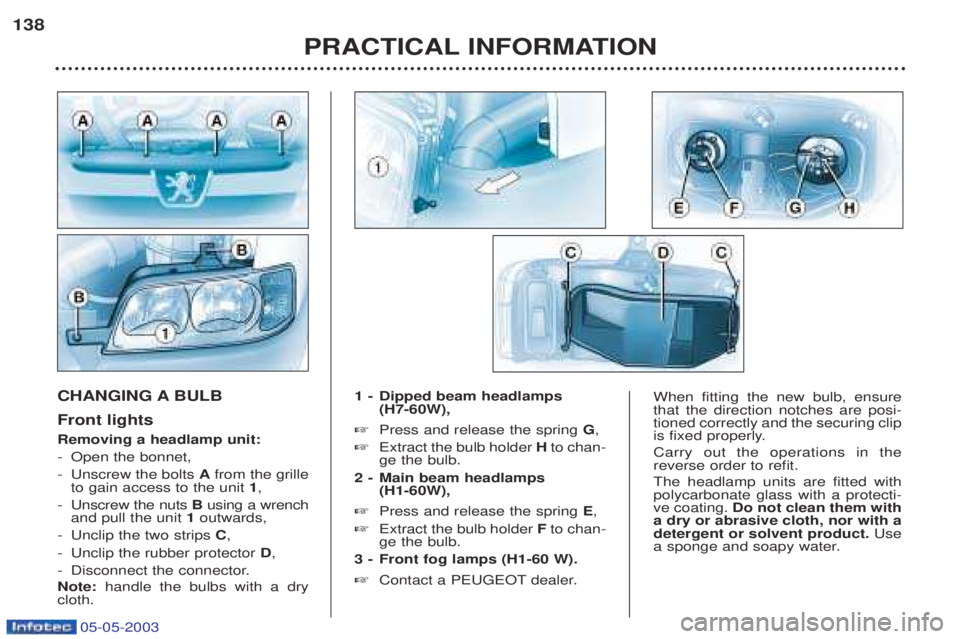
CHANGING A BULB Front lights Removing a headlamp unit: -
Open the bonnet,
- Unscrew the bolts Afrom the grille
to gain access to the unit 1,
- Unscrew the nuts Busing a wrench
and pull the unit 1outwards,
- Unclip the two strips C,
- Unclip the rubber protector D,
- Disconnect the connector. Note: handle the bulbs with a dry
cloth. 1 - Dipped beam headlamps
(H7-60W),
☞ Press and release the spring G,
☞ Extract the bulb holder Hto chan-
ge the bulb.
2 - Main beam headlamps (H1-60W),
☞ Press and release the spring E,
☞ Extract the bulb holder Fto chan-
ge the bulb.
3 - Front fog lamps (H1-60 W). ☞ Contact a PEUGEOT dealer.When fitting the new bulb, ensure that the direction notches are posi-tioned correctly and the securing clip
is fixed properly. Carry out the operations in the reverse order to refit. The headlamp units are fitted with polycarbonate glass with a protecti-ve coating. Do not clean them with
a dry or abrasive cloth, nor with adetergent or solvent product. Use
a sponge and soapy water.
Page 180 of 180
05-05-2003
TECHNICAL DATA
172
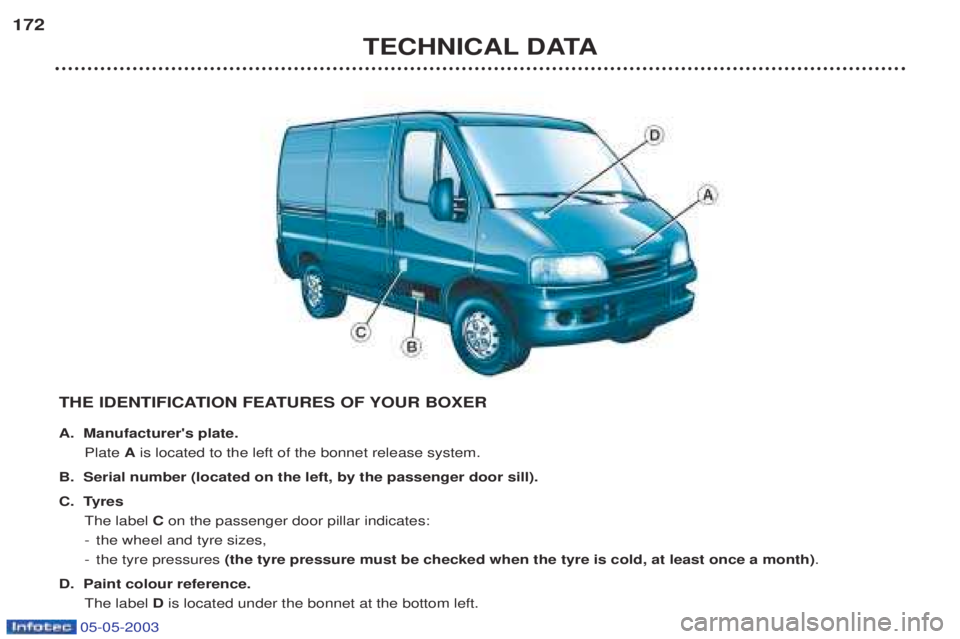
THE IDENTIFICATION FEATURES OF YOUR BOXER
A. Manufacturer's plate.Plate Ais located to the left of the bonnet release system.
B. Serial number (located on the left, by the passenger door sill).
C. Tyres The label Con the passenger door pillar indicates:
- the wheel and tyre sizes,
- the tyre pressures (the tyre pressure must be checked when the tyre is cold, at least once a month) .
D. Paint colour reference. The label Dis located under the bonnet at the bottom left.