Page 30 of 181
17-11-2003
INSTRUMENTS AND CONTROLS
32
Automatic gearbox temperature or fault warning light This comes on for a few seconds when the ignition is switched on. Illumination or flashing of this warning light while the engine is running
and the vehicle is moving indicates an automatic gearbox fault or an excessive automatic gearbox temperature.
Stop immediately.Allow the engine to run at idle (lever in position Nor P) until the warning light
switches off.
Contact a PEUGEOT dealer as soon as possible.
Coolant temperature gauge When the needle is in zone A, the
temperature is correct. When the needle is in zone B, the
temperature is too high.
Stop immediately.
Warning: allow the engine to cool
before topping up.The cooling circuit is pressurised.
To avoid any risk of scalding, unscrew the cap by two turns toallow the pressure to drop. When the pressure has dropped, remove the cap and top up the level.
Contact a PEUGEOT dealer.
Page 50 of 181

YOUR BOXER IN DETAIL
52
Setup The "Day brightness" and "Night
brightness" functions enable you to
set day and night brightness values
independently. The "Colours" function controls dis-
playing on the day or night setting or changes the setting automatically inrelation to the light in the passengercompartment or switching on of thelights. The "Voice language" and "Text
language" functions enable you to
choose the language for voice recog- nition and SMS messages (Italian,German, English, Spanish, French,Portuguese, Dutch). The "Distance unit" function
enables you to choose the distance unit for the trip computer calculations(km or miles). Note: to choose the language and
the distance unit, insert the configu- ration CD-Rom. Fleet Management The
"Fleet Management" function
permits locating of the vehicle by means of the automatic transmissionof SMS messages to a control centre.
To have the SMS messages sent, you must:
Ð activate the "Sending mode" function,
Ð select a type of interval in the "Event mode" function,
Ð set the duration of the interval in the "Data frequency send" function,
Ð enter the registration number in the "Vehicle ID" function,
Ð enter the telephone number of the control centre in the "Telephone number" function,
Ð insert the SIM card.
Speed Limit Warning The "Speed Limit Warning" func-
tion enables you to monitor the speed of the vehicle.
To enable the system to detect an excessive speed and warn you ofthis, you must:
Ð activate the "Alarm" function,
Ð set the permitted speed in the "Speed Limit" function,
Ð activate the "Buzzer" function.
17-11-2003
Page 105 of 181

17-11-2003
YOUR BOXER IN DETAIL105
SEAT BELTS
To adjust the height of the front seat belts �
To lower the attachment point, press the upper control and slide itdownwards.
� To raise the attachment point,slide the control upwards.
To lock the seat belts � Pull the strap, then insert the buckle into the stalk. Pre-tensioning front seat belts Safety in the event of a frontal impact has been improved by the introduc-tion of pre-tensioning front seat belts.Depending on the seriousness of theimpact, the pre-tensioning systeminstantly tightens the seat belt firmlyagainst the body of the occupant. The pre-tensioning seat belts are armed when the ignition is on. Rear seat belts Minibus:
the rear seats are all fitted
with three-point inertia reel seat belts. Combi: the rear side seats are fitted
with three-point inertia reel seat
belts. The centre seats are fitted withlap seat belts
To be effective, a seat belt must be tightened asclose to the body as pos-sible.
Depending on the nature and theseriousness of the impact, thepre-tensioners may be triggeredbefore and independently of theair bags. In all cases of an air bag being triggered, the air bag warning lighton the instrument panel comeson. After an impact, have the system
checked by a PEUGEOT dealer.
Page 111 of 181

17-11-2003
YOUR BOXER IN DETAIL109
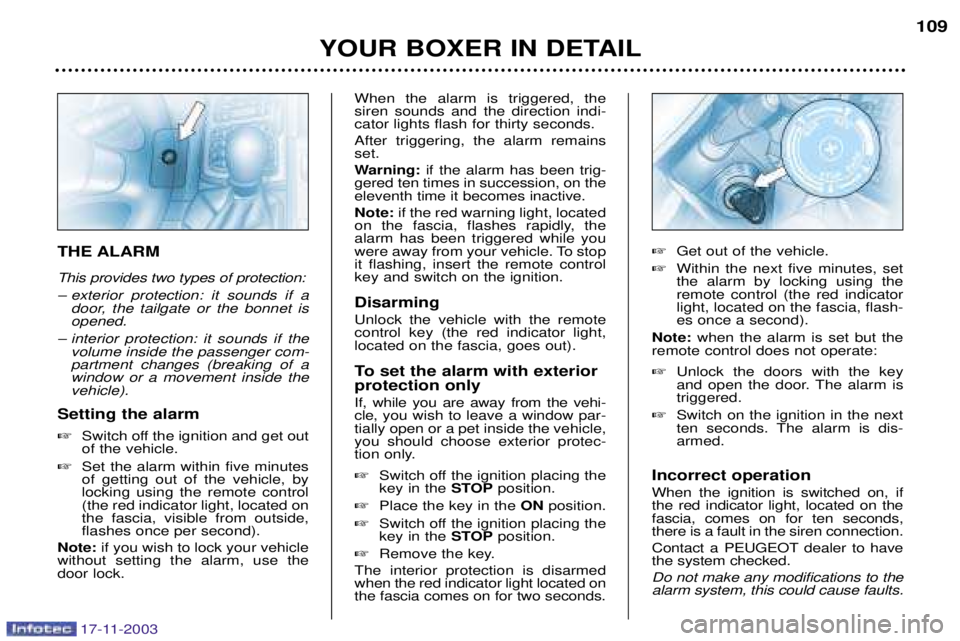
THE ALARM This provides two types of protection:
Ð exterior protection: it sounds if a
door, the tailgate or the bonnet is opened.
Ð interior protection: it sounds if the volume inside the passenger com-partment changes (breaking of awindow or a movement inside thevehicle).
Setting the alarm � Switch off the ignition and get out of the vehicle.
� Set the alarm within five minutesof getting out of the vehicle, bylocking using the remote control(the red indicator light, located onthe fascia, visible from outside,flashes once per second).
Note: if you wish to lock your vehicle
without setting the alarm, use thedoor lock. When the alarm is triggered, thesiren sounds and the direction indi-cator lights flash for thirty seconds. After triggering, the alarm remains set.
Warning:
if the alarm has been trig-
gered ten times in succession, on the eleventh time it becomes inactive. Note: if the red warning light, located
on the fascia, flashes rapidly, the alarm has been triggered while you
were away from your vehicle. To stopit flashing, insert the remote controlkey and switch on the ignition. Disarming Unlock the vehicle with the remote control key (the red indicator light,located on the fascia, goes out).
To set the alarm with exterior protection only If, while you are away from the vehi- cle, you wish to leave a window par-
tially open or a pet inside the vehicle,you should choose exterior protec-
tion only. � Switch off the ignition placing the key in the STOPposition.
� Place the key in the ONposition.
� Switch off the ignition placing thekey in the STOPposition.
� Remove the key.
The interior protection is disarmedwhen the red indicator light located onthe fascia comes on for two seconds. �
Get out of the vehicle.
� Within the next five minutes, setthe alarm by locking using theremote control (the red indicatorlight, located on the fascia, flash-es once a second).
Note: when the alarm is set but the
remote control does not operate: � Unlock the doors with the key
and open the door. The alarm istriggered.
� Switch on the ignition in the next
ten seconds. The alarm is dis-armed.
Incorrect operation When the ignition is switched on, if the red indicator light, located on thefascia, comes on for ten seconds,there is a fault in the siren connection.
Contact a PEUGEOT dealer to have the system checked. Do not make any modifications to the alarm system, this could cause faults.
Page 115 of 181

17-11-2003
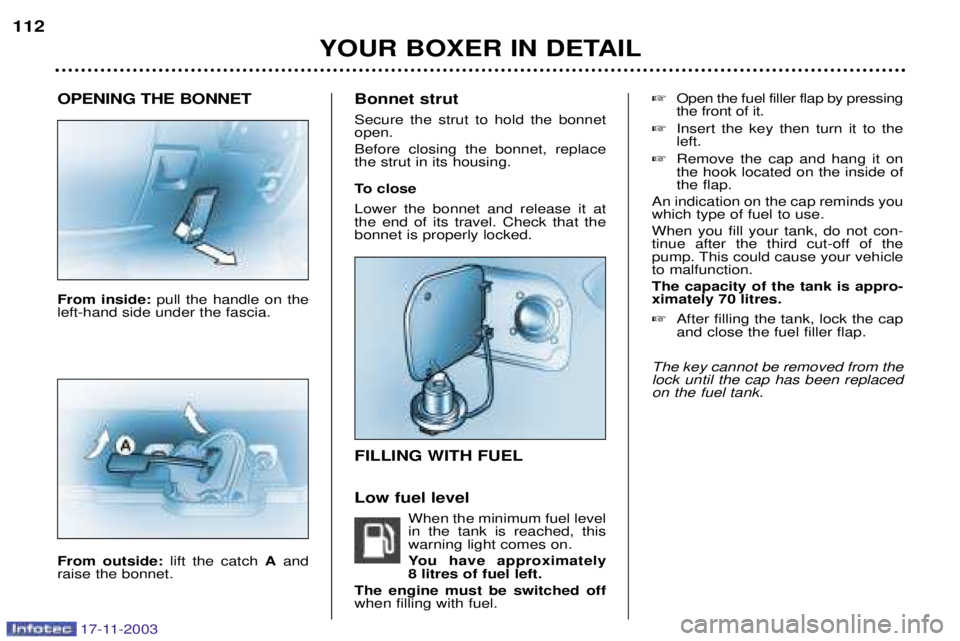
OPENING THE BONNET From inside: pull the handle on the
left-hand side under the fascia. From outside: lift the catch Aand
raise the bonnet. Bonnet strut Secure the strut to hold the bonnet open. Before closing the bonnet, replace the strut in its housing.
To close Lower the bonnet and release it at the end of its travel. Check that thebonnet is properly locked. FILLING WITH FUEL Low fuel level
When the minimum fuel level in the tank is reached, thiswarning light comes on.
You have approximately
8 litres of fuel left.
The engine must be switched offwhen filling with fuel. �
Open the fuel filler flap by pressingthe front of it.
� Insert the key then turn it to theleft.
� Remove the cap and hang it onthe hook located on the inside ofthe flap.
An indication on the cap reminds youwhich type of fuel to use. When you fill your tank, do not con-
tinue after the third cut-off of the
pump. This could cause your vehicleto malfunction. The capacity of the tank is appro- ximately 70 litres. � After filling the tank, lock the cap and close the fuel filler flap.
The key cannot be removed from thelock until the cap has been replacedon the fuel tank.
YOUR BOXER IN DETAIL
112
Page 116 of 181

17-11-2003
YOUR BOXER IN DETAIL113
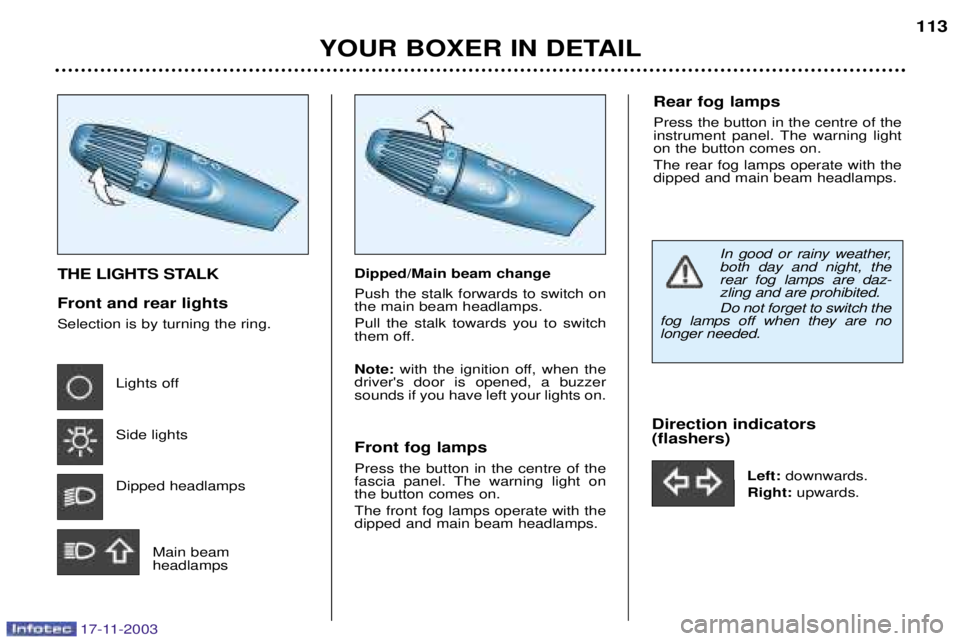
THE LIGHTS STALK Front and rear lights Selection is by turning the ring.
Lights off Side lights Dipped headlamps
Main beam headlamps Dipped/Main beam change Push the stalk forwards to switch on the main beam headlamps. Pull the stalk towards you to switch
them off. Note:
with the ignition off, when the
driver's door is opened, a buzzer sounds if you have left your lights on. Front fog lamps Press the button in the centre of the
fascia panel. The warning light onthe button comes on. The front fog lamps operate with the dipped and main beam headlamps. Direction indicators (flashers)
Left: downwards.
Right: upwards.
Rear fog lamps Press the button in the centre of the
instrument panel. The warning lighton the button comes on. The rear fog lamps operate with the dipped and main beam headlamps.
In good or rainy weather, both day and night, therear fog lamps are daz-zling and are prohibited. Do not forget to switch the
fog lamps off when they are no longer needed.
Page 121 of 181
17-11-2003
YOUR BOXER IN DETAIL117
ADJUSTING THE HEADLAMPS Depending on the load in your vehicle, adjusting the beam of the headlampsis recommended. 0 -
No load.
1 - Partial load.
2 - Average load.
3 - Maximum authorised load.
Initial setting is position 0. HAZARD WARNING LIGHTS Press the button, the direction indicators flash. They can operate with the ignition
off.
STEERING WHEEL HEIGHT ADJUSTMENT
When the vehicle is stationary, unlock the steering wheel by pullinghandle
Atowards you.
Adjust the height of the steeringwheel, then lock it by pushing handleA down fully.
HORN Press one of the spokes or the cen- tre of the steering wheel.
Page 125 of 181

17-11-2003
W:snow programme.
P ark :to immobilise the vehicle or start the engine ,
with the handbrake on or off. R everse :to reverse (select this function with the vehi-
cle stationary, engine at idle).
N eutral :to start the engine and to park, with the
handbrake on. Note: if function N is engaged inadvertently while
driving, allow the engine to return to idle before engaging function Dto accelerate.
D rive :for driving in automatic mode.
M anual :for driving in manual mode.
YOUR BOXER IN DETAIL
122
Moving off
With the engine running, to move off from position P:
� it is essential to press the
brake pedal to exit position P,
� select function R, D or M, then
gradually release the pressureon the brake pedal; the vehicle
moves off immediately.
You can also move off from position N:
� release the handbrake, with yourfoot on the brake
� select function R, D or M, then
gradually release the pressureon the brake pedal; the vehicle
moves off immediately.
WARNING When the engine is at idle, brakes not applied, if function R, D or Mis
selected the vehicle moves evenwithout the accelerator beingpressed. For this reason, do not leave chil- dren unsupervised inside thevehicle, with the engine running. When maintenance operations need to be carried out with the engine run-ning, apply the handbrake and selectposition P.
"PORSCHE TIPTRONIC SYSTEM" AUTOMATIC GEARBOX The four speed automaticgearbox offers a choice between the comfort of inte-
gral automatic operation , enhanced by a snowprogramme, or the pleasure of
manual gear changing .
Gear selection gate � Move the lever in the gate to select a function. Once the function is selected, the corresponding indicator light appears on
the instrument panel display.