Page 9 of 131
30-06-2003
9YOUR AT A GLANCE
8675
STEERING WHEEL HEIGHT ADJUSTMENT
When stationary, lower the lever to release the steering wheel. Adjust to the required height and raise the lever to lock the steer-ing wheel. OPENING THE BONNET Inside the vehicle:
pull the handle.
Outside the vehicle: lift the
catch and lift the bonnet. Secure the strut to hold the bon- net open.
Page 66 of 131

30-06-2003
YOUR 206 CC IN DETAIL67
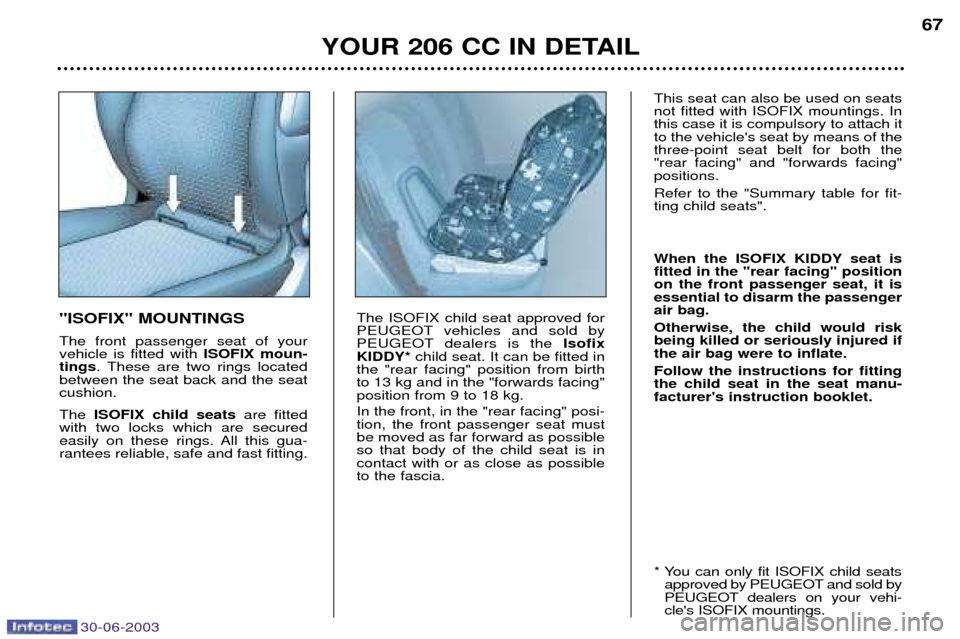
"ISOFIX" MOUNTINGS The front passenger seat of your vehicle is fitted with
ISOFIX moun-
tings . These are two rings located
between the seat back and the seatcushion. The ISOFIX child seats are fitted
with two locks which are secured
easily on these rings. All this gua-rantees reliable, safe and fast fitting. The ISOFIX child seat approved for
PEUGEOT vehicles and sold by
PEUGEOT dealers is the
Isofix
KIDDY* child seat. It can be fitted in
the "rear facing" position from birthto 13 kg and in the "forwards facing"position from 9 to 18 kg. In the front, in the "rear facing" posi- tion, the front passenger seat mustbe moved as far forward as possibleso that body of the child seat is incontact with or as close as possibleto the fascia. This seat can also be used on seatsnot fitted with ISOFIX mountings. Inthis case it is compulsory to attach itto the vehicle's seat by means of thethree-point seat belt for both the"rear facing" and "forwards facing"positions. Refer to the "Summary table for fit- ting child seats".
When the ISOFIX KIDDY seat is fitted in the "rear facing" positionon the front passenger seat, it isessential to disarm the passengerair bag. Otherwise, the child would risk being killed or seriously injured ifthe air bag were to inflate. Follow the instructions for fitting the child seat in the seat manu-facturer's instruction booklet.
* You can only fit ISOFIX child seats
approved by PEUGEOT and sold by
PEUGEOT dealers on your vehi-cle's ISOFIX mountings.
Page 67 of 131
30-06-2003
YOUR 206 CC IN DETAIL
68
CHILD SEATS RECOMMENDED BY PEUGEOT
In addition to the ISOFIX child seats, PEUGEOT offers a complete range of child seats which are secured using the seat belt: Group 0+: from birth to 13 kg
L1 - "Britax Babysure": installed in the rear-facing position in the front or in the rear using a three-point seat belt.
In the front, it is compulsory to disarm the passenger air bag and the passenger seat must be adjusted to the "mid-way" position on the runner.
Group 1: from 9 to 18 kg
L2 - "Ršmer Prince": installed in the rear using a two or three-point seat belt. For the safety of your child, the seat and the restraining cushion must never be separated.
Group 2: from 15 to 25 kg
L3 - "Ršmer Vario'': installed in the rear with a two or three-point seat belt.
Page 68 of 131

30-06-2003
YOUR 206 CC IN DETAIL69
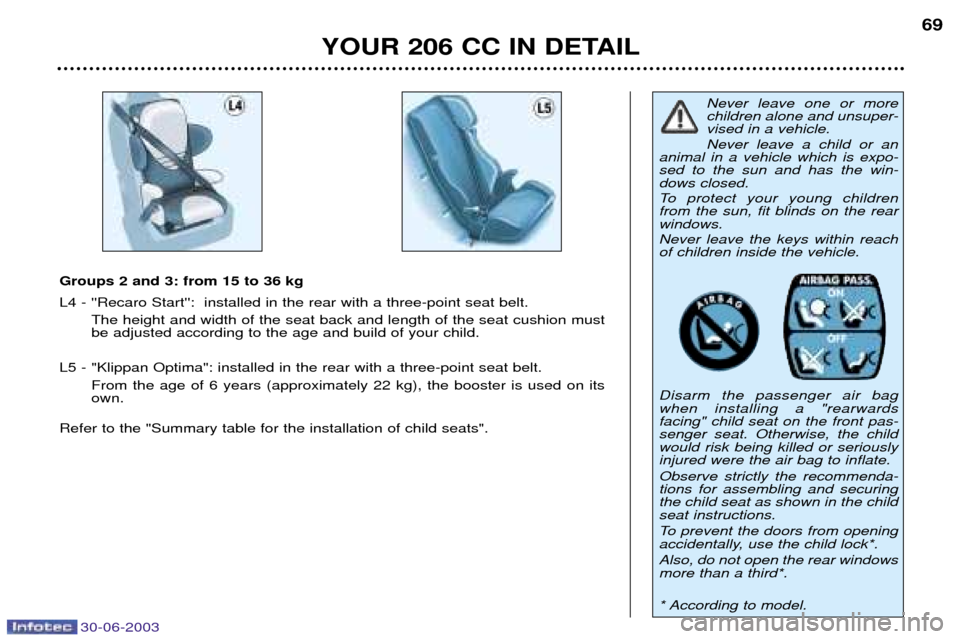
Groups 2 and 3: from 15 to 36 kg L4 - ''Recaro Start'': installed in the rear with a three-point seat belt.
The height and width of the seat back and length of the seat cushion must be adjusted according to the age and build of your child.
L5 - "Klippan Optima": installed in the rear with a three-point seat belt. From the age of 6 years (approximately 22 kg), the booster is used on itsown.
Refer to the "Summary table for the installation of child seats".
Never leave one or more children alone and unsuper-vised in a vehicle. Never leave a child or an
animal in a vehicle which is expo- sed to the sun and has the win-dows closed.
To protect your young children from the sun, fit blinds on the rearwindows. Never leave the keys within reach of children inside the vehicle. Disarm the passenger air bag when installing a "rearwardsfacing" child seat on the front pas-senger seat. Otherwise, the childwould risk being killed or seriouslyinjured were the air bag to inflate. Observe strictly the recommenda- tions for assembling and securingthe child seat as shown in the childseat instructions.
To prevent the doors from opening
accidentally, use the child lock*. Also, do not open the rear windows more than a third*.
* According to model.
Page 75 of 131
30-06-2003
YOUR 206 CC IN DETAIL75
BONNET STRUT Secure the strut to hold the bonnet open. Before closing the bonnet, replace the strut in its housing.
To close Lower the bonnet and release it at the end of its travel. Check that thebonnet is locked.
OPENING THE BONNET Inside the vehicle:
pull the handle
on the left-hand side, under the fascia. Outside the vehicle: lift the catch
and raise the bonnet. FILLING THE FUEL TANK The tank must be filled with fuel with the engine switched off
.
Insert the key then turn it to the left. Remove the cap.
A label indicates which type of fuel to use. If you fill your tank, do not continue
after the third cut-off of the pump
nozzle. This could result in vehiclemalfunctions. The capacity of the tank is approximately 10.3 gallons (47 litres).
Page 89 of 131
30-06-2003
YOUR 206 CC IN DETAIL
88
GLOVE COMPARTMENT The glove compartment is fitted with a lock.
To open the glove compartment, lift the handle. The light comes on when the lid is opened. 1.
Vehicle document folder storage
2. Can holder
3. Pen holder
4. Spectacles storage
5. Map storage
6. Coin storage BOTTLE HOLDER
A bottle holder is fitted between the two rear seat backs.
To open it, pull the top of the cover.
LASHING RINGS Use the 4 lashing rings on the lug- gage compartment floor to secureyour luggage.
LUGGAGE RETAINING NET Hooked onto the lashing rings, this enables you to secure your luggage.
Page 103 of 131

30-06-2003
PRACTICAL INFORMATION
100
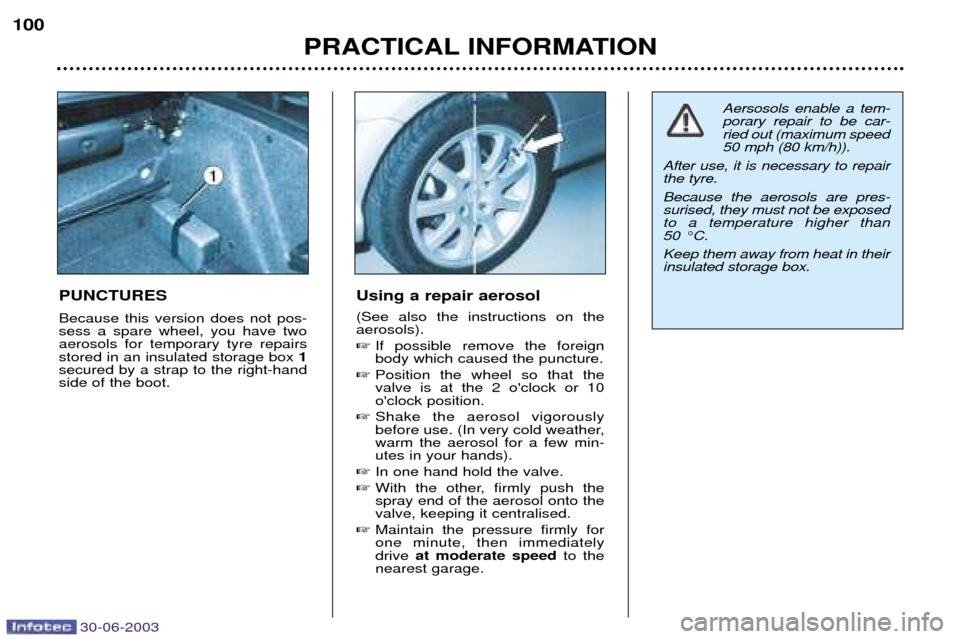
PUNCTURES Because this version does not pos- sess a spare wheel, you have twoaerosols for temporary tyre repairsstored in an insulated storage box
1
secured by a strap to the right-handside of the boot. Using a repair aerosol (See also the instructions on the aerosols). �
If possible remove the foreign body which caused the puncture.
� Position the wheel so that thevalve is at the 2 o'clock or 10o'clock position.
� Shake the aerosol vigorously
before use. (In very cold weather,warm the aerosol for a few min-utes in your hands).
� In one hand hold the valve.
� With the other, firmly push thespray end of the aerosol onto thevalve, keeping it centralised.
� Maintain the pressure firmly forone minute, then immediatelydrive at moderate speed to the
nearest garage. Aersosols enable a tem-porary repair to be car-ried out (maximum speed50 mph (80 km/h)).
After use, it is necessary to repairthe tyre. Because the aerosols are pres- surised, they must not be exposedto a temperature higher than
50 ¡C. Keep them away from heat in their insulated storage box.
Page 104 of 131

30-06-2003
PRACTICAL INFORMATION101
CHANGING A WHEEL �
Park the vehicle on level, stable
ground which is not slippery.
� Apply the handbrake, engage first
gear or reverse (position Pon the
automatic gearbox) and switch offthe ignition.
� Chock the rear of the wheel withshim 2diagonally opposite the
wheel to be changed.
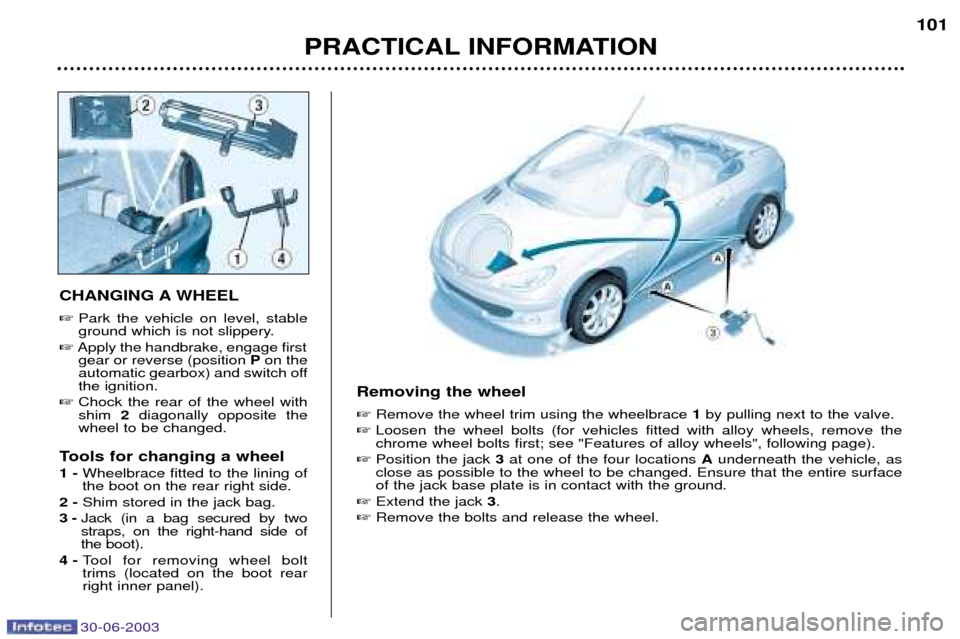
Tools for changing a wheel 1 - Wheelbrace fitted to the lining of the boot on the rear right side.
2 - Shim stored in the jack bag.
3 - Jack (in a bag secured by twostraps, on the right-hand side ofthe boot).
4 - Tool for removing wheel bolttrims (located on the boot rearright inner panel). Removing the wheel �
Remove the wheel trim using the wheelbrace 1by pulling next to the valve.
� Loosen the wheel bolts (for vehicles fitted with alloy wheels, remove the chrome wheel bolts first; see "Features of alloy wheels", following page).
� Position the jack 3at one of the four locations Aunderneath the vehicle, as
close as possible to the wheel to be changed. Ensure that the entire surfaceof the jack base plate is in contact with the ground.
� Extend the jack 3.
� Remove the bolts and release the wheel.