2003 Oldsmobile Bravada change time
[x] Cancel search: change timePage 224 of 410

When you drive over obstacles or rough terrain, keep a
firm grip on the steering wheel. Ruts, troughs or
other surface features can jerk the wheel out of your
hands
if you’re not prepared.
When you drive over bumps, rocks, or other obstacles,
your wheels can leave the ground.
If this happens,
even with one or two wheels, you can’t control
the vehicle as well or at all.
Because you will be on an unpaved surface, it’s
especially important
to avoid sudden acceleration,
sudden turns or sudden braking.
In a way, off-road driving requires a different kind of
alertness from driving on paved roads and highways.
There are no road signs, posted speed limits or
signal lights.
You have to use your own good judgment
about what is safe and what isn’t.
Drinking and driving can be very dangerous on any
road. And this is certainly true for off-road driving. At the
very time you need special alertness and driving
skills, your reflexes, perceptions and judgment can be
affected by even a small amount of alcohol.
You
could have a serious - or even fatal - accident if you
drink and drive or ride with a driver who has been
drinking. See
Drunken Driving on page 4-2.
Driving on Off-Road Hills
Off-road driving often takes you up, down or across a
hill. Driving safely on hills requires good judgment
and understanding of what your vehicle can and can’t
do. There are some hills that simply can’t be driven, no
matter how well bui he vehicle.
Man) ills are ~..-.ply .,o steep for any vehicle.
If you drive up them, you will stall. If you drive
down them, you can’t control your speed.
If you
drive across them, you
will roll over. You could
be seriously injured or killed. If you have any
doubt about the steepness, don’t drive the hill.
Approaching a Hill
When you approach a hill, you need to decide if it’s one
of those hills that’s just
too steep to climb, descend
or cross. Steepness can be hard to judge. On a very
small hill, for example, there may be a smooth, constant
incline with only a small change in elevation where
you can easily see all the way to the top. On a large hill,
the incline may get steeper as you near the top, but
you may not see this because the crest
of the hill
is hidden by bushes, grass or shrubs.
4-1 9
Page 250 of 410

Towing a Trailer
If you don’t use the correct equipment and
drive properly, you can lose control when you
pull
a trailer. For example, if the trailer is too
heavy, the brakes may not work well
-- or even
at all. You and your passengers could be
seriously injured. Pull a trailer only if you have
followed all the steps in this section. Ask your
dealer for advice and information about towing
a trailer with your vehicle.
Notice: Pulling a trailer improperly can damage
your vehicle and result
in costly repairs not covered
by your warranty.
To pull a trailer correctly, follow
the advice in
this part, and see your dealer for
important information about towing a trailer with
your vehicle. Additional rear axle maintenance
is required for a vehicle used to tow a trailer. See
“Scheduled Maintenance Services’’
in the Index.
To identify the trailering capacity of your vehicle,
you should read the information in “Weight of the Trailer’’
that appears later in this section.
Trailering is different than just driving your vehicle by
itself. Trailering means changes in handling, durability
and fuel economy. Successful, safe trailering takes
correct equipment, and
it has to be used properly.
That’s the reason for this part. In
it are many time-testea,
important trailering
tips and safety rules. Many of
these are important for your safety and that of your
passengers.
So please read this section carefully before
you pull a trailer.
4-45
Page 276 of 410

As in the chart shown previously, SAE 5W-30 is the
only viscosity grade recommended for your vehicle. You
should look for and use only oils which have the API
Starburst symbol and which are also identified as
SAE 5W-30.
If you cannot find such SAE 5W-30 oils,
you can use an SAE IOW-30 oil which has the API
Starburst symbol,
if it's going to be 0°F (-18°C)
or above. Do not use other viscosity grade oils, such as
SAE IOW-40 or SAE 20W-50 under any conditions.
Notice: Use only engine oil with the American
Petroleum Institute Certified For Gasoline Engines
starburst symbol. Failure to use the recommended
oil can result in engine damage not covered by
your warranty.
GM Goodwrench@ oil meets all the requirements for
your vehicle.
If you are in an area of extreme cold, where the
temperature falls below -20°F (-29"C), it is
recommended that you use either an SAE 5W-30
synthetic
oil or an SAE OW-30 oil. Both will provide
easier cold starting and better protection for your engine
at extremely low temperatures.
Engine Oil Additives
Don't add anything to your oil. The recommended oils
with the starburst symbol are all you will need for
good performance and engine protection.
When to Change Engine Oil
(GM Oil Life System)
Your vehicle has a computer system that lets YO
when to change the engine oil-and filter. This is
IU know
based on engine revolutions and engine temperature,
and not on mileage. Based on driving conditions,
the mileage at which an oil change will be indicated can
vary considerably. For the oil life system to work
properly, you must reset the system every time the oil is
changed.
When the system has calculated that oil life has been
diminished, it will indicate that an oil change
is
necessary. A CHANGE ENG OIL light in the Driver
Information Center (DIC) will come on. Change your oil
as soon
as possible within the next two times you
stop for fuel. It is possible that,
if you are driving under
the best conditions, the oil life system may not
indicate that an oil change is necessary for over a year.
However, your engine oil and filter must be changed
at least once a year and at this time the system must be
reset. It is also important to check your oil regularly
and keep it at the proper level.
If the system is ever reset accidentally, you must
change your oil at 3,000 miles (5
000 km) since your
last oil change. Remember to reset the oil life system
whenever the oil is changed.
5-1
7
Page 277 of 410

How to Reset the CHANGE ENG OIL Light
The GM Oil Life System calculates when to change
your engine oil and filter based on vehicle use. Anytime
your oil is changed, reset the system
so it can
calculate when the next oil change is required. If a
situation occurs where you change your oil prior to a
CHANGE ENG OIL light being turned on, reset the
system.
To reset the CHANGE ENG OIL light, do the following:
1. Turn the ignition key to RUN with the
2. Fully press and release the accelerator pedal three
engine
off.
times within five seconds.
For vehicles with the Driver Information Center, see
Driver Information Center (DE) on page 3-43 to reset
the system.
What to Do with Used Oil
Used engine oil contains certain elements that may be
unhealthy for your skin and could even cause cancer.
Don’t let used oil stay on your skin for very long. Clean
your skin and nails with soap and water, or a good
hand cleaner. Wash or properly dispose of clothing or
rags containing used engine oil. See the manufacturer’s
warnings about the use and disposal of oil products. Used oil can be a threat
to the environment. If you
change your own oil, be sure to drain all the oil from the
filter before disposal. Never dispose
of oil by putting it
in the trash, pouring it on the ground, into sewers, or into
streams
or bodies of water. Instead, recycle it by
taking it to a place that collects used oil. If you have a
problem properly disposing
of your used oil, ask
your dealer, a service station or a local recycling center
for help.
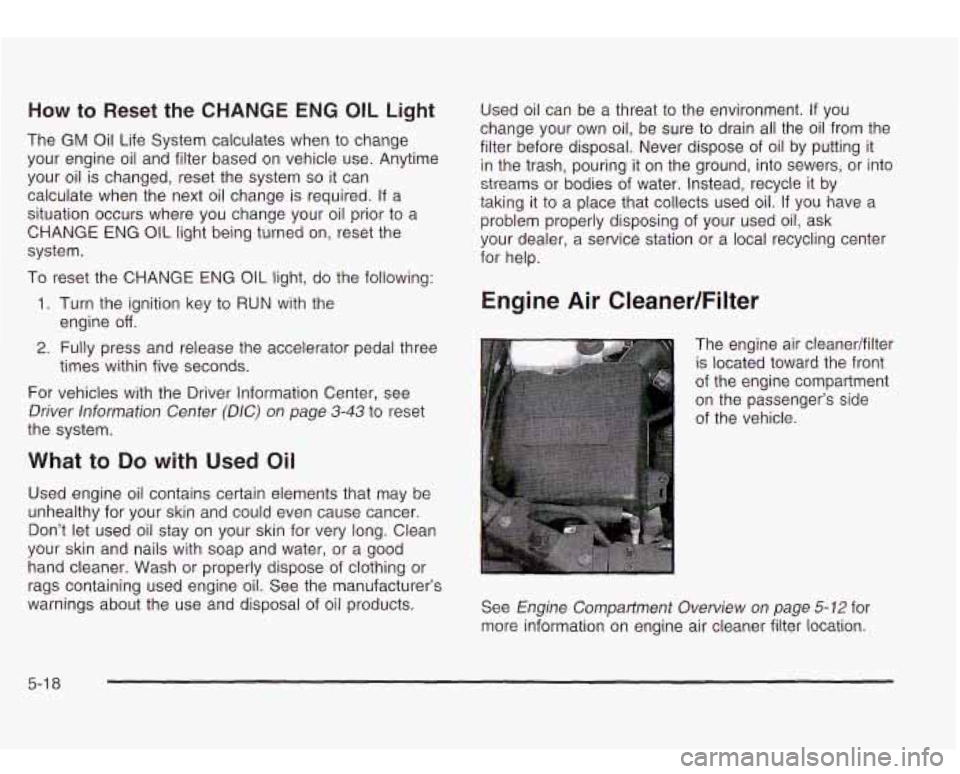
Engine Air CleanedFilter
The engine air cleanedfilter
is located toward the front
of the engine compartment
on the passenger’s side
of the vehicle.
See
Engine Compartment Overview on page 5-12 for
more information on engine air cleaner filter location.
5-1 8
Page 279 of 410

Automatic Transmission Fluid
When to Check and Change
A good time to check your automatic transmission fluid
level is when the engine oil is changed.
Change both the fluid and filter every
50,000 miles
(83
000 km) if the vehicle is mainly driven under one or
more of these conditions:
In heavy city traffic where the outside temperature
9 In hilly or mountainous terrain.
0 When doing frequent trailer towing.
regularly
reaches
90°F (32°C) or higher.
Uses such as found in taxi, police or delivery
If you do not use your vehicle under any of these
conditions, change the fluid and filter every
100,000 miles (1 66 000 km).
service.
How to Check
Because this operation can
be a little difficult, you may
choose
to have this done at the dealership service
department.
If you do it yourself, be sure to follow all the instructions
here, or you could get a false reading on the dipstick.
Notice: Too much or too little fluid can damage
your transmission.
Too much can mean that some
of the fluid could come out and fall on hot engine
part or exhaust system parts, starting
a fire.
Too little fluid could cause the transmission to
overheat.
Be sure to get an accurate reading if you
check your transmission fluid.
Wait at least 30 minutes before checking the
transmission fluid level
if you have been driving:
When outside temperatures are above
90°F (32°C).
At high speed for quite a while.
In heavy traffic-especially in hot weather
While pulling a trailer.
To get the right reading, the fluid should be at normal
operating temperature, which is 180°F
to 200°F
(82°C to 93°C).
5-20
Page 296 of 410

Brake Pedal Travel
The brake wear warning sound means that
soon your brakes won’t work well. That could
lead to an accident. When you hear the brake
wear warning sound, have your vehicle
serviced.
Notice: Continuing to drive with worn-out brake
pads could result
in costly brake repair.
Some driving conditions or climates may cause a brake
squeal when the brakes are first applied or lightly
applied. This does not mean something is wrong with
your brakes.
Properly torqued wheel nuts are necessary
to help
prevent brake pulsation. When tires are rotated, inspect
brake pads for wear and evenly tighten wheel nuts in
the proper sequence
to GM torque specifications.
Brake linings should always be replaced as complete
axle sets.
See
Brake System Inspection on page 6-16.
See your dealer if the brake pedal does not return to
normal height, or
if there is a rapid increase in
pedal travel. This could be a sign of brake trouble.
Brake Adjustment
Every time you make a brake stop, your disc brakes
adjust for wear.
Replacing Brake System Parts
The braking system on a vehicle is complex. Its many
parts have
to be of top quality and work well together if
the vehicle is to have really good braking. Your
vehicle was designed and tested with top-quality GM
brake parts. When you replace parts
of your braking
system
- for example, when your brake linings
wear down and you need new ones put in
- be sure
you get new approved GM replacement parts.
If
you don’t, your brakes may no longer work properly. For
example,
if someone puts in brake linings that are
wrong for your vehicle, the balance between your front
and rear brakes can change
- for the worse. The
braking performance you’ve come
to expect can change
in many other ways
if someone puts in the wrong
replacement brake parts.
5-37
Page 313 of 410

The purpose of regular rotation is to achieve more
uniform wear for all tires on the vehicle. The first rotation
is the most important. See “Part A: Scheduled
Maintenance Services,” in Section
6, for scheduled
rotation intervals.
When rotating your tires, always use the correct rotation
pattern shown here.
After the tires have been rotated, adjust the front and
rear inflation pressures as shown on the
Certificationnire label. Make certain that
all wheel nuts
are properly tightened. See “Wheel
Nut Torque”
under
Capacities and Specifications on page 5-93.
Rust c. dirt or. - wheel, or on the parts to
which
it is fastened, can make wheel nuts
become loose after a time.
The wheel could
come
off and cause an accident. When you
change a wheel, remove any rust
or dirt from
places where the wheel attaches to the vehicle.
In an emergency, you can use a cloth or
a
paper towel to do this; but be sure to use a
scraper
or wire brush later, if you need to, to
get
all the rust or dirt off. See “Changing a Flat
Tire” in the Index.
5-54
Page 330 of 410

5. Raise the vehicle by turning the jack handle
clockwise. Raise the vehicle far enough
off the
ground
so there is enough room for the spare
tire to fit.
6. Remove all the wheel nuts and take off the flat tire.
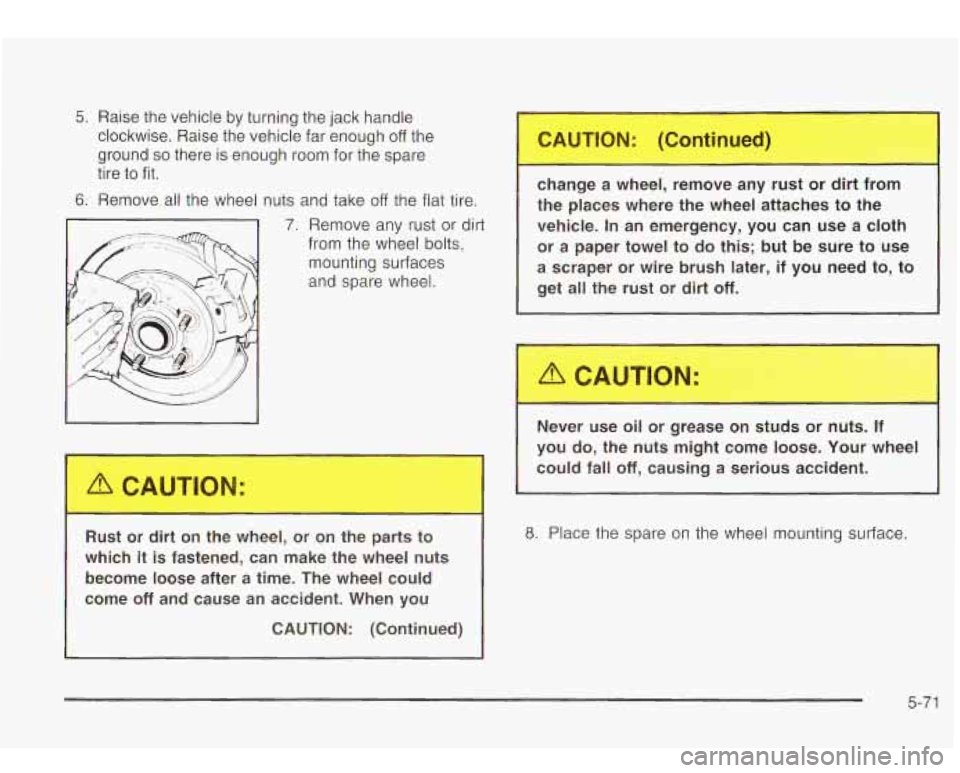
7. Remove any rust or dirt
from the wheel
bolts,
mounting surfaces
and spare wheel.
Is--- -
Rust or dir n t ---lee-, 3r 4 the p. s to
which
it is fastened, can make the wheel nuts
become loose after
a time. The wheel could
come
off and cause an accident. When you
CAUTION: (Continued) change a
wheel, remove any rust or dirt from
the places where the wheel attaches
to the
vehicle. In an emergency, you can use a cloth
or a paper towel to do this;
but be sure to use
a scraper or wire brush later, if you need to, to
get all the rust or dirt
off.
1
Never use oil or grease on studs tan nnutS. If
you do, the nuts might come loose. Your wheel
could fall
off, causing a serious
8. Place the spare on the wheel mounting surface.
5-71