Page 268 of 410

When you put the fuel cap back on, turn it to the right
(clockwise) until you hear a clicking sound. Make
sure you fully install the cap. The diagnostic system can
determine
if the fuel cap has been left off or improperly
installed. This would allow fuel to evaporate into the
atmosphere. See
Malfunction lndicator Lamp on
page 3-35.
Notice: If you need a new fuel cap, be sure to get
the right type. Your dealer can get one for you.
If you get the wrong type, it may not fit properly.
This may cause your malfunction indicator lamp to
light and may damage your fuel tank and emissions
system. See “Malfunction lndicator Lamp”
in the
Index.
Filling a Portable Fuel Container
NeveL ,,I1 a portable f,,l container while it is in
your vehicle. Static electricity discharge from
the container can ignite the gasoline vapor. You can be badly burned and your vehicle damaged if
this occurs. To help avoid injury to
you and others:
Dispense gasoline only into approved
containers.
Do not fill a container while it is inside a
vehicle,
in a vehicle’s trunk, pickup bed or
on any surface other than the ground.
Bring the fill nozzle in contact with the
I inside of the fill opening before operating
i the nozzle. Contact should be maintained
Don’t smoke while pumping gasoline.
until the filling
is complete.
5-9
Page 289 of 410
How to Add Coolant to the Radiator
1. You can remove the radiator pressure cap when
the cooling system, including the radiator pressure
cap and upper radiator hose, is no longer hot.
Turn the pressure cap slowly counterclockwise
about one full turn.
If you hear a hiss, wait for that to stop. A hiss
means there is still some pressure left.
2. Then keep turning the pressure cap. Remove the
pressure cap.
5-30
Page 320 of 410

To use the air inflator attach the appropriate nozzle
adapter to the end of the hose
if required. Then attach
that end of the hose to the object you wish to inflate.
Attach the other end of the hose to the outlet.
Press and release the switch to turn the air inflator on.
The indicator light will remain on when the inflator is
running.
The system has an internal clock to prevent overheating.
The system will allow about five minutes of running
time, then the compressor will stop. The indicator light
will then begin to flash. When the indicator is off,
the inflator can be started again by pressing the switch.
If the compressor is still hot,
it may only run for a
short time before shutting off again.
Press and release the switch to turn the inflator off.
Place the inflator kit
tools in the pouch and store
it properly. Remove the inflator hose from the outlet
during loading and unloading. Load leveling will
not function with the inflator hose attached
to the inflator
outlet. See ”Electronically Controlled Air Suspension
System” in the Index.
To reinstall the cover, line up the tabs at the back of the
cover, put it in place and latch the tabs.
A continuous flashing indicator light may also indicate a
malfunction in the air suspension system. See
“Electronically Controlled Air Suspension System” in the
Index.
Inllarlllg something too m,.-h can make it
explode, and you or others could be injured.
Be sure to read the inflator instructions, and
inflate any object only to its recommended
If a Tire Goes Flat
It’s unusual for a tire to “blowout” while you’re driving,
especially
if you maintain your tires properly. If air goes
out of a tire, it’s much more likely to leak out slowly.
But
if you should ever have a “blowout”, here are a few
tips about what to expect and what to do:
If a front tire fails, the flat tire will create a drag that
pulls the vehicle toward that side. Take your foot off the
accelerator pedal and grip the steering wheel firmly.
Steer to maintain lane position, and then gently brake to
a stop well out of the traffic lane.
5-61
Page 324 of 410
2. Turn the wheel wrench counterclockwise to lower
the spare tire. Keep turning the wheel wrench until
the spare tire can be pulled out from under the
vehicle.
If the spare tire does not lower to the ground, the
secondary latch is engaged causing the tire
not to lower. See “Secondary Latch System” later in
this section.
When the tire has been completely lowered, tilt the
retainer at the end of the cable and pull it through
the wheel opening. Pull the tire out from under
the vehicle.
Notice:
To help avoid vehicle damage, do not drive
the vehicle before the cable is restored.
3. Put the spare tire near the flat tire.
4. Position the chisel end of
your wheel wrench in the
notch of the center
cap and pry
off the
center cap.
See “Removing the Flat Tire and Installing the Spare
Tire” later in this section to continue changing the flat tire.
5-65
Page 326 of 410

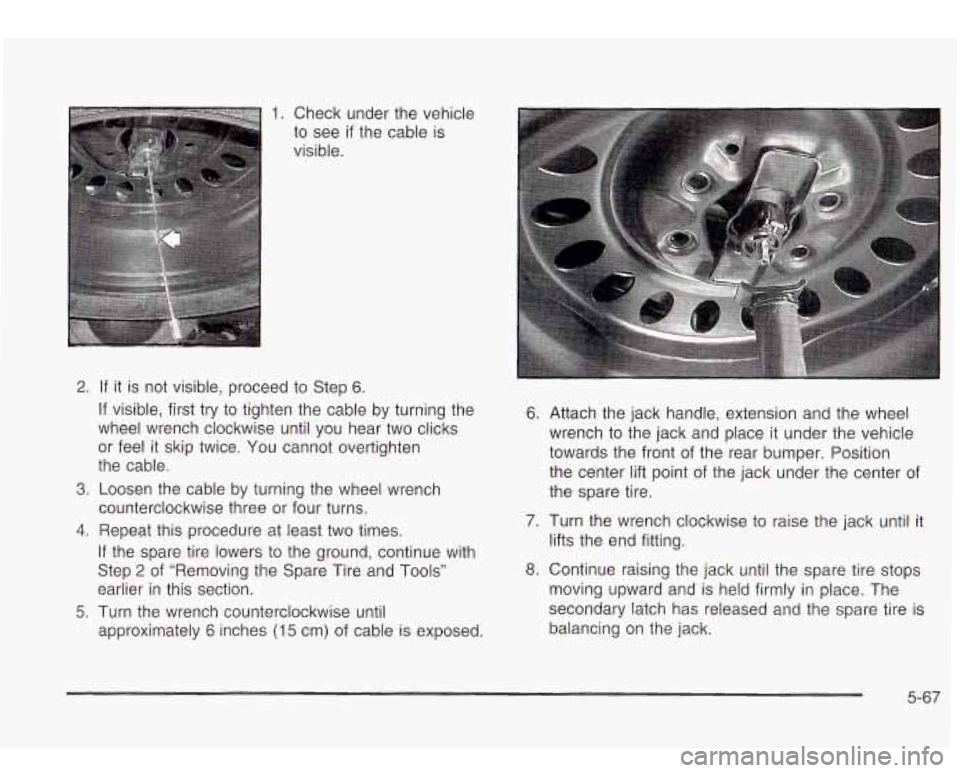
1. Check under the vehicle
to see
if the cable is
visible.
2. If it is not visible, proceed to Step 6.
If visible, first try to tighten the cable by turning the
wheel wrench clockwise until you hear two clicks
or feel it skip twice. You cannot overtighten
the cable.
3. Loosen the cable by turning the wheel wrench
counterclockwise three or four turns.
4. Repeat this procedure at least two times.
If the spare tire lowers to the ground, continue with
Step
2 of “Removing the Spare Tire and Tools”
earlier in this section.
approximately
6 inches (15 cm) of cable is exposed.
5. Turn the wrench counterclockwise until
6. Attach the jack handle, extension and the wheel
wrench to the jack and place it under the vehicle
towards the front of the rear bumper. Position
the center lift point of the jack under the center of
the spare tire.
7. Turn the wrench clockwise to raise the jack until it
lifts the end fitting.
8. Continue raising the jack until the spare tire stops
moving upward and is held firmly in place. The
secondary latch has released and the spare tire is
balancing on the jack.
5-67
Page 327 of 410

9.
10. Lower the jack by turning the wheel wrench
counterclockwise. Keep lowering the jack until the
spare tire slides
off the jack or is hanging by
the cable.
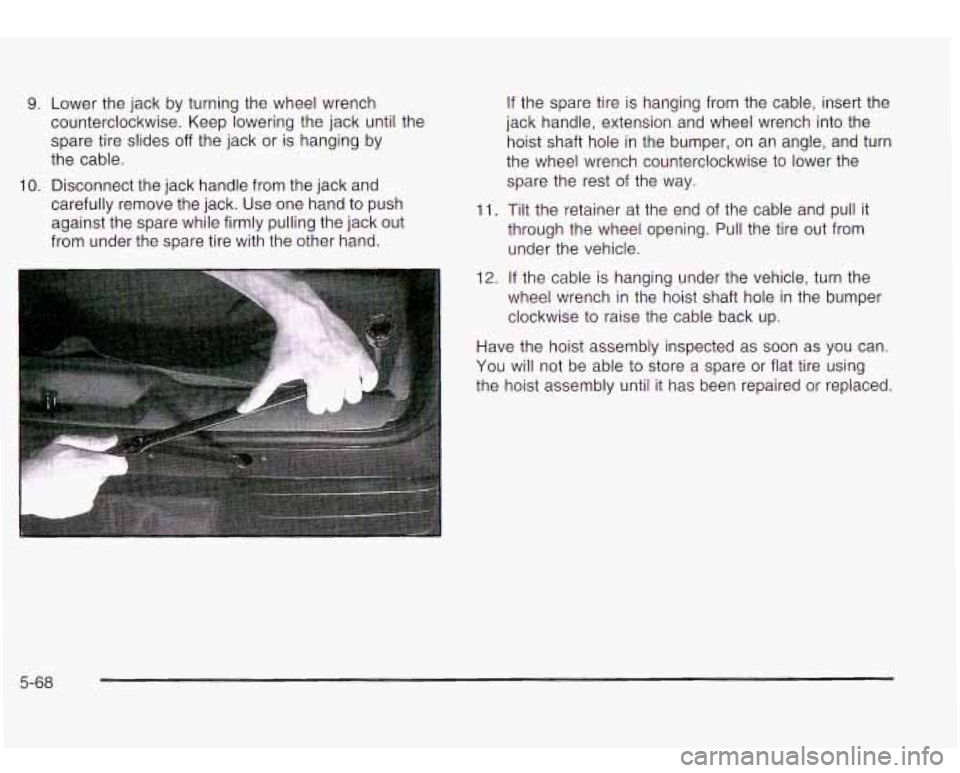
Disconnect the jack handle from the jack and
carefully remove the jack. Use one hand to push
against the spare while firmly pulling the jack out
from under the spare tire with the other hand.
If the spare tire is hanging from the cable, insert the
jack handle, extension and wheel wrench into the
hoist shaft hole in the bumper, on an angle, and turn
the wheel wrench counterclockwise
to lower the
spare the rest of the way.
11. Tilt the retainer at the end of the cable and pull it
through the wheel opening. Pull the tire out from
under the vehicle.
12. If the cable is hanging under the vehicle, turn the
wheel wrench in the hoist shaft hole in the bumper
clockwise to raise the cable back up.
Have the hoist assembly inspected as soon as you can.
You will not be able to store a spare or flat tire using
the hoist assembly until it has been repaired or replaced.
5-68
Page 328 of 410
Removing the Flat Tire and Installing
the Spare Tire
'- 1. Using the wheel wrench,
loosen all the wheel nuts.
Don't remove them yet.
Front
2. Turn the jack adjusting knob clockwise by hand to
3. Place the handle, extension and wheel wrench onto
raise the
jack lift head.
the jack.
5-69
Page 330 of 410
5. Raise the vehicle by turning the jack handle
clockwise. Raise the vehicle far enough
off the
ground
so there is enough room for the spare
tire to fit.
6. Remove all the wheel nuts and take off the flat tire.
7. Remove any rust or dirt
from the wheel
bolts,
mounting surfaces
and spare wheel.
Is--- -
Rust or dir n t ---lee-, 3r 4 the p. s to
which
it is fastened, can make the wheel nuts
become loose after
a time. The wheel could
come
off and cause an accident. When you
CAUTION: (Continued) change a
wheel, remove any rust or dirt from
the places where the wheel attaches
to the
vehicle. In an emergency, you can use a cloth
or a paper towel to do this;
but be sure to use
a scraper or wire brush later, if you need to, to
get all the rust or dirt
off.
1
Never use oil or grease on studs tan nnutS. If
you do, the nuts might come loose. Your wheel
could fall
off, causing a serious
8. Place the spare on the wheel mounting surface.
5-71