2003 Oldsmobile Bravada ECO mode
[x] Cancel search: ECO modePage 134 of 410

Climate Controls
Dual Automatic Climate Control
System
Your vehicle may have the optional dual automatic
climate control system. With this system you can control
the heating, cooling and ventilation for your vehicle.
When your vehicle is first started, the display will show
the driver’s temperature setting and air delivery mode for
five seconds. Then it will show the outside temperature.
0 (Off): Press this button to turn off the entire climate
control system. Outside air will still enter the vehicle,
and will be directed to the floor. Press the AUTO button,
the mode button, the fan arrows, or either temperature
knob to turn the system on.
Q., *d (Mode): Press this button to manually select the air
delivery mode to the floor, instrument panel, or
windshield outlets. The system will stay in the selected
mode until the mode button is pressed again or the
AUTO button is pressed.
Driver’s Side Temperature Knob: Turn this knob
clockwise or counterclockwise to manually raise or lower
the temperature on the driver’s side of the vehicle. The
display will show the temperature setting decreasing or
increasing and the word “DRIVER” will light up. This knob
can also adjust the passenger’s side temperature setting
simultaneously
if the two zones are linked. The words
“DRIVER and PASS” will then light up.
Passenger’s Side Temperature Knob: Turn this knob
clockwise or counterclockwise to manually raise or lower
the temperature on the passenger’s side of the vehicle.
The display will show the temperature setting decreasing
or increasing and the word “PASS” will light up. The
passenger’s temperature setting can be set to match and
link to the driver’s temperature setting by pressing and
holding the AUTO button for three seconds. By adjusting
the driver’s side temperature setting, the passenger’s
side temperature setting will follow and both “DRIVER
and PASS” will be displayed. The passenger’s side
temperature setting also resets and relinks to the driver’s
side temperature setting
if the vehicle has been off for
more than two hours.
3-21
Page 135 of 410

Automatic Operation Manual Operation
AUTO
(Automatic): When automatic operation is
active, the system will control the inside temperature,
the air delivery mode, and the fan speed.
Use the steps below to place the entire system in
automatic mode:
1. Press the AUTO button.
When AUTO is selected, the air conditioning
operation and air inlet will be automatically
controlled. The air conditioning compressor will run
when the outside temperature is over approximately
40°F (4°C). The air inlet will normally be set to
outside air. If it’s hot outside, the air inlet will
automatically switch to recirculate inside air to help
quickly cool down your vehicle.
2. Set the driver’s and passenger’s temperature.
To find your comfort setting, start with a 72°F (22°C)
temperature setting and allow about 20 minutes
for the system to regulate. Turn the driver’s or
passenger’s side temperature knob to adjust the
temperature setting as necessary. If you choose the
temperature setting
of 60°F (15”C), the system
will remain at the maximum cooling setting.
If you
choose the temperature setting of 90°F
(32”C),
the system will remain at the maximum heat setting.
Choosing either maximum setting may not cause
the vehicle to heat or cool any faster. To change
the current setting, select one of the
following:
v (Fan): This button allows you to manually
adjust the fan speed. Press the up arrow to increase fan
speed and the down arrow to decrease fan speed.
The display will change to show you the selected fan
speed and the driver’s side temperature setting for five
seconds.
@* *d (Mode): Press this button to manually change the
direction of the airflow in your vehicle. Keep pressing the
button until the desired mode appears on the display.
The display will change to show you the selected
air delivery mode and the driver’s temperature setting
for five seconds.
2 (Vent): This mode directs air to the instrument
panel outlets.
+2 (Bi-Level): This mode directs approximately half of
the air to the instrument panel outlets, then directs
the remaining air to the floor outlets. A little air is
directed toward the windshield and the side window
outlets. Cooler air is directed to the upper outlets and
warmer air to the floor outlets.
3-22
Page 152 of 410

Don’t keep driving if the oil pressure is low. If
you do, your engine can become so hot that it
catches fire. You or others could be burned.
Check your oil as
soon as possible and have
your vehicle serviced.
Notice: Damage to your engine from neglected oil
problems can be costly and is not covered by
your warranty.
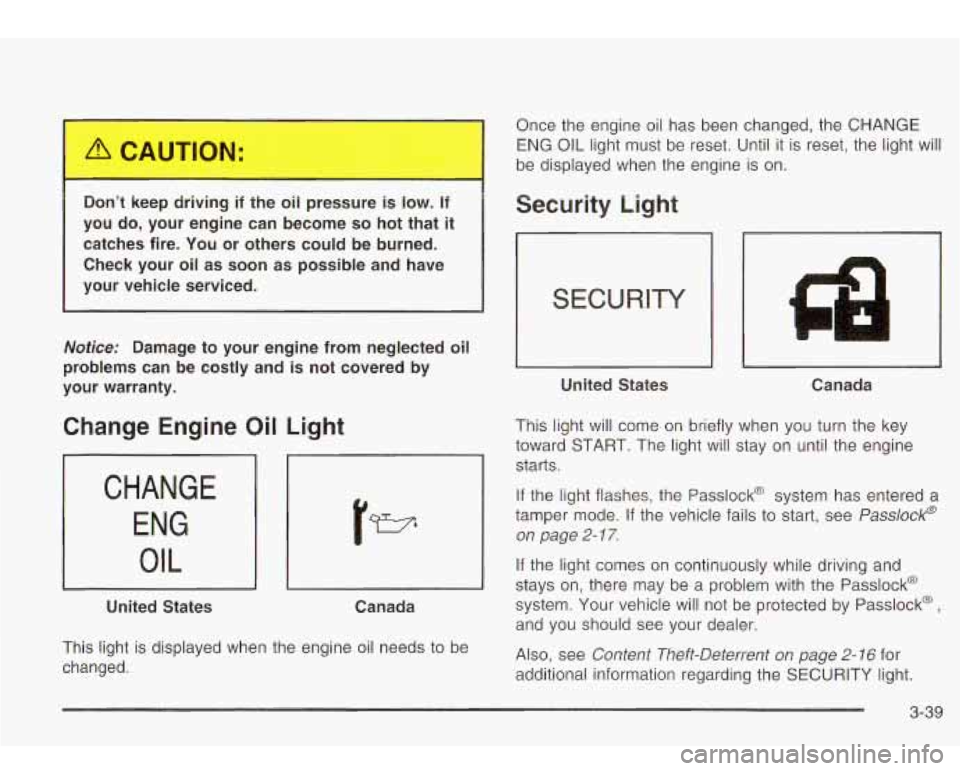
Change Engine Oil Light
CHANGE ENG
I OIL
United States Canada
This light is displayed when the engine oil needs to be
changed. Once the engine oil has been changed, the CHANGE
ENG OIL light
must be reset. Until it is reset, the light will
be displayed when the engine is on.
Security Light
United States Canada
This light will come on briefly when you turn the key
toward START. The light will stay on until the engine
starts.
If the light flashes, the Passlock@ system has entered a
tamper mode. If the vehicle fails to start, see
Passlock@
on page
2- 1 7.
If the light comes on continuously while driving and
stays on, there may be a problem with the Passlock@
system. Your vehicle will not be protected by Passlock@
,
and you should see your dealer.
Also, see
Content Theft-Deterrent on page 2- 16 for
additional information regarding the SECURITY light.
3-39
Page 156 of 410

Driver Information Center (DIC)
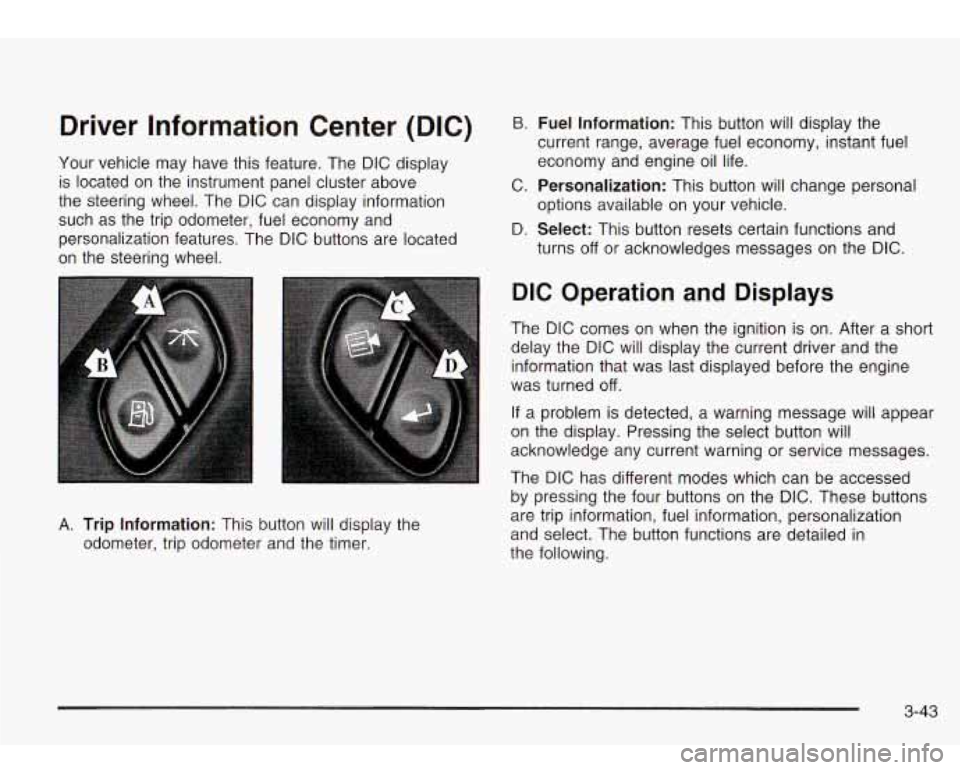
Your vehicle may have this feature. The DIC display
is located on the instrument panel cluster above
the steering wheel. The DIC can display information
such as the trip odometer, fuel economy and
personalization features. The DIC buttons are located
on the steering wheel.
B. Fuel Information: This button will display the
current range, average fuel economy, instant fuel
economy and engine oil life.
C.
Personalization: This button will change personal
D.
Select: This button resets certain functions and
options available
on your vehicle.
turns
off or acknowledges messages on the DIC.
A. Trip Information: This button will display the
odometer, trip odometer and the timer.
DIC Operation and Displays
The DIC comes on when the ignition is on. After a short
delay the DIC will display the current driver and the
information that was last displayed before the engine
was turned
off.
If a problem is detected, a warning message will appear
on the display. Pressing the select button will
acknowledge any current warning or service messages.
The DIC has different modes which can be accessed
by pressing the four buttons on the DIC. These buttons
are trip information, fuel information, personalization
and select. The button functions are detailed in
the following.
3-43
Page 172 of 410

AUTO EQ (Automatic Equalizer): Press this button to
choose bass, midrange and treble equalization
settings designed for country, jazz, talk, pop, rock and
classical program types.
To return to the manual mode, press the AUTO EQ
button until MANUAL appears on the display. Then you
will be able
to manually adjust the bass, midrange
and treble using the AUDIO button.
If your vehicle has the Bose radio, your audio system
allows you to choose from five different equalization
settings: talk, driver, normal, spatial, and auto eq normal.
These settings can be used while listening to the
radio or the
CD player. Press the AUTO EQ button to
select your choice.
TALK: This setting makes spoken words sound very
clear. When listening
to non-musical material such
as news, talk shows, sports broadcasts and books
on tape.
DRIVER: This setting gives the driver the best sound
quality.
NORMAL: This setting enhances the stereo effects.
AUTO EQ NORMAL (Automatic Equalization): This
setting will provide the best overall Bose performance.
The radio will save separate AUTO EQ settings for each
preset and source.
Adjusting the Speakers (Balance/Fade)
AUDIO: To adjust the balance between the right
and the left speakers, press and release the AUDIO
button until BAL appears on the display. Press the knob
above the AUDIO button to extend it, then turn the
knob
to move the sound toward the left or the right
speakers.
To adjust the fade between the front and the rear
speakers, press and release the AUDIO button until
FAD appears on the display. Press the knob above the
AUDIO button to extend it, then turn the knob
to
move the sound toward the front or the rear speakers.
Pressing and holding the AUDIO button for at least
two seconds will return all tone settings, including bass
and treble to flat.
SPATIAL: This setting makes the listening space seem
larger.
3-59
Page 174 of 410

BAND (Alternate Frequency): Alternate frequency
allows the radio
to switch to a stronger station with the
same program type. Press and hold BAND for two
seconds to turn alternate frequency on. AF ON
will appear on the display. The radio may switch to
stronger stations. Press and hold BAND again for two
seconds
to turn alternate frequency off. AF OFF
will appear on the display. The radio will not switch to
other stations. When you turn the ignition
off and then on
again, the alternate frequency feature will automatically
be turned on.
Setting Preset PTYs
The six numbered pushbuttons let you return to your
favorite Program Types (PTYs). These pushbuttons
have factory PTY presets. You can set up to 12 PTYs
(six FM1 and six FM2) by performing the following steps:
1. Press BAND
to select FMI or FM2.
2. Press the P-TYPE button to activate program type
select mode.
3. Turn the P-TYPE knob to select a PTY.
4. Press and hold one of the six numbered
pushbuttons until you hear a beep. Whenever you
press that numbered pushbutton, the PTY you
set will return.
5. Repeat the steps for each pushbutton.
RDS Messages
ALERT!: Alert warns of local or national emergencies.
When an alert announcement comes on the current
radio station, ALERT! will appear on the display. You will
hear the announcement, even
if the volume is muted
or a cassette tape or compact disc is playing.
If the
cassette tape or compact disc player is playing, play will
stop during the announcement. You will not be able
to turn off alert announcements.
ALERT! will not be affected by tests of the emergency
broadcast system. This feature is not supported by
all RDS stations.
INFO (Information): If the current station has a
message, INFO will appear on the display. Press this
button
to see the message. The message may display
the artist and song title, call in phone numbers, etc.
If the whole message is not displayed, parts of it
will appear every three seconds. To scroll through the
message at your own speed, press the INFO button
repeatedly. A new group
of words will appear on
the display with each press. Once the complete
message has been displayed, INFO will disappear from
the display until another new message
is received.
The old message can be displayed by pressing
the INFO button until
a new message is received or a
different station is tuned to.
3-61
Page 183 of 410

SCAN: You can also scan through the channels within
a category by performing the following:
1. Press the P-TYPE button. P-TYPE and the last
selected PTY will be displayed on the screen.
2. Select a category by turning the P-TYPE knob.
3. Once the desired category is displayed, press and
hold either SCAN arrow, and the radio will begin
scanning within your chosen category.
4. Press either SCAN arrow again to stop at a
particular station.
AM
FM (Alternate Frequency): Alternate frequency
allows the radio
to switch to a stronger station with the
same program type. Press and hold AM FM for two
seconds
to turn alternate frequency on. AF ON
will appear on the display. The radio may switch to
stronger stations. Press and hold AM FM again for two
seconds
to turn alternate frequency off. AF OFF will
appear on the display. The radio will not switch
to other
stations. When you turn the ignition
off and then on
again, the alternate frequency feature will automatically
be turned on.
Setting Preset PTYs
The six numbered pushbuttons let you return to your
favorite PTYs. These buttons have factory PTY presets.
You can set up
to 12 PTYs (six FMl and six FM2) by
performing the following steps:
1.
2.
3.
4.
5.
Press BAND to select FMl or FM2.
Press the P-TYPE button
to activate program type
select mode.
Turn the P-TYPE knob
to select a PTY.
Press and hold one of the six numbered
pushbuttons until you hear a beep. Whenever you
press that numbered pushbutton, the PTY you
set will return.
Repeat the steps for each pushbutton.
3-70
Page 188 of 410

Using Song List Mode
The integrated six-disc CD changer has a feature called
song list. This feature is capable of saving
20 track
selections.
To save tracks into the song list feature, perform the
following steps:
1. Turn the disc player on and load it with at least one
disc. See “LOAD CD” listed previously in this
section for more information.
2. Check to see that the disc changer is not in song
list mode. S-LIST should not appear in the display.
If S-LIST is present, press the SONG LIST
button
to turn it off.
3. Select the desired disc by pressing the numbered
pushbutton and then use the SEEK SCAN right
arrow button
to locate the track that you want
to save. The track will begin to play.
4. Press and hold the SONG LIST button for two or
more seconds
to save the track into memory.
When SONG LIST is pressed a beep will be heard
immediately. After two seconds of pressing
SONG LIST continuously, two beeps will sound
to
confirm that the track has been saved.
5. Repeat Steps 3 and 4 for saving other selections.
If you attempt to save more than 20 selections, S-LIST
FULL will appear on the display.
To play the song list, press the SONG LIST button. One
beep will be heard and S-LIST will appear on the
display. The recorded tracks will begin
to play in the
order that they were saved.
You may seek through the song list by using the SEEK
SCAN arrows. Seeking past the last saved track will
return you
to the first saved track.
To delete tracks from the song list, perform the following
steps:
1. Turn the disc player on.
2. Press the SONG LIST button to turn song list on.
S-LIST will appear on the display.
3. Press the SEEK SCAN arrows to select the desired
track
to be deleted.
4. Press and hold the SONG LIST button for two
seconds. When pressing SONG LIST, one beep
will be heard immediately. After two seconds
of pressing the SONG LIST button continuously,
two beeps will be heard
to confirm that the track has
been deleted.
After a track has been deleted, the remaining tracks are
moved up the
list. When another track is added to the
song list, the track will be added
to the end of the list.
3-75