2003 OLDSMOBILE AURORA door lock
[x] Cancel search: door lockPage 2 of 387

The 2003 Oldsmobile Aurora Owner Manual
Seats and Restraint Systems ........................... 1-1
Front Seats
............................................... 1-2
Safety Belts
.............................................. 4 -8
Child Restraints
....................................... 1-28
Air Bag Systems
...................................... 1-47
Restraint System Check
............................ 1-55
Features and Controls ..................................... 2-1
Keys
........................................................ 2-3
Doors and Locks
...................................... 2-10
Windows
................................................. 2-1 7
Theft-Deterrent Systems ............................ 2-1 9
Starting and Operating Your Vehicle
........... 2-23
Mirrors
.................................................... 2-35
Onstar@ System
...................................... 2-39
HomeLink@ Transmitter
............................. 2-41
Storage Areas
......................................... 2-45
Sunroof
.................................................. 2-47
venicie Personaiization
............................. 2-48
Instrument Panel ............................................. 3-1
Instrument Panel Overview
.......................... 3-2
Climate Controls
...................................... 3-23
Warning Lights, Gages and Indicators
......... 3-30
D!%%?r !!?formatior! Center (D!C) .................. u 12-AK -rJ
Audio System(s) ....................................... 3-59 Driving
Your Vehicle
....................................... 4-1
Your Driving. the Road. and Your Vehicle
..... 4-2
Service and Appearance Care
.......................... 5-1
Towing
................................................... 4-33
Service
............................... ;. .................... 5-3
Fuel
......................................................... 5-5
Checking Things Under
the Hood
............................................. 5-12
Headlamp Aiming
..................................... 5-50
Windshield Wiper Blade Replacement
= ~ iI I I 5-59
Tires ...................................................... 5-60
Appearance Care
..................................... 5-82
Vehicle Identification
................................. 5-90
Electrical System
...................................... 5-91
Capacities and Specifications
................... 5-1 00
Maintenance Schedule ..................................... 6-1
Maintenance Schedule ................................ 6-2
Customer Assistance Information
.................... 7-1
Customer Assistance Information
.................. 7-2
Bulb
Replacement
.................................... 5-54
Normal Maintenance Replacement Parts
.... 5-101
Reporting Safety Defects
............................ 7-8
I-- -I ~ a lnQex ................................................................. 1
ProCarManuals.com
Page 21 of 387

Driver Position
This part describes the driver’s restraint system.
Lap-Shoulder Belt
The driver has a lap-shoulder belt. Here’s how to wear it
properly.
1. Close and lock the door.
2. Adjust the seat so you can sit up straight. To see
how, see “Seats” in the Index.
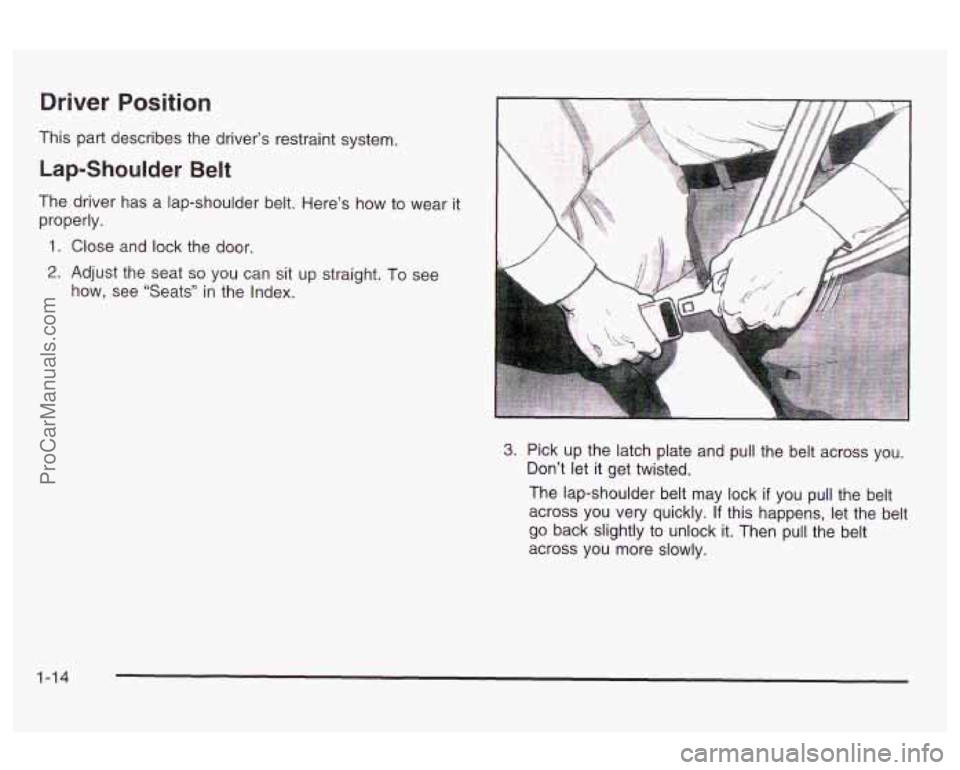
3. Pick up the latch plate and pull the belt across you.
Don’t let
it get twisted.
The lap-shoulder belt may lock
if you pull the belt
across you very quickly. If this happens, let the belt
go back slightly to unlock it. Then pull the belt
across you more slowly.
1-14
ProCarManuals.com
Page 57 of 387

If something is between an occupant and an
air bag, the bag might not inflate properly or
it
might force the object into that person causing
severe injury or even death. The path of an
inflating air bag must be kept clear. Don’t put
anything between an occupant and an air bag,
and don’t attach or put anything
on the
steering wheel hub or on or near any other air
bag covering. Don’t let seat covers block the
inflation path
of a side impact air bag.
The right front passenger’s side impact air bag is in the
side of the passenger’s seatback closest to the door.
1-50
ProCarManuals.com
Page 60 of 387

When an air bag inflates, there is dust in the
air. This dust could cause breathing problems
for people with a history of asthma or other
breathing trouble.
To avoid this, everyone in
the vehicle should get out as soon as
it is safe
to do
so. If you have breathing problems but
can’t get out of the vehicle after an air bag
inflates, then get fresh air by opening a
window or a door.
If you experience breathing
problems following an air bag deployment, you
should seek medical attention.
Your vehicle has a feature that will automatically unlock
the doors and turn the interior lamps on when the air
bags inflate
(if battery power is available). You can lock
the doors again and turn the interior lamps
off by
using
ii~e door iock ana inierior iamp conirois.
In many crashes severe enough to inflate an air bag,
windshields are broken by vehicle deformation.
Additional windshield breakage may also occur from the
right front passenger air bag.
Air bags are designed to inflate only once. After an
air bag inflates, you’ll need some new parts for
your air bag system. If you don’t get them, the air
bag system won’t be there to help protect you
in another crash.
A new system will include air bag
modules and possibly other parts. The service
manual for your vehicle covers the need to replace
other parts.
Your vehicle is equipped with an electronic frontal
sensor, which helps the sensing system distinguish
between a moderate frontal impact and a more
severe frontal impact. Your vehicle is also equipped
with a crash sensing and diagnostic module,
which records information about the frontal air bag
system. The module records information about
the readiness of the system, when the system
commands air bag inflation and driver’s safety belt
usage at deployment. The module also records
speed, engine
RPM, brake and throttle data.
1-53
ProCarManuals.com
Page 64 of 387

Section 2 Features and Controls
Keys ............................................................... 2-3
Remote Keyless Entry System
......................... 2.5
Remote Keyless Entry System Operation
........... 2.6
Doors and Locks
............................................ 2.10
Door Locks
.................................................. 2-10
Central Door Unlocking System
...................... 2-1 1
Power Door Locks
........................................ 2-1 1
Door Ajar Reminder
...................................... 2-1 1
Delayed Locking
........................................... 2-1 1
Programmable Automatic Door Locks
.............. 2-12
Rear Door Security Locks
.............................. 2-13
Lockout Protection
........................................ 2-14
Leaving Your Vehicle
.................................... 2-14
Trunk
.......................................................... 2-14
Windows
........................................................ 2-17
Power Windows
............................................ 2-18
Sun Visors
................................................... 2-18
Theft-Deterrent Svstems
................................. -2-1 9
Universal Theft-Deterrent
........ ........ 2-19
PASS-Key@
Ill Operation .................... .... 2-21
PASS-Key@
III ............................... .... 2-21 Starting and Operating
Your Vehicle
................ 2.23
New Vehicle Break-In
.................................... 2.23
Ignition Positions
.......................................... 2-23
Starting Your Engine
..................................... 2-24
Engine Coolant Heater
.................................. 2-25
Automatic Transaxle Operation
....................... 2-26
Parking Brake
.............................................. 2-29
Shifting Into Park (P)
..................................... 2-30
Shifting Out of Park (P)
................................. 2-32
Parking Over Things That Burn
....................... 2-32
Engine Exhaust
............................................ 2-33
Running Your Engine While You Are Parked
.... 2-34
Mirrors
.......................................................... -2-35
Automatic Dimming Rearview Mirror with
Compass
................................................. 2-35
Outside Power Mirrors
................................... 2-37
Outside Convex Mirror
................................... 2-38
Outside Heated Mirrors
.................................. 2-38
Guisiue Curb View Assist iviirror ..................... 2-31
2- 1
ProCarManuals.com
Page 67 of 387

The master key works in
all of the lock cylinders
(driver’s door, trunk,
ignition and glove box).
The VALET key only
operates the driver’s door
and the ignition. Your
vehicle has the PASS-Key@ Ill vehicle theft
system. Both the master and VALET key have a
transponder
in the key head that matches a decoder in
the vehicle’s steering column.
If a replacement key
or any additional key is needed, you must purchase this
key from your dealer. The key will have PK3@ stamped
on it. Keep the bar code tag that came with the
original keys. Give this tag to your dealer
if you need a
new key made.
Any new PASS-Key@
Ill key must be programmed
before it will start your vehicle. See
PASS-Key“
111 Operation on page 2-21 for more information on
programming your new key.
If your vehicle is equipped with the Onstar@ System
with an active subscription and you lock your keys inside
the vehicle, Onstar@ may be able to send a command
to unlock your vehicle. See
OnStap System on
page 2-39 for more information.
Notice: Your vehicle has a number of features that
can help prevent theft. You can have a lot of
trouble getting into your vehicle
if you ever lock
your keys inside. You may even have to damage
your vehicle to get in.
So be sure you have
spare keys.
2-4
ProCarManuals.com
Page 69 of 387

Remote Keyless Entry System
Operation
With this feature, you can lock and unlock your doors or
unlock your trunk from about
3 feet (1 m) up to 30 feet
(9 m) away using the remote keyless entry transmitter
supplied with your vehicle.
The numbers on the back
of your transmitter correspond
to DRIVER
#I and DRIVER #2 on the DIC. For more
information see
Driver Information Center (DIC) on
page
3-45.
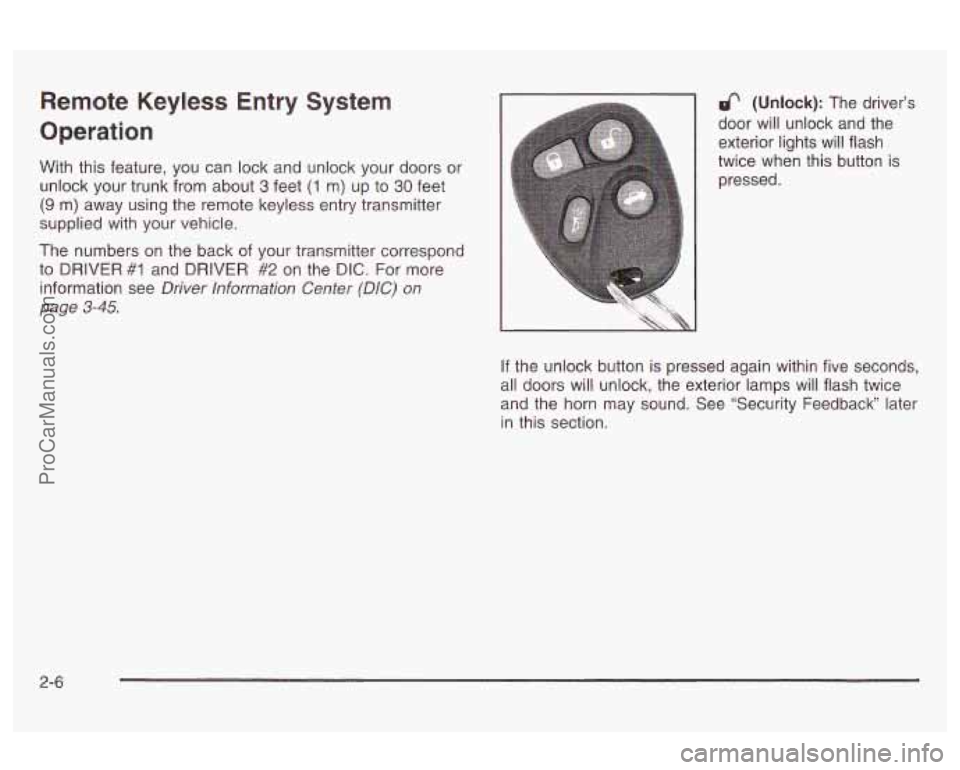
& (Unlock): The driver’s
door will unlock and the
exterior lights will flash
twice when this button
is
pressed.
If the unlock button is pressed again within five seconds,
all doors will unlock, the exterior lamps will flash twice
and the horn may sound. See “Security Feedback later
in this section.
2-6
ProCarManuals.com
Page 70 of 387

Pressing the unlock button will also illuminate the
interior lamps. See “Entry Lighting’’ under
Interior Lamps
on page
3- 17.
8 (Lock): All doors will lock, the exterior lamps will
flash once and the horn may sound when this button is
pressed.
(Trunk): The trunk will unlock when this button is
pressed when the ignition is in OFF. This button will
also work when the ignition is on, but only while
the transaxle is in PARK (P) or NEUTRAL
(N).
& (Instant Alarm): When this button is pressed, the
horn will sound and the headlamps and taillamps
will flash for up to
30 seconds. This can be turned off by
pressing the button again, unlocking the vehicle with
a key or by turning the ignition on.
Personalization Features
The following list of features available on your vehicle
can be programmed to the driver’s preference for
each transmitter.
e
e
e
e
Automatic DOQ~ Locks: This feature programs
your door locks to automatically lock or unlock
when shifting in and out of PARK (P) or when the
key is turned to OFF.
Security Feedback: This feature provides feedback
to the driver when the vehicle receives a command
from the remote keyless entry transmitter.
Delayed Locking: This feature lets the driver delay
the actual locking of the vehicle. When all doors
have been closed, the doors will lock automatically
after five seconds.
Perimeter Lighting: When the unlock symbol on
the remote keyless entry transmitter is pressed,
the Daytime Running Lamps (DRL), parking lamps
and back-up lamps will turn on
if it is dark enough
outside.
For more detailed information and programming
instructions for each feature mentioned, refer to
DIC
Vehicle Personalization on page 3-52.
2-7
ProCarManuals.com