2003 NISSAN XTERRA lock
[x] Cancel search: lockPage 8 of 272
WARNING
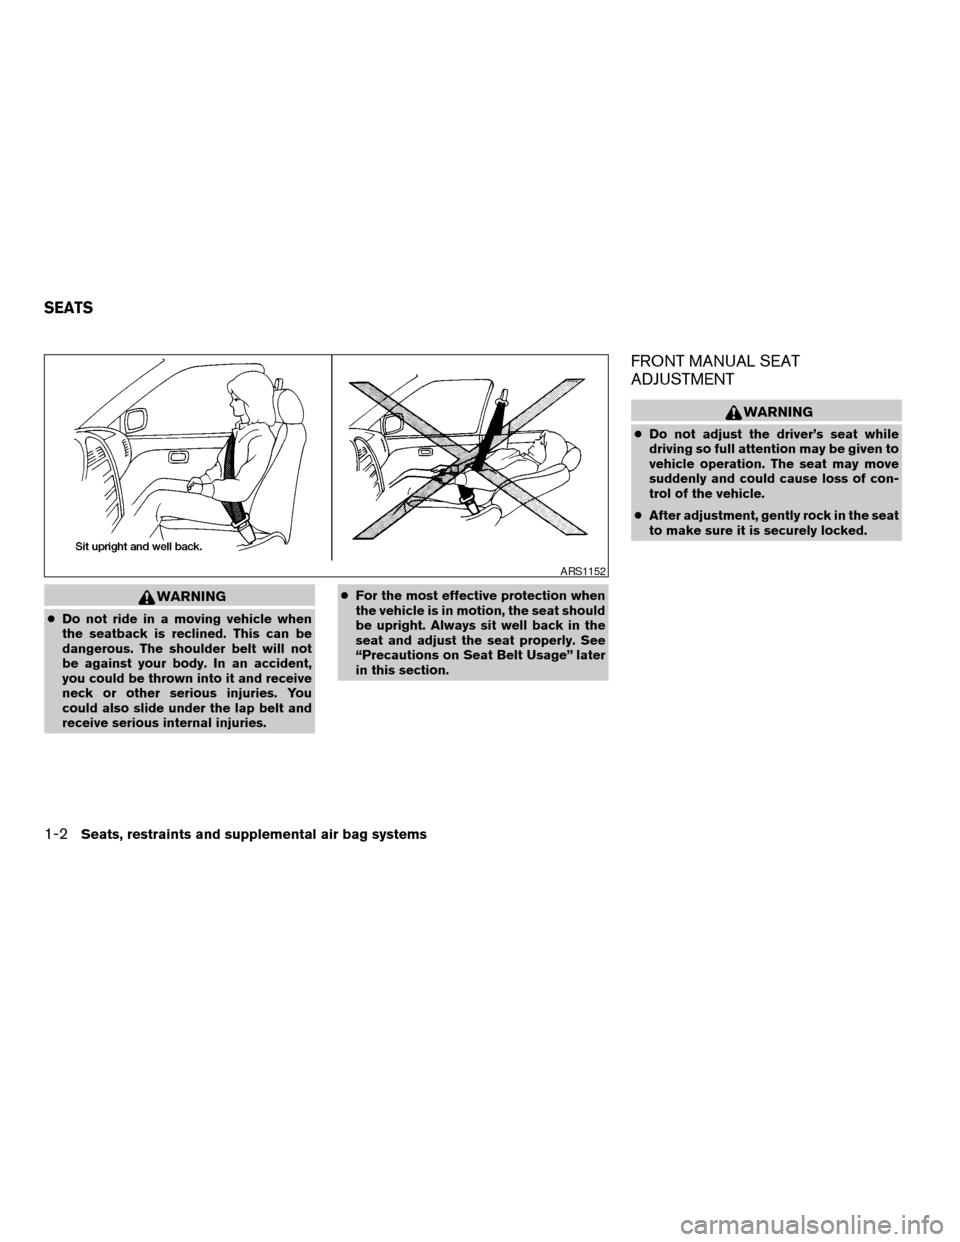
cDo not ride in a moving vehicle when
the seatback is reclined. This can be
dangerous. The shoulder belt will not
be against your body. In an accident,
you could be thrown into it and receive
neck or other serious injuries. You
could also slide under the lap belt and
receive serious internal injuries.cFor the most effective protection when
the vehicle is in motion, the seat should
be upright. Always sit well back in the
seat and adjust the seat properly. See
“Precautions on Seat Belt Usage” later
in this section.
FRONT MANUAL SEAT
ADJUSTMENT
WARNING
cDo not adjust the driver’s seat while
driving so full attention may be given to
vehicle operation. The seat may move
suddenly and could cause loss of con-
trol of the vehicle.
cAfter adjustment, gently rock in the seat
to make sure it is securely locked.
ARS1152
SEATS
1-2Seats, restraints and supplemental air bag systems
ZREVIEW COPY:Ð2003 Xterra(xtr)
Owners Manual(owners)ÐUSA English(nna)
02/21/03Ðtbrooks
X
Page 9 of 272
Forward and backward
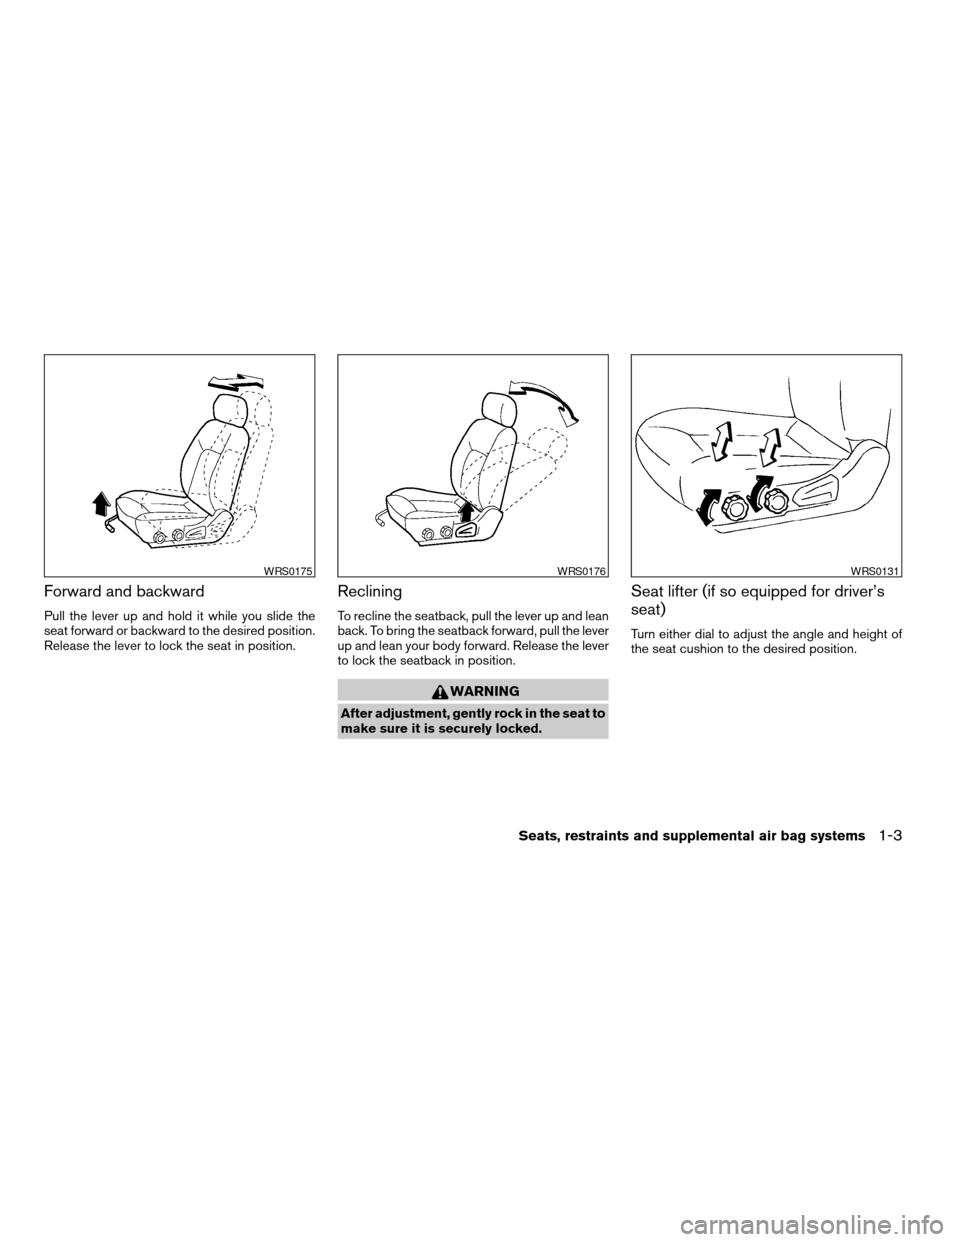
Pull the lever up and hold it while you slide the
seat forward or backward to the desired position.
Release the lever to lock the seat in position.
Reclining
To recline the seatback, pull the lever up and lean
back. To bring the seatback forward, pull the lever
up and lean your body forward. Release the lever
to lock the seatback in position.
WARNING
After adjustment, gently rock in the seat to
make sure it is securely locked.
Seat lifter (if so equipped for driver’s
seat)
Turn either dial to adjust the angle and height of
the seat cushion to the desired position.
WRS0175WRS0176WRS0131
Seats, restraints and supplemental air bag systems1-3
ZREVIEW COPY:Ð2003 Xterra(xtr)
Owners Manual(owners)ÐUSA English(nna)
02/21/03Ðtbrooks
X
Page 13 of 272
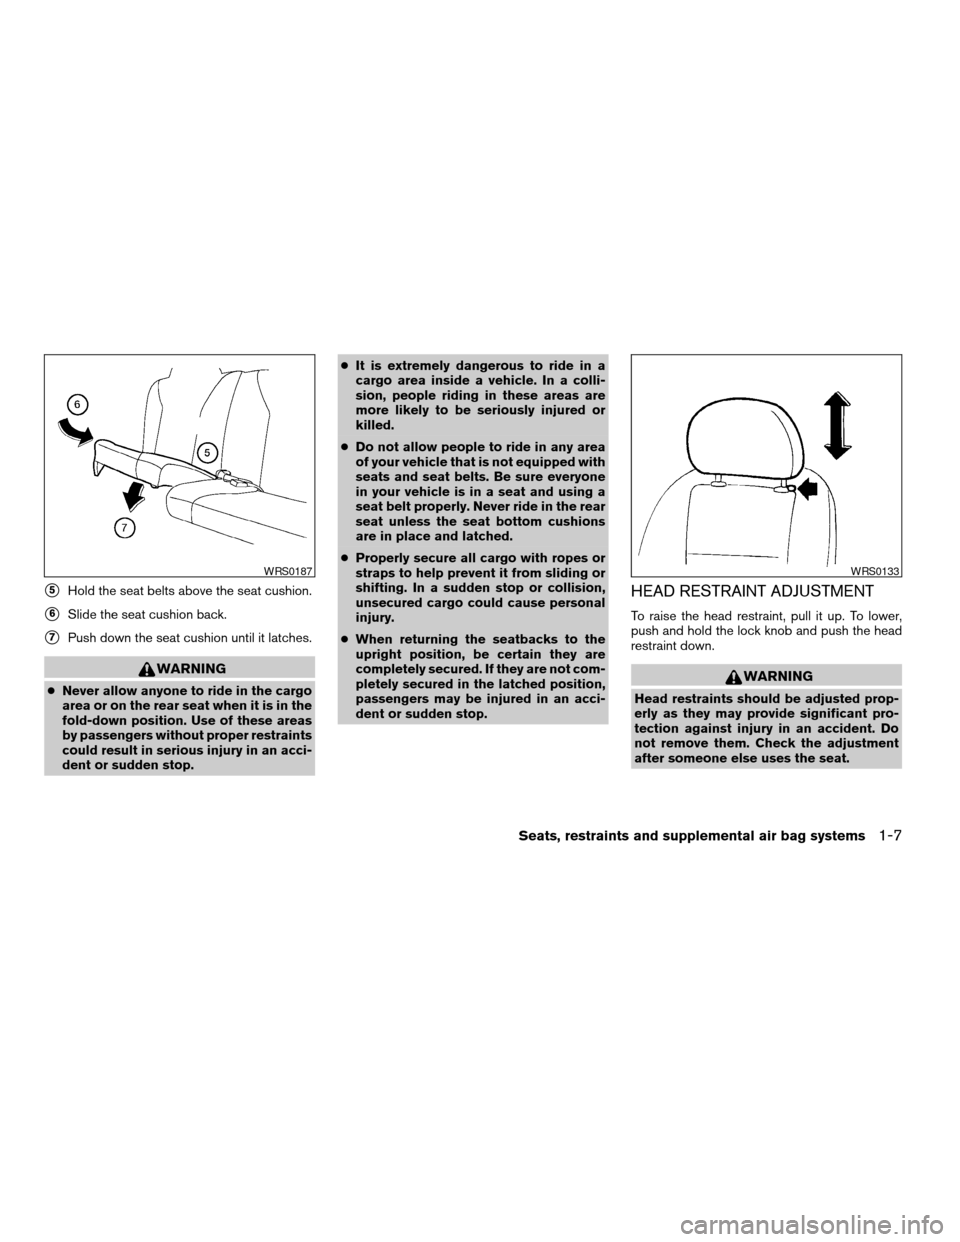
s5Hold the seat belts above the seat cushion.
s6Slide the seat cushion back.
s7Push down the seat cushion until it latches.
WARNING
cNever allow anyone to ride in the cargo
area or on the rear seat when it is in the
fold-down position. Use of these areas
by passengers without proper restraints
could result in serious injury in an acci-
dent or sudden stop.cIt is extremely dangerous to ride in a
cargo area inside a vehicle. In a colli-
sion, people riding in these areas are
more likely to be seriously injured or
killed.
cDo not allow people to ride in any area
of your vehicle that is not equipped with
seats and seat belts. Be sure everyone
in your vehicle is in a seat and using a
seat belt properly. Never ride in the rear
seat unless the seat bottom cushions
are in place and latched.
cProperly secure all cargo with ropes or
straps to help prevent it from sliding or
shifting. In a sudden stop or collision,
unsecured cargo could cause personal
injury.
cWhen returning the seatbacks to the
upright position, be certain they are
completely secured. If they are not com-
pletely secured in the latched position,
passengers may be injured in an acci-
dent or sudden stop.
HEAD RESTRAINT ADJUSTMENT
To raise the head restraint, pull it up. To lower,
push and hold the lock knob and push the head
restraint down.
WARNING
Head restraints should be adjusted prop-
erly as they may provide significant pro-
tection against injury in an accident. Do
not remove them. Check the adjustment
after someone else uses the seat.
WRS0187WRS0133
Seats, restraints and supplemental air bag systems1-7
ZREVIEW COPY:Ð2003 Xterra(xtr)
Owners Manual(owners)ÐUSA English(nna)
02/21/03Ðtbrooks
X
Page 26 of 272
When the ignition key is in the ON or START
position, the supplemental air bag warning light
illuminates for about 7 seconds and then turns
off. This means the system is operational.
If any of the following system conditions occur,
the supplemental front air bag, supplemental cur-
tain side-impact air bag and pre-tensioner seat
belt systems need servicing:
cThe supplemental air bag warning light re-
mains on after approximately 7 seconds.
cThe supplemental air bag warning light
flashes intermittently.
cThe supplemental air bag warning light does
not come on at all.
Under these conditions, the Supplemental Re-
straint System (supplemental front air bag,
supplemental curtain side-impact air bag or pre-
tensioner seat belt systems) may not operate
properly. It must be checked and repaired. Take
your vehicle to the nearest NISSAN dealer.
WARNING
If the supplemental air bag warning light
is on, it could mean that the supplemental
front air bag or pre-tensioner seat belt
systems will not operate in an accident.
Repair and replacement procedure
The supplemental front air bags, supplemental
curtain side-impact air bags (if so equipped) and
pre-tensioner seat belts are designed to inflate
on a one-time-only basis. As a reminder, unless it
is damaged, the supplemental air bag warning
light remains illuminated after inflation has oc-
curred. Repair and replacement of these supple-
mental air bag systems should be done only by a
NISSAN dealer.
When maintenance work is required on the ve-
hicle, the supplemental front air bags, supple-
mental curtain side-impact air bags, pre-
tensioner seat belts and related parts should be
pointed out to the person performing the mainte-
nance. The ignition key should always be in the
LOCK position when working under the hood or
inside the vehicle.
WARNING
cOnce a supplemental front air bag or
supplemental curtain side-impact air
bag has inflated, the air bag module will
not function again and must be re-
placed. Additionally, if any of the
supplemental front air bags inflate, the
activated pre-tensioner seat belts must
also be replaced. The air bag module
and pre-tensioner seat belt system
should be replaced by a NISSAN dealer.
The air bag module and pre-tensioner
seat belt system cannot be repaired.
cThe supplemental front air bag and cur-
tain side-impact air bag systems, and
the pre-tensioner seat belt system
should be inspected by a NISSAN
dealer if there is any damage to the
front end or side portion of the vehicle.
cIf you need to dispose of the supple-
mental air bag, pre-tensioner seat belt
system or scrap the vehicle, contact a
NISSAN dealer. Correct supplemental
air bag and pre-tensioner seat belt sys-
tem disposal procedures are set forth in
the appropriate NISSAN Service
Manual. Incorrect disposal procedures
could cause personal injury.
1-20Seats, restraints and supplemental air bag systems
ZREVIEW COPY:Ð2003 Xterra(xtr)
Owners Manual(owners)ÐUSA English(nna)
02/21/03Ðtbrooks
X
Page 31 of 272
THREE-POINT TYPE SEAT BELT
WITH RETRACTOR
WARNING
cEvery person who drives or rides in this
vehicle should use a seat belt at all
times.
cDo not ride in a moving vehicle when
the seatback is reclined. This can be
dangerous. The shoulder belt will not
be against your body. In an accident,
you could be thrown into it and receive
neck or other serious injuries. You
could also slide under the lap belt and
receive serious internal injuries.
cFor the most effective protection when
the vehicle is in motion, the seat should
be upright. Always sit well back in the
seat and adjust the seat belt properly.
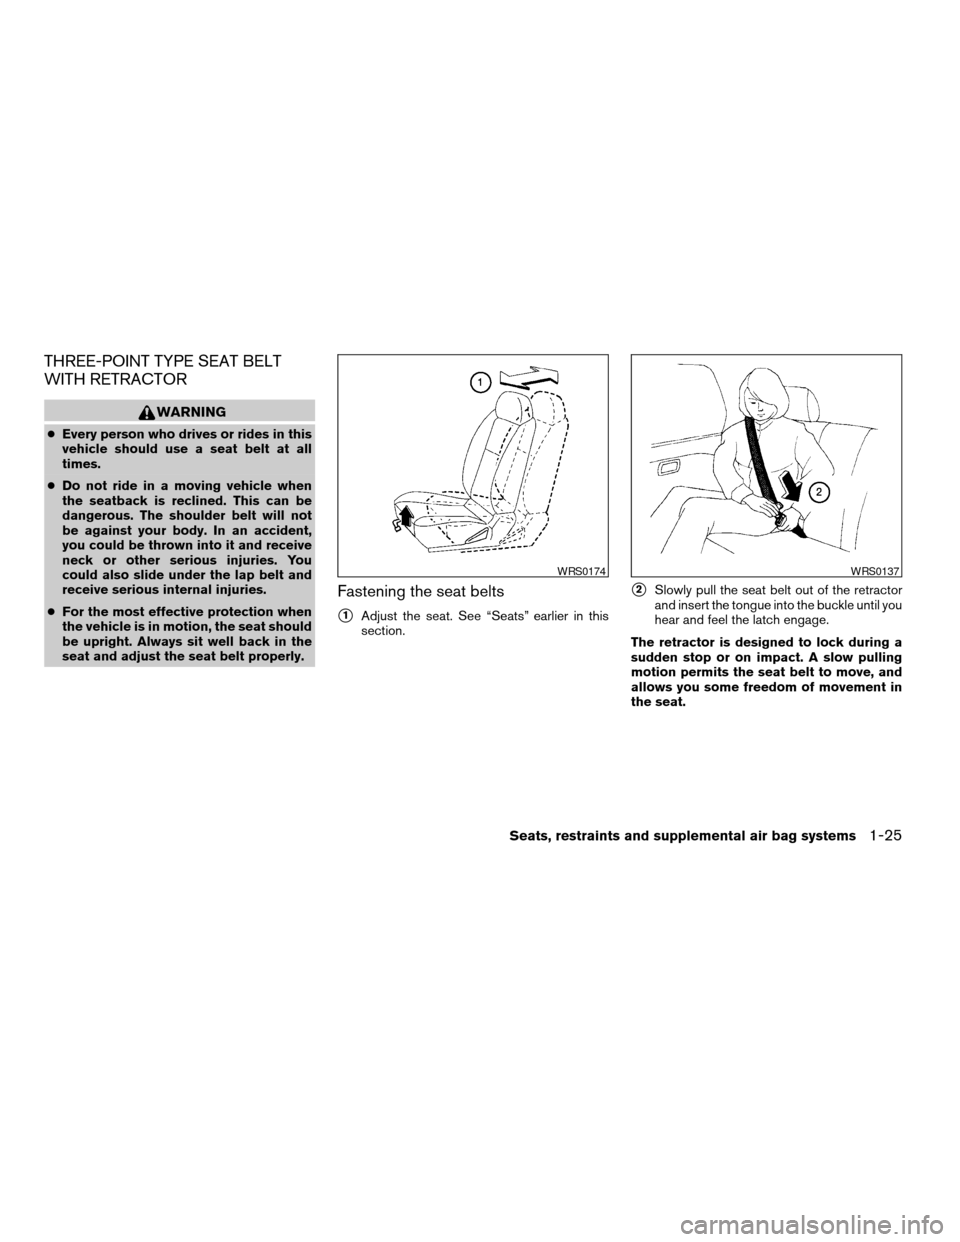
Fastening the seat belts
s1Adjust the seat. See “Seats” earlier in this
section.
s2Slowly pull the seat belt out of the retractor
and insert the tongue into the buckle until you
hear and feel the latch engage.
The retractor is designed to lock during a
sudden stop or on impact. A slow pulling
motion permits the seat belt to move, and
allows you some freedom of movement in
the seat.
WRS0174WRS0137
Seats, restraints and supplemental air bag systems1-25
ZREVIEW COPY:Ð2003 Xterra(xtr)
Owners Manual(owners)ÐUSA English(nna)
02/21/03Ðtbrooks
X
Page 32 of 272
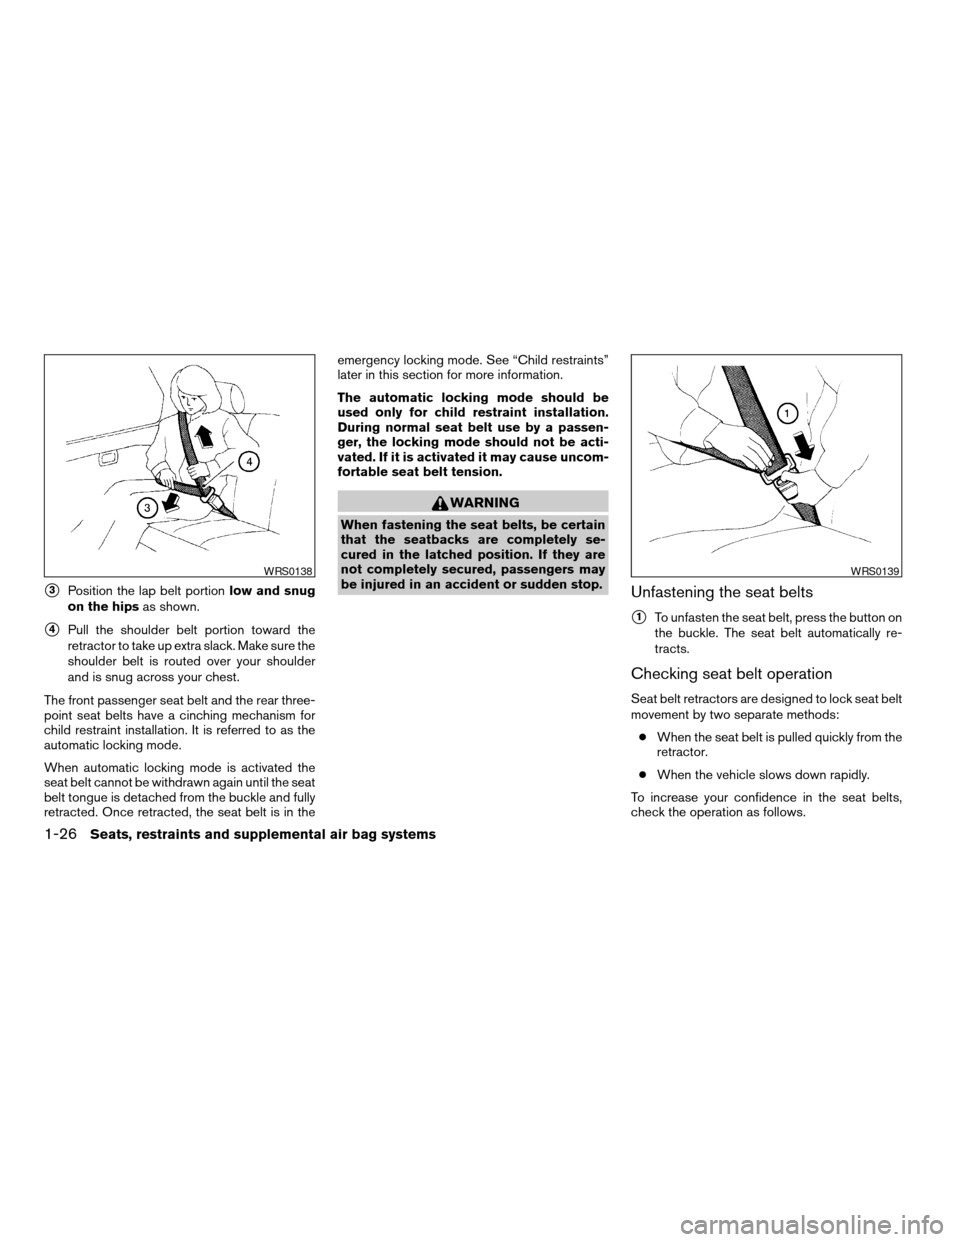
s3Position the lap belt portionlow and snug
on the hipsas shown.
s4Pull the shoulder belt portion toward the
retractor to take up extra slack. Make sure the
shoulder belt is routed over your shoulder
and is snug across your chest.
The front passenger seat belt and the rear three-
point seat belts have a cinching mechanism for
child restraint installation. It is referred to as the
automatic locking mode.
When automatic locking mode is activated the
seat belt cannot be withdrawn again until the seat
belt tongue is detached from the buckle and fully
retracted. Once retracted, the seat belt is in theemergency locking mode. See “Child restraints”
later in this section for more information.
The automatic locking mode should be
used only for child restraint installation.
During normal seat belt use by a passen-
ger, the locking mode should not be acti-
vated. If it is activated it may cause uncom-
fortable seat belt tension.
WARNING
When fastening the seat belts, be certain
that the seatbacks are completely se-
cured in the latched position. If they are
not completely secured, passengers may
be injured in an accident or sudden stop.
Unfastening the seat belts
s1To unfasten the seat belt, press the button on
the buckle. The seat belt automatically re-
tracts.
Checking seat belt operation
Seat belt retractors are designed to lock seat belt
movement by two separate methods:
cWhen the seat belt is pulled quickly from the
retractor.
cWhen the vehicle slows down rapidly.
To increase your confidence in the seat belts,
check the operation as follows.
WRS0138WRS0139
1-26Seats, restraints and supplemental air bag systems
ZREVIEW COPY:Ð2003 Xterra(xtr)
Owners Manual(owners)ÐUSA English(nna)
02/21/03Ðtbrooks
X
Page 33 of 272
cGrasp the shoulder belt and pull forward
quickly. The retractor should lock and re-
strict further belt movement.
If the retractor does not lock during this check or
if you have any questions about seat belt opera-
tion, see a NISSAN dealer.
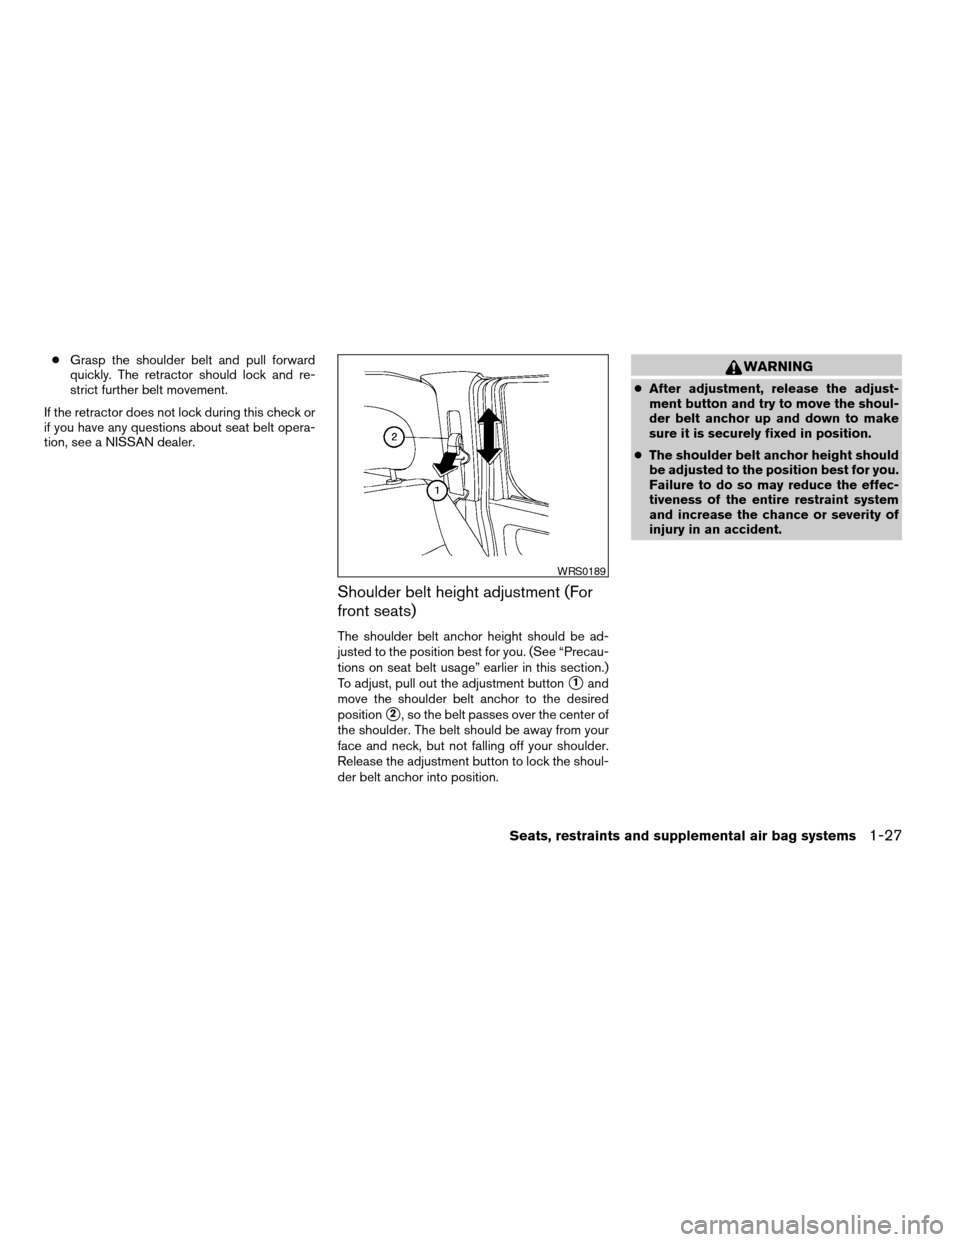
Shoulder belt height adjustment (For
front seats)
The shoulder belt anchor height should be ad-
justed to the position best for you. (See “Precau-
tions on seat belt usage” earlier in this section.)
To adjust, pull out the adjustment button
s1and
move the shoulder belt anchor to the desired
position
s2, so the belt passes over the center of
the shoulder. The belt should be away from your
face and neck, but not falling off your shoulder.
Release the adjustment button to lock the shoul-
der belt anchor into position.
WARNING
cAfter adjustment, release the adjust-
ment button and try to move the shoul-
der belt anchor up and down to make
sure it is securely fixed in position.
cThe shoulder belt anchor height should
be adjusted to the position best for you.
Failure to do so may reduce the effec-
tiveness of the entire restraint system
and increase the chance or severity of
injury in an accident.
WRS0189
Seats, restraints and supplemental air bag systems1-27
ZREVIEW COPY:Ð2003 Xterra(xtr)
Owners Manual(owners)ÐUSA English(nna)
02/21/03Ðtbrooks
X
Page 41 of 272
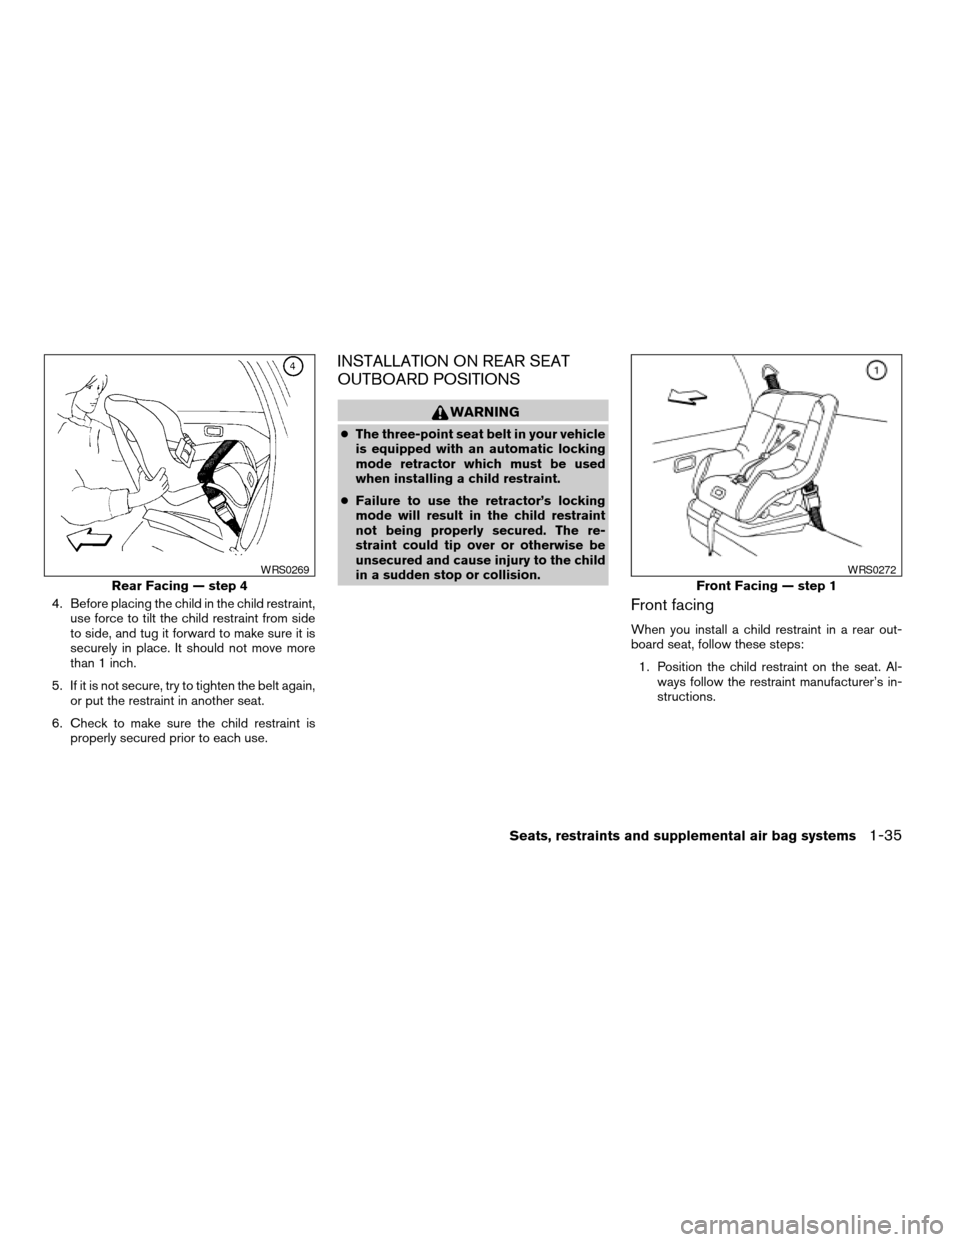
4. Before placing the child in the child restraint,
use force to tilt the child restraint from side
to side, and tug it forward to make sure it is
securely in place. It should not move more
than 1 inch.
5. If it is not secure, try to tighten the belt again,
or put the restraint in another seat.
6. Check to make sure the child restraint is
properly secured prior to each use.
INSTALLATION ON REAR SEAT
OUTBOARD POSITIONS
WARNING
cThe three-point seat belt in your vehicle
is equipped with an automatic locking
mode retractor which must be used
when installing a child restraint.
cFailure to use the retractor’s locking
mode will result in the child restraint
not being properly secured. The re-
straint could tip over or otherwise be
unsecured and cause injury to the child
in a sudden stop or collision.
Front facing
When you install a child restraint in a rear out-
board seat, follow these steps:
1. Position the child restraint on the seat. Al-
ways follow the restraint manufacturer’s in-
structions.
Rear Facing — step 4
WRS0269
Front Facing — step 1
WRS0272
Seats, restraints and supplemental air bag systems1-35
ZREVIEW COPY:Ð2003 Xterra(xtr)
Owners Manual(owners)ÐUSA English(nna)
02/21/03Ðtbrooks
X